Samsung HW-C560S User Manual (user Manual) (ver.1.0) (English) - Page 46
Listening To The Radio
 |
UPC - 036725617247
View all Samsung HW-C560S manuals
Add to My Manuals
Save this manual to your list of manuals |
Page 46 highlights
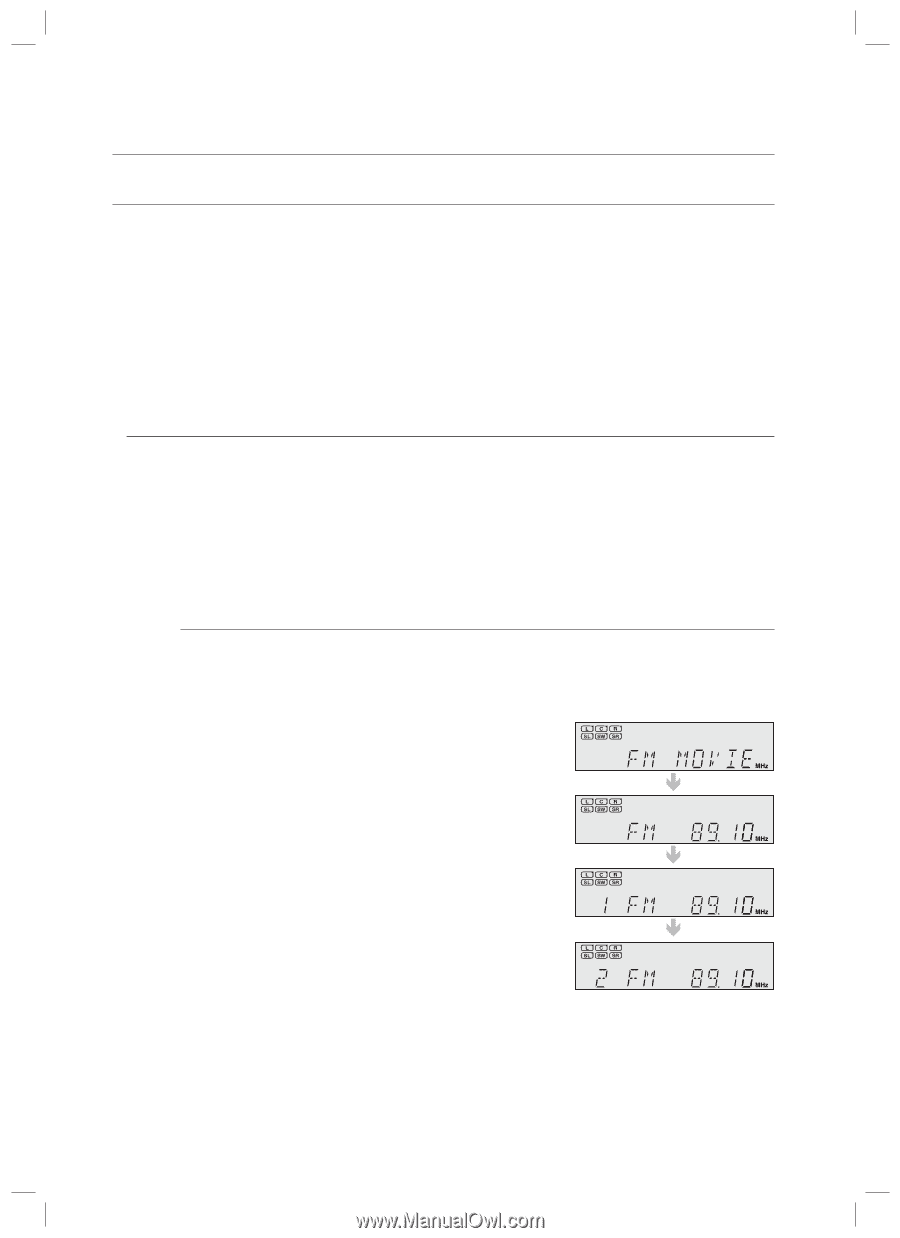
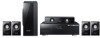
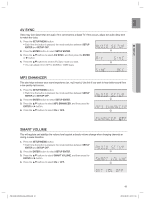
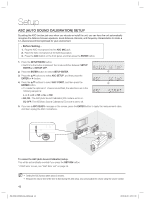
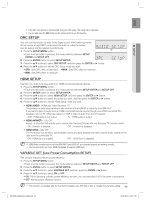
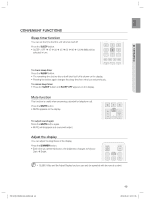
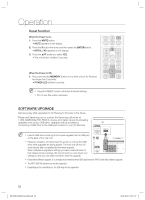
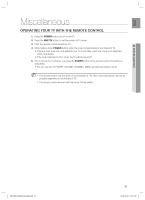
Operation LISTENING TO THE RADIO You can listen to the radio by using either automatic or manual tuning. 1. Press the INPUT SELECT button to select FM. 2. Select a frequency (radio broadcast). • Preset tuning : Press the #,$ buttons on the remote control to select the preset frequency. • Manual tuning 1 (Automatic tuning): Press and hold the TUNING/CH ( .,, ) buttons on the remote control to automatically tune in a frequency. • Manual tuning 2 : Press the TUNING/CH ( .,, ) buttons on the remote control to increase or decrease the frequency step by step. M You can also use the SELECT ( .,, ) buttons on the main uint to change the radio frequency. To Listen in mono/stereo Press the MO/ST button on the remote control. • Each time you press this button, STEREO or MONO will be selected in turn. • If you select MONO in an area with weak reception, it will help to reduce noise. • This function works only with the remote control. Presetting radio stations You can preset up to 30 FM stations. E.g.: Setting station FM 89.10 in preset 2. 1. Press the INPUT SELECT button to select FM. 2. Press the TUNING/CH ( .,, ) buttons on the remote control to select 89.10. • Refer to step 2 above to tune in automatically and manually. 3. Press the MEMORY button on the main unit. Æ • You can also use the TUNER MEMORY button on the remote control. • Tuner number will blink on the display. Æ 4. Press the TUNING/CH ( .,, ) buttons on the remote control to select preset 2. • You can select from presets 1 to 30. 5. Press the MEMORY button on the main unit. Æ • Tuner number will disappear and station 89.10 will be saved in preset 2. 6. To preset other stations, repeat steps 2 to 5. To Listen to Preset Station • Press the TUNING MODE button to select PRESET and press the SELECT ( .,, ) buttons. 46 HW-C500-C560S-XAA_0609.indd 46 2010-06-09 5:11:35
-
 1
1 -
2
-
3
-
4
-
5
-
6
-
7
-
8
-
9
-
10
-
11
-
12
-
13
-
14
-
15
-
16
-
17
-
18
-
19
-
20
-
21
-
22
-
23
-
24
-
25
-
26
-
27
-
28
-
29
-
30
-
31
-
32
-
33
-
34
-
35
-
36
-
37
-
38
-
39
-
40
-
 41
41 -
 42
42 -
 43
43 -
 44
44 -
 45
45 -
 46
46 -
 47
47 -
 48
48 -
 49
49 -
 50
50 -
 51
51 -
52
-
53
-
54
-
55
-
56
-
57
-
58
-
59
 |
 |