Samsung MultiXpress SCX-8623 User Manual Ver.1.03 (English) - Page 71
Selecting a received fax output tray, Printing received faxes on both sides of the paper
 |
View all Samsung MultiXpress SCX-8623 manuals
Add to My Manuals
Save this manual to your list of manuals |
Page 71 highlights
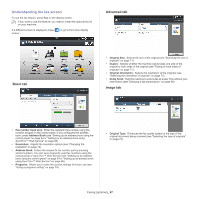
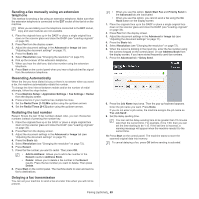
Selecting a received fax output tray This option allows you to specify the tray where the fax will be printed. 1. Press Machine Setup > Application Settings > Fax Settings > Received Fax Printing > Output Tray from the display screen. Adjusting the document settings Before sending a fax, you can adjust the document settings, such as resolution, darkness, color, duplex and so on. The document setting herein is for the current job only. If you want to change the default settings on document settings, refer to Machine Setup > Application Settings > Fax Settings > Default Value. Selecting the size of originals A fax can be sent after specifying the original document size if the original document size cannot be detected automatically or if you wish to specify a certain document size. 1. Press the Advanced tab > Original Size from the display screen.. 2. Press the appropriate tray. • In CLX-9301 Series, the Right Tray (Face-Up) is optional device. • The Finishing Tray and Top Tray are available only when the optional Inner Finisher or booklet finisher is installed. • When the optional Inner Finisher or booklet finisher is installed, Center Tray is inactivated. 3. Press OK. Printing received faxes on both sides of the paper Set this duplex feature to save paper. When the machine prints the received fax data, it prints them on both sides of the paper. 1. Press Machine Setup > Application Settings > Fax Settings > Received Fax Printing > Duplex from the display screen. 2. Press the appropriate option. • Off: Prints on only one side of the paper. • Long Edge: Prints on both sides of the paper; however, the binding will be the long edge. • Short Edge: Prints on both sides of the paper; however, the binding will be the short edge. 3. Press OK. Printing received faxes to the right tray (face up) This machine allows you to receive incoming faxes through the right tray (face up). When you use the right tray, the received faxes pile up in sequence beginning with the first page at the bottom. 1. Press Machine Setup > Application Settings > Fax Settings > Received Fax Printing > Output Tray > Right Tray(Face-Up) from the display screen. 2. Press OK. Receiving faxes in memory Since your machine is a multi-tasking device, it can receive faxes while you are making copies or printing. If you receive a fax while you are copying or printing, your machine stores incoming faxes in its memory. Then, as soon as you finish copying or printing, the machine automatically prints the fax. 2. Press the appropriate option. You can change the paper list on the display screen pressing inch Size or mm Size. The paper list is divided into the available A/B size type and letter size type paper in this machine. • Auto: Automatically detects the size of originals, but this option supports only when originals are Letter-, Ledger-, Legal-, Statement-, A3-, A4-, A5-, B4-, or JIS B5-sized. • Other preset values: Allows you to easily select values commonly used. 3. Press OK from the display screen. Faxing on both sides of originals This function is especially intended for two-sided originals. You can select whether the machine sends the fax on one side or both sides of the paper. 1. Press the Advanced tab > Duplex, then set the original orientation. 2. Press the appropriate option. Faxing (optional)_ 71
-
 1
1 -
2
-
3
-
4
-
5
-
6
-
7
-
8
-
9
-
10
-
11
-
12
-
13
-
14
-
15
-
16
-
17
-
18
-
19
-
20
-
21
-
22
-
23
-
24
-
25
-
26
-
27
-
28
-
29
-
30
-
31
-
32
-
33
-
34
-
35
-
36
-
37
-
38
-
39
-
40
-
41
-
42
-
43
-
44
-
45
-
46
-
47
-
48
-
49
-
50
-
51
-
52
-
53
-
54
-
55
-
56
-
57
-
58
-
59
-
60
-
61
-
62
-
63
-
64
-
65
-
 66
66 -
 67
67 -
 68
68 -
 69
69 -
 70
70 -
 71
71 -
 72
72 -
 73
73 -
 74
74 -
 75
75 -
 76
76 -
77
-
78
-
79
-
80
-
81
-
82
-
83
-
84
-
85
-
86
-
87
-
88
-
89
-
90
-
91
-
92
-
93
-
94
-
95
-
96
-
97
-
98
-
99
-
100
-
101
-
102
-
103
-
104
-
105
-
106
-
107
-
108
-
109
-
110
-
111
-
112
-
113
-
114
-
115
-
116
-
117
-
118
-
119
-
120
-
121
-
122
-
123
-
124
-
125
-
126
-
127
-
128
-
129
-
130
-
131
-
132
-
133
-
134
-
135
-
136
-
137
-
138
-
139
-
140
-
141
-
142
-
143
-
144
-
145
-
146
-
147
-
148
-
149
-
150
-
151
-
152
-
153
-
154
-
155
-
156
-
157
-
158
-
159
-
160
-
161
-
162
-
163
-
164
-
165
-
166
-
167
-
168
-
169
-
170
-
171
-
172
-
173
-
174
-
175
-
176
-
177
-
178
 |
 |
