Samsung PPM42M5S User Manual (ENGLISH) - Page 11
Installing the Display Vertically, continued - model
 |
View all Samsung PPM42M5S manuals
Add to My Manuals
Save this manual to your list of manuals |
Page 11 highlights
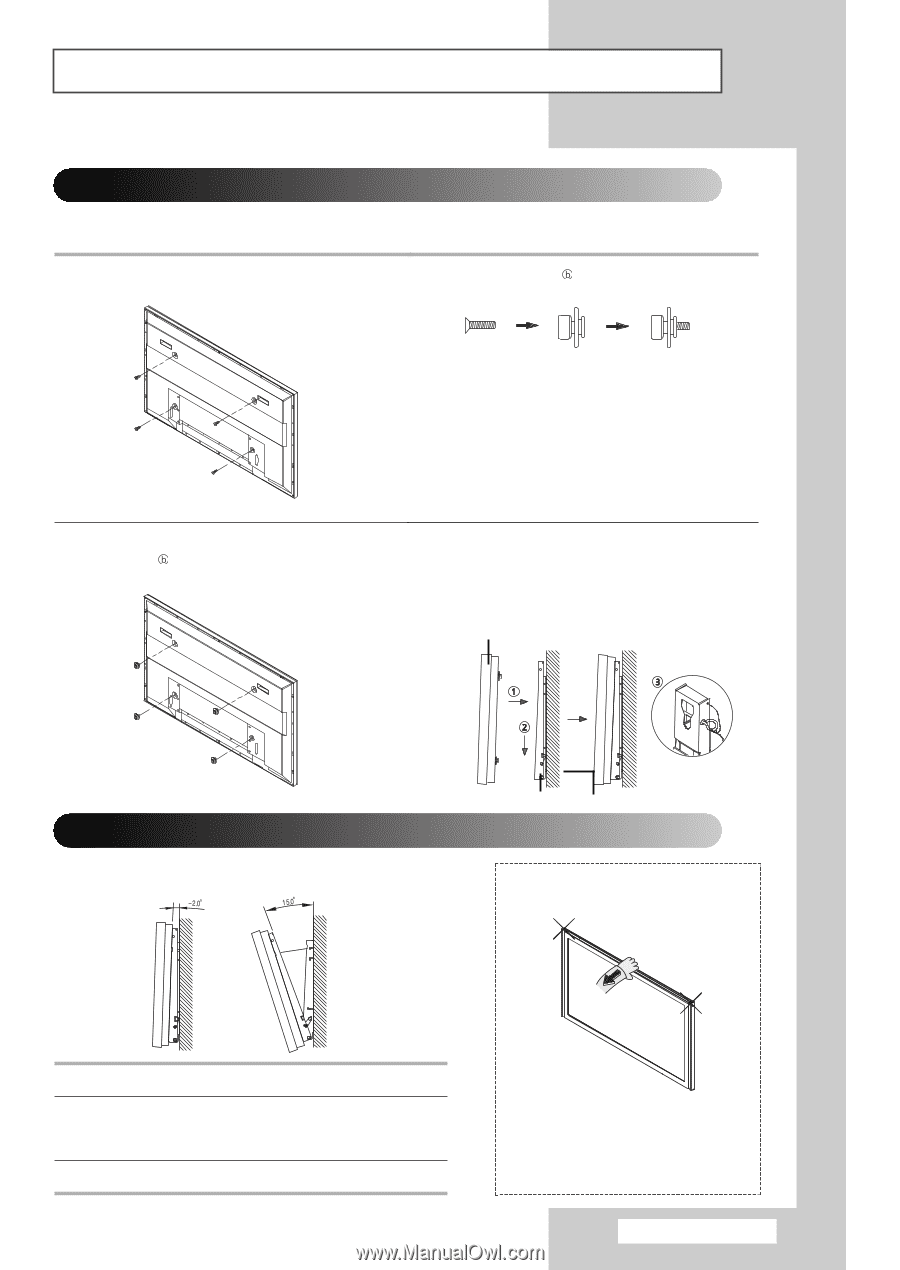
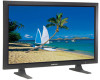
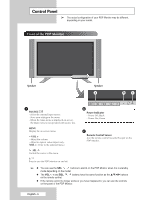
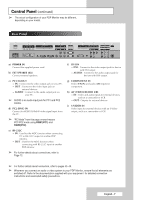
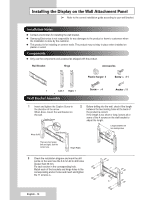
Installing the Display on the Wall Attachment Panel (continued) To mount the product on the wall bracket ◆ The shape of the product may vary depending on the model. (The assemblies of the plastic hanger and the screw are the same) 1 Remove the 4 screws on the back of the product. 2 Insert the screw into the plastic hanger. (See the figure below) ☛ ◆ Mount the product on the wall bracket and make sure it is properly fixed to the left and right plastic hangers. ◆ Be careful when installing the product on the bracket as fingers can be caught in the holes. ◆ Make sure the wall bracket is securely fixed to the wall, or the product may not stay in place after installation. 3 Tighten the 4 screws in step 2 (plastic hanger 4 Remove safety pin (#) and insert the 4 product + screw ) to the rear holes of the product. holders into the corresponding bracket holes (!). Then place the product (@) so that it is firmly fixed to the bracket. Make sure to reinsert and tighten the safety pin (#) to securely hold the product to the bracket. PDP Monitor Wall Bracket Angle Adjustment ➢ Adjust the bracket angle to -2o before installing it on the wall. Wall Bracket Wall 1 Fix the product to the wall bracket. 2 Hold the product at the top in the center and pull it forward (direction of the arrow) to adjust the angle. (See the figure to the right) 3 You can adjust the bracket angle between -2° and 15°. Make sure to use the top center, and not the left or the right side of the product to adjust the angle. English - 11
-
 1
1 -
2
-
3
-
4
-
5
-
 6
6 -
 7
7 -
 8
8 -
 9
9 -
 10
10 -
 11
11 -
 12
12 -
 13
13 -
 14
14 -
 15
15 -
 16
16 -
17
-
18
-
19
-
20
-
21
-
22
-
23
-
24
-
25
-
26
-
27
-
28
-
29
-
30
-
31
-
32
-
33
-
34
-
35
-
36
-
37
-
38
-
39
-
40
-
41
-
42
-
43
-
44
-
45
-
46
-
47
-
48
-
49
-
50
-
51
-
52
-
53
-
54
-
55
-
56
-
57
-
58
 |
 |