Samsung SGH-A257 User Manual (user Manual) (ver.f8) (English) - Page 72
Repeat Every Year, My Stuff, Tools, Calendar, Options, Create, Send via Message, Appointment
 |
View all Samsung SGH-A257 manuals
Add to My Manuals
Save this manual to your list of manuals |
Page 72 highlights
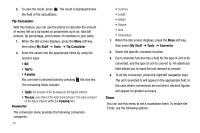
- Before: allows you to set the amount of time (day, week) before your appointment you wish the alarm to sound. - Alarm Time: allows you to enter a time for the alarm to begin notifying you of the occasion. - AM/PM: allows you to select AM or PM. • Repeat Every Year: allows you to set whether this entry is repeated on a yearly basis. Press to select this option. 3. When you have finished making your selections, press to save this new anniversary entry. Note: The remaining Calendar entry types, Miscellaneous and Task, contain similar fields and use similar creation procedures. Other Event Options 1. When the Idle screen displays, press the Menu soft key, then select My Stuff ➔ Tools ➔ Calendar. 2. Select a day containing a Calendar entry and press . If the selected day has one or multiple Calendar entries, those are then displayed in a list. Viewing an Event 1. When the Idle screen displays, press the Menu soft key, then select My Stuff ➔ Tools ➔ Calendar. 68 The calendar displays with today's date highlighted. If an alarm or alarms are set, the icon displays on the icon line above the Calendar. 2. Select the date of the event (s) you want to view and press or use the Navigation keys to move to the date with an assigned event. Note: The icon categories displayed at the bottom display any events scheduled for the day you selected. Indicates an Appointment. Indicates an Anniversary. Indicates that an Alarm was set in reference to an event. 3. Highlight an event and press the Options soft key to use one of the following Calendar entry options: • View: this option allows you view the details for a selected event. • Create: this option allows you to add an additional event to the selected day(s). • Send via Message: this option allows you to send a listing of the event via a multimedia message.
-
 1
1 -
2
-
3
-
4
-
5
-
6
-
7
-
8
-
9
-
10
-
11
-
12
-
13
-
14
-
15
-
16
-
17
-
18
-
19
-
20
-
21
-
22
-
23
-
24
-
25
-
26
-
27
-
28
-
29
-
30
-
31
-
32
-
33
-
34
-
35
-
36
-
37
-
38
-
39
-
40
-
41
-
42
-
43
-
44
-
45
-
46
-
47
-
48
-
49
-
50
-
51
-
52
-
53
-
54
-
55
-
56
-
57
-
58
-
59
-
60
-
61
-
62
-
63
-
64
-
65
-
66
-
 67
67 -
 68
68 -
 69
69 -
 70
70 -
 71
71 -
 72
72 -
 73
73 -
 74
74 -
 75
75 -
 76
76 -
 77
77 -
78
-
79
-
80
-
81
-
82
-
83
-
84
-
85
-
86
-
87
-
88
-
89
-
90
-
91
-
92
-
93
-
94
-
95
-
96
-
97
-
98
-
99
-
100
-
101
-
102
-
103
-
104
-
105
-
106
-
107
-
108
-
109
-
110
-
111
-
112
-
113
-
114
-
115
-
116
-
117
-
118
-
119
-
120
-
121
 |
 |
