Samsung SHR-5082 User Manual - Page 69
Remote Mode, Calendar Window, Audio Volume, Video Brightness, Contrast Buttons, Screen Split
 |
View all Samsung SHR-5082 manuals
Add to My Manuals
Save this manual to your list of manuals |
Page 69 highlights
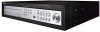
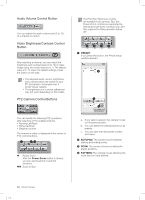
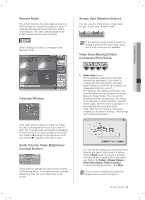
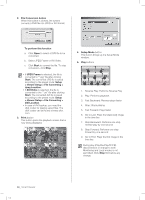
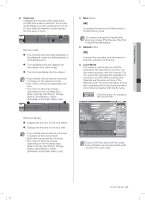
Remote Mode This mode transfers the video data recorded on DVR through the network for playback. Up to 4 channels are allowed for simultaneous search and playback. The video data is played at the position where the time bar is located. When clicking this button, it changes to the Remote mode. Calendar Window If the video data has been recorded on a date, the date is distinguished in red. If you click the date, the recorded video information is displayed in the time line. If you select a date, it turns thick red. Clicking changes to the previous month and clicking changes to the next month. Audio Volume, Video Brightness/ Contrast Buttons Those buttons operate the same as the controls in Monitoring Mode. The brightness and contrast adjustment may not work depending on the model. SHR-5162_Eng.indb 65 Screen Split Selection Buttons You can use any of full screen, single, quad (4-split), 9-split, and 16-split modes. In the Remote mode, 9-split mode is not available while in the Local mode, quad and 9-split modes are not available. Video Save (Backup)/Video Conversion/Print/Setup 1234 1. Video Save button During playback (play/reverse play/fast forward/fast backward), if you select a channel and click this button, the video data is saved in a DVR file. (It is saved in the designated folder on your PC.) The directory, file naming convention, and recording time can be configured in Viewer Setup for Setup Mode. You can set the recording duration ranging from one minute to 10 minutes. To stop recording, click this button again. But this action is possible in 10 seconds after the recording starts. If the video file is not playing, this button enables you to perform backup, which brings up the following window. You can set the starting and ending times for backup and select a file format for saving. Clicking Start begins the backup process. The backup file is saved in the folder which was defined by Setup > Viewer Setup > Video Recording > Video Location. To stop the backup process, click Stop. This function is enabled only when the playback actions are in progress. Smart Viewer _65 2007-06-18 11:50:21 10 Smart Viewer
-
 1
1 -
2
-
3
-
4
-
5
-
6
-
7
-
8
-
9
-
10
-
11
-
12
-
13
-
14
-
15
-
16
-
17
-
18
-
19
-
20
-
21
-
22
-
23
-
24
-
25
-
26
-
27
-
28
-
29
-
30
-
31
-
32
-
33
-
34
-
35
-
36
-
37
-
38
-
39
-
40
-
41
-
42
-
43
-
44
-
45
-
46
-
47
-
48
-
49
-
50
-
51
-
52
-
53
-
54
-
55
-
56
-
57
-
58
-
59
-
60
-
61
-
62
-
63
-
 64
64 -
 65
65 -
 66
66 -
 67
67 -
 68
68 -
 69
69 -
 70
70 -
 71
71 -
 72
72 -
 73
73 -
 74
74 -
75
-
76
-
77
-
78
-
79
-
80
-
81
-
82
-
83
-
84
-
85
-
86
-
87
-
88
-
89
-
90
-
91
-
92
-
93
 |
 |