Samsung SRP-350PG User Manual - Page 12
Setting the Dip Switches - srp 350 dip switch settings
 |
View all Samsung SRP-350PG manuals
Add to My Manuals
Save this manual to your list of manuals |
Page 12 highlights
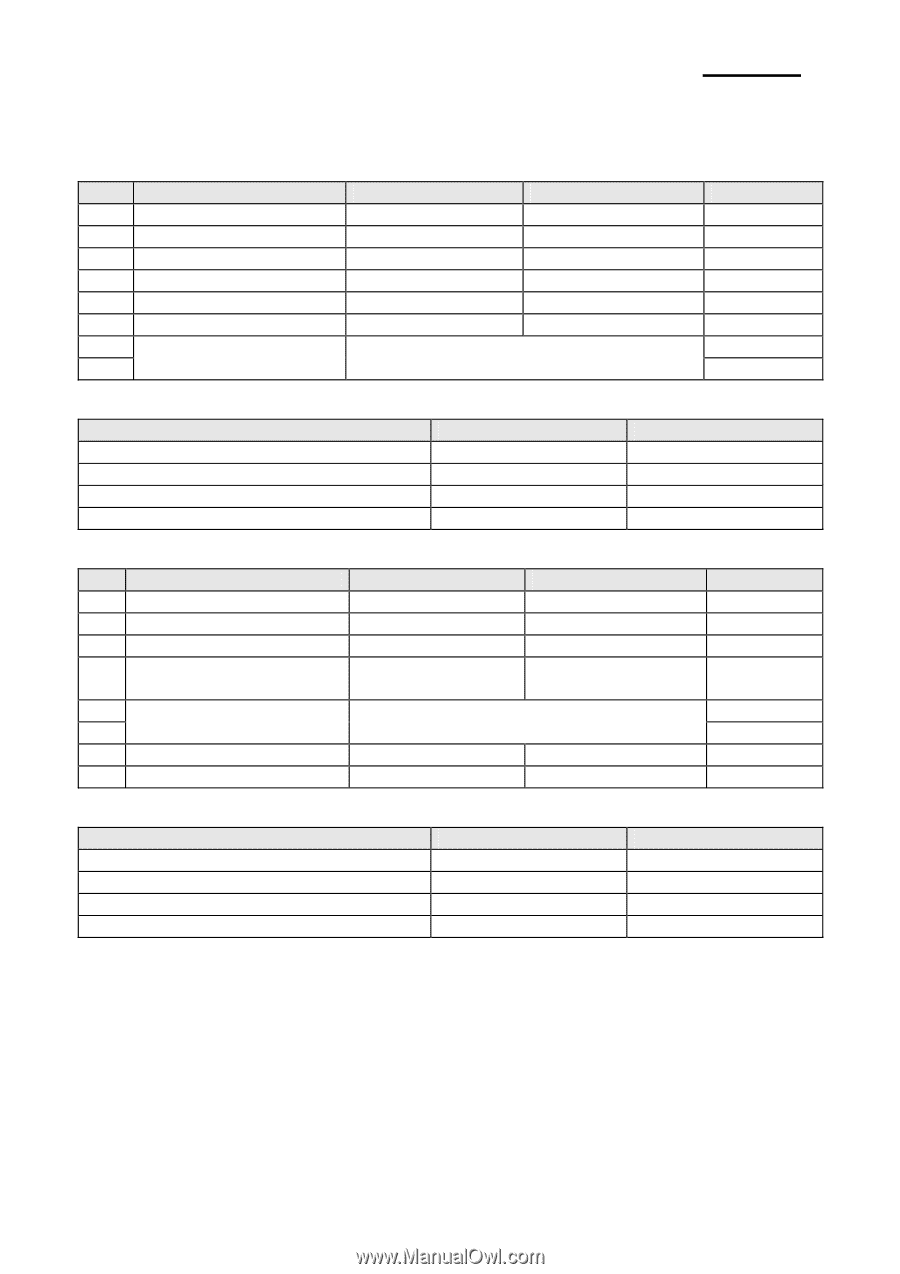
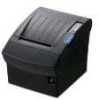
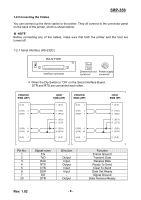
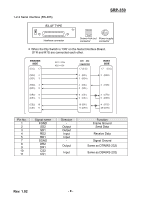
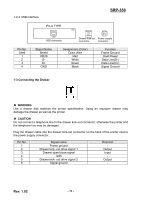
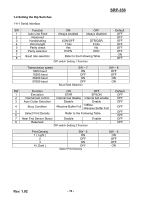
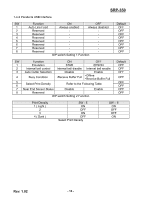
SRP-350 1-4 Setting the Dip Switches 1-4-1 Serial Interface SW Function ON OFF 1 Auto Line Feed Always enabled Always disabled 2 Reserved - - 3 Handshaking XON/OFF DTR/DSR 4 Word length 7 bits 8 bits 5 Parity check Yes No 6 Parity selection EVEN ODD 7 8 Baud rate selection Refer to the Following Table DIP switch Setting 1 Function Default OFF OFF OFF OFF OFF OFF ON OFF Transmission speed 9600 baud 19200 baud 38400 baud 57600 baud SW - 7 ON OFF ON OFF Baud Rate Selection SW - 8 OFF OFF ON ON SW Function ON OFF 1 Emulation STAR EPSON 2 Internal bell control Internal bell disable Internal bell enable 3 Auto Cutter Selection Disable Enable 4 Busy Condition •Receive Buffer Full •Offline •Receive Buffer Full 5 6 Select Print Density Refer to the Following Table 7 Near End Sensor Status Disable Enable 8 Reserved - - DIP switch Setting 2 Function Default OFF OFF OFF OFF OFF OFF OFF OFF Print Density 1 ( Light ) 2 3 4 ( Dark ) SW - 5 ON OFF ON OFF Select Print Density SW - 6 ON OFF OFF ON Rev. 1.02 - 12 -
-
 1
1 -
2
-
3
-
4
-
5
-
6
-
 7
7 -
 8
8 -
 9
9 -
 10
10 -
 11
11 -
 12
12 -
 13
13 -
 14
14 -
 15
15 -
 16
16 -
 17
17 -
18
-
19
-
20
-
21
 |
 |