Samsung TL90 User Manual (ENGLISH) - Page 22
Starting the recording mode, Things to Watch Out for When Taking Pictures - timing light
 |
UPC - 044701012337
View all Samsung TL90 manuals
Add to My Manuals
Save this manual to your list of manuals |
Page 22 highlights
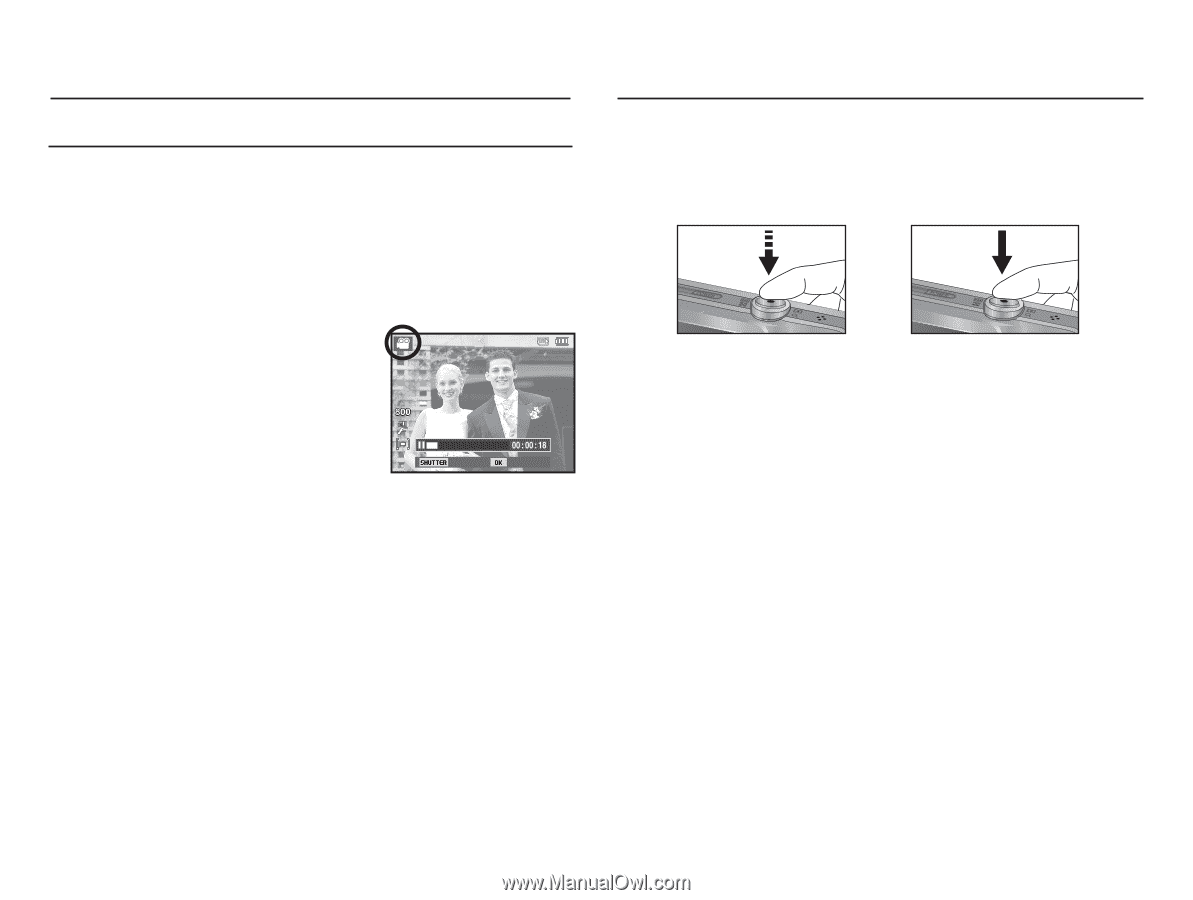
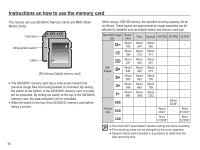
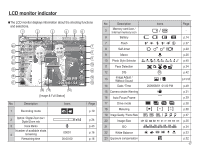
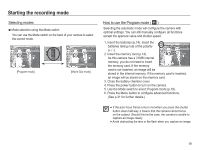
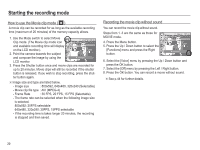
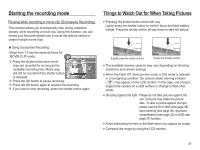
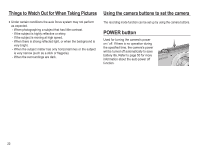
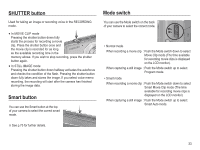
Starting the recording mode Pausing while recording a movie clip (Successive Recording) This camera allows you to temporarily stop during unwanted scenes, while recording a movie clip. Using this function, you can record your favourite scenes into a movie clip without having to create multiple movie clips. Ê Using Successive Recording Steps from 1-2 are the same as those for MOVIE CLIP mode. 3. Press the shutter button and movie clips are recorded for as long as the available recording time. Movie clips will still be recorded if the shutter button is released. Stop Record 4. Press the OK button to pause recording. 5. Press the OK button again to resume the recording. 6. If you wish to stop recording, press the shutter button again. Things to Watch Out for When Taking Pictures å Pressing the shutter button down half way. Lightly press the shutter button to confirm focus and flash battery charge. Press the shutter button all way down to take the picture. [Lightly press the shutter button] [Press the shutter button] å The available memory capacity may vary depending on shooting conditions and camera settings. å When the Flash Off, Slow synchro mode or DIS mode is selected in a low lighting condition, the camera shake warning indicator ( Ã ) may appear on the LCD monitor. In this case, use a tripod, support the camera on a solid surface or change to flash shot mode. å Shooting against the light : Please do not take pictures against the sun. Doing so may make the picture dark. To take a picture against the light, please use the fill-in flash (see page 28), spot metering (see page 38), exposure compensation (see page 32) or ACB (see page 37) function. å Avoid obstructing the lens or the flash when you capture an image. å Compose the image by using the LCD monitor. 21
-
 1
1 -
2
-
3
-
4
-
5
-
6
-
7
-
8
-
9
-
10
-
11
-
12
-
13
-
14
-
15
-
16
-
 17
17 -
 18
18 -
 19
19 -
 20
20 -
 21
21 -
 22
22 -
 23
23 -
 24
24 -
 25
25 -
 26
26 -
 27
27 -
28
-
29
-
30
-
31
-
32
-
33
-
34
-
35
-
36
-
37
-
38
-
39
-
40
-
41
-
42
-
43
-
44
-
45
-
46
-
47
-
48
-
49
-
50
-
51
-
52
-
53
-
54
-
55
-
56
-
57
-
58
-
59
-
60
-
61
-
62
-
63
-
64
-
65
-
66
-
67
-
68
-
69
-
70
-
71
-
72
-
73
-
74
-
75
-
76
-
77
-
78
-
79
-
80
-
81
-
82
-
83
-
84
-
85
-
86
-
87
-
88
-
89
-
90
-
91
-
92
-
93
-
94
-
95
-
96
-
97
-
98
-
99
-
100
-
101
-
102
-
103
-
104
-
105
-
106
 |
 |