Sanyo PLV-60HT Owners Manual
Sanyo PLV-60HT - WXGA LCD Projector Manual
 |
View all Sanyo PLV-60HT manuals
Add to My Manuals
Save this manual to your list of manuals |
Sanyo PLV-60HT manual content summary:
- Sanyo PLV-60HT | Owners Manual - Page 1
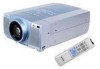
Multimedia Projector MODEL PLV-60HT Owner's Manual - Sanyo PLV-60HT | Owners Manual - Page 2
EXCEPT LAMP REPLACEMENT. REFER SERVICING TO QUALIFIED SERVICE PERSONNEL. THIS SYMBOL INDICATES THAT DANGEROUS VOLTAGE CONSTITUTING A RISK OF ELECTRIC SHOCK IS PRESENT WITHIN THIS UNIT. THIS SYMBOL INDICATES THAT THERE ARE IMPORTANT OPERATING AND MAINTENANCE INSTRUCTIONS IN THE OWNER'S MANUAL WITH - Sanyo PLV-60HT | Owners Manual - Page 3
, be sure the service technician has used replacement parts specified by the manufacturer that have the same characteristics as the original part. Unauthorized substitutions may result in fire, electric shock, or injury to persons. Upon completion of any service or repairs to this projector, ask the - Sanyo PLV-60HT | Owners Manual - Page 4
and used in accordance with the instructions, may cause harmful interference to television reception, which can be determined by turning the equipment off and on, the user POWER CORD REQUIREMENT The AC Power Cord supplied with this projector meets the requirement for use in the country you purchased - Sanyo PLV-60HT | Owners Manual - Page 5
OF ON-SCREEN MENU OPERATION 18 MENU BAR 19 MAINTENANCE 38 WARNING TEMP. INDICATOR 38 BASIC OPERATION AIR FILTER CARE AND CLEANING 38 20 CLEANING THE PROJECTION LENS 38 LAMP REPLACEMENT 39 TURNING ON / OFF PROJECTOR 20 LAMP REPLACE COUNTER TROUBLESHOOTING 39 40 ADJUSTING SCREEN - Sanyo PLV-60HT | Owners Manual - Page 6
is not pressed over 5 minutes. Projection Lamp is automatically turned on again when the projector detects the signal or any operation button is pressed. This projector is shipped with this function ON. x Multilanguage Menu Display Operation menu is displayed in; English, German, French, Italian - Sanyo PLV-60HT | Owners Manual - Page 7
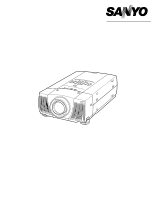
PROJECTOR FRONT TOP CONTROLS AND INDICATORS PROJECTION LENS LENS COVER SPEAKERS BACK EXHAUST VENTS HOT AIR EXHAUSTED ! Air blown from Exhaust Vents is hot. When using or installing projector . Obstructions may block cooling air. LAMP COVER INFRARED REMOTE RECEIVERS TERMINALS AND CONNECTORS MAIN - Sanyo PLV-60HT | Owners Manual - Page 8
SETTING-UP PROJECTOR CONNECTING AC POWER CORD This projector uses nominal input voltages of 100-120 V or 200-240 V AC. The projector dealer or service station if you are not sure of the type of power supply being in use. Connect projector with the peripheral equipment before turning projector on. ( - Sanyo PLV-60HT | Owners Manual - Page 9
PREPARATION POSITIONING THE PROJECTOR This projector is designed to project on a flat 4430 x 2490 mm 6644 x 3736 mm 8860 x 4980 mm LENS SHIFT ADJUSTMENT Projection Lens can be moved up and down with Motor-driven Lens Shift function. This function makes it easy to provide the projected image - Sanyo PLV-60HT | Owners Manual - Page 10
Lock Latches. Position and keystone distortion of the image can be adjusted using Menu Operation. (Refer to P 21 and 36.) FEET LOCK LATCHES MOVING PROJECTOR Use Carry Handle when moving projector. When moving projector, replace Lens Cover and retract Adjustable Feet to prevent damage to Projection - Sanyo PLV-60HT | Owners Manual - Page 11
/Y, Pb(Cb) and Pr(Cr). (Refer to P12.) RESET BUTTON This projector uses a micro processor to control the unit. Occasionally, the micro processor may This can be done by pressing RESET button with a pen, which will shut down and restart the unit. Do not use RESET function excessively. AUDIO OUTPUT - Sanyo PLV-60HT | Owners Manual - Page 12
(BNC x 1)✽, (BNC x 2)✽ or (BNC x 3)✽ • S-VIDEO Cable • Audio Cable (RCA x 2) • Speaker Cable (Mini x 1 (stereo)) ✽ NOTE : When connecting projector, AC Power Cords of both projector and external equipment should be disconnected from AC outlet. Video Source (example) Video Cassette Recorder Video - Sanyo PLV-60HT | Owners Manual - Page 13
should be disconnected from AC outlet. Turn projector and peripheral equipment on before your computer is switched on. IBM-compatible computers or Macintosh computers (VGA / SVGA / XGA / SXGA) Desktop type Laptop type Monitor Output MAC Adapter ✽ Set the slide switches according to the chart - Sanyo PLV-60HT | Owners Manual - Page 14
INDICATOR This indicator lights green when projector is ready to be turned on. And it flashes green in Power Management mode. (P37) LAMP INDICATOR This indicator is dim when projector is turned on. And bright when projector is in stand-by mode. LAMP REPLACE WARNING TEMP. READY LAMP ON-OFF 14 - Sanyo PLV-60HT | Owners Manual - Page 15
ON-OFF BUTTON Used to turn projector on or off. (P20) INPUT BUTTON Used to select input source among INPUT 1, 2 or 3. (P23, 31) ZOOM BUTTONS Used to adjust zoom. (P21) ON-OFF VOLUME BUTTONS Used to adjust volume. (P22) ZOOM FOCUS MENU SELECT INPUT LENS SHIFT VOLUME AUTO PC ADJ. NORMAL - Sanyo PLV-60HT | Owners Manual - Page 16
MUTE INPUT ON-OFF VOLUME ZOOM FOCUS AUTO PC ADJ. D.ZOOM FREEZE IMAGE NO SHOW LENS SHIFT KEYSTONE SELECT MENU NORMAL INPUT BUTTON Used to select input source. (P23, 31) POWER ON-OFF BUTTON Used to turn projector on or off. (P20) ZOOM BUTTONS Used to adjust zoom. (P21) FOCUS BUTTONS Used to - Sanyo PLV-60HT | Owners Manual - Page 17
compartment. OPEN Slide the lid upward. To insure safe operation, please observe the following precautions : q Use (2) AA, UM3 or R06 type alkaline batteries. q Replace two batteries at the same time. q Do not use a new battery with a used battery. q Avoid contact with water or liquid. q Do not - Sanyo PLV-60HT | Owners Manual - Page 18
BEFORE OPERATION OPERATING ON-SCREEN MENU HOW TO OPERATE ON-SCREEN MENU You can control and adjust this projector through ONSCREEN MENU. Refer to the following pages to operate each adjustment on ON-SCREEN MENU. REMOTE CONTROL LENS SHIFT KEYSTONE 1 DISPLAY MENU Press MENU button to display ON - Sanyo PLV-60HT | Owners Manual - Page 19
select image level among Standard, Real or Image 1 ~ 4. (Refer to P28) SETTING MENU Used to change settings of projector and reset Lamp Replace Counter. (Refer to P36, 37) GUIDE WINDOW Shows selected item of ONSCREEN MENU. PC ADJUST MENU Used to adjust parameters to match with input signal format - Sanyo PLV-60HT | Owners Manual - Page 20
turn off projector. LAMP Indicator lights bright and READY Indicator turns off. After projector is turned turned on. 3 When projector has cooled down, READY Indicator turns to green again and you can turn projector on. After cooling down completely, turn page 38.) 4. Turn projector on again. If WARNING - Sanyo PLV-60HT | Owners Manual - Page 21
down. Refer to P9 for operating range. Lens shift Message disappears after 4 seconds. KEYSTONE ADJUSTMENT If image has keystone distortion, correct image with KEYSTONE adjustment. 1 Press KEYSTONE button on Remote Control Unit or select Keystone on SETTING Menu (P36). The message "Keystone" is - Sanyo PLV-60HT | Owners Manual - Page 22
dialog box appears on the screen for a few seconds. (+) button to increase volume, and (-) button decreasing. Indicates the roughly level of volume. MUTE SETTING Press MUTE button on Remote Control Unit to cut off sound. To restore sound to its previous level, press MUTE button again or press - Sanyo PLV-60HT | Owners Manual - Page 23
image is not provided properly, manual adjustment is required. (Refer to P25 and 26.) No signal There is no signal input from computer. Make sure the connection of computer and projector is set correctly. (Refer to TROUBLESHOOTING on page 40.) SYSTEM MENU SYSTEM Menu icon Displays system being - Sanyo PLV-60HT | Owners Manual - Page 24
parameters. Adjustment parameters from Auto PC Adjustment can be memorized in this projector. Once parameters are memorized, setting can be done just by selecting Mode in SYSTEM Menu (above). Refer to step 3 of MANUAL PC ADJUSTMENT section (P26). NOTE : Auto PC Adjustment function cannot be operated - Sanyo PLV-60HT | Owners Manual - Page 25
to match with those special signal formats. This projector has 5 independent memory areas to memorize those parameters manually adjusted. This enables you to recall the setting for a specific computer whenever you use it. Note : This PC ADJUST Menu cannot be operated when "RGB" is selected on - Sanyo PLV-60HT | Owners Manual - Page 26
Adjustment of vertical area displayed with this projector. Press POINT LEFT/RIGHT button(s) and " or "HDTV1080i" is selected on SYSTEM Menu (P23, 24). Fine sync and Total dots adjustment data. Mode free To clear adjustment parameters previously set, move a red frame pointer to Mode free icon - Sanyo PLV-60HT | Owners Manual - Page 27
COMPUTER MODE COMPATIBLE COMPUTER SPECIFICATIONS Basically this projector can accept the signal from all computers with the V, H-Frequency mentioned below and less than 180 MHz of Dot Clock. ON-SCREEN DISPLAY VGA 1 VGA 2 - Sanyo PLV-60HT | Owners Manual - Page 28
POINT DOWN button to move a red frame pointer to the level that you want to set and then press SELECT button. IMAGE SELECT MENU Standard Normal picture level preset on this projector. IMAGE SELECT Menu icon Real Picture level adjusted for the picture with fine tone. IMAGE 1~4 User preset picture - Sanyo PLV-60HT | Owners Manual - Page 29
balance of contrast. (From 0 to 15.) 3 Stored To store manually preset image, move a red frame pointer to STORE icon and press SELECT button. Image Level Menu will appear. Move a red frame pointer to the Image 1 to 4 where you want to set and then press SELECT button. Other icons operates as - Sanyo PLV-60HT | Owners Manual - Page 30
mode automatically. Image size can be set to Normal by pressing NORMAL button. Digital Zoom Adjusts image size or pans image. In "Digital Zoom" mode, the ONSCREEN MENU disappears and the magnifying glass icon and the message "D. Zoom" is displayed. This projector also enters Digital Zoom mode by - Sanyo PLV-60HT | Owners Manual - Page 31
Top Control or on the Remote Control Unit. If projector cannot reproduce proper video source, select correct input source through MENU OPERATION (see below). INPUT button Input 1 Input 2 Input 3 MENU OPERATION 1 Press MENU button and ON-SCREEN MENU will appear. Press POINT LEFT/RIGHT button to - Sanyo PLV-60HT | Owners Manual - Page 32
System is PAL-M or PAL-N, select system manually. PAL / SECAM / NTSC / NTSC4.43 / PAL-M / PAL-N If projector cannot reproduce proper video image, it is optimize its performance. AV SYSTEM MENU (COMPONENT VIDEO) COMPONENT VIDEO SIGNAL FORMAT If projector cannot reproduce proper video image, - Sanyo PLV-60HT | Owners Manual - Page 33
Press POINT DOWN button to move a red frame pointer to the level that you want to set and then press SELECT button. IMAGE SELECT MENU Standard Normal picture level preset on this projector. IMAGE SELECT Menu icon Cinema Picture level adjusted for the picture with fine tone. IMAGE 1~4 User preset - Sanyo PLV-60HT | Owners Manual - Page 34
or POINT RIGHT button to obtain better balance of contrast. (From 0 to 15.) Noise reduction Set "On" to reduce noise (rough parts) of the image. Progressive Set "On" to provide progressive scan mode. IMAGE ADJUST MENU Move a red frame pointer to the item to be selected and then press SELECT button - Sanyo PLV-60HT | Owners Manual - Page 35
. Reset Reset all adjustment to previous figure. Quit Closes IMAGE MENU. Stored icon Image Level Menu Move a red frame pointer to the image icon to be set and then press SELECT button. PICTURE SCREEN ADJUSTMENT This projector has a picture screen resize function, which enables you to display - Sanyo PLV-60HT | Owners Manual - Page 36
is unplugged or turned off. Display This function decides whether to display the On-Screen Displays. On ··· shows all the On-Screen Displays. Off ···· sets the On-Screen Displays disappeared except; q ON SCREEN MENU q "Power off?" message Logo When this function is "On," projector displays logo - Sanyo PLV-60HT | Owners Manual - Page 37
SETTING Power management This function turns Projection Lamp off when projector detects signal interruption and projector is not used for a certain period in order to reduce power consumption and maintain the Lamp-life. (This projector is shipped with this function ON.) Power Management function - Sanyo PLV-60HT | Owners Manual - Page 38
out the dust and particles. Be sure to dry them out. 4 Replace Air Filters and Air Filter Cover properly. Make sure that they are fully set. CAUTION Do not operate projector with Air Filters removed. Dust may accumulate on the LCD Panel and the Mirror degrading picture quality. Do not put small - Sanyo PLV-60HT | Owners Manual - Page 39
q Model No. of your projector : PLV-60HT q Replacement Lamp Type No. : POA-LMP28 (Service Parts No. 610 285 4824) LAMP REPLACE COUNTER Be sure to reset Lamp Replace Counter when Lamp Assembly is replaced. When Lamp Replace Counter is reset, LAMP REPLACE Indicator stops lighting. 1 Turn projector on - Sanyo PLV-60HT | Owners Manual - Page 40
on. (See "TURNING ON/OFF THE PROJECTOR" section on page 20.) q Check the Projection Lamp. (Refer to page 39.) q Adjust the focus q Make sure the projection screen is at least 4.43' (1.35 m) from projector. q Check the projection lens to see if it needs cleaning. NOTE : Moving projector from a cool - Sanyo PLV-60HT | Owners Manual - Page 41
"SETTING" section on page 36, 37.) WARNING : High voltages are used to operate this projector. Do not attempt to open the cabinet. If the problem still persists after following all operating instructions, contact the sales dealer where you purchased projector or the service center. Give the model - Sanyo PLV-60HT | Owners Manual - Page 42
Projector Type Dimensions (W x H x D) Net Weight LCD Panel System Panel Resolution Number of Pixels Color System High Definition TV Signal Scanning Frequency Projection Image size (Diagonal) Horizontal Resolution Projection Lens Throw Distance Projection Lamp batteries) Owner's Manual AC Power Cord - Sanyo PLV-60HT | Owners Manual - Page 43
4 No Connect 5 Ground 6 No Connect 7 RTS 8 CTS 9 No Connect MAC ADAPTER (NOT SUPPLIED) Set Slide Switches as shown in the table below depending on RESOLUTION MODE that you want to use before you turn-on projector and computer. Slide Switches (1 ~ 6) ON OFF ON DIP 123456 123456 13" MODE (640 - Sanyo PLV-60HT | Owners Manual - Page 44
Printed in Japan Part No. 610 294 7861 (1AA6P1P2944-- M4HAA) SANYO Electric Co., Ltd
-
 1
1 -
 2
2 -
 3
3 -
 4
4 -
 5
5 -
 6
6 -
 7
7 -
8
-
9
-
10
-
11
-
12
-
13
-
14
-
15
-
16
-
17
-
18
-
19
-
20
-
21
-
22
-
23
-
24
-
25
-
26
-
27
-
28
-
29
-
30
-
31
-
32
-
33
-
34
-
35
-
36
-
37
-
38
-
39
-
40
-
41
-
42
-
43
-
44
 |
 |
Owner's Manual
PLV-60HT
Multimedia Projector
MODEL