Sanyo VPC T1060 Owners Manual - Page 25
Panorama Mode - digital camera
 |
UPC - 086483072277
View all Sanyo VPC T1060 manuals
Add to My Manuals
Save this manual to your list of manuals |
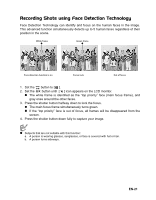
Page 25 highlights
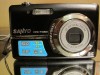
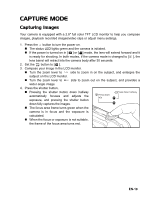
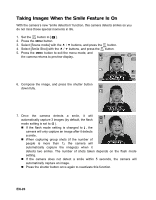
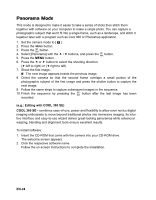
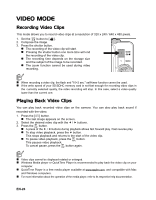
Panorama Mode This mode is designed to make it easier to take a series of shots then stitch them together with software on your computer to make a single photo. You can capture a photographic subject that won't fit into a single frame, such as a landscape, and stitch it together later with a program such as Cool 360 or Photoshop application. 1. Set the camera mode to [ P ]. 2. Press the button. 3. Press the button. 4. Select [Panorama] with the c / d buttons, and press the button. 5. Press the MENU button. 6. Press the e or f button to select the shooting direction. (f:left to right) or (e:right to left) 7. Shoot the first image. „ The next image appears beside the previous image. 8. Orient the camera so that the second frame overlaps a small portion of the photographic subject of the first image and press the shutter button to capture the next image. 9. Follow the same steps to capture subsequent images in the sequence. 10. Finish the sequence by pressing the button after the last image has been recorded. (e.g.: Editing with COOL 360 SE) COOL 360 SE - combines ease-of-use, power and flexibility to allow even novice digital imaging enthusiasts to move beyond traditional photos into immersive imaging. Its intuitive interface and easy-to-use wizard deliver great-looking panoramas while advanced warping, blending and alignment tools ensure excellent results. To install software: 1. Insert the CD-ROM that came with the camera into your CD-ROM drive. The welcome screen appears. 2. Click the respective software name. Follow the on-screen instructions to complete the installation. EN-24
-
 1
1 -
2
-
3
-
4
-
5
-
6
-
7
-
8
-
9
-
10
-
11
-
12
-
13
-
14
-
15
-
16
-
17
-
18
-
19
-
 20
20 -
 21
21 -
 22
22 -
 23
23 -
 24
24 -
 25
25 -
 26
26 -
 27
27 -
 28
28 -
 29
29 -
 30
30 -
31
-
32
-
33
-
34
-
35
-
36
-
37
-
38
-
39
-
40
-
41
-
42
-
43
-
44
-
45
-
46
-
47
 |
 |