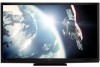
Sharp PRO-70X5FD User Manual
Sharp PRO-70X5FD Manual
 |
View all Sharp PRO-70X5FD manuals
Add to My Manuals
Save this manual to your list of manuals |
Sharp PRO-70X5FD manual content summary:
- Sharp PRO-70X5FD | User Manual - Page 1
OPERATING INSTRUCTIONS MODE D'ENPLOI PRO-70X5FD PRO-60X5FD LED LCD TV Téléviseur LCD LED - Sharp PRO-70X5FD | User Manual - Page 2
• For the Spanish version of this operation manual, go to www.elitelcdtv.com/espanol. • Pour la version en espagnol de ce mode d'emploi, veuillez consulter www.elitelcdtv.com/espanol. • Para le versión en español de este manual de operación, acceda a www.elitelcdtv.com/espanol. - Sharp PRO-70X5FD | User Manual - Page 3
PRO-70X5FD PRO-60X5FD LED LCD TV ENGLISH OPERATION MANUAL IMPORTANT: To aid reporting in case of loss or theft, please record the TV's model and serial numbers in the space provided. The numbers are located at the rear of the TV. Model and maintenance (servicing) instructions in the literature - Sharp PRO-70X5FD | User Manual - Page 4
. DECLARATION OF CONFORMITY: ELITE LIQUID CRYSTAL TELEVISION, MODEL PRO-70X5FD/PRO-60X5FD This device complies with Part 15 of the FCC Rules is connected. Consult the dealer or an experienced radio/TV technician for help. FCC Compliance Statement This device complies with part 15 of the FCC Rules - Sharp PRO-70X5FD | User Manual - Page 5
/or fire. In order to prevent potential danger, please observe the following instructions when installing, operating and cleaning the product. To ensure your safety and prolong the service life of your LED LCD TV, please read the following precautions carefully before using the product. 1) Read these - Sharp PRO-70X5FD | User Manual - Page 6
unless proper ventilation is provided or the manufacturer's instructions are followed. • The front panel used in this product is made of glass. power lines or circuits as contact with them might be fatal. • To prevent fire, never place any type of candle or flames on the top or near the TV set - Sharp PRO-70X5FD | User Manual - Page 7
experience is a growing trend and larger flat panel displays are popular purchases. However, flat panel displays are not always supported on the proper stands or installed according to the manufacturer's recommendations. • Flat panel displays that are inappropriately situated on dressers, bookcases - Sharp PRO-70X5FD | User Manual - Page 8
recharging. Recharging using other devices may lead to battery damage. Caution regarding the power supply • Use the USB cable to connect to a USB terminal of a 3D compatible Elite LCD TV for supplying power. Supplying power using other devices may lead to heat generation or battery damage. • During - Sharp PRO-70X5FD | User Manual - Page 9
ELITE and the ELITE logo are registered trademarks of Pioneer Corporation. • THX and the THX logo are trademarks of THX Ltd. which are registered in some jurisdictions. The THX 3D logo is a trademark of THX Ltd. All rights reserved. • ISF CERTIFIED™ are trademarks, service marks, or certification - Sharp PRO-70X5FD | User Manual - Page 10
Internet 70-71 Internet Setup 72-73 ELITE Advantage Live 73 Entering Text (Software Keyboard 74 Using the Browser 75-78 Using Applications via the Internet 79-80 Appendix Removing the Stand 81 Setting the TV on the Wall 82 Optional Accessories 82 Troubleshooting 83-84 Troubleshooting - 3D - Sharp PRO-70X5FD | User Manual - Page 11
with the product. Remote control unit (g1) Page 10 "AA" size battery (g2) Page 11 ■ Operation manual (g1) Cable tie (g1) Page 10 Stand unit (g1) Page 9 3D Glasses (g2) See pages 43 to 47 for details of the 3D Glasses and their accessories. • Always use the AC cord supplied with the TV. • The - Sharp PRO-70X5FD | User Manual - Page 12
cases, change the angle of the lighting or the TV, or operate the remote control unit closer to the remote control sensor. B) The Power LED on the front of the television lights up. Power LED 5 Insert the batteries into the remote control unit. (See page 11.) • Speakers cannot be detached from - Sharp PRO-70X5FD | User Manual - Page 13
TV set. (The breaking of internal circuit, etc.) 75-ohm coaxial cable Installing Batteries in the Remote Control Unit If the remote control fails to operate TV functions, replace the batteries in the remote control or explosion. Be sure to follow the instructions below. • Do not mix batteries of - Sharp PRO-70X5FD | User Manual - Page 14
Part Names TV (Front/Side) *1 POWER button MENU button INPUT button Channel buttons (CHU/V) Volume buttons (VOLk/l) OPC sensor *2 Remote control sensor Power LED (See page 34.) 3D infrared emitter *3 *1 See pages 19 and 26 for button operations. *2 OPC: Optical Picture Control (See page 28.) - Sharp PRO-70X5FD | User Manual - Page 15
D. 30 15 AV RECEIVER: Operate an AV receiver. (See page 61.) 16 SLEEP: Set the sleep timer. POWER SAVING: Select Power Saving settings. (See page 23.) 32 FREEZE: Set the still image. Press again to return to normal screen. (See page 22.) • When using the remote control unit, point it at the TV - Sharp PRO-70X5FD | User Manual - Page 16
Quality ■ Connecting to audio equipment Terminal on the TV Component video cable Audio cable AV cable Cable Optical fiber cable Ø3.5 mm stereo source images, select the input source by pressing INPUT on the remote control unit or on the TV. Example I NPUT AIR 1 Press INPUT. • The INPUT list - Sharp PRO-70X5FD | User Manual - Page 17
INPUT on the remote control unit or on the TV. (See pages 14 and 22.) For connecting the TV to external equipment, use commercially available cables. CAUTION • To protect equipment, always turn off the TV before connecting any external equipment. • Please read the relevant operation manual (Blu-ray - Sharp PRO-70X5FD | User Manual - Page 18
disc player • DVD player • HD cable/satellite set-top box Audio cable AUDIO-R (Red) AUDIO-L ed cable or a component cable and set the equipment to 1080p output. • See page /satellite set-top box to the HDMI terminal. Connecting a VCR, Game Console, Camcorder or Cable/Satellite Set-top Box - Sharp PRO-70X5FD | User Manual - Page 19
fier for surround system HDMI-certified cable *1 HD Cable/Satellite set-top box HDMI OUT OPTICAL DIGITAL AUDIO INPUT HDMI OUT HDMI IN Optical fiber cable *2 • Letting the TV output the audio to an AV amplifier: *1 When you connect ARC-compatible equipment, use the HDMI 1 terminal. *2 If the equipment - Sharp PRO-70X5FD | User Manual - Page 20
PC Refer to page 67 for a list of PC signals compatible with the TV. ■ When using HDMI cable (HDMI 1, 2, 3, 4 or 5): HDMI- minijack cable to the AUDIO IN terminal and set "Audio Select" to "HDMI+Analog". (See page 67.) • The HDMI terminals only support digital signal. ■ When using DVI-HDMI - Sharp PRO-70X5FD | User Manual - Page 21
) Press POWER on the TV or on the remote control unit to turn the power on. • The Power LED on the TV lights up. • The Initial Installation starts when the TV powers on for the first time. If the TV has been turned on before, the Initial Installation will not be invoked. For changing the settings of - Sharp PRO-70X5FD | User Manual - Page 22
top box. When doing so, you must make the setting to skip "TV". Press c/d to select "On", and then press ENTER. On Off • When this is set to "On", the channel on the TV cannot be changed using the remote control unit or menu. (e.g. CH U/V, Favorite CH, etc.) • See page 33 for details on the Input - Sharp PRO-70X5FD | User Manual - Page 23
box. OK • If no channel is found, confirm the type of connection made with your TV and try "EZ Setup" again. (See page 35.) • For changing the settings of the Initial Installation, perform "EZ setup" on the Initial Setup menu on page 35. • To see the list of channels found during - Sharp PRO-70X5FD | User Manual - Page 24
volume by pressing VOLk/l on the TV or on the remote control unit. • To increase the volume, press VOLk. • To decrease the volume, press VOLl. 20 Audio status Output device Speaker Output Select Fixed Variable Variable sound Mute • When "Output Select" is set to "Variable", the indicator on - Sharp PRO-70X5FD | User Manual - Page 25
This TV contains the detailed calibrations necessary for professional certification by the Imaging Science Foundation (ISF). After completion of the adjustments by an ISF-certificated technician, the "ISF DAY" and "ISF NIGHT" modes will be accessible by the user in AV MODE. • Contact your local dealer - Sharp PRO-70X5FD | User Manual - Page 26
. See page 31 for details of Power Saving settings. • See page 34 for detailed closed caption settings. • When the program contains no these services at the discretion of the program provider. • When TV+Web or Web is displayed, Closed Captions are not available. • You can have the same settings by - Sharp PRO-70X5FD | User Manual - Page 27
programs Stretch • You can have the same settings by choosing "View Mode" on the menu items. (See may not be able to change the View Mode while in 3D mode. Dot by Dot (Full Screen) S.Stretch (Smart :1 DVDs, stretch mode will still show very thin black bands at the top and bottom of the screen. - Sharp PRO-70X5FD | User Manual - Page 28
operations on the control panel correspond to the ones on the remote control as shown below. MENU: Press to open or close the menu screen. a/b/c/d: Press to select a desired item on the screen or adjust a selected item. ENTER: Press to go to the next step or complete the setting. RETURN: Press to - Sharp PRO-70X5FD | User Manual - Page 29
Page 34 Caption Setup Page 34 Game Play Time Page 34 Operation Lock Out Page 34 Power LED Setting Page 34 Demo Mode Page 34 Initial Setup EZ Setup Page 35 Language Page 35 Location & Time Page 35 TV Location Page 35 Antenna & Cable/STB Page 35 Air/Cable Page 35 CH Search Page - Sharp PRO-70X5FD | User Manual - Page 30
. • For details of the selectable items in 3D mode, see page 47. • You can select AV MODE by pressing AV MODE on the remote control unit. See page 23 for details of AV MODE settings. Intelligent Variable Contrast This function adjusts the LED backlight according to the brightness of the divided - Sharp PRO-70X5FD | User Manual - Page 31
ELITE parts and dark parts. The adjustment range of the gamma can be set to a maximum of +2 and a minimum of -2 by pressing c or d. Black Level Adjusts on-screen black level to your preferred level. High: The black level gets brighter. Low: The black level gets darker. • "Black when you set AV MODE - Sharp PRO-70X5FD | User Manual - Page 32
commercial breaks. The Automatic Volume Control (Auto Volume) reduces this problem by equalizing levels. High: Reducing 3D Standard: Creating 3 dimensional surround sound with detailed control of the signal phase. Normal: Providing mild surround sound. Off: Outputs the normal sound. • Audio Settings - Sharp PRO-70X5FD | User Manual - Page 33
of "OPC" in the Picture Settings menu screen. • You can select Power Saving by pressing POWER SAVING on the remote control unit. (See page 23.) • "Power Saving" is not available when the TV is in 3D mode. No Signal Off This function allows the TV to automatically shut the power down when there is no - Sharp PRO-70X5FD | User Manual - Page 34
Option 3D Setup Link Control Setup Input Terminal Setting Menu Design Operation Lock Out [Off] Power LED Setting on the remote control unit. -See page 25 for adjusting the video being input from a TV, other cult to hear. • Obtain a clearer sound by manually switching to fixed mono-sound mode. You can - Sharp PRO-70X5FD | User Manual - Page 35
CC on the remote control unit. See page 24 for details of Closed Caption function. Input Terminal Setting Audio Setup You can output digital audio to an AV amplifier or similar device whose DIGITAL AUDIO INPUT terminal is connected to the DIGITAL AUDIO OUTPUT terminal on the TV. Please select an - Sharp PRO-70X5FD | User Manual - Page 36
. It cannot be manually adjusted. • The TV, press MENU on the remote control, and then select "Off" in "Operation Lock Out". Power LED Setting When this function is set to "On", the Power LED on the front of the TV turns on. • The Power LED lights blue in 2D mode. • The Power LED lights white in 3D - Sharp PRO-70X5FD | User Manual - Page 37
", "Manual" or "Off". TV Location: Select "Home" or "Store" for the location where you plan to install the TV. This product qualifies for ENERGY STAR in Home mode default setting. Home: "Power Saving" is set to "Advanced", and AV MODE is set to "STANDARD". Store: "Power Saving" is set to "Off" and AV - Sharp PRO-70X5FD | User Manual - Page 38
all the favorite channels, select "All Data Clear". • Before setting the channel, select the channel you want to register as a favorite channel. • You can display the "Favorite CH" screen by pressing FAVORITE CH on the remote control. Antenna Setup-DIGITAL In order to receive digital air broadcasts - Sharp PRO-70X5FD | User Manual - Page 39
children. TV-G: General audience. TV-PG: Parental Guidance suggested. TV-14: Parents strongly cautioned. TV-MA: Mature audience only. Example MPAA TV Guidelines TV-Y Can. English Ratings TV-Y7 D Can. French Ratings TV-G L TV-PG S TV-14 V TV-MA FV NONE When setting an individual - Sharp PRO-70X5FD | User Manual - Page 40
English ratings and Canadian French ratings) • The TV rating systems in Canada are based on the Canadian Radio-Television and setting ("MPAA", "TV Guidelines", "Can. English Ratings" or "Can. French Ratings") from the Parental CTRL to reactivate BLOCK. (See pages 37 to 38.) • Switch off the TV power - Sharp PRO-70X5FD | User Manual - Page 41
Setup are required to update the software using the network. (See pages 70 to 73.) • It may take time to access and download the update depending on the Internet connection and other factors. Auto Update Setting When the TV is on, or when an Internet application is being accessed, this function - Sharp PRO-70X5FD | User Manual - Page 42
the server. Check the network settings and try again. OK The TV does not need to be com. If you have any questions, please call 1-855-ELITE-01. CAUTION • Do not remove the USB memory Remote control operation is disabled during update process. Do not unplug AC cord. or 2 Press a/b on the Manual - Sharp PRO-70X5FD | User Manual - Page 43
device. Checking • The current version of the TV software and the version of the update file on Example Now updating Update Version : UXXXXXX2 30% Remote Control operation is disabled during Update process. Do not fails again, contact the customer service center. Update Version : UXXXXXX2 - Sharp PRO-70X5FD | User Manual - Page 44
or images may appear overlapping. • View 3D images at the appropriate distance from the TV screen. The recommended distance is three times the effective height of the TV screen. Examples of recommended distances 70-inch screen: Approx. 8.5 ft (2.6 m) 60-inch screen: Approx. 7.2 ft (2.2 m) Viewing - Sharp PRO-70X5FD | User Manual - Page 45
after 10 minutes if no signal is received from the TV. 2 USB terminal This terminal is for recharging and supplying power. 3 3D/2D/OFF switch This button switches between 2D, 3D and OFF modes. 4 LED light Blinks once every second when the battery power is low. 5 Nose pad mount The dedicated nose pad - Sharp PRO-70X5FD | User Manual - Page 46
again if the LED light blinks on and off once every 0.5 seconds. If it still does not respond, inquire with a retail dealer or Elite LCD TV Authorized Service Center. 3 After the recharge has completed, turn off the TV, and then remove the USB cable from the 3D Glasses. Turning the Power On/Off - Sharp PRO-70X5FD | User Manual - Page 47
injury. Removing the Battery for Recycling The following instruction and procedure is provided solely as a guide for the safe removal of the Li-ion battery for proper disposal. This product is not repairable. Do not attempt to replace the battery; once the 3D Glasses are taken apart, they cannot be - Sharp PRO-70X5FD | User Manual - Page 48
by selecting "System Options" > "3D Setup" > "3D Auto Change" on the TV. (See page 48.) 1 When "3D Auto Change" is set to "Yes" • The 3D image type is detected automatically and the appropriate 3D image is displayed. Changed to 3D mode. Put on 3D glasses and press the power button on the glasses. If - Sharp PRO-70X5FD | User Manual - Page 49
to make the necessary settings. A: 3D Brightness Boost B: 3D Surround (See page 30.) The surround mode changes each time you press B. C: 2D➝3D Convert Effect (See page 48.) D: 3D Setup (See page 48.) • You can select AV MODE by pressing AV MODE on the remote control unit. 3D Brightness Boost You - Sharp PRO-70X5FD | User Manual - Page 50
the elapsed viewing time. 3D Test This displays 3D images for testing the 3D operation. Clicking "Start" on the screen plays back 3D test images. • If you press EXIT during playback, the previous screen will be displayed. 3D Glasses Control To enable this function, set "TV Location" to "Store - Sharp PRO-70X5FD | User Manual - Page 51
Image Viewing • These 3D Glasses are only for use with Elite LCD TVs supporting 3D. ■ 3D Glasses lenses • Do not apply pressure to the lenses of the 3D Glasses. Also, do not drop or bend the 3D Glasses. • Do not scratch the surface of the lenses of the 3D Glasses with a pointed instrument or other - Sharp PRO-70X5FD | User Manual - Page 52
Glasses Product 3D Glasses Model number AN-3DG20-EL Lens type Liquid crystal shutter Power supply DC5V (supplied by a USB terminal of an Elite LCD TV) Battery Lithium ion polymer rechargeable battery (DC3.7V 70mAh) Battery life* Approx. 30 hours of continuous use Charging time Dimension - Sharp PRO-70X5FD | User Manual - Page 53
les. • File names over 80 characters (may vary depending on character set) may not be displayed. Connecting a USB Memory Device/USB Hard with recorded photos, music or videos into the USB 1 or USB 2 terminal on the TV. • If USB memory devices are inserted into both terminals, the USB 1 terminal has - Sharp PRO-70X5FD | User Manual - Page 54
back data on a USB memory device, insert the USB memory device on the TV. USB mode is selected automatically. (Go to step 2) • Use the following ) mode, check your TV's network settings and connection. • You can also display the Media screen by pressing FAV APP on the remote control unit. See page 36 - Sharp PRO-70X5FD | User Manual - Page 55
display disappears automatically after a particular time has elapsed. To display the key guide display again, press DISPLAY. USB Menu Example USB MENU 3D Display Select Slide Show Intrerval Select Slide Show BGM Set All Slide Show Image Reset All Slide Show Image Remove USB Device [On] [10sec - Sharp PRO-70X5FD | User Manual - Page 56
.MP3 SONG_06.MP3 SONG_07.MP3 music 3 music 4 music 5 ... I 3:42 I 4:55 I 4:35 I 4:08 I 4:20 I 3:55 I 4:26 • All of the music files are selected by default. ■ Set/Reset All Slide Show Image Set or reset the images to be displayed. 1 Press D to display the USB MENU screen. 2 Press a/b to select - Sharp PRO-70X5FD | User Manual - Page 57
d. After playing to the end, the TV goes to the next file and starts to and 3D modes. Jump to the scene where playback was last stopped. Stop a video. Display the USB operation panel. le without chapters, playback points are set automatically. Playback points are set at intervals of a one-tenth - Sharp PRO-70X5FD | User Manual - Page 58
CC" or by pressing CC on the remote control unit. • Use "Audio" on the operation panel to change the audio. You can also switch the audio by using "System Options" > "View Option" > "Change Audio". USB Menu Menu for file selecting operations Example USB MENU Set All Auto Play Reset All Auto Play - Sharp PRO-70X5FD | User Manual - Page 59
can find your registration code on this menu. You need to register the TV at http://www.divx.com before playing the DivX content. ■ DivX® VOD MP3 AAC Dolby Digital MPEG LPCM • Progressive format jpeg files are not supported. • USB 1.1 devices may not be played properly. • Operation using - Sharp PRO-70X5FD | User Manual - Page 60
(shooting date is only available in the EXIF file format). • Rotating photos only applies to the temporarily selected item and this setting is not saved. • In 3D mode, you cannot rotate the photos. Slide Show The photos displayed on the thumbnail selection screen are displayed as a slide show - Sharp PRO-70X5FD | User Manual - Page 61
Jump back in a video. *1 Play/Pause the video. *1 Go back to the file selection screen. Switches between 2D and 3D modes. Stop a video. Display the home network (DLNA) operation panel.*2 *1 Jump forward/back and play/pause may not be available depending on the files. *2 See page 56 for details on the - Sharp PRO-70X5FD | User Manual - Page 62
Options Presetting Remote Control Function You can operate the connected AV products (AV receiver, cable box, SAT tuner, DTV, VCR, BD, DVD, LD) using the presetting manufacturer function of your remote control unit. Manufacturer codes STB mode CATV Pioneer SAT Pioneer REMOTE CONTROL CODE NUMBER - Sharp PRO-70X5FD | User Manual - Page 63
STB GUIDE screen or STB MENU screen. (STB) Press the button to select items on the BD/DVD menu screen. (BD, DVD) • ENTER: Press to activate the selected function. (STB, BD, DVD) 12 AV RECEIVER: Operate an AV receiver. • D: Turns the power on and off. • INPUT: Select an input source. • +/-: Set the - Sharp PRO-70X5FD | User Manual - Page 64
ber cable BD-DVD Player Link Control-compatible AV receiver Back panel horizontal inputs Back panel vertical inputs • For connecting the TV to Link Control-compatible equipment, use commercially available cables. • Point the remote control toward the TV, not to connected HDMI equipment. • Video - Sharp PRO-70X5FD | User Manual - Page 65
cannot be output from the AV amplifier even after making the necessary settings, connect the TV to the AV amplifier with an optical fiber cable and select "Off". One Touch Playback Link Control allows you to operate the HDMIconnected equipment with one remote control. Press d to start playing back - Sharp PRO-70X5FD | User Manual - Page 66
works only when Link Control-compatible ELITE equipment with the Device Operation Panel function is connected. Playback of Titles Using Link Control This section explains how to play back a title in the Link Control-compatible equipment. 1 Power on the Link Control-compatible equipment, and select - Sharp PRO-70X5FD | User Manual - Page 67
You can call up the Link Control-compatible recorder's EPG and preset timer recordings using the TV's remote control. 1 Press LINK CTRL to This function works only when a Link Control-compatible recorder is connected. • Refer to the operation manual of the recorder for details. Check Booking - Sharp PRO-70X5FD | User Manual - Page 68
screen size may vary with input signal type. • You can have the same settings by choosing "View Mode" on the menu items. (See page 32.) • You may not be able to change the View Mode while in 3D mode. Example: Screen size images Input signal Normal Zoom Stretch Dot by Dot 4:3 - Sharp PRO-70X5FD | User Manual - Page 69
3D Setup Link Control Setup Input Terminal Setting Menu Design 1 Press MENU to display the MENU screen, and then press a/b to select "System Options". 2 Press a/b to select "Input Terminal Setting black) edges, or is moved while executing "Auto Sync.". • Be sure to connect the PC to the TV kHz 70 Hz - Sharp PRO-70X5FD | User Manual - Page 70
Set the IP address on the TV menu Service: None (Do not select Telnet or SSH) TCP port#: Set a port number on the TV menu (Control port) When you set your ID and password on the TV present setting ? value responds. ???? ■ Response code format Normal response OK Return code (0DH) Problem - Sharp PRO-70X5FD | User Manual - Page 71
of the TV software is displayed. IP PROTOCOL VERSION I PPV1 _ _ _ The currently supported version of IP protocol is displayed. 3D T D C H * _ _ _ 0: 3D Off 1: 2D➝3D 2: SBS 3: TAB 4: 3D➝2D (SBS) 5: 3D➝2D (TAB) 6: 3D auto 7: 2D auto REMOTE CONTROL BUTTONS R C K Y * _ _ _ 0-9: 0-9, 10 - Sharp PRO-70X5FD | User Manual - Page 72
and receive online user support. • You can enjoy a variety of streaming content and Internet applications. • You may not be able to view 3D images when accessing the Internet. * About the ELITE ADVANTAGE LIVE • The ELITE ADVANTAGE LIVE is a website set up specifically for Elite LCD TV owners. • The - Sharp PRO-70X5FD | User Manual - Page 73
. Therefore, do not use a separate wireless LAN adapter. • This TV has received the following certifications. - Wi-Fi CERTIFIED™ (certification access point that supports IEEE802.11a/n (5 GHz) and set the access point to transmit at 5 GHz. For setup details, see the operation manual of your - Sharp PRO-70X5FD | User Manual - Page 74
press ENTER. • If " " or " " is displayed after you connect to the Internet, check your TV's network settings and connection. • You can also display the ELITE ADVANTAGE LIVE screen by pressing FAV APP on the remote control unit. See page 36 for details on the FAV APP key Assign function. 3 Press - Sharp PRO-70X5FD | User Manual - Page 75
and allow you to receive support service over the network. 1 Press APPS to display the application window. 2 Press a/b/c/d to select "ELITE ADVANTAGE LIVE", and then press ENTER. • You can also display the ELITE ADVANTAGE LIVE screen by pressing FAV APP on the remote control unit. See page 36 for - Sharp PRO-70X5FD | User Manual - Page 76
at a time. • You can also delete text by pressing RETURN on the remote control unit. Enters a space. While you are entering text, likely input conversion the opposite edge (right edge). When the focus is on "Character Set", this selects the character type (moving backwards). When the focus is - Sharp PRO-70X5FD | User Manual - Page 77
to the corresponding link destination. CAUTION • If the power is cut due to a power failure or the TV being unplugged while you are using the Internet, information can set whether or not this window is displayed. You can also opt to delete all the cookies at once. (See page 78.) ELITE ADVANTAGE - Sharp PRO-70X5FD | User Manual - Page 78
Toolbar You can use the toolbar to control the browser and to specify settings. 1 Press D on the remote control unit to display the toolbar. 2 Press Refreshes the page. Interrupts a page while it is loading. Displays the ELITE ADVANTAGE LIVE. Select this to open a bookmark. Adds the current page - Sharp PRO-70X5FD | User Manual - Page 79
return to that page later by simply selecting it from your list of bookmarks. 1 Display the page that you want to bookmark. 2 Press D on the remote control unit to display the toolbar. 3 Press c/d to select " " in the toolbar, and then press ENTER. 4 Select "Yes", and then press ENTER. • The page is - Sharp PRO-70X5FD | User Manual - Page 80
from a protected page to an unprotected page. To change this setting, remove the tick, select "Save Setting" and then press ENTER. Root Certificates/CA Certificates: LTD. All rights reserved. • This software is based in part on the work of the Independent JPEG Group. • "Reset" does not reset - Sharp PRO-70X5FD | User Manual - Page 81
games. Please check that the most current software is loaded on TV by selecting "Auto Update Setting" on "Software Update" (see page 39) or by visiting screen for the selected application is displayed. Follow the on-screen instructions for each application. • Check the web site of the provider for - Sharp PRO-70X5FD | User Manual - Page 82
should be made directly to the applicable content or service provider. You may not be able to access content or services from the device for a variety of reasons which may be unrelated to the device itself, including, but not limited to, power failure, other Internet connection, or failure to con - Sharp PRO-70X5FD | User Manual - Page 83
, make sure to turn off the TV. 1 2 Unfasten the four screws used to secure the stand in Detach the stand from the TV. place. • To attach the stand, perform the above steps in reverse order. • In the installation procedure, be careful not to catch your fingers between the TV set and the floor. 81 - Sharp PRO-70X5FD | User Manual - Page 84
(See the bracket instructions for details.) About setting the TV angle AN-52AG4 0/5°/10° PRO-70X5FD • The center of the display: /25 64 inch (10.0 mm) above the "c" position. PRO-60X5FD • The "e" position is at the center of the display. • Refer to the operation manual of AN-52AG4 for - Sharp PRO-70X5FD | User Manual - Page 85
Appendix Troubleshooting Problem Possible Solution • No power • Check if you pressed POWER on the remote control unit. Page 19 If the Power LED on the TV does not light up, press POWER on the TV. • Is the AC cord disconnected? Page 10 • Has the power been turned on? Page 19 • Unit cannot be - Sharp PRO-70X5FD | User Manual - Page 86
cable connected correctly? Page 70 • Check the settings of "Internet Setup". Pages 72 to 73 • Some Internet functions used on a • The TV has only limited functions compared with regular PC browsers. Page 75 PC are not available from the TV. Troubleshooting - 3D Images Problem • 3D images are not - Sharp PRO-70X5FD | User Manual - Page 87
"Color system" ( "Input Terminal Setting" System Options menu). • "EZ " Initial Setup menu). • "Interactive Service" ( "Internet Setup" Initial Setup CHU and VOLk on the TV simultaneously until the message appears on panel to malfunction. Storage temperature: f4°F to e140°F (f20°C to e60°C) 85 - Sharp PRO-70X5FD | User Manual - Page 88
Specifications TV LCD panel Item Size Resolution Model: PRO-70X5FD 70o Class (69 1/2o Diagonal) 2,073,600 pixels (1,920 g 1,080) Model: PRO-60X5FD 60o Class (60 1/32o Diagonal) TV-standard (CCIR) American TV Standard ATSC/NTSC System VHF/UHF VHF 2-13ch, UHF 14-69ch TV Function Receiving - Sharp PRO-70X5FD | User Manual - Page 89
cations Wireless LAN FCC This device complies with part 15 of the FCC Rules. Operation is could cause interference and/or damage to LE-LAN devices. Standard Frequency Band Security Modulation Transmit Power and Sensitivity Specification IEEE 802.11a/b/g/n 2412-2484 MHz 5150-5850 MHz Static WEP ( - Sharp PRO-70X5FD | User Manual - Page 90
Information on the Software License for This Product ■ Software composition The software included in this product is comprised of various software components whose individual copyrights are held by SHARP or by third parties. ■ Software developed by SHARP and open source software The copyrights for - Sharp PRO-70X5FD | User Manual - Page 91
XMLRPC-EPI Copyright 2000 © Epinions, Inc. libjpeg This software is copyright © 1991-1998, Thomas G. Lane. Portions of this software are based in part on the work of the Independent JPEG Group. OpenSSL Copyright © 1998-2008 The OpenSSL Project. This product includes software developed by the - Sharp PRO-70X5FD | User Manual - Page 92
PRO-70X5FD/PRO-60X5FD LCD Color Television (Be sure to have this information available when you need service for your Product.) Two (2) year parts Operation Manual on how to prevent this). Where to Obtain Service: What to do to Obtain Service: From an Elite LCD TV Authorized Servicer located in - Sharp PRO-70X5FD | User Manual - Page 93
91 - Sharp PRO-70X5FD | User Manual - Page 94
NOTE - Sharp PRO-70X5FD | User Manual - Page 95
Dimensional Drawings PRO-70X5FD 63 61/64 (1624) 60 19/32 (1538.88)*1 1 63/64 (50)*2 2 47/64 (69) 3 1/32 (77) Unit: inch (mm) Unité: pouce (mm) ) 4 1/4 (108) 9 5/8 (244) *1 Active area/Área activa *2 Thinnest part/Parte más delgada 5 (127) 9 11/32 (237) AN-52AG4 15 1/4 (387) 17 11/16 (449) - Sharp PRO-70X5FD | User Manual - Page 96
Register Your Product on http://www.elitelcdtv.com (in USA only) Enregistrez votre produit sur http://www.elitelcdtv.com (aux Etats-Unis uniquement) Printed in Mexico Imprimé au Mexique TINS-F205WJZZ 11P07-MX-NM
-
 1
1 -
 2
2 -
 3
3 -
 4
4 -
 5
5 -
 6
6 -
 7
7 -
8
-
9
-
10
-
11
-
12
-
13
-
14
-
15
-
16
-
17
-
18
-
19
-
20
-
21
-
22
-
23
-
24
-
25
-
26
-
27
-
28
-
29
-
30
-
31
-
32
-
33
-
34
-
35
-
36
-
37
-
38
-
39
-
40
-
41
-
42
-
43
-
44
-
45
-
46
-
47
-
48
-
49
-
50
-
51
-
52
-
53
-
54
-
55
-
56
-
57
-
58
-
59
-
60
-
61
-
62
-
63
-
64
-
65
-
66
-
67
-
68
-
69
-
70
-
71
-
72
-
73
-
74
-
75
-
76
-
77
-
78
-
79
-
80
-
81
-
82
-
83
-
84
-
85
-
86
-
87
-
88
-
89
-
90
-
91
-
92
-
93
-
94
-
95
-
96
 |
 |

PRO-70X5FD
PRO-60X5FD
O
PERATING
I
NSTRUCTIONS
M
ODE
D'
ENPLOI
LED LCD TV
Téléviseur LCD LED