Sharp R-2120JK Owners Manual
Sharp R-2120JK - 1200 Watt 2.1 cu. Ft. Microwave Manual
 |
UPC - 074000612204
View all Sharp R-2120JK manuals
Add to My Manuals
Save this manual to your list of manuals |
Sharp R-2120JK manual content summary:
- Sharp R-2120JK | Owners Manual - Page 1
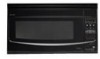
ODEL R-2120J/2130J Follow by letter indicating color K = Black, W = White Q = Bisque, S = Stainless Steel - Sharp R-2120JK | Owners Manual - Page 2
and retain for future reference. MODEL NUMBER SERIAL NUMBER DATE OF PURCHASE DEALER TELEPHONE SERVICER TELEPHONE TO PHONE: DIAL 1-800-BE-SHARP ( 237-4277 ) for : SERVICE (for your nearest Sharp Authorized Servicer) PARTS (for your authorized parts distributor) ADDITIONAL CUSTOMER INFORMATION - Sharp R-2120JK | Owners Manual - Page 3
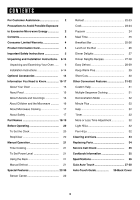
and Examining Your Oven ...... 6 Installation Instructions 6-14 Optional Accessories 14 Information You Need to Know 15-17 About Your Oven 15 About Food 15 About Utensils and Coverings 16 About Children and the Microwave 16 About Microwave Cooking 17 About Safety 17 Part Names 18-19 - Sharp R-2120JK | Owners Manual - Page 4
you. THIS WARRANTY GIVES YOU SPECIFIC LEGAL RIGHTS. YOU MAY ALSO HAVE OTHER RIGHTS WHICH VARY FROM STATE TO STATE. Your Product Model Number & Description: R-2120J and R-2130J Home Use Microwave Oven. (Be sure to have this information available when you need service for your Product.) Warranty - Sharp R-2120JK | Owners Manual - Page 5
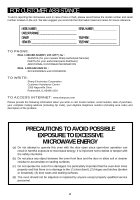
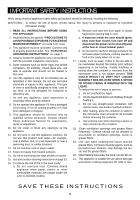
, electric shock, fire, injury to persons or exposure to excessive microwave energy: 1. READ ALL INSTRUCTIONS BEFORE USING THE APPLIANCE. 2. Read and follow the specific "PRECAUTIONS TO AVOID POSSIBLE EXPOSURE TO EXCESSIVE MICROWAVE ENERGY" on inside front cover. 3. This appliance must be grounded - Sharp R-2120JK | Owners Manual - Page 6
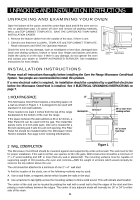
is any damage, do not operate the oven and contact your dealer or SHARP AUTHORIZED SERVICER. See Installation Instructions for more details. INSTALLATION INSTRUCTIONS Please read all instructions thoroughly before installing the Over the Range Microwave Oven/Hood System. Two people are recommended - Sharp R-2120JK | Owners Manual - Page 7
Microwave Oven mounting location as shown in Figure 2. NOTE: 1. If you have any questions about the grounding or electrical instructions, consult a qualified electrician or serviceperson. Figure 2 2. Neither Sharp equivalent length of some typical ductwork parts. Use the values in paren- theses - Sharp R-2120JK | Owners Manual - Page 8
and range - you may also use carton for protection • Scissors • Pencil • Measure • Tape 6 INSTALLATION HARDWARE The INSTALLATION HARDWARE items 1 - 7 are in a small bag. Items 8 - " are packed separately. All items are in a small carton packed below the oven. ITEM NAME QUANTITY PART CODE - Sharp R-2120JK | Owners Manual - Page 9
of the oven. See Figure 6. (B) When lever is out, pull that side of the mounting plate away from the oven. See Figure 5. (C) Repeat step (A) on other side. (D) Repeat step (B) on other side. Figure 5 (A) (B) (C) Figure 6 (A) Use screwdriver to assist in releasing mounting plate. Bottom of Microwave - Sharp R-2120JK | Owners Manual - Page 10
UNPACKING AND INSTALLATION INSTRUCTIONS 8 VENTILATION SYSTEM (PREPARING OVEN FOR INSTALLATION) This Microwave Oven/Hood is designed for 3 screws from the top center of Fan Cover Bracket. Save 2 screws to be used later and discard remaining 3. Remove Fan Cover Bracket by sliding it in the opposite - Sharp R-2120JK | Owners Manual - Page 11
INSTALLATION INSTRUCTIONS (C) the fan blades are visible through the top openings in the oven before proceeding. 5. Attach the Fan Cover Bracket to unit with by sliding it into the slits in the same direction as the arrow. Use 1 Tapping Screw 4 X 12 mm 5 from the INSTALLATION HARDWARE and tighten - Sharp R-2120JK | Owners Manual - Page 12
INSTRUCTIONS FOUND ON WALL AND TOP CABINET TEMPLATES. THE NEXT STEP IS TO READ AND FOLLOW MOUNTING INFORMATION ON WALL AND TOP CABINET TEMPLATES. THIS OVEN the holes in the wall with the Toggle Nuts closed. Figure 18. Use Wood Screws 1 to attach the Mounting Plate to studs. NOTE: Before insertion - Sharp R-2120JK | Owners Manual - Page 13
UNPACKING AND INSTALLATION INSTRUCTIONS 10 PREPARATION AND USE OF THE CARTON TO ASSIST IN THE INSTALLATION OF THE MICROWAVE OVEN Utilization of the carton may make installation easier. 1. Place carton upside down. See Figure 20. 2. Using cutting line around the carton, cut into two pieces (A) and - Sharp R-2120JK | Owners Manual - Page 14
INSTRUCTIONS MOUNTING OVEN TO THE WALL Two people are recommended to attach the Microwave Oven/Hood to the Mounting Plate. 1. Thread the Power Supply Cord through the hole made in the bottom of the top cabinet. Install the oven by snapping it onto the Mounting Plate. See Figure 23. 2. Use - Sharp R-2120JK | Owners Manual - Page 15
ordering the Sharp Carousel Microwave Cookbook. ALWAYS have food in the oven when it is on to absorb the microwave energy. When using the oven at power levels normal part of microwave cooking. Room humidity and the moisture in food will influence the amount of moisture that condenses in the oven. - Sharp R-2120JK | Owners Manual - Page 16
and assure you that foods have been cooked to safe temperatures. Sharp is not responsible for any damage to the oven when accessories are used. ABOUT CHILDREN AND THE MICROWAVE Children below the age of 7 should use the microwave oven with a supervising person very near to them. Between the ages - Sharp R-2120JK | Owners Manual - Page 17
thick or dense area away from fat or bone. NEVER leave the thermometer in the food during cooking, unless it is approved for microwave oven use. • ALWAYS use potholders to prevent burns when handling utensils that are in contact with hot food. Enough heat from the food can transfer through utensils - Sharp R-2120JK | Owners Manual - Page 18
PART NAMES FRONT VIEW 12 13 BOTTOM VIEW 14 (Front of Microwave) (Rear of Microwave) 15 1 Oven door with see-through window 2 Door hinges 3 Oven light It will light when oven is operating or door is open. 4 Rack holders for two rack positions. 5 Safety door latches The oven will not operate - Sharp R-2120JK | Owners Manual - Page 19
PART NAMES CONTROL PANEL Words in the lower portion of the display will light to indicate what function is in progress. 23 25-26 31 30 - Sharp R-2120JK | Owners Manual - Page 20
BEFORE OPERATING • Before operating your new microwave oven make sure you read and understand this operation manual completely. • Before the oven can be used, follow these procedures: 1. Plug in the oven. Close the door. The oven display will show ENJOY YOUR OVEN PRESS CLOCK . 2. Touch the Stop/ - Sharp R-2120JK | Owners Manual - Page 21
the rack in the microwave oven when not in use. • Popping popcorn with the rack in the microwave oven. • Using any browning dish on the rack. • Using special features, except Sensor Reheat with the rack. • Cooking directly on the rack-use microwave-safe cookware. MANUAL DEFROST If the food that - Sharp R-2120JK | Owners Manual - Page 22
the chart should be cooked following the guidelines in any microwave cookbook. 6. During the first part of any sensor cooking or reheating, food name will appear on the display. Do not open the oven door or touch Stop/Clear during this part of the cycle. The measurement of vapor will be interrupted - Sharp R-2120JK | Owners Manual - Page 23
COOK will automatically compute the microwave power and cooking time oven, wrap in aluminum foil and let stand 5 to 10 minutes. 2. Fresh Vegetables: soft Wash and place in casserole. Add no water if vegetables have just been Broccoli .25 - 2.0 lb washed. Cover with lid for tender vegetables. Use - Sharp R-2120JK | Owners Manual - Page 24
3 minutes. .25 - 2.0 lb Cover with vented plastic wrap. When oven stops, turn over. Shield with small, flat pieces of aluminum foil any Snack. FOOD AMOUNT PROCEDURE Popcorn 2.85 - 3.5 oz bag Use only popcorn packaged for the microwave. Try several brands (Regular or Regular Light) to decide - Sharp R-2120JK | Owners Manual - Page 25
listed in the chart should be cooked following the guidelines in any microwave cookbook. 4. The final cooking result will vary according to the food , continue to cook manually. 1. BREAKFAST BAR BREAKFAST BAR is for preparing popular breakfast foods. • Suppose you want to use Breakfast Bar to cook - Sharp R-2120JK | Owners Manual - Page 26
directions for how to wrap or cover. Be careful when removing from the oven as snack may be very hot. 3. Pizza 1 (6 - 8 oz) Use for frozen microwave pizza. Remove from package and unwrap. Follow package directions for use of package and/or silver crisping disk. 4. Hot dogs* in buns 1 - 6 Place - Sharp R-2120JK | Owners Manual - Page 27
Card. Follow Recipe Card for ingredients and instructions. • Suppose you want to use DINNER DELIGHTS to cook Yellow Rice and Chicken with 1/2 cup catsup during last 2 minutes of cooking time. At end, remove from oven, cover with foil and allow to stand 3 to 5 minutes before serving. 4. CREAMY - Sharp R-2120JK | Owners Manual - Page 28
2 and 0. (Ex: 2.0 lb steak.) 3 Touch START/Minute Plus pad. The oven will stop so the food can COVER be checked. The display will show: EDGES 4 or below the weights allowed on the EASY DEFROST CHART, use time and 30% power. See Manual Defrost on page 21. 2. EASY DEFROST can be programmed with - Sharp R-2120JK | Owners Manual - Page 29
microwave safe rack. After each stage, if there are warm or thawed portions, rearrange or remove. Let stand, covered, for 5 to 15 minutes. NOTE: Check foods when oven warm for 30 minutes. DIRECT USE • Suppose you want to manual cooking to keep food warm continuously after cooking. WITH MANUAL - Sharp R-2120JK | Owners Manual - Page 30
SHORT CUTS automatically compute the correct heating time and microwave power level for melting, softening and warming foods shown warm other food or foods except the quantity listed in the SHORT CUTS CHART, use manual operation. 2. Short Cuts can be programmed with More or Less Time Adjustment. See - Sharp R-2120JK | Owners Manual - Page 31
using your oven easy because specific instructions are provided in the interactive display. 1. CHILD LOCK The CHILD LOCK prevents unwanted oven operation such as by small children. The oven 1. Auto Start can be used for manual cooking if clock is set. 2. If the oven door is opened after programming - Sharp R-2120JK | Owners Manual - Page 32
and specific special features can now be demonstrated with no power in the oven. range surface units or burners. This protects the microwave oven from excessive temperature rise. The fan will stay on until the temperature decreases. It cannot be turned off manually during this time. For other uses - Sharp R-2120JK | Owners Manual - Page 33
any spills or spatters. Metal parts will be easier to maintain if wiped frequently with a damp cloth. Avoid the use of spray and other harsh in a 2-cup glass measuring cup. Boil for several minutes using 100% power. Allow to set in oven until cool. Wipe interior with a soft cloth. Grease Filters - Sharp R-2120JK | Owners Manual - Page 34
cover. (See illustration.) 3. Replace light bulbs with equivalent watt bulb available from your Sharp Authorized Servicer or parts distributor. Bulbs are also available at most hardware stores or lighting centers. DO NOT USE A BULB LARGER THAN 30 WATTS. 4. Close light cover and secure with screw - Sharp R-2120JK | Owners Manual - Page 35
SHARP AUTHORIZED SERVICER. A microwave oven should never be serviced microwave reference guide ✪ Many color photos ✪ Step-by-step instructions ✪ Nutritional information for each recipe ✪ Durable wipe-clean soft cover with 128 8 1/2 x 11 pages ✪ Helpful tips and special techniques CAROUSEL MICROWAVE - Sharp R-2120JK | Owners Manual - Page 36
SPECIFICATIONS AC Line Voltage: AC Power Required: Output Power:* Frequency: Outside Dimensions: Cavity Dimensions: Oven Capacity: Weight: R-2120J / R-2130J of Health and Human Services (DHHS) rule, CFR SHARP Accessories & Supplies Center 2130 Townline Road Peoria, Illinois 61615-1560 Price - Sharp R-2120JK | Owners Manual - Page 37
GUIA AUTO-TOUCH Para mayor informacion y precauciones de seguridad, consulte el Manual de Operaciones. PONER LA HORA (CLOCK) Si el indicador dice ENJOY YOUR OVEN PRESS CLEAR AND PRESS CLOCK toque primero el botón Stop/Clear. 1 Toque el botón que dice Timer/ Clock y número 2. Timer Clock 2 2 - Sharp R-2120JK | Owners Manual - Page 38
30 minutos. 2 Capture el tiempo deseado. (Ej: 25:00) 3 Pulse la tecla START/Minute Plus. Keep Warm Plus 2500 START Minute Plus Cocimiento Con del Manual 1 Marque el tiempo de cocimiento. 2 Pulse el botón Power Level cuatro veces para la energía 70%. 3 Pulse la tecla Keep Warm Plus. 800 Power - Sharp R-2120JK | Owners Manual - Page 39
AUTO-TOUCH GUIDE For more complete information and safety precautions, refer to your Operation Manual. SET CLOCK If ENJOY YOUR OVEN PRESS CLEAR AND PRESS CLOCK is in the display, first touch Stop/Clear. 1 Touch Timer/Clock pad and number 2. Timer Clock 2 2 Enter correct time of - Sharp R-2120JK | Owners Manual - Page 40
GUIDE START/Minute Plus pad. 2 0 The oven will stop and directions will be displayed. Minute Plus pad. Keep Warm Plus 2500 START Minute Plus With Manual Cooking 1 Enter cooking time. 2 Touch Power Level pad 4 cup TINSEB382MRK0 SHARP ELECTRONICS CORPORATION Sharp Plaza, Mahwah, New Jersey 07430-
-
 1
1 -
 2
2 -
 3
3 -
 4
4 -
 5
5 -
 6
6 -
 7
7 -
8
-
9
-
10
-
11
-
12
-
13
-
14
-
15
-
16
-
17
-
18
-
19
-
20
-
21
-
22
-
23
-
24
-
25
-
26
-
27
-
28
-
29
-
30
-
31
-
32
-
33
-
34
-
35
-
36
-
37
-
38
-
39
-
40
 |
 |
Follow by letter indicating color
K = Black, W = White
Q = Bisque, S = Stainless Steel
ODEL R-2120J/2130J