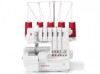
Singer 14T968DC PROFESIONAL 5 Instruction Manual - Page 19
Turn Auto Tension Dial to D.
 |
View all Singer 14T968DC PROFESIONAL 5 manuals
Add to My Manuals
Save this manual to your list of manuals |
Page 19 highlights
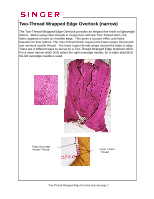
Turn Auto Tension Dial to "D". Turn Stitch Length Dial to "2". Engage Upper Knife. The knife will not trim the fabric when it is disengaged. 1. Open Looper Cover. 2. Pull the movable knife holder (silver screw) to the right as far as it will go. 3. Turn the holder toward clockwise until the knife clicks into a lock position. Upper Knife Disengaged Upper Knife Engaged Two-Thread Wrapped Edge Overlock (narrow) page 3
-
 1
1 -
2
-
3
-
4
-
5
-
6
-
7
-
8
-
9
-
10
-
11
-
12
-
13
-
 14
14 -
 15
15 -
 16
16 -
 17
17 -
 18
18 -
 19
19 -
 20
20 -
 21
21 -
 22
22 -
 23
23 -
 24
24 -
25
-
26
-
27
-
28
-
29
-
30
-
31
-
32
-
33
-
34
-
35
-
36
-
37
-
38
-
39
-
40
-
41
-
42
-
43
-
44
-
45
-
46
-
47
-
48
-
49
-
50
-
51
-
52
-
53
-
54
-
55
-
56
-
57
-
58
-
59
-
60
-
61
-
62
-
63
-
64
-
65
-
66
-
67
-
68
-
69
-
70
-
71
-
72
-
73
-
74
-
75
-
76
-
77
-
78
-
79
-
80
-
81
-
82
-
83
-
84
-
85
-
86
-
87
-
88
-
89
-
90
-
91
-
92
-
93
-
94
-
95
-
96
-
97
-
98
-
99
-
100
-
101
-
102
-
103
-
104
-
105
-
106
-
107
-
108
-
109
 |
 |
±
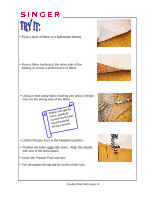
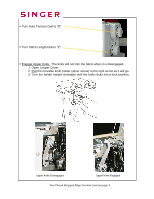
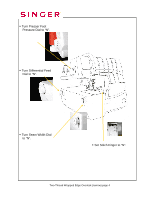
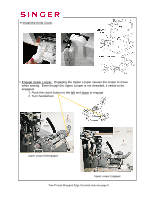
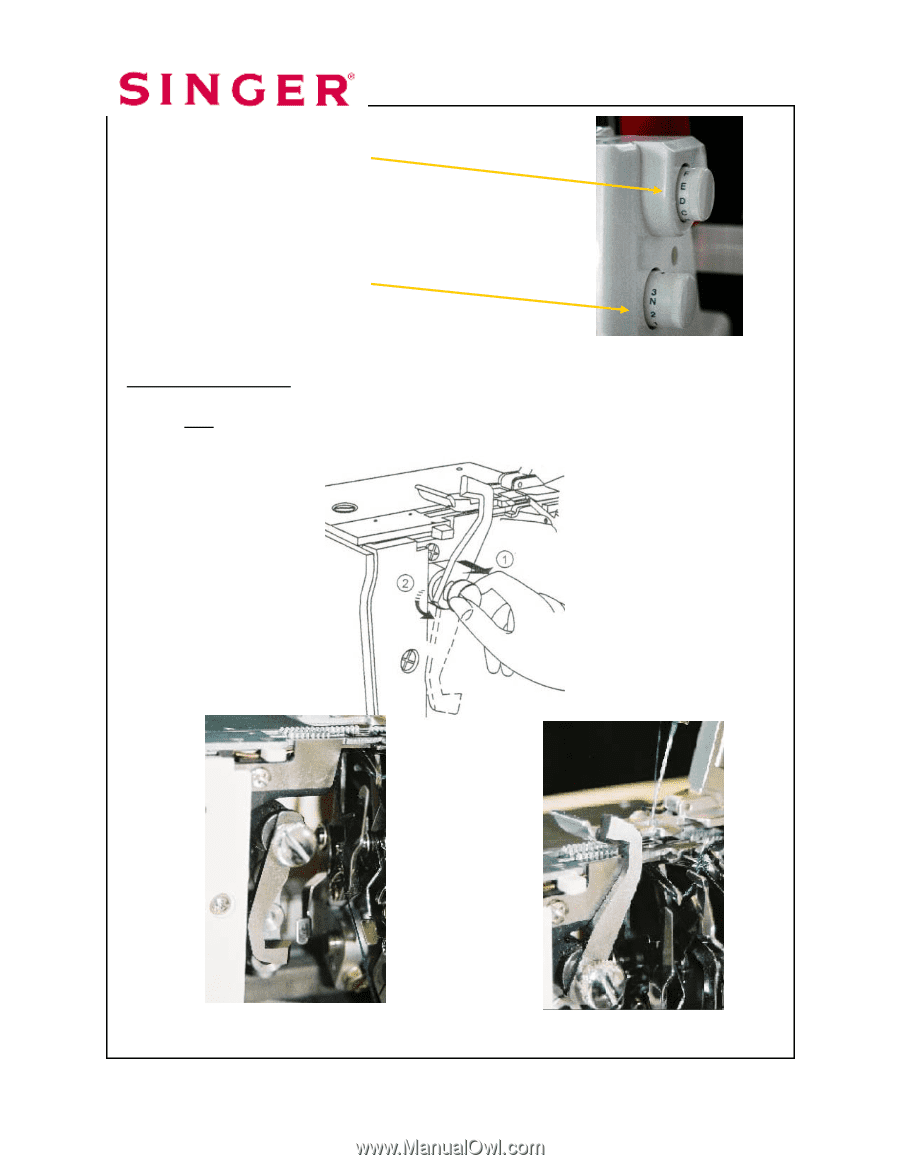
Turn Auto Tension Dial to “D”.
±
Turn Stitch Length Dial to “2”.
±
Engage Upper Knife.
The knife will not trim the fabric when it is disengaged.
1. Open Looper Cover.
2. Pull
the movable knife holder (silver screw) to the right as far as it will go.
3. Turn the holder toward clockwise until the knife clicks into a lock position.
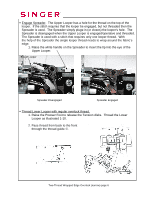
Upper Knife Engaged
Upper Knife Disengaged
Two-Thread Wrapped Edge Overlock (narrow) page 3