Singer 2263 Simple Instruction Manual - Page 42
Buttonholes
 |
View all Singer 2263 Simple manuals
Add to My Manuals
Save this manual to your list of manuals |
Page 42 highlights
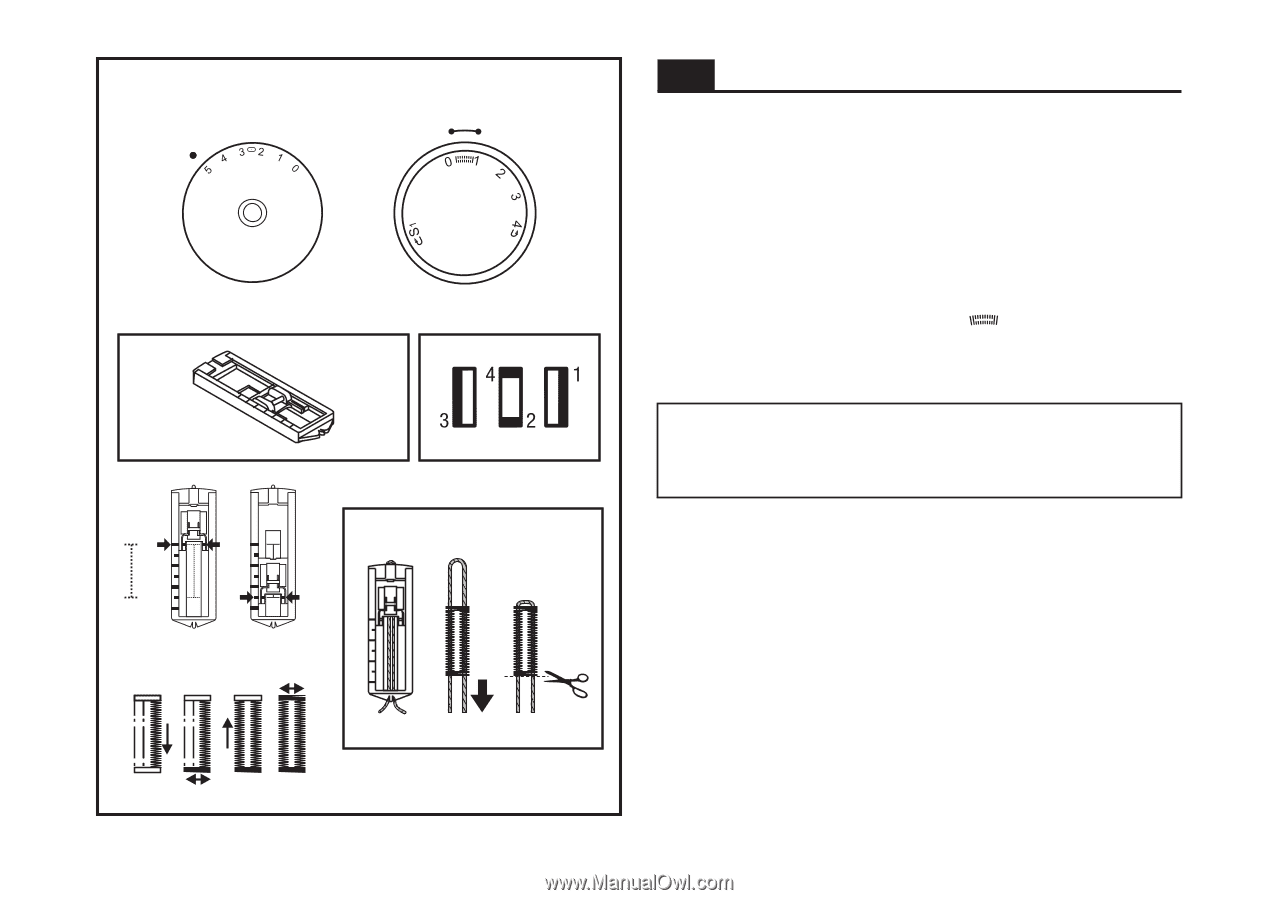
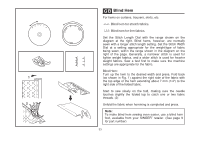
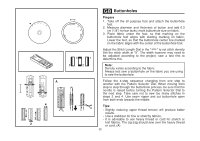
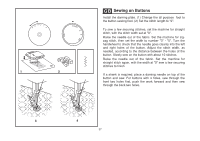
A 4 1 3 2 GB Buttonholes Prepare 1. Take off the all purpose foot and attach the buttonhole foot. 2. Measure diameter and thickness of button and add 0.3 cm (1/8") for bar tacks; mark buttonhole size on fabric. 3. Place fabric under the foot, so that marking on the buttonhole foot aligns with starting marking on fabric. Lower the foot, so that the buttonhole center line marked on the fabric aligns with the center of the buttonhole foot. Adjust the Stitch Length Dial in the " " to set stitch density. Set the stitch width at "5". The width however may need to be adjusted according to the project, sew a test first to determine this. Note: Density varies according to the fabric. Always test sew a buttonhole on the fabric you are using to sew the buttonhole. Follow the 4-step sequence changing from one step to another with the Pattern Selector Dial. When moving from step to step through the buttonhole process, be sure that the needle is raised before turning the Pattern Selector Dial to the next step. Take care not to sew too many stitches in steps 2 and 4. Use seam ripper and cut buttonhole open from both ends towards the middle. Tips: - Slightly reducing upper thread tension will produce better results. - Use a stabilizer for fine or stretchy fabrics. - It is advisable to use heavy thread or cord for stretch or knit fabrics. The zig-zag should sew over the heavy thread or cord. (A) 35
-
 1
1 -
2
-
3
-
4
-
5
-
6
-
7
-
8
-
9
-
10
-
11
-
12
-
13
-
14
-
15
-
16
-
17
-
18
-
19
-
20
-
21
-
22
-
23
-
24
-
25
-
26
-
27
-
28
-
29
-
30
-
31
-
32
-
33
-
34
-
35
-
36
-
 37
37 -
 38
38 -
 39
39 -
 40
40 -
 41
41 -
 42
42 -
 43
43 -
 44
44 -
 45
45 -
 46
46 -
 47
47 -
48
-
49
-
50
-
51
-
52
-
53
-
54
-
55
-
56
-
57
-
58
-
59
-
60
-
61
-
62
 |
 |