Singer One Instruction Manual 6 - Page 40
Singer One Manual
 |
View all Singer One manuals
Add to My Manuals
Save this manual to your list of manuals |
Page 40 highlights
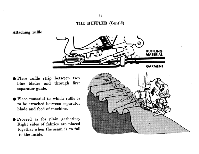
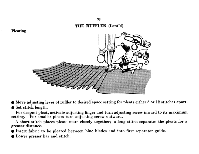
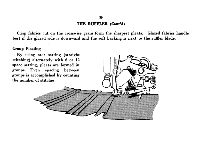
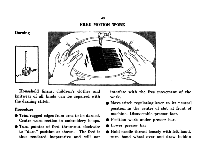
Pleating 38 THE RUFFLER (Cont'd) 'O 41 • Move adjusting lever of ruffler to desired space setting for pleats either 6 or 12 stitches apart. Set stitch length. For deepest pleat, activate adjusting finger and turn adjusting screw inward to its maximum setting. For smaller pleats turn adjusting screw outward. A short stitch places pleats more closely together; a long stitch separates the pleats for a greater distance. • Insert fabric to be pleated between blue blades and into first separator guide. • Lower presser bar and stitch.
-
 1
1 -
2
-
3
-
4
-
5
-
6
-
7
-
8
-
9
-
10
-
11
-
12
-
13
-
14
-
15
-
16
-
17
-
18
-
19
-
20
-
21
-
22
-
23
-
24
-
25
-
26
-
27
-
28
-
29
-
30
-
31
-
32
-
33
-
34
-
 35
35 -
 36
36 -
 37
37 -
 38
38 -
 39
39 -
 40
40 -
 41
41 -
 42
42 -
 43
43 -
 44
44 -
 45
45 -
46
-
47
-
48
-
49
-
50
-
51
-
52
-
53
-
54
-
55
-
56
 |
 |

38
THE
RUFFLER
(Cont'd)
Pleating
'O
41
•
Move
adjusting
lever
of
ruffler
to
desired
space
setting
for
pleats
either
6
or
12
stitches
apart.
Set
stitch
length.
For
deepest
pleat,
activate
adjusting
fi
nger
and
turn
adjusting
screw
inward
to
its
maximum
setting.
For
smaller
pleats
turn
adjusting
screw
outward.
A
short
stitch
places
pleats
more
closely
together;
a
long
stitch
separates
the
pleats
for
a
greater
distance.
•
Insert
fabric
to
be
pleated
between
blue
blades
and
into
fi
rst
separator
guide.
•
Lower
presser
bar
and
stitch.