Singer One Instruction Manual 9 - Page 16
FOOT HEMMER -- Hemming, FOOT HEMMER, Hemming and Sewing on Lace, INSTRUCTIONS FOR USING
 |
View all Singer One manuals
Add to My Manuals
Save this manual to your list of manuals |
Page 16 highlights
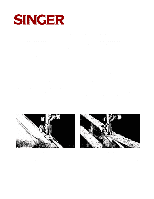
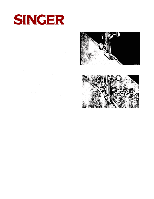
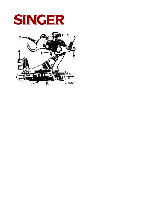
127-3 & 128-3 INSTRUCTIONS FOR USING THE ATTACHMENTS FOOT HEMMER -- Hemming Raise the needle to its highest point. Remove the presser foot and attach the foot hemmer in its place (see Fig. 18). Clip off the right hand corner of the cloth, so that it will take the roll easily, turn up the edge about a quarter of an inch, insert it in the mouth of the hemmer and draw or push it along until under the needle. Then let down the presser bar and after taking two or three stitches, draw gently on the ends of the threads to help the work along till the feed catches it. In order to produce a smooth even hem, the mouth of the hemmer must be kept just full. Fig. 18 shows also what is known as a bag seam or fell, made by passing two pieces of fabric through the hemmer together and hemming them down. FOOT HEMMER Hemming and Sewing on Lace Start the hem as previously explained, and when it is well started, raise the needle to its highest point. Raise the hemmer to relieve its pressure on the hem, pass the end of the lace through the slot in the side of the hemmer, under the back of the hemmer and over the hem, as shown in Fig 19. Take care that the hem is not displaced in the hemmer and that the needle goes down through the lace and hem together. Then let down the presser bar and guide tile lace over the front of the hemmer, keeping it well into the slot. FIG. 18 Table of Contents FIG. 19 Previous Page | Next Page 16
-
 1
1 -
2
-
3
-
4
-
5
-
6
-
7
-
8
-
9
-
10
-
 11
11 -
 12
12 -
 13
13 -
 14
14 -
 15
15 -
 16
16 -
 17
17 -
 18
18 -
 19
19 -
 20
20 -
 21
21 -
22
-
23
-
24
-
25
-
26
 |
 |
