Singer One Instruction Manual 9 - Page 20
a crease for the next tuck, then proceed
 |
View all Singer One manuals
Add to My Manuals
Save this manual to your list of manuals |
Page 20 highlights
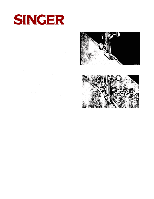
127-3 & 128-3 TUCKER Remove the presser foot and attach the tucker in its place. The width of the tuck is determined by the scale of figures nearest the needle, which shows in eighths and sixteenths of an inch the distance of the edge of the fold from the line of stitching. The crease or mark for the second and following tucks is determined by the scale nearest the operator and this is set by the line in front of the needle hole in the presser foot. For blind tucks without spaces, adjust the scale nearest the operator so that the figure opposite the line on the presser foot will be the same as that at which the guide is located on the scale nearest the needle. To make spaces between the tucks, move the front scale farther to the left until the desired space is obtained. Having adjusted the scales for tuck and space as desired, fold the material and crease by hand; pass the folded edge between the spring and spur near you, then between the two blades of the second scale, and back under the presser foot; draw to tile right against the guide, lower the presser bar; see that the lever for the needle clamp to strike is in its backward position so as to form a crease for the next tuck, then proceed with the first tuck. For the second tuck, fold carefully at the crease made by the spur and place the edge of the first tuck underneath and against the spur at the left. The spur will serve as a guide and will also make a distinct crease for the next tuck. Always place the last tuck against the spur to ensure perfect work. When making the last tuck, the lever upon which the needle clamp strikes while tucking should be raised to its highest point; while the lever is in this position no crease for a succeeding tuck is made upon the goods. FIG. 25. Table of Contents Previous Page | Next Page 20
-
 1
1 -
2
-
3
-
4
-
5
-
6
-
7
-
8
-
9
-
10
-
11
-
12
-
13
-
14
-
 15
15 -
 16
16 -
 17
17 -
 18
18 -
 19
19 -
 20
20 -
 21
21 -
 22
22 -
 23
23 -
 24
24 -
 25
25 -
26
 |
 |
