Sony AIR-SA15Ti Operating Instructions (AIRSA20PK) - Page 19
Wireless transceiver, S-AIR ID selector, FM/AM antennas, Power, To use the iPod, Getting.Started
 |
View all Sony AIR-SA15Ti manuals
Add to My Manuals
Save this manual to your list of manuals |
Page 19 highlights
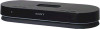
Getting Started Wireless transceiver Insert the supplied wireless transceiver (EZW-RT10) securely into the EZWRT10 slot on the rear panel of each unit. Check the orientation of the mark when inserting the supplied wireless transceivers (EZW-RT10). Failure to do so may result in damage to the unit. Notes Make sure to turn off the main unit and the sub units when inserting or removing the supplied wireless transceivers (EZW-RT10). Failure to do so may result in damage to the unit. Do not touch the terminals of the supplied wireless transceivers (EZW-RT10). Do not insert any device other than the supplied wireless transceivers (EZW-RT10) into the EZW-RT10 slot. S-AIR ID selector Set the same S-AIR ID for the main unit and the sub units. For details on setting the S-AIR ID, see "Establishing the S-AIR connection" (page 20). FM/AM antennas Find a location and an orientation that provide good reception, and then set up the antenna. Keep the antennas away from the power supply cord to avoid picking up noise. Power Connect the power supply cord and the power cord to a wall socket. To use the iPod Insert an iPod Dock Adapter into the iPod connector on the main unit before use. For details on the supplied iPod Dock Adapters, refer to the instructions supplied with the Dock Adapters. To remove the iPod Dock Adapter, pull it up with your fingernail or a flat object using the slot inside the adapter. Slot Continued 19GB
-
 1
1 -
2
-
3
-
4
-
5
-
6
-
7
-
8
-
9
-
10
-
11
-
12
-
13
-
 14
14 -
 15
15 -
 16
16 -
 17
17 -
 18
18 -
 19
19 -
 20
20 -
 21
21 -
 22
22 -
 23
23 -
 24
24 -
25
-
26
-
27
-
28
-
29
-
30
-
31
-
32
-
33
-
34
-
35
-
36
-
37
-
38
-
39
-
40
-
41
-
42
-
43
-
44
 |
 |
