Sony CPD-100VS Operating Instructions (primary manual) - Page 10
Installation
 |
View all Sony CPD-100VS manuals
Add to My Manuals
Save this manual to your list of manuals |
Page 10 highlights
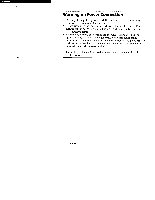
Installation Step 1: Connect the computer With the computer switched off, connect the video signal cable to the display (VGA) connector on your computer. If your computer supports the DDC plug-and-play standard, this connection will enable the DDC communication between the monitor and the computer. Also the video signal cable is combined with audio and microphone cables. If your computer is equipped with sound capability, connect the audio and microphone plugs to appropriate jacks located on your computer. For Sony VAIO series computer users: The color coding on each connector housing will ease your work for proper connection. Computer Blue Green to display connector to speaker connector Red i/ Note on handling the video signal cable Do not touch the pins of the video signal cable. to microphone connector ▪ Step 2: Connect the power cord With the monitor switched off, connect the power cord to the monitor and the other end to a power outlet. to a power outlet L:ciL] Power cord (supplied) ■ Step 3: Turn on the monitor and computer. U Step 4: If necessary... Adjust the user controls according to your personal preference. The installation of your monitor is complete. Enjoy your monitor. 10 Getting Started
-
 1
1 -
2
-
3
-
4
-
 5
5 -
 6
6 -
 7
7 -
 8
8 -
 9
9 -
 10
10 -
 11
11 -
 12
12 -
 13
13 -
 14
14 -
 15
15 -
16
-
17
-
18
-
19
-
20
-
21
-
22
-
23
-
24
 |
 |
