Sony CSS-HD1 Instruction Manual - Page 13
Viewing images on a TV screen, 1²-GB - compatibility
 |
UPC - 027242701175
View all Sony CSS-HD1 manuals
Add to My Manuals
Save this manual to your list of manuals |
Page 13 highlights
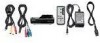
Viewing images on a TV screen You can playback images by connecting to the TV with the AV connecting cable (supplied) or the Component video cable (supplied). 1 Connect the Cyber-shot Station with the AV connecting cable. Connect the AV connecting cable (supplied) to the AV OUT jack of the Cyber-shot Station and the audio/video input jacks of the TV. Red White Audio Yellow Video AV connecting cable To connect the Cyber-shot Station with the Component video cable and the AV connecting cable Connect the Component video cable to the COMPONENT OUT jack and the component video input jacks of the TV, and connect the AV OUT jack and the audio input jacks of the TV. - Refer to the operating instructions supplied with the TV for connection. Turn off both the camera and the TV before connecting the Cyber-shot Station and the TV with the Component video cable and the AV connecting cable. The signal format to be output via the COMPONET OUT jack depends on the camera. To view the 1080i format images, you need the TV compatible with 1080i format. The Audio to be output via the AV out jack is monaural. When both the Component video cable and the AV connecting cable is connected, the images will be output via the COMPONENT OUT jack, not via the AV OUT jack. The Cyber-shot Station is not compatible with the S-VIDEO connecting cable. 2 Turn on the power by pressing the (playback) button of the camera or the POWER button on the remote control. Notes The buttons on the camera or the remote control may not function immediately after the camera is attached to the Cyber-shot Station. This occurs when the camera is booting up and is not a malfunction. Wait for about 10 seconds. 3 Turn on the TV and set the TV/Video switch to "Video". 4 Press / on the Control buttons of the remote control to select the image. You can also select the image by pressing / on the Control buttons of the camera. The Cyber-shot Station is compatible with both NTSC and PAL TV systems. For further details, see the operating instructions supplied with the camera. Red White Audio Yellow AV connecting cable Green Y Blue Pb/Cb Red Pr/Cr Component video cable 13-GB
-
 1
1 -
2
-
3
-
4
-
5
-
6
-
7
-
 8
8 -
 9
9 -
 10
10 -
 11
11 -
 12
12 -
 13
13 -
 14
14 -
 15
15 -
 16
16 -
 17
17 -
 18
18 -
19
-
20
-
21
-
22
-
23
-
24
-
25
-
26
-
27
-
28
-
29
-
30
-
31
-
32
 |
 |
