Sony DCR-HC65 Camera Operations Guide
Sony DCR-HC65 - Digital Handycam Camcorder Manual
 |
View all Sony DCR-HC65 manuals
Add to My Manuals
Save this manual to your list of manuals |
Sony DCR-HC65 manual content summary:
- Sony DCR-HC65 | Camera Operations Guide - Page 1
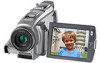
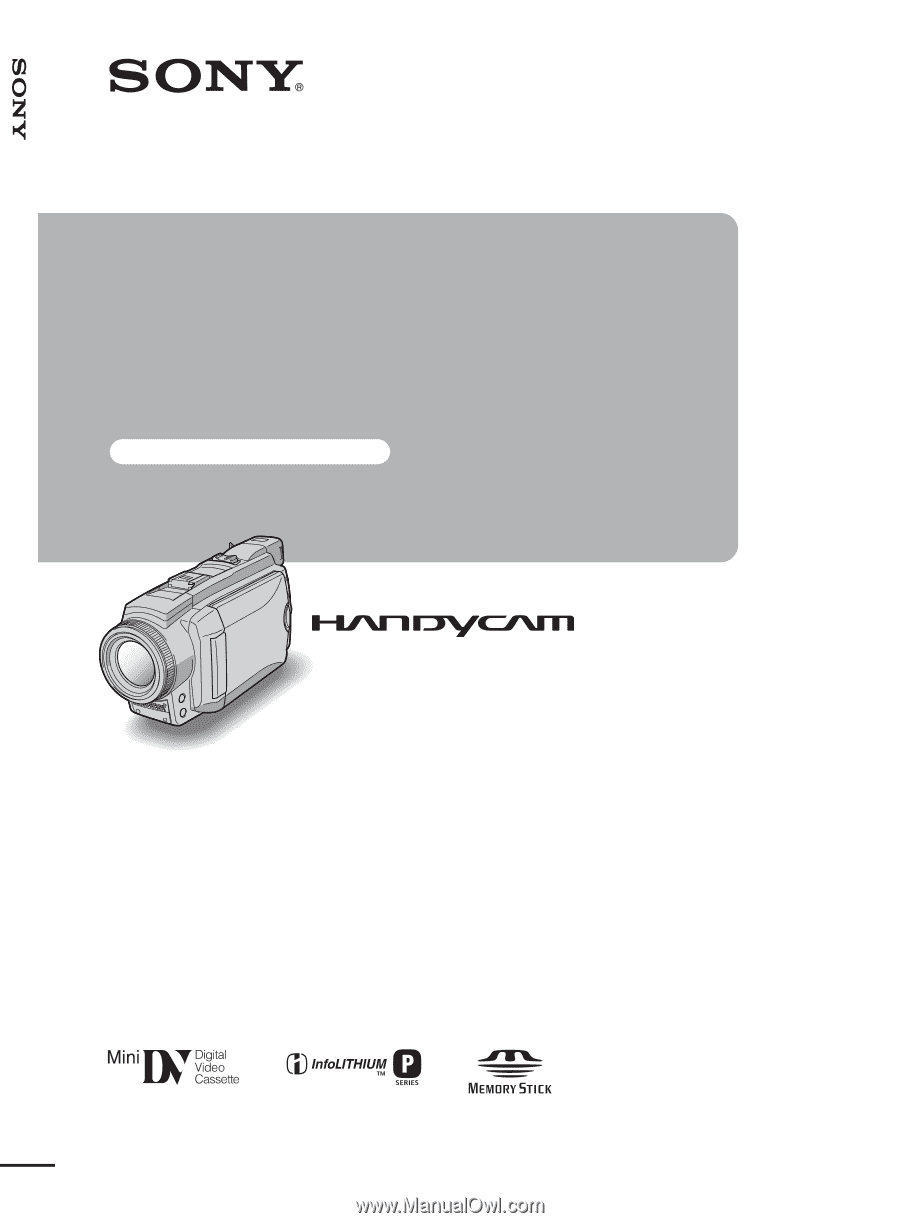
Camera Operations Guide [US] 3-090-178-11(1) Camera Operations Guide Read this first Digital Video Camera Recorder DCR-HC65/HC85 © 2004 Sony Corporation - Sony DCR-HC65 | Camera Operations Guide - Page 2
you. For more information regarding recycling of rechargeable batteries, call toll free 1-800-822- 8837, or visit http://www.rbrc.org/ Caution: Do not handle damaged or leaking LithiumIon batteries. "Memory Stick" and battery pack This device complies with Part 15 of the FCC Rules. Operation is - Sony DCR-HC65 | Camera Operations Guide - Page 3
use only mini DV cassettes in your camcorder. Use of mini DV cassettes with Cassette Memory is recommended as you can use Title search (p. 60), Date search (p. 61), [ TITLE] (p. 81), [ TAPE TITLE] (p. 83). Cassettes with Cassette Memory are marked with . Note on the type of "Memory Stick" you can - Sony DCR-HC65 | Camera Operations Guide - Page 4
on your camcorder, extend its viewfinder. • Be careful not to press buttons on the LCD frame accidentally when you open or close the LCD panel, or when you adjust the angle of the LCD panel. • Do not hold the camcorder by the following parts. Viewfinder LCD panel Battery pack Flash (DCR-HC85) 4 - Sony DCR-HC65 | Camera Operations Guide - Page 5
(DCR-HC85 28 Recording still images - Memory photo recording 29 Selecting image quality or size 31 Using the flash (DCR-HC85 31 Using the self-timer 33 Recording a still image on a "Memory Stick Duo" while recording movies on a tape 33 Recording with ease - Easy Handycam 34 Recording a movie - Sony DCR-HC65 | Camera Operations Guide - Page 6
review 48 Playback Viewing movies recorded on a tape 49 Playing back in various modes 50 Viewing recordings with added effects - Digital effect 51 Viewing recordings on a "Memory Stick Duo 52 Playing back in various modes from a "Memory Stick Duo 53 Playing back with ease - Easy Handycam 54 - Sony DCR-HC65 | Camera Operations Guide - Page 7
108 Printing recorded images (PictBridge compliant printer 110 Troubleshooting Troubleshooting 113 Warning indicators and messages ...121 Additional Information Using your camcorder abroad ..........125 Usable cassette tapes 126 About the "Memory Stick 127 About the "InfoLITHIUM" battery pack - Sony DCR-HC65 | Camera Operations Guide - Page 8
Quick Start Guide Recording movies 1 Attach the charged battery pack to the camcorder. To charge the battery, see page 14. a Lift up the viewfinder. b Slide the battery pack in the direction of the arrow until it clicks. 2 Insert a cassette into the camcorder. a Slide the OPEN/ EJECT lever in - Sony DCR-HC65 | Camera Operations Guide - Page 9
Quick Start Guide 3 Start recording while checking the subject on the LCD screen. The pressing the green button, slide the POWER switch down to light up the CAMERA-TAPE lamp. The power turns on. d Press REC START/ STOP. Recording starts. To change to standby mode, press REC START/STOP again. You - Sony DCR-HC65 | Camera Operations Guide - Page 10
Recording still images 1 Attach the charged battery pack to the camcorder. To charge the battery, see page 14. a Lift up the viewfinder. b Slide the battery pack in the direction of the arrow until it clicks. 2 Insert a "Memory Stick Duo" into the camcorder. Insert it so that the b mark is at - Sony DCR-HC65 | Camera Operations Guide - Page 11
Quick Start Guide 3 Start recording while checking the subject on the LCD screen OPEN and open the LCD panel. c While pressing the green button, slide the POWER switch repeatedly until the CAMERA-MEMORY lamp lights up. The power turns on. d Press PHOTO lightly. A short beep sound is heard when the - Sony DCR-HC65 | Camera Operations Guide - Page 12
/playback. Press EASY when recording/ playing back. EASY lights up in blue (1) and screen font size increases (2) during Easy Handycam operation. Easy Handycam operation ON For details, see instructions for each operation. See page 34 for recording, page 54 for playback. 12 Quick Start Guide - Sony DCR-HC65 | Camera Operations Guide - Page 13
cable (1) AC Adaptor (1) USB cable (1) Power cord (1) Lens cap (1) Attached to the camcorder. Rechargeable battery pack NP-FP50 (1) CD-ROM "SPVD-012 USB Driver" (1) Cleaning cloth (1) Shoe cover (1) Attached to the camcorder. Camera Operations Guide (This manual) (1) Computer Applications Guide - Sony DCR-HC65 | Camera Operations Guide - Page 14
the DC plug facing the LCD panel side, connect the AC Adaptor to the DC IN jack on your camcorder. Battery pack DC plug DC IN jack Power cord To the wall outlet AC Adaptor 1 Lift up the viewfinder. b mark 4 Connect the power cord to the AC Adaptor. 5 Connect the power cord to the wall outlet - Sony DCR-HC65 | Camera Operations Guide - Page 15
The CHG (charge) lamp turns off when the battery is fully charged. Disconnect the AC Adaptor from the DC IN jack. To remove the battery pack POWER PUSH switch Battery pack 1 Set the POWER switch to OFF (CHG). 2 Lift up the viewfinder. 3 Slide the battery pack out in the direction of the arrow while - Sony DCR-HC65 | Camera Operations Guide - Page 16
with the viewfinder Approximate number of minutes available when you use a fully charged battery pack at 25°C (77°F). For DCR-HC65: Battery pack Continuous Typical* recording recording time time NP-FP50 100 55 (supplied) NP-FP70 215 115 NP-FP90 385 210 For DCR-HC85: Battery pack - Sony DCR-HC65 | Camera Operations Guide - Page 17
• CAMERA-TAPE mode: To record on a tape. • CAMERA-MEMORY mode: To record on a "Memory Stick Duo." • PLAY/EDIT mode: To play or edit pictures on a tape or "Memory Stick Duo." To turn off the power Slide the POWER switch up to OFF (CHG). Connect your camcorder as shown in "Charging the battery pack - Sony DCR-HC65 | Camera Operations Guide - Page 18
SET) menu to [OFF] (p. 88). Adjusting the viewfinder You can view images using the viewfinder when you close the LCD panel. Use the viewfinder when the battery is running out, or when the screen is hard to see. Open the LCD panel 90 degrees to the camcorder, then rotate it to the desired position - Sony DCR-HC65 | Camera Operations Guide - Page 19
When you are recording on a tape or a "Memory Stick Duo," you can adjust the exposure (p. 37) and fader (p. 42) while checking the image on the viewfinder. Have the LCD panel rotated 180 degrees and closed with the screen facing out. 1 Set the power mode to CAMERA-TAPE or CAMERA-MEMORY (p. 17 - Sony DCR-HC65 | Camera Operations Guide - Page 20
60min -:--:-- CAMERA SET PROGRAM AE recording media Inserting a cassette tape You can use mini DV cassettes only. For details on these cassettes (such as write- protection), see page 126. b Note • Do not force the cassette into the compartment. This may cause a malfunction of your camcorder - Sony DCR-HC65 | Camera Operations Guide - Page 21
-protection), see page 127. b Note • You can use only a "Memory Stick Duo," which is about half the size of a standard "Memory Stick," in your camcorder (p. 127). Do not try to force any other type of "Memory Stick" into the "Memory Stick Duo" slot. Access lamp b mark 4 Close the lid. To eject - Sony DCR-HC65 | Camera Operations Guide - Page 22
. • When the access lamp is lit or flashing, your camcorder is reading/writing data from/to the "Memory Stick Duo." Do not shake or knock your camcorder, turn the power off, eject the "Memory Stick Duo," or remove the battery pack. Otherwise, image data may be damaged. Step 7: Setting the screen - Sony DCR-HC65 | Camera Operations Guide - Page 23
Getting started z Tip • Your camcorder offers [ENG [SIMP]] (simplified English) for when you cannot find your native tongue among the options. Getting started 23 - Sony DCR-HC65 | Camera Operations Guide - Page 24
stereo sound. When you are recording on a "Memory Stick Duo," the movie will be recorded with monaural sound. Camera recording lamp POWER switch 3 Select the recording mode. To record on a tape Slide the POWER switch until the CAMERA-TAPE lamp lights up, and your camcorder is set to the standby - Sony DCR-HC65 | Camera Operations Guide - Page 25
the camcorder for more than about 5 minutes, the power will automatically turn off to prevent battery loss ([A.SHUT OFF], p. 88). To restart recording, slide the POWER switch down to select CAMERATAPE or CAMERA-MEMORY, and then press REC START/STOP. • While recording movies on a "Memory Stick Duo - Sony DCR-HC65 | Camera Operations Guide - Page 26
• When you are recording on a "Memory Stick Duo" with an external flash (optional) attached to the intelligent accessory shoe, turn off the power of the external flash to prevent charging noise from getting recorded. z Tip • If you do not use your camcorder for a long time, remove the cassette and - Sony DCR-HC65 | Camera Operations Guide - Page 27
Move the power zoom lever slightly for a slower zoom. Move it further for a faster zoom. To record wider range of view Move the power zoom lever towards W. The subject appears farther away (Wide angle). To record closer view Move the power zoom lever towards T. The subject appears closer (Telephoto - Sony DCR-HC65 | Camera Operations Guide - Page 28
movies fit for breaking into still images - Progressive recording mode (DCR-HC85) This feature is useful for movies you intend to import to your computer to produce still images. You can record pictures with less blurring than recording in the normal mode, producing pictures suitable for analyzing - Sony DCR-HC65 | Camera Operations Guide - Page 29
[PROGRES. REC] from the (CAMERA SET) menu. 3 Touch [ON], then . appears. Recording still images - Memory photo recording You can record still images on a "Memory Stick Duo." Before recording, follow steps 1 to 7 in "Getting started" (p. 13 to p. 22). PHOTO Recording 4 Press REC START/STOP. Press - Sony DCR-HC65 | Camera Operations Guide - Page 30
on the "Memory Stick Duo." To check the most recently recorded image - Review Touch . Touch to return to standby. To delete the image, touch , then [YES]. To cancel deleting, touch [NO]. 60min 101 1600 FINE P-MENU A Recording folder B Image size For DCR-HC65: (1152 × 864) or For DCR-HC85: 1600 - Sony DCR-HC65 | Camera Operations Guide - Page 31
pictures that can be recorded on a "Memory Stick Duo" formatted on your camcorder. When the image quality is [FINE] (number of images) For DCR-HC65: The image size 61 120 245 445 640 × 480 50 96 190 390 780 1400 900 2850 For DCR-HC85: The image size of 1600 × 1200 is 960 kB, that of 640 × 480 - Sony DCR-HC65 | Camera Operations Guide - Page 32
an external flash (optional) and the built-in flash at the same time (for DCR-HC85). z Tip • The amount of light used by the flash is adjusted automatically. To adjust it manually, select [FLASH LEVEL] from the (CAMERA SET) menu (p. 67). • When the focus is hard to adjust, refer to "Adjusting the - Sony DCR-HC65 | Camera Operations Guide - Page 33
a still image on a "Memory Stick Duo" while recording movies on a tape 1 Touch . 2 Touch [SELF-TIMER]. If the item is not displayed on the screen, touch / . If you cannot find it, touch [MENU] and select it from the (CAMERA SET) menu. 60min 1600 FINE 8 SELF-TIMER: OFF OFF ON PHOTO - Sony DCR-HC65 | Camera Operations Guide - Page 34
:9 WIDE] mode - Progressive recording mode for DCR-HC85 - Memory overlap - MEMORY MIX function - [SMTH INT.REC] (smooth interval tape recording) for DCR-HC85 • Titles are not recorded on a "Memory Stick Duo." Recording with ease - Easy Handycam With this Easy Handycam operation, most of the camera - Sony DCR-HC65 | Camera Operations Guide - Page 35
and the Camera recording lamp lights up. Press REC START/STOP again to stop recording. To turn the power off Slide the POWER switch up to the OFF (CHG) position. To cancel Easy Handycam operation Press EASY again. b Note • You cannot turn Easy Handycam operation on or off during: - Recording - USB - Sony DCR-HC65 | Camera Operations Guide - Page 36
the image is recorded on the "Memory Stick Duo." To turn the power off Slide the POWER switch up to the OFF (CHG) position. To cancel Easy Handycam operation Press EASY again. b Note • You cannot turn Easy Handycam operation on or off during recording. • During Easy Handycam operation, the following - Sony DCR-HC65 | Camera Operations Guide - Page 37
it from the (CAMERA SET) menu. SPOT METER STBY 0:00:00 Recording AUTO END BACK LIGHT Press BACK LIGHT during recording or in the standby MANUAL] (p. 38) or select [SPOT METER] (p. 37). 3 Touch the point you want to adjust and fix the exposure on the screen. [SPOT METER] flashes while the camera - Sony DCR-HC65 | Camera Operations Guide - Page 38
indoors on a clear day, for instance, you can avoid backlight shadows on people next to the window by manually fixing the exposure to that of the wall side of the room. 1 Touch during recording or in the standby mode. 2 Touch [EXPOSURE]. If the item is not displayed on the screen, touch - Sony DCR-HC65 | Camera Operations Guide - Page 39
If you cannot find it, touch [MENU], and select it from the (CAMERA SET) menu. 5 Touch [ON], then . and [COLOR SLOW SHUTTER] Digital effect - [PROGRAM AE] • You cannot use the Color Slow Shutter function together with: - Manual exposure - Flexible spot meter ,continued Recording 39 Recording - Sony DCR-HC65 | Camera Operations Guide - Page 40
camcorder changes depending on the brightness. The motion of the picture may slow down at this time. • Adjust the focus manually The default setting is [ON].) If you record subjects in dark places (such as night scene touch [MENU], and select it from the (CAMERA SET) menu. SPOT FOCUS STBY 0:00:00 - Sony DCR-HC65 | Camera Operations Guide - Page 41
to record a close-up image of a subject, move the power zoom lever towards W (wide angle) to fully magnify the image, then adjust the focus. To use the expanded focus For DCR-HC85: It will be easier to confirm the focus setting by enlarging the image during manual focusing. When the CAMERA-MEMORY - Sony DCR-HC65 | Camera Operations Guide - Page 42
[BLACK FADER] [WHITE FADER] [MOSAIC FADER] [DOT FADER] (fade in only) 1 Slide the POWER switch to select the CAMERA-TAPE mode. 2 Touch in the standby mode (to fade in) or during recording (to fade out). 3 Touch [FADER]. If the item is not displayed on the screen, touch / . If you cannot find - Sony DCR-HC65 | Camera Operations Guide - Page 43
plus function - Color Slow Shutter function - Digital effect - [FRAME REC] (Frame recording) - [INTERVAL REC] (Interval recording) for DCR- HC65 - [SMTH INT.REC] (smooth interval tape recording) for DCR-HC85 Fading in from still image on the "Memory Stick Duo" - Memory overlap You can fade in from - Sony DCR-HC65 | Camera Operations Guide - Page 44
. Adjust the focus manually using a tripod to steady the camcorder. 5 Touch . appears. To cancel Digital effect Follow steps WIDE] mode - Picture effect ([PICT.EFFECT]) z Tip • You can create a picture with color and brightness reversed or a picture that looks like a pastel drawing while recording - Sony DCR-HC65 | Camera Operations Guide - Page 45
and a tape (only if you are recording on tape) in your camcorder. 2 Slide the POWER switch repeatedly to select the CAMERA-TAPE mode (when you are recording on a tape) or the CAMERA-MEMORY mode (when you are recording on a "Memory Stick Duo"). 3 Touch . 4 Touch [MEMORY MIX]. If the item is not - Sony DCR-HC65 | Camera Operations Guide - Page 46
play back pictures modified on your computer or recorded with other camcorders on your camcorder. z Tip • The supplied SPVD-012 USB Driver CD-ROM contains sample images for use in MEMORY MIX operations. Refer to the supplied "Computer Applications Guide" for details. 7 Touch (decrease)/ to adjust - Sony DCR-HC65 | Camera Operations Guide - Page 47
with Cassette Memory, it will function even when you have ejected the cassette. 1 Slide the POWER switch repeatedly to select the CAMERA-TAPE mode. 2 Touch . 60min STBY 0:00:00 EDIT The last scene of the most recent recording is played back for about 5 seconds, and the camcorder enters the - Sony DCR-HC65 | Camera Operations Guide - Page 48
it at the point where you want the recording to start. Reviewing the most recently recorded scenes - Rec review You can view a few seconds of the scene recorded just before you stopped the tape. 1 Slide the POWER switch repeatedly to select the CAMERA-TAPE mode. 2 Touch . 60min STBY 0:00:00 - Sony DCR-HC65 | Camera Operations Guide - Page 49
Make sure you have a recorded cassette inserted into your camcorder. Some of the operations are possible using the Remote Commander or using the touch panel. When you want to play back recordings on your TV, see page 59. OPEN POWER switch z Tip • Performing Easy Handycam operation, even first time - Sony DCR-HC65 | Camera Operations Guide - Page 50
battery B Recording mode (SP or LP) C Tape transport indicator D Time code (hour: minute: second: frame) or tape counter (hour: minute: second) E Personal Menu button (p. 62) F Video operation buttons When a "Memory Stick output from the DV Interface cannot be played back smoothly in slow mode. 4 Touch , - Sony DCR-HC65 | Camera Operations Guide - Page 51
input pictures. Also, you cannot output pictures edited with digital effects via the DV Interface. z Tip • You cannot record the pictures edited using special effects on the tape in your camcorder, but you can copy them to a "Memory Stick Duo" (p. 96) or another tape (p. 94). POWER switch 1 Slide - Sony DCR-HC65 | Camera Operations Guide - Page 52
list them to search through them easily. Make sure you have a recorded "Memory Stick Duo" inserted into your camcorder. When you want to play back a recorded picture on your TV, see page 59. OPEN 3 Touch . The most recently recorded picture appears on the screen. 60min 1600 1 0 / 10 101 101 - Sony DCR-HC65 | Camera Operations Guide - Page 53
Memory Stick Duo" playback 60min 1600 101-0010 10 / 10 101 0:00:00 P-MENU A Remaining battery B Image size C Picture number/Total number of recorded on a computer, renamed folders, and modified pictures may not appear on the screen. • While playing back movies on a "Memory Stick Duo," the - Sony DCR-HC65 | Camera Operations Guide - Page 54
ease - Easy Handycam Easy Handycam operation allows easy playback for even first time users by providing only the basic functions for playback. Also screen font size increases for easy viewing. Make sure you have a recorded cassette or a recorded "Memory Stick Duo" inserted into your camcorder. EASY - Sony DCR-HC65 | Camera Operations Guide - Page 55
Handycam operation Press EASY again. b Note • You cannot turn Easy Handycam operation on or off during communication with another device via USB cable. Making full use of Easy Handycam all the images on the "Memory Stick Duo." Touch [YES]. z Tip • During Easy Handycam operation, you can also do - Sony DCR-HC65 | Camera Operations Guide - Page 56
MEMORY PLAY 101-0001 VIDEO Tape playback select button END POWER switch Magnifying pictures - Tape playback zoom/Memory playback zoom You can magnify movies recorded on a tape or still images stored on a "Memory Stick , you cannot output the magnified pictures via the DV Interface. 56 Playback - Sony DCR-HC65 | Camera Operations Guide - Page 57
settings data - Data code During playback, you can view the date/time data and the camera settings data ([CAMERA DATA]) that are automatically recorded while recording pictures on a tape or a "Memory Stick Duo." 1 Slide the POWER switch repeatedly to select the PLAY/EDIT mode. 2 Touch during - Sony DCR-HC65 | Camera Operations Guide - Page 58
b Note • Camera setting data do not appear when movies on a "Memory Stick Duo" are played back. z Tip • Exposure adjustment value (0EV) appears when a "Memory Stick Duo" is played back. • appears for the picture recorded using flash. 58 Playback - Sony DCR-HC65 | Camera Operations Guide - Page 59
the picture on a TV AUDIO/VIDEO jack Connect your camcorder to a TV using the supplied A/V connecting cable as shown in the following illustration. Connect the supplied AC Adaptor to the wall outlet for the power supply (p. 14). Refer also to the instruction manuals supplied with the devices to be - Sony DCR-HC65 | Camera Operations Guide - Page 60
"0:00:00" on the tape counter. To cancel the operation Press ZERO SET MEMORY on the Remote Commander again. b Note • There may be a discrepancy of set memory will not function correctly if there is a blank section between recorded sections on the tape. Searching for a scene using Cassette Memory - - Sony DCR-HC65 | Camera Operations Guide - Page 61
cassette has Cassette Memory): DATE SEARCH 1 JAN/ 4/ 04 2 JAN/ 4/ 04 3 JAN/ 5/ 04 0:00:00:00 Present point on the tape Point where the playback starts To cancel the operation Press STOP on the Remote Commander. b Note • If one day's recording is less than 2 minutes, your camcorder may not - Sony DCR-HC65 | Camera Operations Guide - Page 62
4 Select the icon of the desired menu with / , then touch . CAMERA SET (p. 64) MEMORY SET (p. 70) PICT.APPLI. (p. 74) EDIT/PLAY (p. 80) STANDARD all items. The available items vary depending on the power mode of your camcorder. Unavailable items will be grayed out. 60min 0:00:00:00 REMOTE CTRL - Sony DCR-HC65 | Camera Operations Guide - Page 63
Menu The available items vary depending on the power mode of your camcorder. Unavailable items will be grayed out. You can customize the short- touch on the screen displayed after step 2 (p. 62) to display the video operation screen. Touch to return to the previous screen. • It is convenient - Sony DCR-HC65 | Camera Operations Guide - Page 64
AE/WHITE BAL./16:9 WIDE, etc. You can select items listed below on the CAMERA SET menu. To select camcorder. The screen shows the items you can currently operate. Unavailable items will be grayed out. 60min STBY 0:00:00 CAMERA SET PROGRAM AE SPOT METER EXPOSURE OK PROGRAM AE You can record - Sony DCR-HC65 | Camera Operations Guide - Page 65
Your camcorder is adjusted to focus only on distant subjects. b Note • [SPORTS] (sports lesson) will not work when the POWER switch is set to CAMERA- MEMORY. . • Select when recording at a party or in studios where lighting conditions change quickly. • Select when under video lamps such as those - Sony DCR-HC65 | Camera Operations Guide - Page 66
camcorder at a nearby white object for about 10 seconds after setting the POWER switch to CAMERA-TAPE when: - You remove the battery pack for replacement. - You bring your camcorder EXP.FOCUS For DCR-HC85: When you are recording pictures on a "Memory Stick Duo" while focusing manually, you can see - Sony DCR-HC65 | Camera Operations Guide - Page 67
function with external flashes that do not support the following settings. FLASH MODE For DCR-HC65: GON ON AUTO AUTO Select to trigger camcorder for more than 5 minutes. REDEYE REDUC For DCR-HC85: GOFF ON ( ) Select to disable the red-eye reduction. Select to activate the flash before recording - Sony DCR-HC65 | Camera Operations Guide - Page 68
zoom. 10 times through 120 times zoom is performed digitally. 16:9 WIDE You can record a 16:9 wide picture on the tape to watch on a 16:9 wide-screen TV ([16:9 WIDE] mode). With this function [ON], your camcorder offers even wider angles when you move the power zoom lever to the "W" side than - Sony DCR-HC65 | Camera Operations Guide - Page 69
you have seen on the LCD screen or in the viewfinder. GOFF ON ( ) Standard setting (to record pictures to play back on a 4:3 TV). The recorded picture will not be wide. Select to record a picture to be played back on a 16:9 wide TV. The recorded picture will be played in full mode when you connect - Sony DCR-HC65 | Camera Operations Guide - Page 70
image size and space available on the "Memory Stick Duo" you are using. 1 Select [NORMAL], [HIGH SPEED] (DCR-HC85) or [EXP. BRKTG], and then touch . GOFF NORMAL ( ) HIGH SPEED () EXP. BRKTG () Select when not recording continuously. For DCR-HC65: Select to record from 4 (1152 × 864 image size) to - Sony DCR-HC65 | Camera Operations Guide - Page 71
you have space for fewer than 3 images remaining on the "Memory Stick Duo." • When it is hard to see the difference between the images recorded in [EXP. BRKTG] mode on the LCD screen, connect your camcorder to your TV or a computer. For DCR-HC85: • The images may flicker or discolor when you select - Sony DCR-HC65 | Camera Operations Guide - Page 72
folders. FILE NO. GSERIES RESET Select to assign file numbers in sequence even if the "Memory Stick Duo" is replaced with another one. The file number is reset when a new folder is created or the recording folder is replaced with another. Select to reset the file number to 0001 each time the - Sony DCR-HC65 | Camera Operations Guide - Page 73
[NO]. 2 Touch . b Note • You cannot delete the created folders using your camcorder. You will have to format the "Memory Stick Duo" (p. 72), or delete them using your computer. • The number of pictures that can be recorded on a "Memory Stick Duo" decreases as the number of folders increases on the - Sony DCR-HC65 | Camera Operations Guide - Page 74
The settings you can adjust vary depending on the power mode of your camcorder. The screen shows the items you can currently operate. Unavailable items will effects (such as films) to a picture before or after recording on a tape. appears when the effect is selected. GOFF NEG. ART Select when - Sony DCR-HC65 | Camera Operations Guide - Page 75
. (This effect is not available during playback.) Select to record picture appearing mosaicpatterned. (This effect is not available during playback via the DV Interface. z Tip • You can copy pictures edited using picture effects to a "Memory Stick Duo" (p. 96) or to another tape (p. 94). MEMORY MIX - Sony DCR-HC65 | Camera Operations Guide - Page 76
. SMTH INT.REC For DCR-HC85: This function is useful to observe the movement of clouds or the changes of daylight. Your camcorder will shoot 1 frame of the picture at a selected interval and keep them in memory until it has stored several frames. Then those frames are recorded on the tape at one - Sony DCR-HC65 | Camera Operations Guide - Page 77
the focus manually, you may be able to record clear pictures even if the light changes (p. 41). • You can silence the beeps during recording (p. 88). INTERVAL REC For DCR-HC65: You can record pictures on a tape at a selected interval, when you record flowers blooming, etc. Connect your camcorder to - Sony DCR-HC65 | Camera Operations Guide - Page 78
recording together with the Memory overlap. • There may be a discrepancy in recording time of up to ± 6 frames from the selected time. z Tip • If you adjust the focus manually, you may be able to record camcorder will shoot a still image at a selected interval and record it on a "Memory Stick Duo - Sony DCR-HC65 | Camera Operations Guide - Page 79
demonstration starts again in about 10 minutes.) - When a cassette or "Memory Stick Duo" is inserted. - When a mode other than CAMERA-TAPE is selected. • If [A.SHUT OFF] is set to [5min] when the camcorder is used on the battery pack, the power will be turned off after approximately 5 minutes (p. 88 - Sony DCR-HC65 | Camera Operations Guide - Page 80
"Memory Stick Duo." See page 95, 96 for details. BURN DVD When your camcorder is connected to a Sony VAIO series personal computer, you can easily burn the picture recorded on the tape on a DVD (Direct Access to "Click to DVD") using this command. See the supplied "Computer Applications Guide" for - Sony DCR-HC65 | Camera Operations Guide - Page 81
BURN VCD When your camcorder is connected to a personal computer, you can easily burn the picture recorded on the tape on a CD-R (Direct Access to Video CD Burn) using this command. See the supplied "Computer Applications Guide" for details. END SEARCH EXEC CANCEL SEARCH Select to activate the - Sony DCR-HC65 | Camera Operations Guide - Page 82
index signal when searching a recording with other video device. • When you are using your camcorder on the battery pack and do not operate it Even though the power goes off, the characters you have entered remain stored in memory. Turn the power back on, then start again from step 1 to continue - Sony DCR-HC65 | Camera Operations Guide - Page 83
a cassette with Cassette Memory (up to 10 letters). The label will be displayed for approximately 5 seconds when you select the CAMERA-TAPE mode and insert To change the label you have created, insert the cassette into your camcorder and go through the procedure from step 1. ALL ERASE You can - Sony DCR-HC65 | Camera Operations Guide - Page 84
SET) menu - REC MODE/MULTI- SOUND/AUDIO MIX/USB-CAMERA, etc. You can select the items listed below on use of Sony Excellence/Master mini DV cassette is recommended to get the most out of your camcorder. b Note • You cannot add sound on the tape recorded in the LP mode. • If you record in the - Sony DCR-HC65 | Camera Operations Guide - Page 85
to brighten the LCD screen. b Note • When you connect your camcorder to outside power sources, [BRIGHT] is automatically selected for the setting. • When you select [BRIGHT], battery life is reduced by about 10 percent during recording. LCD COLOR Touch / to adjust the color on the LCD screen - Sony DCR-HC65 | Camera Operations Guide - Page 86
. Select to input an S video signal. USB-CAMERA You can connect a USB cable (supplied) to your camcorder, and view the picture displayed on the screen of your camcorder on your computer (USB Streaming). For details, refer to the "Computer Applications Guide." GOFF USB STREAM Select to deactivate - Sony DCR-HC65 | Camera Operations Guide - Page 87
for more than 5 minutes. GON OFF Select to turn on the camera recording lamp on the front of your camcorder during recording. Select this setting in the following recording situations. The camera recording lamp will not light up during recording. • When you do not want the subject to be nervous - Sony DCR-HC65 | Camera Operations Guide - Page 88
stop recording, operate the touch panel, or when an unusual condition occurs on your camcorder. Select screen, and in the viewfinder. b Note • You cannot input a signal to your camcorder if you press DISPLAY/ your camcorder, the camcorder is automatically turned off to prevent the battery from - Sony DCR-HC65 | Camera Operations Guide - Page 89
WORLD TIME LANGUAGE OK CLOCK SET You can set the date and time (p. 19). WORLD TIME You can adjust the time difference when using your camcorder abroad. Set the time difference by touching / , the clock will be adjusted in accordance with the time difference. If you set the time difference to - Sony DCR-HC65 | Camera Operations Guide - Page 90
customize the Personal Menu for each power mode of your camcorder. Adding a menu - Add You can add frequently used menu items to Personal Menu for easier and faster access. b Note • You can add up to 28 menu items each for the CAMERA-TAPE, CAMERA-MEMORY, and PLAY/EDIT modes. If you want to add - Sony DCR-HC65 | Camera Operations Guide - Page 91
END 1/3 FADER SPOT FOCUS SPOT PRGRAM METER AE 4 Touch the menu that you want to delete. 60min DELETE STBY 0:00:00 Delete this from CAMERA-TAPE mode's P-MENU? YES NO 5 Touch [YES]. The selected menu is deleted from Personal Menu. 6 Touch . b Note • You cannot delete [MENU] and [P-MENU SET - Sony DCR-HC65 | Camera Operations Guide - Page 92
the menu is displayed. 60min STBY P-MENU SET UP 0:00:00 END ADD DELETE SORT RESET 3 Touch [RESET]. 60min RESET STBY 0:00:00 Initialize CAMERA-TAPE mode's P-MENU setting? YES NO 6 Touch . To sort more items, repeat steps 4 to 6. 7 Touch [END]. 8 Touch . 4 Touch [YES]. 60min RESET STBY - Sony DCR-HC65 | Camera Operations Guide - Page 93
shown in the following illustration. Connect your camcorder to the wall outlet using the supplied AC Adaptor during the operation. Connecting with an i.LINK cable DV Interface i.LINK cable (optional) i.LINK jack Dubbing/Editing AUDIO/VIDEO jack When you have an S video jack on your TV or VCR - Sony DCR-HC65 | Camera Operations Guide - Page 94
VCR. b Note • When your camcorder is connected to the VCR via the DV Interface, you cannot record the title, indicators, information for the Cassette Memory, and words entered on the index screen of the "Memory Stick Duo." • When dubbing using the A/V connecting cable, press DISPLAY/BATT INFO to - Sony DCR-HC65 | Camera Operations Guide - Page 95
a tape or a "Memory Stick Duo" inserted in your camcorder. You can also record a scene as a still image on a "Memory Stick Duo." Insert a cassette or a "Memory Stick Duo" for recording in your camcorder. If you have connected the A/V connecting cable, select the input signal in [VIDEO INPUT] in the - Sony DCR-HC65 | Camera Operations Guide - Page 96
pictures from a tape to a "Memory Stick Duo" You can record movies (with sound recorded in monaural) or still images (fixed to image size [640 × 480]) on a "Memory Stick Duo." Make sure you have a recorded tape and a "Memory Stick Duo" inserted into your camcorder. 1 Slide the POWER switch to - Sony DCR-HC65 | Camera Operations Guide - Page 97
time of movies, see page 26. Dubbing still images from a "Memory Stick Duo" to a tape You can record still images on a tape. Make sure you have the "Memory Stick Duo" with the images and a tape inserted into your camcorder. 1 Slide the POWER switch to select the PLAY/EDIT mode. 2 Search - Sony DCR-HC65 | Camera Operations Guide - Page 98
Dubbing selected scenes from a tape - Digital program editing You can select up to 20 scenes (programs) and record them in the desired order to other recording device such as VCRs or to a "Memory Stick Duo" inserted in your camcorder. When you are recording on a "Memory Stick Duo," skip steps 1 and - Sony DCR-HC65 | Camera Operations Guide - Page 99
camcorder as a recording device (p. 93). You can use either the A/V connecting cable or the i.LINK cable to make the connection. The dubbing procedure is easier with the i.LINK connection. 2 Prepare your VCR. • Insert a cassette for recording media. OTHER DEVICE MEMORY STICK 8 Touch [OTHER - Sony DCR-HC65 | Camera Operations Guide - Page 100
recording pause on the VCR, then touch . Refer to the operating instructions supplied with your VCR for details on operation. 5 Point the infrared ray emitter of your camcorder General Electric 8, 32*, 77, 94*, 101 Goldstar/LG 47 GO VIDEO 71 Hitachi 8, 42, 78 HQ 40 Instant Replay 77, 78 - Sony DCR-HC65 | Camera Operations Guide - Page 101
of the VCR Follow the steps below when you are performing digital program edit for the first time to a tape in a camcorder and the VCR to avoid not recording the starting scene. 1 Remove the cassette from your camcorder. Prepare a pen and paper to take notes. 2 Set the VCR to recording - Sony DCR-HC65 | Camera Operations Guide - Page 102
When you are performing a digital program edit for the first time to a tape in a VCR, go through the procedures described in Steps 1 and 2 (p. 98 to p. 101) beforehand. 1 Prepare a cassette or a "Memory Stick Duo." Insert a tape to be played back into the camcorder. When you are recording on a tape - Sony DCR-HC65 | Camera Operations Guide - Page 103
0:00:00:12 SCENE 1 END 11Repeat steps 7 to 10 and create programs. 12Set your VCR to recording pause. Skip this step if your camcorder is connected via an i.LINK cable or recording on a "Memory Stick Duo." 13Touch [START]. START CANCEL 0:00:00:00 ENGAGE REC PAUSE EXEC TOTAL 0:00:00:25 SCENE - Sony DCR-HC65 | Camera Operations Guide - Page 104
Digital program editing Touch [END]. To save a program without using it to record Touch [END] in step 11. The program is stored in memory until the cassette is ejected. To erase programs 1 Follow steps 1 to 6 in "Recording i.LINK cable connection, select [IR] in step 11 on p. 99, and - Sony DCR-HC65 | Camera Operations Guide - Page 105
of MIC jack t Intelligent accessory shoe t AUDIO/VIDEO jack t internal microphone. b Note • You cannot record additional audio: - When the tape is recorded in the 16-bit mode. - When the tape is recorded in the LP mode. - When your camcorder is connected via the i.LINK cable. - On blank sections of - Sony DCR-HC65 | Camera Operations Guide - Page 106
4 to 10. The recording stops automatically at the selected scene. b Note • You can only record additional audio over a tape recorded on your camcorder. The sound may deteriorate when you dub audio on a tape recorded on other camcorders (including other DCR-HC65/ HC85 camcorders). AUDIO DUB 106 - Sony DCR-HC65 | Camera Operations Guide - Page 107
ST2 Deleting recorded pictures You can delete all or selected pictures stored on a "Memory Stick Duo." recorded afterwards (ST2). Then, touch . The original sound (ST1) is output in the default setting. The adjusted audio balance returns to the default setting in about 5 minutes after the battery - Sony DCR-HC65 | Camera Operations Guide - Page 108
• The pictures cannot be restored once they are deleted. Make sure you check the pictures before deleting them. Marking recorded images with specific information - Image protection/Print mark When you are using a "Memory Stick Duo" with the write-protect tab, make sure the write-protect tab on the - Sony DCR-HC65 | Camera Operations Guide - Page 109
mark images that you want to print out while viewing them on your camcorder. (You cannot specify the number of printouts.) The DPOF (Digital Print Order Format) standard is used to select images for printing on your camcorder. 1 Slide the POWER switch to select the PLAY/EDIT mode. 2 Touch . 101 - Sony DCR-HC65 | Camera Operations Guide - Page 110
without using a computer by connecting a printer directly to a digital video camera or digital still camera, regardless of model manufacturer. Connect your camcorder to the printer b Note • Connect the supplied AC Adaptor to the wall outlet for the power supply. 1 Insert the "Memory Stick Duo" on - Sony DCR-HC65 | Camera Operations Guide - Page 111
stored on the "Memory Stick Duo" will be displayed. b Note • We cannot guarantee the operation of models that are not PictBridge compatible. • You cannot connect your camcorder to the printer if [USB-PLY/EDT] in the menu settings is not set to [PictBridge]. Follow the instructions shown on the - Sony DCR-HC65 | Camera Operations Guide - Page 112
your camcorder or printer - Removing the "Memory Stick Duo" from your camcorder • If the printer stops working, disconnect the USB cable and restart the operation from the beginning. • Some printer models may not support the date printing function. Refer to your printer's operating instructions for - Sony DCR-HC65 | Camera Operations Guide - Page 113
If you run into any problem using your camcorder, use the following table to troubleshoot the problem. If the problem Overall operations persists, remove the power source and contact your Sony dealer. If "C:ss:ss" is displayed on the LCD screen or the viewfinder, the self-diagnosis display function - Sony DCR-HC65 | Camera Operations Guide - Page 114
lamp flashes while cAttach the battery pack to the camcorder correctly. If the problem the battery pack is being charged. persists, disconnect the AC Adaptor from the wall outlet and contact your Sony dealer. The battery pack may be damaged. (p. 14) The battery pack is quickly discharged. • The - Sony DCR-HC65 | Camera Operations Guide - Page 115
DEMO MODE]. (The [DEMO MODE] is automatically displayed when you leave the camcorder for 10 minutes after selecting CAMERA-TAPE without inserting a cassette and "Memory Stick Duo.") cTouch on the LCD screen or insert a cassette or "Memory Stick Duo" to cancel [DEMO MODE]. You can also set [DEMO MODE - Sony DCR-HC65 | Camera Operations Guide - Page 116
If you are using a "Memory Stick Duo" for recording, refer also to the "Memory Stick Duo" section. (p. 118) Symptom Cause and/or Corrective Actions The tape does not start when you press REC START/STOP. cSlide the POWER switch to turn on the CAMERA-TAPE lamp. (p. 17) cThe tape has reached - Sony DCR-HC65 | Camera Operations Guide - Page 117
and recording stops. For DCR-HC85: cThe video head may be dirty. Use a cleaning cassette (optional). cTry again from the beginning. cUse a Sony mini DV cassette. Playback Troubleshooting If you are playing back the pictures stored on a "Memory Stick Duo," refer also to the "Memory Stick Duo - Sony DCR-HC65 | Camera Operations Guide - Page 118
functions using the "Memory Stick Duo." cSet the POWER switch to the CAMERA-MEMORY or PLAY/EDIT mode. (p. 17) c Insert a "Memory Stick Duo" into your camcorder. (p. 21) • The "Memory Stick Duo" was formatted on a personal computer. cFormat it on your camcorder. (Note that all recorded data will be - Sony DCR-HC65 | Camera Operations Guide - Page 119
format is not supported on your camcorder. (p. 127) Dubbing/Editing Troubleshooting Symptom Cause and/or Corrective Actions Pictures from connected devices are not displayed on the LCD screen or the viewfinder. • Cannot change the setting of the AUDIO/VIDEO jack during Easy Handycam operation - Sony DCR-HC65 | Camera Operations Guide - Page 120
via an i.LINK cable. Digital program editing on the "Memory Stick Duo" does not function correctly. • The program cannot be set to a blank section on the tape. • You cannot record or a distorted picture may be recorded if the tape has been used repeatedly for recording. 120 Troubleshooting - Sony DCR-HC65 | Camera Operations Guide - Page 121
Sony dealer or local authorized Sony service facility. Inform them of the 5-digit code, which starts from "E." 101-0001 (Warning indicator pertaining to files) • The file is damaged. • The file is unreadable. • You are trying to carry out the MEMORY MIX function on a movie. (p. 45) E (Battery - Sony DCR-HC65 | Camera Operations Guide - Page 122
Memory Stick Duo" is set to lock. (p. 128) pertaining to the write-protect of the "Memory Stick Battery Moisture condensation Cassette/Tape Indications Use the "InfoLITHIUM" battery pack. Battery level is low. Old battery Memory. Corrective Actions/ References cSee page 130. cCharge the battery. - Sony DCR-HC65 | Camera Operations Guide - Page 123
your camcorder. You will have to format the "Memory Stick Duo" (p. 72), or delete them using your computer. Cannot record still images on Memory Stick. - PictBridge Check the connected device. compliant printer cSwitch off the printer and switch it on again, then disconnect the USB cable and - Sony DCR-HC65 | Camera Operations Guide - Page 124
. Cannot record 44.1kHz audio on a Memory Stick. - Smooth interval rec discontinued due to error. For DCR-HC85: cSee page 117. Already added to CAMERA-TAPE mode's P- - MENU. Already added to CAMERA-MEMORY mode's P- - MENU. Already added to PLAY/EDIT mode's P-MENU. - x Dirty video head. Use - Sony DCR-HC65 | Camera Operations Guide - Page 125
then set the time difference (p. 89). AC-L25A/L25B [a] [b] On TV color systems Your camcorder is an NTSC system-based camcorder. If you want to view the playback picture on a TV, it must be an NTSC systembased TV (see following list) with the AUDIO/ VIDEO input jack. System NTSC PAL PAL - M PAL - Sony DCR-HC65 | Camera Operations Guide - Page 126
correctly when you record using a digital video camera recorder that does not support Cassette Memory, on a tape already recorded on using a Cassette Memorycompatible digital video camera recorder. z Tip • The memory capacity of the cassette marked with is 4k bits. Your camcorder can accommodate - Sony DCR-HC65 | Camera Operations Guide - Page 127
the operation of all types of "Memory Stick Duo" on your camcorder. Types of "Memory Stick" "Memory Stick" "Memory Stick Duo"*1 "MagicGate Memory Stick" "Memory Stick Duo" (MagicGate/Parallel Transfer)*1 "MagicGate Memory Stick Duo"*1 "Memory Stick PRO" "Memory Stick PRO Duo"*1 Recording/ Playback - Sony DCR-HC65 | Camera Operations Guide - Page 128
.MPG: This file name appears on the display of a computer. • On a "Memory Stick Duo" formatted on a computer: A "Memory Stick Duo" formatted by the Windows OS or using Macintosh computers does not have guaranteed compatibility with your camcorder. • Data read/write speed may vary depending on the - Sony DCR-HC65 | Camera Operations Guide - Page 129
and "®" are not mentioned in each case in this manual. Additional Information Notes on image data compatibility • Image data files recorded on a "Memory Stick Duo" by your camcorder conform to the Design Rule for Camera File Systems universal standard established by the JEITA (Japan Electronics - Sony DCR-HC65 | Camera Operations Guide - Page 130
according to the operating conditions of your camcorder, and displays the remaining battery time in minutes. With an AC Adaptor/charger (optional), the remaining battery time and charging time appear. To charge the battery pack • Be sure to charge the battery pack before you start using your - Sony DCR-HC65 | Camera Operations Guide - Page 131
battery pack. "InfoLITHIUM" is a trademark of Sony Corporation. About i.LINK The DV Interface on this unit is an i.LINKcompliant DV Interface. This section describes the i.LINK standard and its features. What is i.LINK? i.LINK is a digital serial interface for transferring digital video, digital - Sony DCR-HC65 | Camera Operations Guide - Page 132
this unit to your computer, make sure that application software supported by this unit is already installed on your computer. Some i.LINK compatible video device such as Digital Televisions, DVD recorders/players, and MICROMV recorders/players are not compatible with DV device. Before connecting to - Sony DCR-HC65 | Camera Operations Guide - Page 133
surrounding temperature (after about 1 hour). Video head • When the video head becomes dirty, you cannot record pictures normally, or distorted picture or sound is played back. • If the following problem occurs, clean the video heads for 10 seconds with the Sony DVM-12CLD cleaning cassette (optional - Sony DCR-HC65 | Camera Operations Guide - Page 134
the operation. 1 Slide the POWER switch up to OFF (CHG). 2 Eject the cassette and "Memory Stick Duo" from your camcorder, then disconnect any connecting cables except the AC Adaptor from your camcorder. 3 Slide the POWER switch repeatedly to select the PLAY/EDIT mode while pressing DISPLAY/BATT INFO - Sony DCR-HC65 | Camera Operations Guide - Page 135
battery is not charged, the camcorder operation will not be affected as long as you are not recording the date. Procedures Connect your camcorder to a wall outlet using the supplied AC Adaptor, and leave it with the POWER switch set to OFF (CHG) for more than 24 hours. Specification Video camera - Sony DCR-HC65 | Camera Operations Guide - Page 136
) Average power consumption (when using the battery pack) For DCR-HC65: During camera recording using the viewfinder 2.7 W During camera recording using the LCD 3.8 W For DCR-HC85: During camera recording using the viewfinder 3.3 W During camera recording using the LCD 4.4 W Operating temperature - Sony DCR-HC65 | Camera Operations Guide - Page 137
Supplied accessories See page 13. AC Adaptor AC-L25A/L25B Power requirements AC 100 (w/h/d) excluding the projecting parts Mass (approx.) 190 g (6.7 oz) excluding the power cord Rechargeable battery pack (NP-FP50) CCD (Charge Coupled Device) Flash HC65 HC85 Carl Zeiss Vario-Tessar Approx. - Sony DCR-HC65 | Camera Operations Guide - Page 138
, 54) L Viewfinder (p. 4, 18) M "Memory Stick Duo" slot (p. 21) N Access lamp (p. 21, 128) O Battery pack (p. 14) P For DCR-HC65: CHG (charge) lamp For DCR-HC85: flash charge indicator /CHG (charge) lamp (p. 14) Q DC IN jack (p. 14) * This button is not available during Easy Handycam operation(zmark - Sony DCR-HC65 | Camera Operations Guide - Page 139
. B For DCR-HC85: Flash (p. 31) C Lens (Carl Zeiss Lens) Your camcorder is equipped with a Carl Zeiss lens which can reproduce fine images. The lens for your camcorder was developed jointly by Carl Zeiss, in Germany, and Sony Corporation. It adopts the MTF measurement system for video cameras and - Sony DCR-HC65 | Camera Operations Guide - Page 140
7 qd 8 qf qg A PHOTO button (p. 29) B CAMERA-TAPE, CAMERAMEMORY, PLAY/EDIT mode lamps (p. 17) C Viewfinder lens adjustment lever (p. 18) D PUSH (battery release) button (p. 14) E POWER switch (p. 17) F REC START/STOP button (p. 24, 50) G DV Interface H (USB) jack I NIGHTSHOT PLUS switch (p. 39 - Sony DCR-HC65 | Camera Operations Guide - Page 141
the length of the tripod screw is less than 5.5 mm (7/32 inch). Otherwise, you cannot attach the tripod securely, and the screw may damage your camcorder. D Cassette lid (p. 20) To attach the shoulder strap Attach the shoulder strap supplied with your - Sony DCR-HC65 | Camera Operations Guide - Page 142
SET MEMORY button* (p. 60) G Transmitter After turning on your camcorder, point towards the remote sensor to control your camcorder. H REC START/STOP (p. 28) I Power zoom button (p. 27) J DISPLAY button (p. 60) * These buttons are not available during Easy Handycam operation. To change the battery - Sony DCR-HC65 | Camera Operations Guide - Page 143
batteries according to the manufacturer's instructions. b Notes on the Remote Commander • A button-type lithium battery (CR2025) is used in the Remote Commander. Do not use batteries you are operating with the Remote Commander supplied with your camcorder, your VCR may also operate. In that case, - Sony DCR-HC65 | Camera Operations Guide - Page 144
For DCR-HC65: Flash (p. 67) This indicator appears when you use video flash light (optional). For DCR-HC85: Flash (p. 31) This indicator appears only when the flash is in use. Frame recording (p. 76) Outputting analog images and sound in digital format (p. 86) DV input (p. 95) Zero set memory (p. 60 - Sony DCR-HC65 | Camera Operations Guide - Page 145
Indicators Meanings Print mark (p. 109) Slide show (p. 75) LCD backlight off (p. 18) Image delete (p. 107) PictBridge connecting (p. 110) Quick Reference Quick Reference 145 - Sony DCR-HC65 | Camera Operations Guide - Page 146
Numeric 16:9 WIDE mode 68 A A/V connecting cable 59, 93, 105 AC Adaptor 14 Adjusting the viewfinder 18 Audio dubbing (AUD DUB CTRL) .. 105 AUDIO MIX 85, 107 AUDIO MODE 84 Auto shut off function (A. SHUT OFF).......... 88 AUTO SHUTTER 66 B BACK LIGHT (camera).... 37 Battery Battery Info 15 - Sony DCR-HC65 | Camera Operations Guide - Page 147
38 Manual focus 41 Memory Chroma key (M T CAM CHROMA 45 Memory Luminance key (M T CAM LUMI.) ..45 MEMORY MIX 45 Memory Overlap (OVERLAP 43 Memory photo 29, 52 "Memory Stick Duo" General information ..127 Inserting 21 Number of pictures 26, 31 Menu CAMERA SET 64 EDIT/PLAY 80 MEMORY SET - Sony DCR-HC65 | Camera Operations Guide - Page 148
-CAMERA .......... 86 USB-PLY/EDT........... 86 Using abroad 125 V Video head 133 VIDEO INPUT 86 Viewfinder 18 Brightness (VF B.LIGHT) ..... 85 Volume (VOLUME) ... 49, 52 W Warning indicators .......... 121 Warning messages........... 121 White balance (WHITE BAL 65 WHITE FADER 42 Wide angle - Sony DCR-HC65 | Camera Operations Guide - Page 149
- Sony DCR-HC65 | Camera Operations Guide - Page 150
- Sony DCR-HC65 | Camera Operations Guide - Page 151
- Sony DCR-HC65 | Camera Operations Guide - Page 152
Printed on 100% recycled paper using VOC (Volatile Organic Compound)-free vegetable oil based ink. Printed in Japan
-
 1
1 -
 2
2 -
 3
3 -
 4
4 -
 5
5 -
 6
6 -
 7
7 -
8
-
9
-
10
-
11
-
12
-
13
-
14
-
15
-
16
-
17
-
18
-
19
-
20
-
21
-
22
-
23
-
24
-
25
-
26
-
27
-
28
-
29
-
30
-
31
-
32
-
33
-
34
-
35
-
36
-
37
-
38
-
39
-
40
-
41
-
42
-
43
-
44
-
45
-
46
-
47
-
48
-
49
-
50
-
51
-
52
-
53
-
54
-
55
-
56
-
57
-
58
-
59
-
60
-
61
-
62
-
63
-
64
-
65
-
66
-
67
-
68
-
69
-
70
-
71
-
72
-
73
-
74
-
75
-
76
-
77
-
78
-
79
-
80
-
81
-
82
-
83
-
84
-
85
-
86
-
87
-
88
-
89
-
90
-
91
-
92
-
93
-
94
-
95
-
96
-
97
-
98
-
99
-
100
-
101
-
102
-
103
-
104
-
105
-
106
-
107
-
108
-
109
-
110
-
111
-
112
-
113
-
114
-
115
-
116
-
117
-
118
-
119
-
120
-
121
-
122
-
123
-
124
-
125
-
126
-
127
-
128
-
129
-
130
-
131
-
132
-
133
-
134
-
135
-
136
-
137
-
138
-
139
-
140
-
141
-
142
-
143
-
144
-
145
-
146
-
147
-
148
-
149
-
150
-
151
-
152
 |
 |
3-090-178-
11
(1)
© 2004 Sony Corporation
Camera Operations Guide [US]
Camera
Operations Guide
Read this first
Digital Video Camera Recorder
DCR-HC65/HC85