Sony DSCU60 Operating Instructions - Page 18
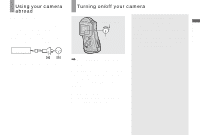
Shooting still images, Inserting and removing a “Memory Stick”, Insert the Memory Stick.
 |
UPC - 027242627970
View all Sony DSCU60 manuals
Add to My Manuals
Save this manual to your list of manuals |
Page 18 highlights
Shooting still images Inserting and removing a "Memory Stick" Terminal side Label side 1 , Slide the lock switch and the OPEN button in the direction of the arrow and open the waterproof cover. The waterproof cover opens toward you. • Before opening the waterproof cover, be sure to rinse off any sand and completely wipe away any water that may be present on the camera body. • Never open the waterproof cover underwater or in places exposed to water, as this may allow water to enter the inside of the camera and cause a malfunction. • Immediately after the camera is brought from a warm place to a cold place such as from indoors to outdoors, the difference in pressure between the inside of the camera and the outside air may make it difficult to open the waterproof cover. 18 2 , Slide the inner cover in the direction of the arrow to open it. The inner cover opens toward you when you slide it in the direction of the arrow. • For details on the "Memory Stick," see page 76. 3 , Insert the "Memory Stick." Holding the "Memory Stick" as shown in the illustration, insert it all the way in until it clicks. • Push the "Memory Stick" all of the way in so that it is securely seated in the connector. If the "Memory Stick" is not inserted correctly, you may not be able to record or display images in the "Memory Stick." • Be careful not to drop the batteries when opening or closing the inner cover.
-
 1
1 -
2
-
3
-
4
-
5
-
6
-
7
-
8
-
9
-
10
-
11
-
12
-
 13
13 -
 14
14 -
 15
15 -
 16
16 -
 17
17 -
 18
18 -
 19
19 -
 20
20 -
 21
21 -
 22
22 -
 23
23 -
24
-
25
-
26
-
27
-
28
-
29
-
30
-
31
-
32
-
33
-
34
-
35
-
36
-
37
-
38
-
39
-
40
-
41
-
42
-
43
-
44
-
45
-
46
-
47
-
48
-
49
-
50
-
51
-
52
-
53
-
54
-
55
-
56
-
57
-
58
-
59
-
60
-
61
-
62
-
63
-
64
-
65
-
66
-
67
-
68
-
69
-
70
-
71
-
72
-
73
-
74
-
75
-
76
-
77
-
78
-
79
-
80
-
81
-
82
-
83
-
84
-
85
-
86
-
87
-
88
 |
 |
