Sony HCD-EX5 Operating Instructions - Page 15
Listening to the radio, — Preset Tuning, — Manual Tuning, Listening to a non-preset, radio station
 |
View all Sony HCD-EX5 manuals
Add to My Manuals
Save this manual to your list of manuals |
Page 15 highlights
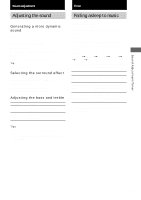
Tuner To change the AM tuning interval (except for the European model) The AM tuning interval is factory-preset to 9 kHz (10 kHz for some areas). To change the AM tuning interval, tune in any AM station first, then turn off the system. While holding down FUNCTION on the system, turn the system back on. When you change the interval, all the AM preset stations are erased. To reset the interval, repeat the same procedure. Tips • The preset stations are retained for about a day even if you disconnect the power cord or if a power failure occurs. • You can label the preset stations (see page 16). • To improve the broadcast reception, adjust the supplied antennas, or connect a commercially available external antenna. Listening to the radio You can listen to a radio station either by selecting a preset station or by manually tuning in a station. Listening to a preset station - Preset Tuning Preset radio stations in the tuner's memory first (see "Presetting radio stations" on page 13). 1 Press TUNER/BAND (or TUNER BAND on the remote) repeatedly to select "FM" or "AM". 2 Press TUNING MODE on the remote repeatedly until "PRESET" appears. 3 Press TUNING - or + (or - or + on the remote) repeatedly to select the desired preset station (or station name* or RDS station name**). * The station name appears only if you have labeled the station (see "Labeling the preset stations" on page 16). ** European model only. To select a desired preset number using the number buttons on the remote Press number buttons instead of performing step 3. To enter preset number 10 or higher, press >10 and enter the corresponding digits. To enter 0, press 10/0 instead. Example: To enter preset number 20, press >10, then 2 and 10/0. Listening to a non-preset radio station - Manual Tuning 1 Press TUNER/BAND (or TUNER BAND on the remote) repeatedly to select "FM" or "AM". 2 Press TUNING MODE on the remote repeatedly until "MANUAL" appears. 3 Press TUNING - or + (or - or + on the remote) repeatedly to tune in the desired station. Tips • To improve the broadcast reception, adjust the supplied antennas, or connect a commercially available external antenna. • When an FM stereo program has static noise, press FM MODE on the remote repeatedly until "MONO" appears. There will be no stereo effect, but the reception will improve. • Press TUNING MODE on the remote repeatedly until "AUTO" appears in step 2, then press TUNING - or + (or - or + on the remote). The frequency indication changes and the scanning stops when the system tunes in a station (Automatic Tuning). 15GB
-
 1
1 -
2
-
3
-
4
-
5
-
6
-
7
-
8
-
9
-
 10
10 -
 11
11 -
 12
12 -
 13
13 -
 14
14 -
 15
15 -
 16
16 -
 17
17 -
 18
18 -
 19
19 -
 20
20 -
21
-
22
-
23
-
24
-
25
-
26
-
27
-
28
 |
 |
