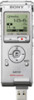
Sony ICD-UX200 Operating Instructions
Sony ICD-UX200 - Digital Flash Voice Recorder Manual
 |
UPC - 027242768338
View all Sony ICD-UX200 manuals
Add to My Manuals
Save this manual to your list of manuals |
Sony ICD-UX200 manual content summary:
- Sony ICD-UX200 | Operating Instructions - Page 1
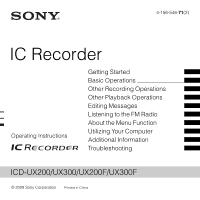
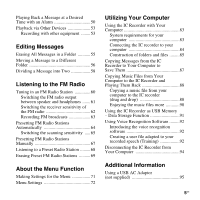
(2) IC Recorder Operating Instructions Getting Started Basic Operations Other Recording Operations Other Playback Operations Editing Messages Listening to the FM Radio About the Menu Function Utilizing Your Computer Additional Information Troubleshooting ICD-UX200/UX300/UX200F/UX300F © 2009 Sony - Sony ICD-UX200 | Operating Instructions - Page 2
Owner's Record The model number is located at the rear panel and the serial number is located inside the battery compartment. Record these numbers in the space provided below. Refer to these numbers whenever you call upon your Sony dealer regarding this product. Model No Serial No FOR UNITED - Sony ICD-UX200 | Operating Instructions - Page 3
Declaration of Conformity Trade Name : SONY Model : ICD-UX200/UX300 Responsible Party : Sony Electronics Inc. Address : 16530 Via Esprillo, San Diego, CA 92127 USA Telephone Number : 858-942-2230 This device complies with part 15 of the FCC Rules. Operation is subject to the following two - Sony ICD-UX200 | Operating Instructions - Page 4
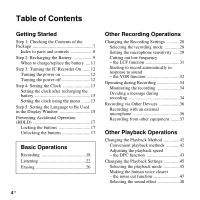
Getting Started Step 1: Checking the Contents of the Package 7 Index to parts and controls 8 Step 2: Recharging the Battery 9 When to charge/replace the battery ....11 Step 3: Turning the IC Recorder On .......12 Turning the power on 12 Turning the power off 12 Step 4: Setting the Clock 13 - Sony ICD-UX200 | Operating Instructions - Page 5
Copying a music file from your computer to the IC recorder (drag and drop 88 Enjoying the music files more 90 Using the IC Recorder as USB Memory - Data Storage Function 91 Using Voice Recognition Software .........92 Introducing the voice recognition software 92 Creating a user file adapted to - Sony ICD-UX200 | Operating Instructions - Page 6
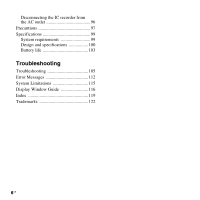
Disconnecting the IC recorder from the AC outlet 96 Precautions 97 Specifications 99 System requirements 99 Design and specifications 100 Battery life 103 Troubleshooting Troubleshooting 105 Error Messages 112 System Limitations 115 Display Window Guide 116 Index 119 Trademarks 122 6 GB - Sony ICD-UX200 | Operating Instructions - Page 7
of the Package IC Recorder (1) Battery case (1) Operating Instructions Remove the film on the display window before you use the IC recorder. NH-AAA (size AAA) rechargeable battery (1) You are cautioned that any changes or modifications not expressly approved in this manual could void your - Sony ICD-UX200 | Operating Instructions - Page 8
button O DIVIDE button Rear A Operation indicator B Built-in microphones (stereo) C Display window D x STOP button E z REC (record)/PAUSE button F Control button (v, V / . (review/fast backward), > (cue/fast forward)) G N (play)/ENT (enter) button* H (folder) button I MENU button J m (microphone - Sony ICD-UX200 | Operating Instructions - Page 9
on the display window before you use the IC recorder. Connect the IC recorder to a running computer, and charge the battery until the battery indicator indicates " ." When you use the IC recorder for the first time, or after you have not used the IC recorder for a certain period of time, charge the - Sony ICD-UX200 | Operating Instructions - Page 10
and the condition of the battery. It also takes more time if the temperature of the battery is low, or if the battery is charged while you are transferring data to the IC recorder. *2 If the IC recorder cannot be connected to a computer directly, use the supplied USB connection support cable. 10 GB - Sony ICD-UX200 | Operating Instructions - Page 11
has not been done properly. See "Troubleshooting" on page 108. When using a fully charged battery or an LR03 (size AAA) alkaline battery Follow the step 1. z Tips • Do not use manganese battery for this IC recorder. • When replacing the battery, messages recorded or alarm settings are not erased - Sony ICD-UX200 | Operating Instructions - Page 12
before auto power off is set to "10min" when you purchase the IC recorder.) You can select the length of time before auto power off in the POWER switch in the direction of "POWER" for more than 1 second. The IC recorder is turned on, and "Accessing..." is displayed. Turning the power off Slide the - Sony ICD-UX200 | Operating Instructions - Page 13
V You need to set the clock to use the alarm function or record the date and time. Clock setting display appears when you insert battery for the first time, or when you insert a battery after the IC recorder has been without battery for more than 3 minutes, "Set Date&Time" appears, and then the year - Sony ICD-UX200 | Operating Instructions - Page 14
The menu mode window will be displayed. 3 Press v or V on the control button to set the year, month, day, hour, and minute in sequence, and then press N/ENT. 2 Press v or V on the control button to select "Detail Menu," and then press N/ENT. 3 Press v or V on the control button to select "Date& - Sony ICD-UX200 | Operating Instructions - Page 15
Getting Started Step 5: Setting the Language to Be Used in the Display Window 2 Press v or V on the control button to select "Detail Menu," and then press N/ ENT. v, V N/ENT MENU 3 Press v or V on the control button to select "Language," and then press N/ ENT. You can select the language to be - Sony ICD-UX200 | Operating Instructions - Page 16
You can select the following languages. English, Español (Spanish), Français (French) 16 GB - Sony ICD-UX200 | Operating Instructions - Page 17
the center so that all buttons will be unlocked. P Note When the HOLD function is activated during recording, all the functions of the buttons are locked to prevent accidental operation. To stop recording, cancel the HOLD function first. z Tip Even if the HOLD function is activated, you can stop the - Sony ICD-UX200 | Operating Instructions - Page 18
power. Selecting a folder 1 Press to display the folder selection window. 2 Press v or V on the control button to select the folder in v which you want to record messages ( FOLDER01-10). V There are 10 folders already available when you purchase the IC - Sony ICD-UX200 | Operating Instructions - Page 19
stops at the beginning of the current recording. x STOP Note while accessing The IC recorder is recording data and saving it in memory when "Accessing..." appears on the display. While the IC recorder is accessing data, do not remove the battery or connect or disconnect the USB AC adaptor (not - Sony ICD-UX200 | Operating Instructions - Page 20
the display window. release pause and resume Press z REC/PAUSE again. Recording resumes from that point. (To recording stop recording after pausing recording, press x STOP.) review the current recording instantly Press N/ENT. Recording stops and playback starts from the beginning of the message - Sony ICD-UX200 | Operating Instructions - Page 21
21GB Basic Operations - Sony ICD-UX200 | Operating Instructions - Page 22
Listening P Note • Before playback starts, exit HOLD mode and turn on the power. To start playback 1 Press . 2 Press v or V on the control button to select the folder. v V 3 Press > on the control button. > 4 Press v or V on the control button to select the message v you want to play. V 22 - Sony ICD-UX200 | Operating Instructions - Page 23
Basic Operations 5 Press N/ENT. Playback will start soon, and the operation indicator will light in green. (When "LED" is set to "OFF" in the menu (page 80), the operation indicator does not light.) 6 Press VOL +/- to adjust the volume. To stop playback 1 Press x STOP. Operation indicator N/ENT - Sony ICD-UX200 | Operating Instructions - Page 24
is displayed as follows. : Folder name: FOLDER01-FOLDER10 : Title: Date_file number (e.g. 090101_001 or FM_090101_001) : Artist name: My Recording : File name: Date_file number (e.g. 090101_001 or FM_090101_001) You can change the folder name, title, artist name, and/or file name using a computer - Sony ICD-UX200 | Operating Instructions - Page 25
time: Elapsed playback time of one message Remaining time: The remaining time of the message Recording date: Date recorded Recording time: Time recorded C Remaining recording time Displays the remaining recording time in hours, minutes, and seconds. If there is more than 10 hours time remaining - Sony ICD-UX200 | Operating Instructions - Page 26
erasing a message, exit HOLD mode and turn on the power. Selecting a message and erasing it 1 Select the message you want to erase when the IC recorder is in the stop or playback mode. 2 Press ERASE. "Erase?" appears with the message title. 3 Press v or V on the control button to select "Execute - Sony ICD-UX200 | Operating Instructions - Page 27
Basic Operations 4 Press N/ENT. "Erasing..." appears in the display window and the selected message will be erased. When a message is erased, the remaining messages will advance and be renumbered so that there will be no space between messages. To cancel erasing 1 Select "Cancel" in step 3 of " - Sony ICD-UX200 | Operating Instructions - Page 28
2 Press v or V on the control button to select "REC Mode," and then press N/ ENT. x STOP N/ENT MENU v, V You can select the recording mode in the menu when the IC recorder is in the stop mode or the FM radio mode. 1 Press MENU to enter the menu mode. The menu mode window will - Sony ICD-UX200 | Operating Instructions - Page 29
with better sound quality, select the ST or STSP mode. The recording mode is set to "ST" when you purchase the IC recorder. P Note You cannot set the recording mode while recording. Setting the microphone sensitivity x STOP N/ENT MENU v, V You can set the microphone sensitivity in the menu when - Sony ICD-UX200 | Operating Instructions - Page 30
ENT. 4 Press x STOP to exit the menu mode. S-High High To record a sound far away from the IC recorder or a low sound, such as a recording made in a spacious room. To record the sound of a normal conversation or meeting, such as a recording made in a conference room or during interviews. Low To - Sony ICD-UX200 | Operating Instructions - Page 31
. 3 Press v or V on the control button to select "ON," and then press N/ENT. The LCF function is set to "OFF" when you purchase the IC recorder. 4 Press x STOP to exit the menu mode. To cancel the LCF function Set "LCF(Low Cut)" to "OFF" in step 3. 31GB - Sony ICD-UX200 | Operating Instructions - Page 32
button to select "ON," and then press N/ENT. N/ENT MENU v, V You can set the VOR (Voice Operated Recording) function to "ON" when the IC recorder is stopped or is recording, to make the IC recorder start recording when the IC recorder detects sound, and pause when no sound is heard, eliminating - Sony ICD-UX200 | Operating Instructions - Page 33
"VOR" to "OFF" in step 3. P Note The VOR function is affected by the sound around you. Set "Mic Sensitivity" in the menu according to the recording conditions. If recording is not satisfactory after you have changed the microphone sensitivity, or for an important - Sony ICD-UX200 | Operating Instructions - Page 34
. You can adjust the monitoring volume by pressing VOL +/-, but the recording level is fixed. You can divide a message during recording so that the message is divided into two parts, and a new message number is added to the newer part of the divided message. Once a message is divided, you cannot - Sony ICD-UX200 | Operating Instructions - Page 35
the display and the new message number is added at the point you pressed the button. The message will be recorded as two messages, however recording continues without stopping. Message 1 Message 2 Message 3 v Message is divided. Message 2 and Message 3 are recorded without stopping. z Tip You can - Sony ICD-UX200 | Operating Instructions - Page 36
is not strong enough, adjust the microphone sensitivity on the IC recorder. When a plug in power type microphone is connected, power is automatically supplied to the microphone from the IC recorder. z Recommended microphones You can use the Sony ECM-CS10, ECM-CZ10, ECM-DS70P, ECM-DS30P electret - Sony ICD-UX200 | Operating Instructions - Page 37
You can use the ECM-TL1 headphone-type electret condenser microphone (not supplied) to record sound from a telephone or a cell phone. For details on how to make the connection, refer to the operating instructions supplied with the ECM-TL1 microphone. P Notes • After you have made the connection - Sony ICD-UX200 | Operating Instructions - Page 38
the control button to select "SYNC REC," and then press N/ ENT. 5 Press x STOP to exit the menu mode. 6 Connect other equipment to the IC recorder when the IC recorder is in the stop mode. Connect the audio output connector (stereo mini-plug) of other equipment to the m (microphone) jack of the IC - Sony ICD-UX200 | Operating Instructions - Page 39
20). • Depending on the piece of equipment connected to the IC recorder, the synchronized recording function may not operate properly due to a difference in the audio input level. To record without using the synchronized recording function 1 Press MENU to enter the menu mode. The menu mode window - Sony ICD-UX200 | Operating Instructions - Page 40
the control button to select "Audio IN," and then press N/ ENT. 5 Press x STOP to exit the menu mode. 6 Connect other equipment to the IC recorder when the IC recorder is in the stop mode. Connect the audio output connector (stereo mini-plug) of other equipment to the m (microphone) jack of the IC - Sony ICD-UX200 | Operating Instructions - Page 41
(not supplied) To the IC recorder RK-G139 Stereo mini-plug (without resistor) RK-G136 Stereo mini-plug (without resistor) To the other equipment Mini-plug (monaural) (without resistor) Stereo mini-plug (without resistor) P Note When recording from other equipment, the microphone sensitivity - Sony ICD-UX200 | Operating Instructions - Page 42
. 10 seconds by pressing > on the control button once. This function is useful for locating a desired point in a long recording. Searching forward/backward during playback (Cue/Review) • To search forward (Cue): Press and hold > on the control button during playback and release it at the point you - Sony ICD-UX200 | Operating Instructions - Page 43
played back repeatedly. To resume normal playback, press N/ENT again. Adjusting the playback speed - the DPC function Rear Front v, V When you set the DPC (Digital Pitch Control) function to "ON," you can adjust the playback speed between +100% and -50% of normal speed in the menu. The message is - Sony ICD-UX200 | Operating Instructions - Page 44
resume normal playback Slide the DPC (SPEED CTRL) switch to "OFF." P Notes • You can only adjust the playback speed between 0% and -50% when messages are recorded as WMA/AAC-LC files. • When any one message is played back repeatedly by pressing and holding N/ENT 44 GB during playback (page 43), or - Sony ICD-UX200 | Operating Instructions - Page 45
. Other Playback Operations x STOP N/ENT MENU v, V You can select the playback mode in the menu. 1 Press MENU to enter the menu mode when the IC recorder is in the stop or playback mode. The menu mode window will be displayed. 3 Press v or V on the control button to select "1," " ," "ALL - Sony ICD-UX200 | Operating Instructions - Page 46
1 A message is played back. Messages in one folder are played back continuously. ALL All the messages are played back continuously. 1 One message is played back repeatedly. Messages in one folder are played back repeatedly. ALL All the messages are played back repeatedly. Playing back a - Sony ICD-UX200 | Operating Instructions - Page 47
mode. 4 Press x STOP to exit the menu mode. P Notes • The effect of the noise cut function may be different depending on the condition of the recorded voice. • When you are using the built-in speaker or listening to the FM radio, the noise cut function does not work. To cancel the noise - Sony ICD-UX200 | Operating Instructions - Page 48
v, V N/ENT MENU ., > You can set the effect you want for the playback in the menu. 1 Press MENU to enter the menu mode when the IC recorder is in the stop or playback mode. The menu mode window will be displayed. 3 Press v or V on the control button to select effect you want - Sony ICD-UX200 | Operating Instructions - Page 49
Other Playback Operations Pop Stresses middle ranges, ideal for vocals. Rock Emphasizes high and low ranges for a powerful sound. Jazz Emphasizes high ranges for lively sound. Bass1 Emphasizes the bass sound. Bass2 Emphasizes the bass sound even more. Custom You can design your own custom sound - Sony ICD-UX200 | Operating Instructions - Page 50
Back a Message at a Desired Time with an Alarm x STOP N/ENT 2 Enter the alarm setting mode. 1 Press MENU to enter the menu mode when the IC recorder is in the stop mode. The menu mode window will be displayed. 2 Press v or V on the control button to select "Alarm," and then press N/ ENT - Sony ICD-UX200 | Operating Instructions - Page 51
Other Playback Operations 3 Set the alarm date and time. 1 Press v or V on the control button to select "Date," a day of the week, or "Daily," and then press N/ENT. 2 When you select "Date": Set the year, month, day, hour, and minute in sequence, as described in "Step 4: Setting the Clock" on page - Sony ICD-UX200 | Operating Instructions - Page 52
any button. P Notes • You can set only one alarm each one message. 52 GB • When the clock has not been set or no messages are recorded, you cannot set the alarm. • The alarm sounds even if you set "Beep" to "OFF" in the menu (page 80). • If the alarm time comes - Sony ICD-UX200 | Operating Instructions - Page 53
connecting cable*. 2 Press N/ENT to start playback and at the same time set the connected equipment to the recording mode. A message from the IC recorder will be recorded on the piece of equipment connected. 3 Press x STOP on the IC recorder and the connected equipment at the same time to stop - Sony ICD-UX200 | Operating Instructions - Page 54
P Note Your dealer may not handle some of the above listed optional accessories. Please ask the dealer for detailed information. 54 GB - Sony ICD-UX200 | Operating Instructions - Page 55
If the selected folder contains a protected message, you cannot erase the message. 1 Select the folder containing the messages you want to erase when the IC recorder is in the stop mode. 2 Press MENU to enter the menu mode. The menu mode window will be displayed. 4 Press v or V on the control - Sony ICD-UX200 | Operating Instructions - Page 56
(page 85). • You cannot move a message to a folder. 1 Select the message you want to move. 2 Press MENU to enter the menu mode when the IC recorder is in the stop or playback mode. 4 Press v or V on the control button to select the folder that you want to move the message into - Sony ICD-UX200 | Operating Instructions - Page 57
Editing Messages When you move a message to another folder, the original message in the previous folder will be deleted. 5 Press x STOP to exit the menu mode. To cancel moving the message Press x STOP before step 4. 57GB - Sony ICD-UX200 | Operating Instructions - Page 58
point from which you want to play back when you make a long recording such as at a meeting. You can divide a message until the total number of messages in the folder reaches the maximum number allowed. Message 1 Message 2 Message 3 fv A Message is divided. Message 1 Message 2 Message 3 Message - Sony ICD-UX200 | Operating Instructions - Page 59
title, artist name, and file name. • You cannot divide a message other than the one recorded using the IC recorder (MP3/ WMA/AAC-LC file transferred from a computer). • Once a message is divided, you > on the control button to display the message number, as the divided messages now each have message - Sony ICD-UX200 | Operating Instructions - Page 60
"FM Radio," and then press N/ ENT. The IC recorder enters the FM radio mode. MENU ., > The headphone cord is an FM antenna, therefore, connect the headphone when listening to the radio. P Note During FM reception you cannot charge the battery. 3 Press v or V on the control button to select - Sony ICD-UX200 | Operating Instructions - Page 61
on the control button until the frequency digits begin to change on the display. The IC recorder automatically scans the radio frequencies and stops number Switching the FM radio output between speaker and headphones x STOP N/ENT MENU v, V Receiver sensitivity During FM reception or FM recording - Sony ICD-UX200 | Operating Instructions - Page 62
button to select "Headphones" or "Speaker," and then press N/ENT. x STOP N/ENT The FM radio output is set to "Headphones" when you purchase the IC recorder. 4 Press x STOP to exit the menu mode. MENU v, V You can set the receiver sensitivity when listening to the FM radio. 1 Press MENU to enter - Sony ICD-UX200 | Operating Instructions - Page 63
the transmitting antenna of the broadcasting station, etc., select this setting. 1 Tune in the station you want to record. 2 Press z REC/PAUSE to start recording. 3 Press x STOP to stop recording. P Note Select "DX" when the IC recorder reception status is not good due to a weak signal. 63GB - Sony ICD-UX200 | Operating Instructions - Page 64
the FM radio. The menu mode window will be displayed. 3 Press v or V on the control button to select "Execute," and then press N/ ENT. The IC recorder automatically scans for available radio frequencies and the stations will be stored in memory from the lower frequencies to the higher ones. While - Sony ICD-UX200 | Operating Instructions - Page 65
Listening to the FM Radio To stop the automatic presetting Press x STOP. The preset numbers stored until you press the x STOP button remain in memory. Switching the scanning sensitivity x STOP N/ENT MENU v, V You can set the scanning sensitivity when presetting - Sony ICD-UX200 | Operating Instructions - Page 66
button to select "High(SCAN H)" or "Low(SCAN L)," and then press N/ ENT. The scanning sensitivity is set to "High(SCAN H)" when you purchase the IC recorder. 4 Press x STOP to exit the menu mode. 66 GB - Sony ICD-UX200 | Operating Instructions - Page 67
Manually N/ENT 2 Press N/ENT. The preset number, frequency and "Set?" will be displayed on the display. 3 Press v or V on the control button to select "Execute," and then press N/ ENT. The station will be stored in memory. v, V You can preset up to 30 FM radio stations in the IC recorder - Sony ICD-UX200 | Operating Instructions - Page 68
MENU ., > 1 Press MENU to enter the menu mode when the IC recorder is stopped. The menu mode window will be displayed. 2 Press v or or V on the control button to select preset number. 4 Press . or > on the control button repeatedly until the preset number you want is displayed. When you press and - Sony ICD-UX200 | Operating Instructions - Page 69
Erasing Preset FM Radio Stations The IC recorder enters the FM radio mode. Listening to the , press . or > on the control button repeatedly until the preset number you want to erase is displayed. 4 Press N/ENT. The preset number, frequency and "Erase?" will be displayed on the display. 5 Press - Sony ICD-UX200 | Operating Instructions - Page 70
The preset number will be changed to "P - -." 70 GB - Sony ICD-UX200 | Operating Instructions - Page 71
About the Menu Function Making Settings for the Menu About the Menu Function x STOP v, V N/ENT 3 Press v or V on the control button to select the setting that you want to set, and then press N/ENT. MENU ., > 1 Press MENU to enter the menu mode. The menu mode window will be displayed. 2 Press v - Sony ICD-UX200 | Operating Instructions - Page 72
, Cancel Execute, Cancel DX, LOCAL * for ICD-UX200F/UX300F only Operation mode (a : the setting can be FM radio FM radio mode mode mode recording mode a - - a - a - a - - a - a - - a - a - - a a - - - a a - - - a a - - - a a - - - a a a - a - Sony ICD-UX200 | Operating Instructions - Page 73
Format Execute, Cancel * for ICD-UX200F/UX300F only Operation mode (a : the setting can be made/ made) Stop mode Playback Recording FM radio FM radio mode mode mode recording mode - - - a - - - - a a a - - - - a - - - - a - - - - a - - - - a - - - - - Sony ICD-UX200 | Operating Instructions - Page 74
Initial setting) See page Sets the recording mode. 28 ST*: Stereo high-quality recording mode STSP: Stereo standard recording mode STLP: Stereo long play recording mode SP: Monaural standard play recording mode LP: Monaural long play recording mode Sets the microphone sensitivity. 29 - Sony ICD-UX200 | Operating Instructions - Page 75
VOR Noise Cut Settings (*: Initial setting) See page Sets the VOR (Voice Operated Recording) function. 32 ON: Recording starts when the IC recorder detects sound and pauses when no sound is heard, eliminating recording during soundless periods. The VOR function is activated when z REC/PAUSE - Sony ICD-UX200 | Operating Instructions - Page 76
and go back for about 3 seconds by pressing . on the control button. This function is useful when attempting to locate desired point in a long recording. OFF*: The easy search function does not work. When you press . or > on the control button, a message will be moved forward or backward. 76 - Sony ICD-UX200 | Operating Instructions - Page 77
. Changes the display mode. Elapsed Time*: Elapsed playback time of one message Remain Time: During stop or playback, the remaining time of the message During recording, the available recording time REC Date: Date recorded REC Time: Time recorded See page 45 - 77GB - Sony ICD-UX200 | Operating Instructions - Page 78
Menu items Alarm Protect Move Erase All Settings (*: Initial setting) See page Sets the alarm. 50 New*: To set the alarm, select "New" and set the date, time or day of the week or choose daily for playback. List: A list of dates or the days of the week, and times at which the alarm has - Sony ICD-UX200 | Operating Instructions - Page 79
See page FM Radio** The IC recorder enters the FM radio mode. 60 Auto setting. P Note Select "DX" when the IC recorder reception status is not good due to a weak signal is set to low. Audio Output** During FM reception or FM recording, you can switch between 61 the sound from the speaker and - Sony ICD-UX200 | Operating Instructions - Page 80
alarm sounds even if you set "Beep" to "OFF" in the menu. Turns the operation indicator on or off during operation. - ON*: During recording or playback, the operation indicator lights or flashes. OFF: The operation indicator does not light or flash, even during operation. P Note When the IC - Sony ICD-UX200 | Operating Instructions - Page 81
a USB connection or 9 not. ON*: The battery will be charged. OFF: The battery will not be charged. P Note If you use a USB AC adaptor (not supplied) to connect the IC recorder to the AC outlet, you can charge battery regardless this setting. Auto Power Off If the IC recorder is on and left for the - Sony ICD-UX200 | Operating Instructions - Page 82
the formatting of the drive. - Execute: "Formatting..." appears and the drive will be formatted. Cancel*: The drive will not be formatted. P Notes • Use the IC recorder formatting function to format the memory. • When the memory is formatted, all the data stored in the IC - Sony ICD-UX200 | Operating Instructions - Page 83
/WMA/AAC-LC files saved on your computer by a simple drag & drop operation when you connect the IC recorder to your computer. You can also play back the copied files. Using the IC recorder as USB memory - data storage function (page 91) You can store image data or text data saved on - Sony ICD-UX200 | Operating Instructions - Page 84
If you connect more than two USB devices to your computer, normal operation will not be guaranteed. • Use of this IC recorder with a USB hub or a USB connection support cable other than the supplied cable is not guaranteed. • A malfunction may occur depending on the USB devices connected at the same - Sony ICD-UX200 | Operating Instructions - Page 85
to your computer, you can see the structure of folders and files on the computer screen. "IC RECORDER" VOICE Folder for messages recorded using the IC recorder FOLDER01 FOLDER10 Conversation*1 Folder transferred from your computer Utilizing Your Computer MUSIC POP OLDIES*1 *2 *3 85GB - Sony ICD-UX200 | Operating Instructions - Page 86
(page 89). P Notes • You cannot copy 511 or more folders (except VOICE folders) or files to the root directory that is located immediately below "IC RECORDER" on the computer. This is due to system limitations (for ICD-UX200/ UX200F only). • If no title, or artist name has been registered "Unknown - Sony ICD-UX200 | Operating Instructions - Page 87
You can save messages or folders by copying them from the IC recorder to your computer. 1 Connect the IC recorder to your computer (page 84). 2 Copy messages or folders you want , refer to the operating instructions supplied with the software application, or contact the respective manufacturers - Sony ICD-UX200 | Operating Instructions - Page 88
recognize up to 500 folders. You can copy up to 999 files to one folder and up to 5,000 files in total. 3 Disconnect the IC recorder from your computer (page 94). 4 Press . 5 Press v or V on the control button to select the folder ( ) in which music files are stored, and then press - Sony ICD-UX200 | Operating Instructions - Page 89
start playback. 8 Press x STOP to stop playback. The maximum playback time (tracks*), when playing music files using the IC recorder, is as follows. 48 kbps ICD- 89 hr. UX200/ 15 min. UX200F (1,338 tracks) ICD- 178 hr. UX300/ 40 min. UX300F (2,680 tracks) 128 kbps 256 kbps 33 hr. 16 hr. 25 min - Sony ICD-UX200 | Operating Instructions - Page 90
For details, see page 45. Adjusting the playback speed - the DPC (Digital Pitch Control) function You can adjust a playback speed between +100% and You can only adjust the playback speed between 0% and -50% when messages are recorded as WMA/AAC-LC files. For details, see page 43. Selecting a sound - Sony ICD-UX200 | Operating Instructions - Page 91
is connected to your computer directly or using a USB connection support cable, image data or text data on the computer, as well as messages or files recorded using the IC recorder can be temporarily stored in the IC recorder. Your computer must meet the specified system requirements to use the - Sony ICD-UX200 | Operating Instructions - Page 92
software application that allows you to recognize and transcribe your recorded voice in a message and convert it into a text file. For details on Dragon NaturallySpeaking, refer to the operating instructions supplied with Dragon NaturallySpeaking. For information on using Dragon NaturallySpeaking - Sony ICD-UX200 | Operating Instructions - Page 93
• Refer to the operating instructions or the help supplied with Dragon to the mode you normally use for voice recognition software. • Set "Mic Sensitivity" to "Low " in the menu. • Hold the IC recorder firmly and start recording. Hold the IC recorder so that the microphone is about an - Sony ICD-UX200 | Operating Instructions - Page 94
Device." The icon can be different on different operating systems. On the Macintosh screen, drag the "IC RECORDER" on the desktop to "Trash" and drop it there. For details on disconnecting the IC recorder from your computer, refer to the operating instructions supplied with your computer. 94 GB - Sony ICD-UX200 | Operating Instructions - Page 95
Additional Information Using a USB AC Adaptor (not supplied) Additional Information USB connector of the IC recorder USB AC adaptor (not supplied) You can charge the rechargeable battery by connecting the IC recorder to an AC outlet using an AC-U50AD (U.S.A. and Canada only) or an AC-U50A (Latin - Sony ICD-UX200 | Operating Instructions - Page 96
to the IC recorder should not be connected to or disconnected from the AC outlet. Doing so may damage the data. If the IC recorder is required extended period of time. This is not a malfunction of the IC recorder. Wait until the start-up display disappears from the display window. • While a - Sony ICD-UX200 | Operating Instructions - Page 97
• Should any solid object or liquid fall into the unit, remove the battery and have the unit checked by qualified personnel before operating it any further. • lamp or a mobile phone during recording or playback. • Noise may be recorded when an object, such as your finger, etc., rubs - Sony ICD-UX200 | Operating Instructions - Page 98
, benzine or thinner. If you have any questions or problems concerning your unit, please consult your nearest Sony dealer. Backup recommendations To avoid potential risk of data loss caused by accidental operation or malfunction of the IC recorder, we recommend that you save a backup copy of your - Sony ICD-UX200 | Operating Instructions - Page 99
with your operating system, please access the support home page for the IC recorder: U.S.A.: http://www.sony.com/recordersupport Canada: http://www.sony.ca/ElectronicsSupport/ http://fr.sony.ca/ElectronicsSupport/ Latin American areas: http://www.sony-latin.com/index.crp Hardware environment: - Port - Sony ICD-UX200 | Operating Instructions - Page 100
compatible, however, MBR (Multi Bit Rate), Lossless, Professional, and Voice are not supported. This IC recorder cannot play back DRM protected contents. Not all encoders are supported. *3 The NoiseSubstitution function is not supported, therefore, playback becomes simple playback with 32 kbps bit - Sony ICD-UX200 | Operating Instructions - Page 101
36.6 mm × 98.5 mm × 14.6 mm (1 1/2 in. × 4 in. × 19/32 in.) Mass (JEITA)*5 Approx. 58 g (2 oz) including NH-AAA rechargeable battery *5 Measured value by the standard of JEITA (Japan Electronics and Information Technology Industries Association) Supplied accessories See page 7. Optional accessories - Sony ICD-UX200 | Operating Instructions - Page 102
. 55 min. 535 hr. 45 min. ICD-UX300/ UX300F 44 hr. 40 min. 67 hr. 178 hr. 40 min. 268 hr. 5 min. 1,072 hr. 25 min. (hr.: hours/min.: minutes) *6 When you are going to record continuously for a long time, you may have to replace the battery with a new one in the midst - Sony ICD-UX200 | Operating Instructions - Page 103
min. 30 min. FM reception: Approx. 6 hr. (hr.: hours/min.: minutes) When using Sony LR03 (SG) (size AAA) alkaline battery Recording ST*2 mode STSP*3 STLP*4 SP*5 LP*6 Music file (128 kbps/ 44.1 kHz) Recording Playback*7 through speaker Approx. 11 hr. Approx. 12 hr. Approx. 15 hr. Approx - Sony ICD-UX200 | Operating Instructions - Page 104
using methods proprietary to Sony. The battery life may shorten depending on how you operate the IC recorder. *2 ST: Stereo high quality recording mode *3 STSP: Stereo standard recording mode *4 STLP: Stereo long play recording mode *5 SP: Monaural standard play recording mode *6 LP: Monaural long - Sony ICD-UX200 | Operating Instructions - Page 105
Troubleshooting Troubleshooting Before taking the IC recorder for repair, check the following sections. Should any problem persist after you have made these checks, consult your nearest Sony dealer. Please note that recorded messages may be erased during service or repair work. Symptom Remedy - Sony ICD-UX200 | Operating Instructions - Page 106
another message, or move a message. Erase some of the messages (page 26) or erase all the messages after you store them on your computer. Recording is interrupted. • The VOR function is activated. Set "VOR" to "OFF" in the menu (page 32). Noise is heard. • An object, such as your finger, - Sony ICD-UX200 | Operating Instructions - Page 107
to adjust the speed in DPC again (page 43). "--:--" is displayed. • You have not set the clock (page 13). "--y--m--d" or "--:--" is • The date of recording will not be displayed if you recorded the displayed on the REC Date message when the clock was not set. display. Troubleshooting 107GB - Sony ICD-UX200 | Operating Instructions - Page 108
The menu items displayed are different depending on the displayed in the menu mode. operation modes (stop mode, playback mode, recording mode, and FM radio reception mode) (page 72). The battery life is short. • The battery life on page 103 is based on playback with the volume level set to 15. The - Sony ICD-UX200 | Operating Instructions - Page 109
indicator disappears in the middle of charging. • A rechargeable battery other than an NH-AAA model or a battery other than a rechargeable battery (alkaline battery, manganese battery, etc.) has been inserted. • The rechargeable battery has deteriorated. • When playing back messages using the built - Sony ICD-UX200 | Operating Instructions - Page 110
Symptom Remedy You cannot charge the • When you connect the IC recorder to a computer which is not battery by connecting the IC running, the battery will not be charged. recorder to your computer. • Even if the computer is on, and the computer is in a mode of reduced operation (standby or - Sony ICD-UX200 | Operating Instructions - Page 111
battery and insert it again (page 9). • You may have formatted the memory of the IC recorder using the computer. Use the IC recorder support cable. Connect the IC recorder directly to your computer or use the supplied USB connection support can be played back using the IC recorder (MP3/WMA/AAC-LC). • - Sony ICD-UX200 | Operating Instructions - Page 112
. Or charge the rechargeable battery or replace the old rechargeable battery with a new one. • The remaining memory capacity of the IC recorder is insufficient. Erase some messages before recording. • When there are already 99 messages in the selected folder or the total number of the file stored in - Sony ICD-UX200 | Operating Instructions - Page 113
or cancel "Read only" on your computer to edit the message using the IC recorder. • This data is not in a file format that is supported by the IC recorder. The IC recorder supports MP3 files (.mp3), WMA files (.wma), and AAC-LC files (.m4a). See "Design and specifications" on page 100. • You - Sony ICD-UX200 | Operating Instructions - Page 114
, no folders are displayed in the display window, therefore, the folder setting will be changed. • A system error other than the above has occurred. Remove the battery and re-insert it. • When the "Noise Cut" is set to "ON" in the menu, the setting of the "Effect" menu does not work. Cancel - Sony ICD-UX200 | Operating Instructions - Page 115
time varies from the maximum ST recording time. mode recording time to the maximum LP mode recording time. • The sum of the number on the counter (elapsed recording time) and the remaining recording time may be less than the IC recorder's maximum recording time. You cannot display or play - Sony ICD-UX200 | Operating Instructions - Page 116
Display Window Guide Display when stopped or recording A Elapsed time/Remaining time/ Recording date and time indication B ( ) Folder name/ Message title name/ Artist name/ File name indication Press v or V of the control button to display a folder name, message - Sony ICD-UX200 | Operating Instructions - Page 117
the IC recorder cannot get the recording mode information. : Unknown F Selected message number/Total number of menu. K Battery indicator When a dry battery is used, the indicator shows the remaining battery power. While charging the rechargeable battery an animation appears. 117GB Troubleshooting - Sony ICD-UX200 | Operating Instructions - Page 118
Display during playback Display when listening to the FM radio (for ICD-UX200F/UX300F only) L Noise cut/Effect Displays the "Noise Cut" or "Effect" setting in the menu. messages are played back repeatedly. N FM indicator O Radio frequency P Preset number Q Receiver sensitivity : LOCAL : DX 118GB - Sony ICD-UX200 | Operating Instructions - Page 119
the volume 23, 34 Alarm 50, 72, 78 Alkaline battery 103 B Battery life 103 Built-in microphones 19 C Connecting the IC recorder to your computer 84 Copying messages 87 Copying music files 88 Cue/Review 42 D Dividing a message 34, 58 DPC (Digital Pitch Control 43 E Easy Search 42, 72, 76 - Sony ICD-UX200 | Operating Instructions - Page 120
Input 73, 82 SYNC REC 73, 82 Time Display 73, 80 USB Charge 73, 81 VOR 72, 75 Microphone sensitivity 29, 72, 74 Monitoring the recording 34 Moving a message 56, 72, 78 MP3 files 100 N Noise 97 Noise Cut 47, 72, 75 P Pause - Sony ICD-UX200 | Operating Instructions - Page 121
99 ST 29, 72, 74, 102, 103 STLP 29, 72, 74, 102, 103 STSP 29, 72, 74, 102, 103 Synchronized recording 38, 73, 82 System Limitations 115 T Troubleshooting 105 U USB AC adaptor 95 USB Memory 91 V Voice recognition software 92 VOR (Voice Operated Recording 32, 72, 75 W WMA files 100 121GB - Sony ICD-UX200 | Operating Instructions - Page 122
or trademarks of Microsoft Corporation in the United States and/or other countries. • Apple, Macintosh and Mac OS are trademarks of Apple Inc., registered in the USA and other countries. • Nuance, the respective holders. Furthermore, " ™ " and "®" are not mentioned in each case in this manual. 122GB - Sony ICD-UX200 | Operating Instructions - Page 123
123GB - Sony ICD-UX200 | Operating Instructions - Page 124
-
 1
1 -
 2
2 -
 3
3 -
 4
4 -
 5
5 -
 6
6 -
 7
7 -
8
-
9
-
10
-
11
-
12
-
13
-
14
-
15
-
16
-
17
-
18
-
19
-
20
-
21
-
22
-
23
-
24
-
25
-
26
-
27
-
28
-
29
-
30
-
31
-
32
-
33
-
34
-
35
-
36
-
37
-
38
-
39
-
40
-
41
-
42
-
43
-
44
-
45
-
46
-
47
-
48
-
49
-
50
-
51
-
52
-
53
-
54
-
55
-
56
-
57
-
58
-
59
-
60
-
61
-
62
-
63
-
64
-
65
-
66
-
67
-
68
-
69
-
70
-
71
-
72
-
73
-
74
-
75
-
76
-
77
-
78
-
79
-
80
-
81
-
82
-
83
-
84
-
85
-
86
-
87
-
88
-
89
-
90
-
91
-
92
-
93
-
94
-
95
-
96
-
97
-
98
-
99
-
100
-
101
-
102
-
103
-
104
-
105
-
106
-
107
-
108
-
109
-
110
-
111
-
112
-
113
-
114
-
115
-
116
-
117
-
118
-
119
-
120
-
121
-
122
-
123
-
124
 |
 |
4-156-546-
71
(2)
© 2009 Sony Corporation
IC Recorder
Operating Instructions
Printed in China
ICD-UX200/UX300/UX200F/UX300F
Getting Started
Basic Operations
Other Recording Operations
Other Playback Operations
Editing Messages
Listening to the FM Radio
About the Menu Function
Utilizing Your Computer
Additional Information
Troubleshooting