Sony ICD-UX200 Operating Instructions - Page 84
Connecting the IC recorder to your computer, computer as soon as the connection is
 |
UPC - 027242768338
View all Sony ICD-UX200 manuals
Add to My Manuals
Save this manual to your list of manuals |
Page 84 highlights
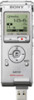
Connecting the IC recorder to your computer IC recorder Computer The IC recorder is recognized by the computer as soon as the connection is made. While the IC recorder is connected to the computer, "Connecting" is displayed in the display window of the IC recorder. If you cannot insert the USB connector of the IC recorder into the USB port of a computer directly, use the supplied USB connection support cable. To USB port 1 Slide the USB lever on the back of the IC recorder in the direction of the arrow, and insert the USB connector into the USB port of a running computer. 2 Make sure the IC recorder has been recognized properly. On the Windows screen; open "My Computer" or "Computer," and make sure that "IC RECORDER" has been recognized. On the Macintosh screen; make sure that an "IC RECORDER" drive is displayed on the desktop. 84 GB USB connection support cable (supplied) P Notes • If you connect more than two USB devices to your computer, normal operation will not be guaranteed. • Use of this IC recorder with a USB hub or a USB connection support cable other than the supplied cable is not guaranteed. • A malfunction may occur depending on the USB devices connected at the same time.
-
 1
1 -
2
-
3
-
4
-
5
-
6
-
7
-
8
-
9
-
10
-
11
-
12
-
13
-
14
-
15
-
16
-
17
-
18
-
19
-
20
-
21
-
22
-
23
-
24
-
25
-
26
-
27
-
28
-
29
-
30
-
31
-
32
-
33
-
34
-
35
-
36
-
37
-
38
-
39
-
40
-
41
-
42
-
43
-
44
-
45
-
46
-
47
-
48
-
49
-
50
-
51
-
52
-
53
-
54
-
55
-
56
-
57
-
58
-
59
-
60
-
61
-
62
-
63
-
64
-
65
-
66
-
67
-
68
-
69
-
70
-
71
-
72
-
73
-
74
-
75
-
76
-
77
-
78
-
 79
79 -
 80
80 -
 81
81 -
 82
82 -
 83
83 -
 84
84 -
 85
85 -
 86
86 -
 87
87 -
 88
88 -
 89
89 -
90
-
91
-
92
-
93
-
94
-
95
-
96
-
97
-
98
-
99
-
100
-
101
-
102
-
103
-
104
-
105
-
106
-
107
-
108
-
109
-
110
-
111
-
112
-
113
-
114
-
115
-
116
-
117
-
118
-
119
-
120
-
121
-
122
-
123
-
124
 |
 |
