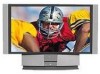
Sony KF50XBR800 Operating Instructions
Sony KF50XBR800 - 50" Rear Projection TV Manual
 |
UPC - 027242616028
View all Sony KF50XBR800 manuals
Add to My Manuals
Save this manual to your list of manuals |
Sony KF50XBR800 manual content summary:
- Sony KF50XBR800 | Operating Instructions - Page 1
LCD Projection TV KF-50XBR800/60XBR800 4-091-169-12(1) © 2002 Sony Corporation - Sony KF50XBR800 | Operating Instructions - Page 2
. You are cautioned that any changes or modifications not expressly approved in this manual could void your warranty and your authority to operate this equipment. This document is for the remote control RM-Y912. MODEL: KF-50XBR800, KF-60XBR800 Please keep this notice with the instruction manual. 2 - Sony KF50XBR800 | Operating Instructions - Page 3
To prevent internal heat buildup, do not block the ventilation openings. ❑ Do not install the LCD Projection TV in a hot or humid place, or . Owner's Record The model and serial numbers are located at the rear of the LCD Projection TV, below the Sony logo, on the sticker, and also on the TV box - Sony KF50XBR800 | Operating Instructions - Page 4
block any ventilation openings. Install in accordance with the manufacturer's instructions consult an electrician for replacement of the obsolete outlet. Use only with the cart stand, tripod, bracket, or table instructions placed on the set or described in the operating instructions or service manual - Sony KF50XBR800 | Operating Instructions - Page 5
service technician. It is normal for some TV sets to make occasional snapping or popping sounds, particularly when being turned on or off. Object and Liquid Entry Never push objects of any kind into the set through the cabinet slots as they may touch dangerous voltage points or short out parts stand - Sony KF50XBR800 | Operating Instructions - Page 6
block overhead power lines or other electric light or power circuits, or where grounding of the mast and supporting structure, grounding of the lead Power service grounding electrode system (NEC Art 250 Part H) instructions. Adjust only those controls that are specified in the operating instructions - Sony KF50XBR800 | Operating Instructions - Page 7
wall. Projection lamp ❑ Your LCD projection TV uses a projection lamp as its light source. When the projection lamp wears out after using the LCD projection TV for a long period of time, the screen image becomes dark, or no image will appear on the display. If the lamp replacement indicator of the - Sony KF50XBR800 | Operating Instructions - Page 8
Contents Introducing the Sony LCD Projection TV Presenting the Sony LCD Projection TV 9 Using This Manual 10 Enjoying Your LCD Projection TV 11 Replacing the Lamp 13 Installing and Connecting the LCD Projection TV Contents 17 Inserting Batteries into the Remote Control ..........17 Carrying - Sony KF50XBR800 | Operating Instructions - Page 9
the Sony LCD Projection TV Introducing the Sony LCD Projection TV Presenting the Sony LCD Projection TV Thank you for purchasing the Sony LCD Projection TV. This manual is for models KF-50XBR800 and KF-60XBR800. Features Some of the features that you will enjoy with your new LCD projection TV - Sony KF50XBR800 | Operating Instructions - Page 10
you how to begin using your new LCD projection TV. It also shows you how to use your remote control functions. 3 Using the menus This section teaches you how to access on-screen menus and adjust your LCD projection TV settings. Instructions in this manual are written for the remote control. Similar - Sony KF50XBR800 | Operating Instructions - Page 11
image becomes dark. Replace the lamp with a new Sony XL-2000U replacement lamp (not supplied). ✍ Be sure to attach the lamp cover securely; otherwise, your LCD projection TV will not turn on. For details on lamp replacement, see "Replacing the Lamp" on page 13. ✍ The light emitted from the lamp - Sony KF50XBR800 | Operating Instructions - Page 12
Introducing the Sony LCD Projection TV Notes on the LCD Projection TV To enjoy clear pictures ❑ Be sure not to allow sunlight or light from a lamp to shine directly onto the screen. ❑ The screen surface is easily scratched. Do not rub, touch, or tap it with a sharp or abrasive object (see " - Sony KF50XBR800 | Operating Instructions - Page 13
resulting in injury or death. Be sure to follow the instructions below. ❑ Use a Sony XL-2000U replacement lamp (not supplied) for replacement. Failure to do so may damage the LCD projection TV. ❑ Do not remove the lamp for any purpose other than replacement. Failure to do so may cause fire or a skin - Sony KF50XBR800 | Operating Instructions - Page 14
cord after turning off the main power. Wait at least 30 minutes to allow the lamp to cool down before replacing it. Take the new lamp out of the box. 3 Remove the front panel. Hold the LCD projection TV firmly so that it does not move. Grasping the right end of the front panel - Sony KF50XBR800 | Operating Instructions - Page 15
front glass of the lamp or the surrounding parts. Introducing the Sony LCD Projection TV Loosen the two screws with the hex key supplied with the lamp. Hold the handle and pull straight out. ✍ After it has cooled, place the removed lamp into the empty box of the replacement lamp. Never put the - Sony KF50XBR800 | Operating Instructions - Page 16
in the illustration. ✍ Consult your Sony dealer for a Sony XL-2000U replacement lamp. ✍ Take great care when replacing the lamp or plugging in/unplugging the connecting cords. If you handle them roughly, the LCD projection TV may fall or be moved, and the TV stand or floor surfaces may be scratched - Sony KF50XBR800 | Operating Instructions - Page 17
remote control and two AAA batteries. No peripheral cables are included. If you intend to add additional equipment to your LCD projection TV, please check the hookup instructions for your desired setup before you begin. You may need to purchase cables and/or splitters to complete the hookup properly - Sony KF50XBR800 | Operating Instructions - Page 18
two people. Do not grasp the pedestal or the front panel of the LCD projection TV, otherwise these parts might break off. When moving the LCD projection TV, support the screen bottom with one hand while grasping the top part with the other hand, as shown in the illustration below. Do not grasp the - Sony KF50XBR800 | Operating Instructions - Page 19
, etc. Bracket with the screw Using the LCD projection TV stand with support belts ❑ You can also use the LCD projection TV stand SU-GW1 (not supplied) with support belts. When Installing Your LCD Projection TV Against a Wall Keep your LCD projection TV at least 10 cm (4 inches) from the wall. 19 - Sony KF50XBR800 | Operating Instructions - Page 20
your viewing position. For the best picture quality, install your LCD projection TV within the areas shown below. Sit at least 1.8 m (approx. 6 ft.) for KF-50XBR800 or 2.2 m (approx. 7 ft.) for KF-60XBR800 away from your LCD projection TV, and within 60° of the vertical viewing area, and 130° of the - Sony KF50XBR800 | Operating Instructions - Page 21
Installing and Connecting the LCD Projection TV LCD Projection TV Controls and Connectors Front Panel Menu Controls The front panel menu controls allow access to the on-screen menus without the use of a remote control. Pressing MENU brings up the on-screen menus. The arrow buttons move the on- - Sony KF50XBR800 | Operating Instructions - Page 22
Installing and Connecting the LCD Projection TV Item 1 MEMORY STICK 2 MEMORY STICK ACCESS LED Description Memory when the indicator is lit.) LCD Projection TV Rear and Side Panel Connectors Rear of LCD projection TV 22 Left side of LCD projection TV VIDEO 2 IN S VIDEO VIDEO L (MONO) AUDIO R - Sony KF50XBR800 | Operating Instructions - Page 23
S OUT jack on the LCD projection TV with the CONTROL S cable. To control the LCD projection TV with a remote control for another Sony product, connect the CONTROL S OUT jack with personal computers. See the instruction manual that came with your equipment for details about connecting and using it - Sony KF50XBR800 | Operating Instructions - Page 24
connector types during set up. Coaxial cable Standard TV cable and antenna cable Plug Type Push into cable High quality video cable for enhanced picture quality Align guides and push into connection. Audio/Video cable Push into are exclusive to Sony products and allow greater control of all - Sony KF50XBR800 | Operating Instructions - Page 25
/UHF Antenna connector C VHF and UHF 75-ohm coaxial cable 300-ohm twin lead cable U/V Splitter (not supplied) Rear of LCD projection TV VHF/UHF ✍ It is highly recommended to connect the antenna using a 75-ohm coaxial cable to get optimum picture quality. A 300-ohm twin lead cable - Sony KF50XBR800 | Operating Instructions - Page 26
not feature local channels, you may find this set up convenient. CATV cable (No connection to TO CONVERTER) Antenna cable AUX Rear of LCD projection TV TO CONVERTER VHF/UHF Select CABLE or antenna (ANT) mode by pressing ANT on the remote control. ✍ To receive channels with an antenna, you need - Sony KF50XBR800 | Operating Instructions - Page 27
3 Using a coaxial cable, connect the cable box's OUT jack to the LCD projection TV's AUX jack. Cable box IN OUT Rear of LCD projection TV AUX 75-ohm coaxial cable (not supplied) TO CONVERTER Signal CATV cable (unscrambled channels) VHF/UHF ✍ Pressing ANT on the remote control switches between - Sony KF50XBR800 | Operating Instructions - Page 28
from your cable service to the cable box's IN jack. 2 Using a coaxial cable, connect the cable box's OUT jack to the LCD projection TV's VHF/UHF jack. Cable Rear of LCD projection TV VHF/UHF IN OUT Cable box Also, set Cable to ON in the Channel menu (see page 73). ✍ Your Sony remote control - Sony KF50XBR800 | Operating Instructions - Page 29
VHF/UHF jack. 3 Using AUDIO and S VIDEO cables, connect the VCR's Audio and S Video OUT jacks to the LCD projection TV's AUDIO and S VIDEO IN jacks. Rear of LCD projection TV Coaxial cable S VIDEO VIDEO (yellow) AUDIO-L (white) AUDIO-R (red) VCR VMC-810S/820S (not supplied) Cable YC-15V/30V - Sony KF50XBR800 | Operating Instructions - Page 30
❑ You want to enjoy the Twin View feature. With this setup you can: ❑ Use the LCD projection TV remote control to change channels on your cable box when the signal is scrambled. To program your Sony remote control to operate your cable box, see "Programming the Remote Control" on page 82. ❑ Use - Sony KF50XBR800 | Operating Instructions - Page 31
VIDEO, use a VIDEO cable (yellow) instead of the S VIDEO cable. ✍ You will not be able to change channels on the VCR. Set your LCD projection TV and VCR to channel 3 or 4, depending on your cable box channel output. ✍ Pressing ANT on the remote control switches between the channels coming in through - Sony KF50XBR800 | Operating Instructions - Page 32
not supplied) ✍ To perform tape editing, set the LCD projection TV to the video input intended for playback by pressing TV/VIDEO on the remote control. ✍ You may need to change the video input on your VCR. Consult your VCR's operating manual for instructions. ✍ If your VCRs have an S VIDEO jack: For - Sony KF50XBR800 | Operating Instructions - Page 33
. ✍ If your satellite receiver is not equipped with S VIDEO, use a VIDEO cable (yellow) instead of the S VIDEO cable. Rear of LCD projection TV Coaxial cable S VIDEO VIDEO (yellow) AUDIO-L (white) AUDIO-R (red) VMC-810S/820S (not supplied) YC-15V/30V (not supplied) Satellite receiver Satellite - Sony KF50XBR800 | Operating Instructions - Page 34
IN jack. 2 Connect the CATV cable to the VCR's VHF/UHF IN jack. 3 Using a coaxial cable, connect the VCR's OUT jack to the LCD projection TV's VHF/UHF jack. 4 Using AUDIO and S VIDEO cables, connect the satellite receiver's AUDIO and S VIDEO OUT jacks to the VCR's AUDIO and S VIDEO IN jacks - Sony KF50XBR800 | Operating Instructions - Page 35
Be sure your VCR's video input is set correctly. Consult your VCR's operating manual for instructions. ✍ Use TV/VIDEO to select - VIDEO 1 to watch satellite TV or the VCR (your VCR must be turned on). - VHF/UHF to watch cable TV. ✍ If your VCR or satellite receiver is not equipped with S VIDEO, use - Sony KF50XBR800 | Operating Instructions - Page 36
an Audio Receiver Disconnect all power sources before making any connections. Using audio cables, connect the LCD projection TV's AUDIO OUT (VAR/ FIX) jacks to the audio receiver's audio LINE IN jacks. Rear of LCD projection TV AUDIO-R (red) RK-74A (not supplied) AUDIO-L (white) Line input 36 - Sony KF50XBR800 | Operating Instructions - Page 37
TV Installing and Connecting the LCD Projection TV to the Y, PB and PR jacks on the LCD projection TV. Use the HD/DVD IN 5 or 6 connections. ✍ Audio OUT jacks to the LCD projection TV's AUDIO IN jacks. Be sure to use /DVD IN 5 or 6). Rear of LCD projection TV Y VMC-10HG (not supplied) PB PR DVD - Sony KF50XBR800 | Operating Instructions - Page 38
aspect ratio to 16:9 on your DVD player. For details, refer to the operating instructions supplied with your DVD player. ✍ Use TV/VIDEO on the remote control to switch between the VCR, DVD player and cable TV inputs. ✍ If your VCR is not equipped with S VIDEO, use a VIDEO cable (yellow) instead of - Sony KF50XBR800 | Operating Instructions - Page 39
all power sources before making any connections. z Be sure to read the Set-top box manual. 1 Using three separate component video cables, connect the Digital TV Set-top box's Y, PB and PR jacks to the LCD projection TV. ✍ The Y, PB and PR jacks do not provide audio, so audio cables must be connected - Sony KF50XBR800 | Operating Instructions - Page 40
manual. 1 Using a DVI-D single link cable, connect the Digital TV Set-top box's DVI-HDTV connector to the LCD projection TV. TV Digital TV Set-top box OPTICAL AUDIO OUT VIDEO OUT (480i) 1 2 L1 L2 OPTICAL S. VIDEO R1 R2 AUDIO OUT VIDEO OUT (1080i/720p/480p) Y PB TYPE PR AUTHORIZED SERVICES - Sony KF50XBR800 | Operating Instructions - Page 41
's AUDIO and S VIDEO IN jacks. ✍ If you have a mono camcorder, connect its left audio output to the LCD projection TV's AUDIO L (MONO) jack. ✍ If your camcorder is not equipped with S VIDEO, use a VIDEO cable (yellow) instead of the S VIDEO cable. VIDEO 2 IN S VIDEO VIDEO L AUDIO R S - Sony KF50XBR800 | Operating Instructions - Page 42
Using the AUDIO and VIDEO cable, connect the MONITOR OUT jacks to the recording VCR's AUDIO and VIDEO IN jacks. Rear of LCD projection TV Playback VCR A/V cable VIDEO AUDIO L AUDIO R Recording VCR A/V cable ✍ When the playback VCR is equipped with the S VIDEO OUT jack, connect the S VIDEO jack - Sony KF50XBR800 | Operating Instructions - Page 43
the CONTROL S Feature CONTROL S allows you to control your LCD projection TV system and other Sony equipment with one remote control. In addition to allowing you to control multiple devices with one remote control, the CONTROL S feature allows you to always - Sony KF50XBR800 | Operating Instructions - Page 44
indicator lights up. 3 Press CH+ on your LCD projection TV to run Auto Setup, or press CH- to exit. If you use the channel buttons on your remote control, be sure to use . LCD projection TV front panel LAMP TIMER STAND BY ✍ You can run Auto Program by selecting it in the Channel menu, as described - Sony KF50XBR800 | Operating Instructions - Page 45
. Select the equipment (TV, SAT/CABLE, DVD/VCR) that you want to operate. The indicator lights up momentarily when pushed to 9 When the menu is displayed, move the on-screen cursor. X: Pause x: Stop m: Rewind M: Fast-Forward H: Playback 0 GUIDE qa INDEX : When the menu is displayed, select - Sony KF50XBR800 | Operating Instructions - Page 46
- 9 and ENTER qh z REC RESET qj FAVORITES qk FREEZE ql MEMORY STICK w; MTS/SAP wa CH +/- ws MENU Description Adjusts the volume. Turn on and off the LCD projection TV and other audio/ video equipment you have programmed into the remote control. For instructions, see "Programming the Remote Control - Sony KF50XBR800 | Operating Instructions - Page 47
buttons found on your remote control. Using the Features Buttons for LCD Projection TV Operations RM-Y912 1 FUNCTION Press until the TV indicator lights up. This activates the remote control for use with the LCD projection TV. 2 ANT- (AUX input) Press to change between the VHF/UHF input and the - Sony KF50XBR800 | Operating Instructions - Page 48
Setup menu, your LCD projection TV will skip the video input you selected (see "Video Label" on page 80). qs MTS/SAP Press to scroll through the Multi-channel TV with minimum enhancements. Mild: Select to smooth the outline of digital image. When you select each mode, you can also adjust the picture - Sony KF50XBR800 | Operating Instructions - Page 49
1 Connect the DTV receiver to HD/DVD IN 5 or 6 on the LCD projection TV (for details, see page 39). 2 Press TV/VIDEO to select HD/DVD IN 5 or 6. 3 Select a digital channel on the DTV receiver. For details, see the Operating Manual of the DTV receiver. 4 Adjust the volume of the LCD projection - Sony KF50XBR800 | Operating Instructions - Page 50
want to clear. Press and then press RESET. 7 Press MENU to exit the Menu. z For details on using the Channel Menu, see page 73. 1 Press FAVORITES Press to select. ✍ When the remote control mode is set to other than TV mode, you can display the Favorite Channels. However, you cannot select the channel - Sony KF50XBR800 | Operating Instructions - Page 51
can also change the size of both the left and right pictures. Activating Twin Pictures To display twin pictures 1 Make sure your LCD projection TV is tuned to a working channel. 2 Press . Using the Features Activating the Picture To cancel twin pictures ❑ Press again (or press ). Although two - Sony KF50XBR800 | Operating Instructions - Page 52
view a different source (such as a VCR or DVD player) in the second window by using the TV/VIDEO button. ❑ Sources connected to the AUX, VIDEO 5, VIDEO 6, and VIDEO 7 inputs display in appears larger. ❑ Twin View does not display channels that are blocked by parental settings (see page 75). 52 - Sony KF50XBR800 | Operating Instructions - Page 53
already activated). 2 Press V to enlarge the picture and v to reduce the picture. Using the Features ✍ When you adjust the twin screen sizes, the LCD projection TV memorizes the change. The next time you use the Twin View function, the memorized sizes appear. 53 - Sony KF50XBR800 | Operating Instructions - Page 54
numbers, recipes, etc. To use the Freeze function 1 When the program information you want to capture is displayed, press FREEZE. 2 The LCD projection TV switches to Twin View mode and displays the "frozen" picture on the right, while the current program continues on the left. Current program in - Sony KF50XBR800 | Operating Instructions - Page 55
Using the Features Using the Features Using Scrolling Channel Index Scrolling Channel Index allows you to view and select from all receivable channels scrolling on the screen without leaving the current channel. ✍ Scrolling Channel Index will not function when Parental Lock is activated. To use the - Sony KF50XBR800 | Operating Instructions - Page 56
Using the Features 4 Press . The selected channel will be enlarged for normal viewing. To cancel Scrolling Channel Index Press again to resume normal viewing. 56 - Sony KF50XBR800 | Operating Instructions - Page 57
the following Screen Mode settings. z You can also access the Screen Mode settings in the Screen menu. For details, see page 71. Wide Zoom enlarges the 4:3 picture to fill the 16:9 screen, keeping the original image as much as possible. Normal returns the 4:3 picture to its original size. Full Mode - Sony KF50XBR800 | Operating Instructions - Page 58
about the using Memory Stick media, see "Notes on Using Memory Stick Media" on page 86. Supported Image Types This LCD projection TV's Memory Stick viewer can display only still images that have been recorded on Memory Stick media by Sony brand digital still and video cameras. ✍ The LCD projection - Sony KF50XBR800 | Operating Instructions - Page 59
cannot be displayed on your LCD projection TV. Unsupported Image Types This LCD projection TV's Memory Stick viewer cannot display any of the following: ❑ Images recorded on digital still cameras and digital video cameras that are not Sony brand ❑ Images recorded using products that are not DCF - Sony KF50XBR800 | Operating Instructions - Page 60
media into the Memory Stick slot. Attempting to insert other objects into the slot may damage the LCD projection TV. To remove a Memory Stick 1 Check that the Memory Stick indicator is off. (When the light is on, this indicates that the LCD projection TV is reading data from the Memory Stick.) 60 - Sony KF50XBR800 | Operating Instructions - Page 61
it is not in use. Displaying the Memory Stick Menu ✍ When the remote control mode is set to other than TV mode, you can display the Memory Stick Menu. However, you cannot select the menu item by using V/v/B/b or . 1 Insert a Memory Stick that contains the images you want to view. For details, see - Sony KF50XBR800 | Operating Instructions - Page 62
Memory Stick Slideshow" on page 64. Setup Allows you to change slideshow options and rotate images. For details, see "Changing the Memory Stick Setup Options" on page 64. 4 To exit the Memory Stick Menu, press CH +/-, TV/VIDEO, ANT, or use the 0-9 buttons and ENTER (or wait 3 seconds) to select - Sony KF50XBR800 | Operating Instructions - Page 63
will take longer to display on screen. 5 To return to the Memory Stick Menu, press the arrow button to Menu and press . ✍ If a blank square appears instead of a thumbnail image, this indicates that the image does not support a thumbnail view. Selecting the icon, however, displays the full-size - Sony KF50XBR800 | Operating Instructions - Page 64
Select: 3 Press the arrow button to highlight an option and press Option Description Menu Returns to the Memory Stick Menu. Slideshow - Interval Decrease or increase the length of time that each image is displayed: 5 seconds, 10 seconds, 1 minute, 5 minutes, or 15 minutes. Slideshow - Repeat - Sony KF50XBR800 | Operating Instructions - Page 65
. 3 Press to rotate an image 90 degrees in a clockwise direction. 4 To return to the Memory Stick Setup Menu, press the arrow button to highlight Menu and press . ✍ If a blank square appears instead of the thumbnail image, this indicates that the image does not support a thumbnail view and cannot be - Sony KF50XBR800 | Operating Instructions - Page 66
menu page for instructions on moving through the menu. To end a menu session ❑ Press MENU again. To end one menu session and move to another ❑ Press V to return to the menu icons. Press B or b to choose the next menu Effect of the sound on your LCD projection TV. Allows you to set the wide screen - Sony KF50XBR800 | Operating Instructions - Page 67
❑ Press RESET on the remote control when in the Video menu. 68Using the Menus Selecting Video Options The Video menu includes the minimum enhancements. Mild Select to smooth the outline of digital image. ✍ You can alter the Video menu settings (Picture, Brightness, Color, etc.) for each Mode - Sony KF50XBR800 | Operating Instructions - Page 68
sources on 24 frame per second films. On The LCD projection TV automatically detects the signal type of a film and processes it appropriately . To return the Custom options to the default factorysettings, press the RESET button. ✍ Advanced Video is unavailable when you have selected Mild picture - Sony KF50XBR800 | Operating Instructions - Page 69
Balance ❑ Press RESET on the remote control when in the Audio menu. 68Using the Menus Selecting Audio Options The Audio menu includes the following broadcast in stereo. Select to automatically switch the LCD projection TV to second audio programs when a signal is received. (If no SAP - Sony KF50XBR800 | Operating Instructions - Page 70
volume output from your audio system can still be controlled by the LCD projection TV's remote control. The LCD projection TV's speakers are turned off and the volume, bass and treble output of the LCD projection TV is fixed. Use your audio receiver's volume control to adjust the volume through your - Sony KF50XBR800 | Operating Instructions - Page 71
Screen menu includes the following options: z To change from one Wide Mode to another, use WIDE MODE on the remote control. Option Wide Mode Select a Screen Mode to use for 4:3 sources. Description Wide Zoom Select to enlarge the 4:3 picture, to fill the 16:9 screen, keeping the original image - Sony KF50XBR800 | Operating Instructions - Page 72
fill the 16:9 screen, keeping the original image as much as possible. Normal Select to return 4:3 Default functions only when the LCD projection TV receives 480i and 480p signals. z If 4:3 change channels (or inputs), Wide Mode is automatically replaced with the 4:3 Default setting. To retain the - Sony KF50XBR800 | Operating Instructions - Page 73
the desired option. 7 Press MENU to exit the menu screen. Selecting Channel Options The Channel menu includes the following options: Option Description cable box or satellite receiver connected AUX 2-6 "Fix" your LCD projection TV's channel setting to 3 or 4 and use the cable box, VCR or - Sony KF50XBR800 | Operating Instructions - Page 74
highlighted character. 5 Repeat to add up to 5 characters to the label. 6 To assign labels to more channels, repeat steps 1-4. 7 Press B to return to the Channel Menu, or press MENU to exit the Menus. z Channel Label is not available (grayed out) when watching the AUX and VIDEO inputs. 74 - Sony KF50XBR800 | Operating Instructions - Page 75
68Using the Menus 68Using the Menus Using the Parent Menu The Parent Menu allows you to set up the TV to block programs according to their content and rating levels. To select the Parent Menu 1 Press MENU. 2 Press B or b to highlight the Parent icon and press . 3 Use the 0-9 buttons on the - Sony KF50XBR800 | Operating Instructions - Page 76
Lock to OFF when in the Parent menu. To change the password 1 Select Change Password option when in the Parent menu using the arrow button, and press . 4 Press MENU to exit the menu screen. You can view a blocked program by entering the password. 1 Press ENTER when tuned to a blocked program. - Sony KF50XBR800 | Operating Instructions - Page 77
following programs may be blocked: emergency broadcasts, political programs, sports, news, public service announcements, religious programs and weather. ✍ The content ratings will increase depending on the level of the age-based rating. For example, a program with a TV-PG V (Violence) rating may - Sony KF50XBR800 | Operating Instructions - Page 78
If you selected Canada as the country of residence on page 76, the Custom Rating Menu includes the following options. (If you selected U.S.A., see page 77.) Option English Rating French for ages under 16. 18 ans+ Programming restricted to adults. See "TV Rating" on page 77 for details. 78 - Sony KF50XBR800 | Operating Instructions - Page 79
the desired option. 7 Press MENU to exit the menu screen. Selecting Setup Options The Setup menu includes the following options: Option Caption time remaining in the program (if the broadcaster offers this service). Displays when the channel is changed or the DISPLAY button is pressed - Sony KF50XBR800 | Operating Instructions - Page 80
Option Video Label Language Description Allows you to label the audio/video components you connected to the LCD projection TV so you can identify them when using TV/VIDEO. When in the Setup menu's Video Label feature, press V or v to highlight an input to label, then press to select it. Use the - Sony KF50XBR800 | Operating Instructions - Page 81
setting. 4 Press MENU to exit the Menu. An LED on the front panel will light, indicating the MENU to exit the Menu. Adjusts the Image on your LCD projection TV. Auto: (Factory setting) Automatically adjust double images or ghosts. 0-3 (manual): Select the value with which double images or ghosts - Sony KF50XBR800 | Operating Instructions - Page 82
for 30 seconds or invalid or incorrect numbers are input, the remote control is reset to the normal TV remote control mode. Tips ❑ If more than one code number is listed, try operate your component with the Sony remote control. In this case, use the component's own remote control unit. RM-Y912 82 - Sony KF50XBR800 | Operating Instructions - Page 83
, 308 Toshiba 312, 311 Manufacturer Wards Yamaha Zenith Code 327, 328, 335, 331, 332 314, 330, 336, 337 331 DVD Players Manufacturer Sony Panasonic Pioneer RCA Toshiba Code 751 753 752 755 754 Cable Boxes Manufacturer Hamlin/Regal Jerrold/G. I. Oak Panasonic Pioneer Scientific Atlanta Tocom - Sony KF50XBR800 | Operating Instructions - Page 84
Other Information Operating Other Components with Your LCD Projection TV Remote Control Operating a VCR Press FUNCTION until the DVD/VCR indicator lights up. To Do This ... Turn on/off Change channels Record Play Stop Fast forward Rewind the tape Pause Search the picture forward or backward - Sony KF50XBR800 | Operating Instructions - Page 85
Operating a Cable Box Press FUNCTION until the SAT/CABLE indicator lights up. To Do This ... Turn on/off Select Cable Box CH +/- JUMP Operating a Satellite Receiver Press FUNCTION until the SAT/CABLE indicator lights up. To Do This ... Turn on/off Select Satellite Receiver Select a channel - Sony KF50XBR800 | Operating Instructions - Page 86
precautions: ❑ To avoid permanent damage to still image data, do not turn off the TV or remove Memory Stick media from the insertion slot while data is being read (as indicated by the Memory Stick indicator light being on). ❑ - Sony KF50XBR800 | Operating Instructions - Page 87
could be station trouble. ❏ The Parental Control feature is activated (see "Using the Parent Menu" on page 75). ❏ If your LCD projection TV's power is on, and LAMP (red) indication is flashing, the lamp for the light source burns out. Replace it with new Sony XL-2000U replacement lamp (see page 13 - Sony KF50XBR800 | Operating Instructions - Page 88
Program in the Channel menu to add receivable channels that are not one channel presently in TV memory (see page 73). ❏ Check your Channel Fix settings (see page 73). Double images, ghosts, or merged colors ❏ Use a highly directional outdoor antenna or a cable (when the problem is caused by - Sony KF50XBR800 | Operating Instructions - Page 89
Setup menu and no text is available. (see page 79 to reset menu on page 80. Some video sources do not appear when you press TV/ VIDEO ❏ Ensure that Video Label is not set to "Skip" (see "Video Label" on page 80). Image does not display ❏ Make sure the image is supported by the LCD projection TV - Sony KF50XBR800 | Operating Instructions - Page 90
goes out and the LCD projection TV enters the standby mode (see page 13). The LAMP indicator flashes. ❑ The lamp for the light source burns out. Replace it with new one (see page 13). If the LCD projection TV is not recovered after correcting the problems, contact with qualified Sony personnel. 90 - Sony KF50XBR800 | Operating Instructions - Page 91
049,088 pixels) High Performance, large diameter hybrid lens F2.4 75 ohm external terminal for VHF/UHF UHP lamp, 100W XL-2000U NTSC, American TV Standard KF-50XBR800: 50 inches, KF-60XBR800: 60 inches 2-13 14-69 1-125 120V, 60 Hz 1 terminal, 3.3 V T.M.D.S., 50 ohms The DVI-HDTV input terminal is - Sony KF50XBR800 | Operating Instructions - Page 92
Other Information In Standby Supplied Accessories Remote Control AAA Batteries Cleaning Cloth Hex key wrench Brackets with screws Optional Accessories TV Stand Lamp AV Cable Audio Cable Control S Cable Component Video Cable AV Receiver Memory Stick media Under 1 W RM-Y912 2 supplied for remote - Sony KF50XBR800 | Operating Instructions - Page 93
setting ON/OFF 73 with VCR, connecting 29 Cable box connecting with VCR 30 using with TV remote control 85 Camcorder, connecting 41 Caption Vision 79 CATV. See Cable. Channel list, adding channels 73 Channel menu 66, 73 Channel Skip/Add 74 Channels Auto Program 73 creating labels 74 setting up 44 - Sony KF50XBR800 | Operating Instructions - Page 94
projection TV 25-43 J JUMP button 45 Jump, using 47 L Label Channels 74 video inputs 80 Lamp, replacing 13-16 M Memory Stick Index 62 indicator (LED) 22 inserting 60 insertion slot 22 Menu 61 precautions 86 Rotate Picture 65 Setup Options 64 Slideshow 64 supported and unsupported Images 58 MEMORY - Sony KF50XBR800 | Operating Instructions - Page 95
46 Twin View™ activating a picture 51 described 9 using 51 V VCR using with TV remote control 84 with cable box, connecting 30 with cable, connecting 29 with satellite receiver, connecting 34 Video inputs, labeling 80 Video menu 66, 67 Video Modes, selecting 67 Viewing area, recommended 20 VOL - Sony KF50XBR800 | Operating Instructions - Page 96
If, after reading this instruction manual, you have additional questions related to the use of your Sony projection TV, please call one of the following numbers (English only). Customers in the continental United States contact the Direct Response Center at: 1-800-222-SONY (7669) Customers in Canada
-
 1
1 -
 2
2 -
 3
3 -
 4
4 -
 5
5 -
 6
6 -
 7
7 -
8
-
9
-
10
-
11
-
12
-
13
-
14
-
15
-
16
-
17
-
18
-
19
-
20
-
21
-
22
-
23
-
24
-
25
-
26
-
27
-
28
-
29
-
30
-
31
-
32
-
33
-
34
-
35
-
36
-
37
-
38
-
39
-
40
-
41
-
42
-
43
-
44
-
45
-
46
-
47
-
48
-
49
-
50
-
51
-
52
-
53
-
54
-
55
-
56
-
57
-
58
-
59
-
60
-
61
-
62
-
63
-
64
-
65
-
66
-
67
-
68
-
69
-
70
-
71
-
72
-
73
-
74
-
75
-
76
-
77
-
78
-
79
-
80
-
81
-
82
-
83
-
84
-
85
-
86
-
87
-
88
-
89
-
90
-
91
-
92
-
93
-
94
-
95
-
96
 |
 |
4-091-169-
12
(1)
© 2002 Sony Corporation
LCD Projection TV
KF-50XBR800/60XBR800