Sony NV-U70 Quick Start Guide - Page 7
Installing the unit, x - installation
 |
UPC - 027242687875
View all Sony NV-U70 manuals
Add to My Manuals
Save this manual to your list of manuals |
Page 7 highlights
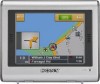
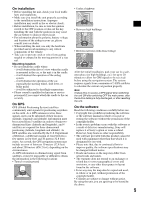
Installing the unit Check that the installation method complies with local traffic laws and regulations before installing and operating the unit. The unit can either be installed on a windshield (page 7), or a dashboard with the supplied mounting plate and screws (page 9). About the main power switch Before installation, switch on the main power by sliding the POWER switch to the ON position. POWER OFF ON RESET CHG OPFOFWEORN 1 Attach the cradle on the windshield. Figure example of completed cradle installation Follow steps 1 - 3 to complete. 1 Clean and dry the surface of the suction cup. 2 Press the center of suction cup firmly against the windshield to remove the remaining air inside it, then press the lever. Thereafter, you can turn the unit on/off by pressing ?/1 on the top right of the unit. Notes • Keep main power on unless the unit is not to be used for more than 3 months. • If you switch off the main power, it may take time to receive GPS signals when switching on again. About the suction mount Before you start, choose a position on the windshield that is clearly visible to the driver without obstructing the road view, and make sure all surfaces are clean and dry. The optional cradle NVA-CU3 can also be installed following the steps below. Notes • Install the unit in a safe place where it does not interrupt the GPS signal. • Detach and reattach the cradle regularly as cup suction is affected by high/low temperature, extended use, etc. • Be sure to keep a distance between the cradle and dashboard when installing. x 3 Holding the left knob*, loosen the right knob and set the approximate vertical angle, then retighten. *The left knob does not turn. To tighten To loosen 7 continue to next page t
-
 1
1 -
 2
2 -
 3
3 -
 4
4 -
 5
5 -
 6
6 -
 7
7 -
 8
8 -
 9
9 -
 10
10 -
 11
11 -
 12
12 -
13
-
14
-
15
-
16
-
17
-
18
-
19
-
20
-
21
-
22
-
23
-
24
-
25
-
26
-
27
-
28
-
29
-
30
-
31
-
32
-
33
-
34
-
35
-
36
-
37
-
38
-
39
-
40
-
41
-
42
-
43
-
44
-
45
-
46
-
47
-
48
-
49
-
50
-
51
-
52
-
53
-
54
-
55
-
56
-
57
-
58
-
59
-
60
-
61
-
62
-
63
-
64
-
65
-
66
-
67
-
68
 |
 |
