Sony PCG-GRX550 VAIO User Guide
Sony PCG-GRX550 - VAIO - Pentium 4-M 1.6 GHz Manual
 |
UPC - 027242604711
View all Sony PCG-GRX550 manuals
Add to My Manuals
Save this manual to your list of manuals |
Sony PCG-GRX550 manual content summary:
- Sony PCG-GRX550 | VAIO User Guide - Page 1
the center Jog Dial control 22 Launcher mode 23 Guide mode 24 Center Jog Dial back button 24 Using the center Jog Dial control with Sony software ......25 Using the center Jog Dial control with other software ......25 Using the Optical Disc Drive 26 To insert a disc 26 To eject a disc 27 - Sony PCG-GRX550 | VAIO User Guide - Page 2
Notes on using Memory Stick media 38 Using a Second Battery Pack 40 To insert a second battery pack 40 To charge the second battery pack 41 To remove the second battery pack 42 Using the Weight Saver 43 To attach the weight saver 43 To remove the weight saver 44 Using Power Saving Modes 45 - Sony PCG-GRX550 | VAIO User Guide - Page 3
drive 59 To remove a floppy disk from the external floppy disk drive 59 To disconnect an external floppy disk drive when the notebook is on 60 To carry an external floppy disk drive player, active speaker, or an amplifier...67 Connecting an Audio-Video Device 69 To change the display 72 Connecting - Sony PCG-GRX550 | VAIO User Guide - Page 4
Displaying the Sony Notebook Setup Screen 90 To display the Sony Notebook Setup screen 90 Sony Notebook Setup tabs 91 Controlling Power Management 92 Viewing the Power Management status icons 92 Power Management profiles 93 Power Management commands 96 Conserving battery power 96 Displaying - Sony PCG-GRX550 | VAIO User Guide - Page 5
the Application Recovery CD(s 122 To use the Driver Recovery CD(s 123 To use the System Recovery CD(s 125 To recover Microsoft Word 127 Troubleshooting 129 Troubleshooting Your Notebook 130 My notebook does not start 130 My notebook starts but a BIOS error appears 130 My notebook starts, but - Sony PCG-GRX550 | VAIO User Guide - Page 6
to document title. Troubleshooting the LCD Screen 134 My LCD screen is blank 134 My LCD screen continues to show the previous screen. 134 The image on my connected external display is not centered or sized properly 134 I want to change the video resolution of my display. ..... 134 I cannot switch - Sony PCG-GRX550 | VAIO User Guide - Page 7
slow 142 Troubleshooting Audio 143 My speakers make no sound 143 My microphone does not work 144 Troubleshooting the Printer 145 I cannot print 145 Troubleshooting Wireless LAN interrupted 147 Getting Help 149 Support Options 150 Software Support Information 152 Sony Service Center 154 7 - Sony PCG-GRX550 | VAIO User Guide - Page 8
Change text in this variable definition to document title. 8 - Sony PCG-GRX550 | VAIO User Guide - Page 9
Welcome Congratulations on your purchase of this Sony VAIO computer, and welcome to the VAIO User Guide. This User Guide provides detailed information on all aspects of using your new VAIO computer, from keyboard functions to preinstalled software applications. In the left navigation window, click - Sony PCG-GRX550 | VAIO User Guide - Page 10
Change text in this variable definition to document title. 10 - Sony PCG-GRX550 | VAIO User Guide - Page 11
❑ Using the Touchpad ❑ Using the Center Jog Dial Control ❑ Using the Optical Disc Drive ❑ Using PC Cards ❑ Using Memory Stick Media ❑ Using a Second Battery Pack ❑ Using the Weight Saver ❑ Using Power Saving Modes ❑ Connecting a Phone Line ❑ Connecting to a Local Area Network ❑ Connecting to - Sony PCG-GRX550 | VAIO User Guide - Page 12
the keyboard has additional keys that perform specific computer-related tasks. Keyboard Escape key Function keys Print Screen key Shift key Ckeoyrrsection Esc F1 F2 the numeric keypad. (When you do so, the Num Lock light will be on.) Press the Num Lock key again to deactivate it. Navigation - Sony PCG-GRX550 | VAIO User Guide - Page 13
Print Screen key The Print Screen key takes an electronic snapshot of the screen and places it in the Windows® Clipboard. You can then paste the screen shot The key with the Windows logo displays the Windows Start menu; it is the equivalent of clicking the Start button on the taskbar. See " - Sony PCG-GRX550 | VAIO User Guide - Page 14
. Combinations and functions with the Windows key Combination Function + F1 Displays VAIO® Help and Support Center. + Tab Switches the selected button on the taskbar. +D Displays the desktop. +E Displays Windows Explorer. +F Displays the Search window to find a file or folder. This is - Sony PCG-GRX550 | VAIO User Guide - Page 15
bay on the right side of the notebook. Battery 2 2 Indicates the status of the battery inserted in the multipurpose drive bay on the left side of the notebook. Memory Stick Indicates that the Memory Stick® slot is in use. Hard disk This indicator will light when data is being read from or - Sony PCG-GRX550 | VAIO User Guide - Page 16
the you type (unless you hold down case of typed letters when Caps the Shift key). Lock is on. Scroll LockThe screen scrolls differently. Information moves across the (Exactly how it scrolls depends on display normally. the specific application. It has no effect in many applications.) 16 - Sony PCG-GRX550 | VAIO User Guide - Page 17
(if available on your computer) will be interrupted. To switch to an external display or monitor, see "Selecting the Display Mode" for more information. Combinations/ Feature Function Fn+ (F3) Mute On/Off Toggles the built-in speaker off and on. Fn+ (F4) Speaker volume Adjusts the built-in - Sony PCG-GRX550 | VAIO User Guide - Page 18
into the optical drive. Provides for the lowest level of power consumption. When you run this command, the state of the system and state of the peripheral devices are written to the hard disk and the system power is turned off. To return the system to its original state, use the power button to turn - Sony PCG-GRX550 | VAIO User Guide - Page 19
-pointing device called a touchpad. You can point to, select, drag, and scroll objects on the screen using the built-in touchpad. Touchpad Pointer Action Point Click Double-click Touchpad Left and Right buttons Description Slide one finger on the touchpad to place the pointer on an item or object - Sony PCG-GRX550 | VAIO User Guide - Page 20
button once. In many applications, this action displays a shortcut menu of context-sensitive choices. Drag Slide one finger while pressing the left button , motion, and buttons. To open the Mouse Properties dialog box 1 Click Start on the Windows® taskbar, and then Control Panel. 2 Click Printers - Sony PCG-GRX550 | VAIO User Guide - Page 21
changing the settings using VAIO Action Setup, right-click the Jog Dial Utility icon or in the taskbar and click Help Topics. * i.LINK is a trademark of Sony used to designate that , such as a CD-RW or hard disk drive, confirm their operating system compatibility and required operating conditions. 21 - Sony PCG-GRX550 | VAIO User Guide - Page 22
start the selected application or document. Center Jog Dial Control Turn Back button Press Center Jog Dial Control The center Jog Dial control window always appears in the display. It is either in the launcher mode or in the guide mode. Using the center Jog Dial control This section explains how - Sony PCG-GRX550 | VAIO User Guide - Page 23
application is launched or the Jog Dial control window becomes active. When you select an item in the Jog Dial control window and it is displayed between orange bars, you can press the center Jog Dial control to view a submenu of that item. Using Launcher mode To use the center Jog - Sony PCG-GRX550 | VAIO User Guide - Page 24
Jog Dial control. Using Guide mode The Jog Dial control window displays the function of the center Jog Dial control. Center Jog Dial back button The center Jog Dial control includes a back button located to the right of the control. Pressing this button brings you back to the previous screen. 24 - Sony PCG-GRX550 | VAIO User Guide - Page 25
Control Using the center Jog Dial control with Sony software If Sony software that supports the center Jog Dial control is active, you window size. Using a Dialog box When a window such as Screen Properties is active, the Dialog box is displayed in the Jog Dial window. You can select an item in the - Sony PCG-GRX550 | VAIO User Guide - Page 26
or Hibernate mode, you cannot insert a disc. See "Controlling Power Management" for more information on Standby and Hibernate modes. 2 Press the Eject button to open the optical drive. The tray slides out. Ejecting the Tray Eject button ✍ Avoid using adhesive labels to identify your discs. Adhesive - Sony PCG-GRX550 | VAIO User Guide - Page 27
Using the Optical Disc Drive 3 Place an optical disc on the tray with the label side facing up. using a disc, wait until the LED indicator turns off, and then press the Eject button to remove the disc. When the notebook is in a power saving mode, you cannot remove an optical disc. See "Controlling - Sony PCG-GRX550 | VAIO User Guide - Page 28
button, turn off the notebook and insert a thin, pointed object (such as a paper clip) into the manual drive and you may not be able to open the tray. Manual Eject Hole To play a DVD To play a DVD, you may use the optical disc drive drive to play a DVD, quit any open applications. Your optical drive - Sony PCG-GRX550 | VAIO User Guide - Page 29
default display setting, part of the video screen will not appear. To view the entire screen, adjust the display resolution to 640 x 480. Some discs recorded at 20 or 24 bits may produce noise while playing. If you have audio devices connected, this may cause damage to your hearing and the speakers - Sony PCG-GRX550 | VAIO User Guide - Page 30
disc* You can use Sony SonicStage and Microsoft® Windows® XP instructions included with Windows® XP. Do not strike or shake the notebook while writing data to a disc. Always use the AC adapter as the power source for your notebook if you are writing data to a CD-RW or CD-R disc. Using battery power - Sony PCG-GRX550 | VAIO User Guide - Page 31
Disc Drive Notes on writing data to a CD-RW or CD-R disc ❑ For optimal writing speed, deactivate the screen saver and exit anti-virus software before writing data to a disc. ❑ For best results, use CD-Rs that are compatible with 8x speed. ❑ Your notebook does not support 1x writing speed. ❑ Memory - Sony PCG-GRX550 | VAIO User Guide - Page 32
if you are writing data to a CD-RW or CD-R disc. Using battery power may result in data transfer failure. Your notebook includes two PC Card slots. PC Cards enable you to connect portable external devices such as another hard disk drive, or a PC Network Interface Card (NIC) to connect to a network - Sony PCG-GRX550 | VAIO User Guide - Page 33
system to correct the problem. ❑ Some PC Cards may require that you disable idle devices when using the PC Card. You can use Sony Notebook Setup to disable devices. See "Displaying the Sony Notebook Setup Screen" for more information. ❑ Be sure to use the most recent software driver provided by the - Sony PCG-GRX550 | VAIO User Guide - Page 34
some functions of the PC Card with this notebook. If you have difficulty inserting a card, check that you are orienting the card correctly. See the manual that came with your PC Card for more information on its use. 34 - Sony PCG-GRX550 | VAIO User Guide - Page 35
compliant devices and media. Protected content is recorded and transferred in an encrypted format to prevent unauthorized duplication or playback. ✍ MG Memory Stick media has the MG mark . * MagicGate Memory Stick and are trademarks of Sony Corporation. † Memory Stick and are trademarks of - Sony PCG-GRX550 | VAIO User Guide - Page 36
change this setting in VAIO Action Setup. To view the contents of Memory Stick media 1 Click Start in the Windows taskbar and then click My Computer 2 Double-click Sony Memory Stick under the Devices with Removable Storage box. The Sony Memory Stick window opens. To remove Memory Stick media 1 Make - Sony PCG-GRX550 | VAIO User Guide - Page 37
. Write-protect on Data can be read from but not saved on the Memory Stick media. Using the Write-protect Tab Woffrite-protect Wonrite-protect LOCK LOCK LOCK (Back of Memory Stick Media) Formatting Memory Stick media Memory Stick media is formatted for immediate use when you purchase it. If you - Sony PCG-GRX550 | VAIO User Guide - Page 38
, a blue screen with an error message appears, prompting you to continue or exit. Reinsert the media into the slot and press Enter to continue. This enables the media to finish reading or writing data. ❑ You can view video clips that you have recorded with Memory Stick mediacompatible video camera - Sony PCG-GRX550 | VAIO User Guide - Page 39
Using Memory Stick Media ❑ Do not attach labels other than the supplied label to a media. ❑ Do not bend, drop, or apply strong shock to the media. ❑ Do not disassemble or modify the media. ❑ the supplied storage case. See the instructions that came with your media for more information on its use. 39 - Sony PCG-GRX550 | VAIO User Guide - Page 40
variable definition to document title. Using a Second Battery Pack You can purchase a second rechargeable battery pack. With two battery packs, you can extend the time that you use your notebook with battery power. When using two battery packs, the battery pack you insert first charges first. The - Sony PCG-GRX550 | VAIO User Guide - Page 41
Pack Using Weight Saver for Second Battery Cover Battery pack Weight saver Keep the battery pack in the notebook while it is connected to AC power. The battery indicator flashes while the battery is charging. See also "To charge the battery pack" in the printed Quick Start for more information - Sony PCG-GRX550 | VAIO User Guide - Page 42
packs, you can remove either of them without shutting down the notebook. When removing one battery pack, make sure that the other battery pack's indicator is on. If the indicator of the battery pack you are removing is on, right-click the battery icon on the taskbar and click the "Switch discharge - Sony PCG-GRX550 | VAIO User Guide - Page 43
it is installed in the multipurpose bay. To attach the weight saver 1 If another device, such as a battery pack, is in the multipurpose bay, remove that device. See "To remove the second battery pack" for more information. 2 Slide the weight saver in the direction of the arrow until it clicks into - Sony PCG-GRX550 | VAIO User Guide - Page 44
Change text in this variable definition to document title. To remove the weight saver 1 To remove the weight saver, first slide the multipurpose bay Release switch in the direction of the arrow. Multipurpose Bay Release Switch Release switch 2 Remove the weight saver. 44 - Sony PCG-GRX550 | VAIO User Guide - Page 45
and insert a fully charged battery. Normal mode Normal mode is the normal state of your notebook when it is in use. The power indicator displays green when your notebook is in this mode. To save power, you can turn off a specific device such as the LCD or the hard disk drive. Standby mode In Standby - Sony PCG-GRX550 | VAIO User Guide - Page 46
and releasing it immediately caused prior notebook systems to enter Standby mode. 2 Press the power button to return to normal mode. Notes on power saving modes ❑ When returning from Hibernate mode, the system status stored on the hard disk is erased and the notebook starts normally if you press the - Sony PCG-GRX550 | VAIO User Guide - Page 47
Line Connecting a Phone Line You need to connect a phone line to take advantage of online services and the Internet. ✍ In order to register your Sony VAIO notebook, register your software online, and use Sony Customer Support, you must connect to a phone line. 1 Plug one end of the phone cable into - Sony PCG-GRX550 | VAIO User Guide - Page 48
Change text in this variable definition to document title. Connecting to a Local Area Network You can connect your notebook to 10BASE-T and 100BASE-TX-type Local Area Networks (LANs). For the detailed settings and devices needed to connect to the network, ask your network administrator. Connecting - Sony PCG-GRX550 | VAIO User Guide - Page 49
Connecting to a Local Area Network 4 Follow the on-screen instructions. 49 - Sony PCG-GRX550 | VAIO User Guide - Page 50
Network (LAN) PC Card* that allows for wireless connections. With Sony's Wireless LAN functionality, all compatible digital devices can communicate freely wireless LAN environment by plugging the Access point into an AC power outlet and using the provided software with compatible devices. Because - Sony PCG-GRX550 | VAIO User Guide - Page 51
Services Digital Network (ISDN) router, cable modem, or Digital Subscriber Line (DSL) modem to share access to the Internet among multiple computers. ✍ For information on available Sony a specific range. part of the antenna could damage it. 2 Click Start on the Windows taskbar, and then Control Panel - Sony PCG-GRX550 | VAIO User Guide - Page 52
connection status To confirm your connection status with an access point 1 Click Start on the Windows taskbar, and then Control Panel. 2 Click Network and Internet Connections, and then Network Connections. 3 Double-click Wireless Network Connection Enabled. The Wireless Network Connection Status - Sony PCG-GRX550 | VAIO User Guide - Page 53
Wireless LAN Confirming access point information To check access point information 1 Click Start on the Windows taskbar, and then Control Panel. 2 Click Network and Internet Connections, and then Network Connections. 3 Double-click Wireless Network Connection Enabled. The Wireless Network Connection - Sony PCG-GRX550 | VAIO User Guide - Page 54
5 Click OK. 6 When "...is safe to remove" is displayed in the notification area, press the PC Card slot eject button. 7 Hold both sides of the card to pull it out of the slot. Notes on using Wireless LAN ❑ Sony Wireless LAN devices support the IEEE 802.11b standard. Devices connecting to a Wireless - Sony PCG-GRX550 | VAIO User Guide - Page 55
❑ Wireless LAN communication occurs on divided frequency bands known as channels. Third-party Wireless LAN Access Point channels may be preset to different channels from Sony devices. ❑ If using a Wireless LAN Access Point, refer to connectivity information contained in those - Sony PCG-GRX550 | VAIO User Guide - Page 56
Change text in this variable definition to document title. 56 - Sony PCG-GRX550 | VAIO User Guide - Page 57
❑ Connecting an Audio-Video Device ❑ Connecting a Parallel Port Printer ❑ Connecting a USB Printer ❑ Connecting an External Display ❑ Connecting a Universal Serial Bus Device ❑ Connecting an i.LINK Device ❑ Connecting with another VAIO computer ❑ Connecting External Speakers ❑ Connecting an External - Sony PCG-GRX550 | VAIO User Guide - Page 58
. Connecting an External Floppy Disk Drive You can connect a Sony USB floppy disk drive (not supplied) to a USB port on your notebook. Your notebook has three USB ports: one located on the left panel, one located on the right panel, and one located on the rear panel. To connect an external floppy - Sony PCG-GRX550 | VAIO User Guide - Page 59
into place. Inserting a Floppy Disk Floppy disk Floppy disk drive To remove a floppy disk from the external floppy disk drive 1 Close all applications that were opened from the disk and wait for the LED indicator to turn off. 2 Push the Eject button, and remove the disk. Removing a Floppy Disk Eject - Sony PCG-GRX550 | VAIO User Guide - Page 60
the notebook. To carry an external floppy disk drive Fold the floppy disk drive cable and connector into the side compartment on the floppy disk drive. Carrying an External Floppy Disk Drive Notes on handling floppy disks ❑ Do not open the shutter manually and touch the surface of the floppy disk - Sony PCG-GRX550 | VAIO User Guide - Page 61
a Port Replicator Your notebook supports the use of a port replicator (not supplied). Attaching a port replicator enables you to connect additional peripherals to your notebook. Port Replicator (Rear Panel) 1 USB ports 6 DC In port 2 LINE IN jacks 7 Serial port 3 S Video Out jack 8 LINE OUT - Sony PCG-GRX550 | VAIO User Guide - Page 62
the DC IN port on the port replicator, and plug the power cord into the AC adapter and an AC outlet. Connecting AC Adapter to Port Replicator AcoCnandeacptoter r AC adapter Power cord You will know the power is on when the green power indicator located on top of the port replicator switches on - Sony PCG-GRX550 | VAIO User Guide - Page 63
attaching your notebook to the port replicator, do not attempt to insert or remove the battery pack. Lifting and turning the notebook with an attached port replicator could cause a temporary loss of power. To remove your notebook from the port replicator 1 Double-click in the taskbar. The "Safely - Sony PCG-GRX550 | VAIO User Guide - Page 64
Change text in this variable definition to document title. Releasing Notebook from Port Replicator Release levers 5 Lift the notebook away from the port replicator. Removing Notebook from Port Replicator 64 - Sony PCG-GRX550 | VAIO User Guide - Page 65
Connecting a PS/2 External Mouse or Keyboard Connecting a PS/2 External Mouse or Keyboard You can connect either an external PS/2® mouse or PS/2 keyboard to the port replicator (not supplied) using a similar type PS/2 plug or adapter. You may connect only one PS/2 device to the port replicator at a - Sony PCG-GRX550 | VAIO User Guide - Page 66
Change text in this variable definition to document title. ✍ See the manual that came with your PS/2 mouse or keyboard for more information on its installation and use. 66 - Sony PCG-GRX550 | VAIO User Guide - Page 67
device to the port replicator (not supplied) or the notebook using mini-plug cables shorter than 2 meters with no resistance. To connect a CD player, active speaker, or an amplifier If you use the port replicator to connect a CD, MiniDisc, or audio cassette player, you may use the LINE IN jacks. To - Sony PCG-GRX550 | VAIO User Guide - Page 68
Change text in this variable definition to document title. Connecting an Audio Device to the Notebook To AV Out jack Audio cable (not supplied) Aamctpivliefisepr,eeatkce.r, 68 - Sony PCG-GRX550 | VAIO User Guide - Page 69
jack or the LINE OUT jacks and the Composite Video Out jack. The S Video Out jack requires a S Video cable (not supplied), and the LINE OUT jacks and Composite Video Out jack require an audio-video cable (not supplied). If you use the S Video jack, you must connect an audio cable to the LINE OUT - Sony PCG-GRX550 | VAIO User Guide - Page 70
supplied) Audio-L Audio-R Video To connect an AV device to the notebook, use the AV Out jack and an audiovideo cable (not supplied). ✍ The S Video Out jack and the AV Out jack are not designed to be used simultaneously. If you connect cables to both jacks, only the S Video jack will function. 70 - Sony PCG-GRX550 | VAIO User Guide - Page 71
) Audio-L Audio-R Video Regardless if you use the port replicator or the notebook to connect an AV device, you will need to switch the TV input channel to external input and set up the TV configuration system. See "Selecting the Display Mode" for more information. ✍ See the manual that came with - Sony PCG-GRX550 | VAIO User Guide - Page 72
The DVD will play on only one display at a time, so select either LCD or TV as the primary display. See "Selecting the Display Mode" for more information. 4 Re-insert your DVD to launch your DVD software. ✍ A part of the image cannot be displayed on your TV display if the resolution of your notebook - Sony PCG-GRX550 | VAIO User Guide - Page 73
settings before you use the printer. See "Displaying the Sony Notebook Setup Screen" for more information. Connecting a Parallel Printer to the Notebook Printer Power cord TPorinter port P(sruinptpelriecdabwleith the printer) ✍ See the manual that came with your printer for more information - Sony PCG-GRX550 | VAIO User Guide - Page 74
on your printer. ✍ To use a printer, first install the driver software that came with your printer. Connecting a USB Printer to the Notebook Power cord Printer To USB ports USB connector USB printer cable (not supplied) ✍ See the manual that came with your printer for more information on its - Sony PCG-GRX550 | VAIO User Guide - Page 75
port. 4 Verify that the power cord is plugged into the computer display and an AC outlet. Connecting an External Computer Display to the Notebook Computer display Power cord TVoGA port Display cable (not supplied) ✍ See the manual that came with your computer display for more information on its - Sony PCG-GRX550 | VAIO User Guide - Page 76
otherwise Fn + F8 will not work. You cannot use the Fn + F8 function to switch between LCD and TV once a DVD is inserted into the optical drive. Connecting a Multimedia Computer Display to the Notebook Multimedia display Power cord Audio In LR Video In To AV Out jack Display cable (not supplied) 76 - Sony PCG-GRX550 | VAIO User Guide - Page 77
Connecting an External Display ✍ See the manual that came with your multimedia computer display for more information on its installation and use. To connect a projector to the notebook You can also connect a projector, such as the Sony LCD Projector, to the notebook or port replicator. 1 Shut down - Sony PCG-GRX550 | VAIO User Guide - Page 78
Projector Power cord To VGA port A(nuodtiosucpapbllieed) Dcaisbplela(ynot supplied) ✍ See the manual that display when connecting an external computer display or projector When you connect an external display to the VGA (Monitor) port, you can toggle the output between the Liquid Crystal Display - Sony PCG-GRX550 | VAIO User Guide - Page 79
connected to the Monitor port, or both the LCD and external display. Only LCD LCD and external display Only external display ✍ (On selected models) Connect the external display to the notebook or port replicator before you turn on the unit, otherwise the Fn+F7 key combination will not work. 79 - Sony PCG-GRX550 | VAIO User Guide - Page 80
keyboard, speaker, , or right panel. 2 Plug Sony USB PCGA-UMS1 series mouse (not supplied) with this computer. The USB mouse software driver is preinstalled in the notebook, so you simply plug the USB mouse into the USB port to use it. One USB port generally supports one USB device. ✍ See the manual - Sony PCG-GRX550 | VAIO User Guide - Page 81
Sony digital video camera recorder is connected to the notebook. Instructions for connecting a different type of digital video camera recorder may differ. * i.LINK is a trademark of Sony as a CD-RW or hard disk drive, confirm their operating system compatibility and required operating conditions. - Sony PCG-GRX550 | VAIO User Guide - Page 82
video camera at a time. The software supplied with your notebook will not recognize multiple cameras. ❑ The i.LINK port on the notebook does not supply power to external devices. If the external device requires power . ✍ See the manual that came with your digital video camera recorder for more information - Sony PCG-GRX550 | VAIO User Guide - Page 83
VAIO computers that do not have the latest Windows® operating system, Smart Connect software may be necessary. Consult the Sony Web site for support options (http://www.sony.com/pcsupport). * i.LINK is a trademark of Sony CD-RW or hard disk drive, confirm their operating system compatibility and - Sony PCG-GRX550 | VAIO User Guide - Page 84
jack on the right panel of the notebook, and plug the speaker cable (supplied with speakers) connector into this jack. Connecting Speakers to the Headphone Jack Speakers To Headphone jack Speaker cable (supplied with speakers) ✍ See the manual that came with your speakers for more information on - Sony PCG-GRX550 | VAIO User Guide - Page 85
for notebook use and compliant with the plug-in power microphone. 2 Locate the Microphone jack on the right panel of the notebook. A protruding dot above the Microphone Microphone (not supplied) To Microphone jack ✍ See the manual that came with your microphone for more information on its installation and use. - Sony PCG-GRX550 | VAIO User Guide - Page 86
a wireless LAN environment by plugging the Access Point into an AC power outlet, installing the Wireless LAN PC Card in your notebook, and using You can also connect your Access Point to a telephone line, Integrated Services Digital Network (ISDN) router, cable modem, or Digital Subscriber Line ( - Sony PCG-GRX550 | VAIO User Guide - Page 87
and gain access to the Internet. Without the Access Point, you can achieve direct communication (Peer to Peer mode) between computers. ✍ For more information on Sony Wireless LAN, go to http://www.sonystyle.com - Sony PCG-GRX550 | VAIO User Guide - Page 88
Change text in this variable definition to document title. 88 - Sony PCG-GRX550 | VAIO User Guide - Page 89
Customizing Your VAIO Notebook The following sections briefly describe how to change your notebook's default settings. ❑ Displaying the Sony Notebook Setup Screen ❑ Controlling Power Management ❑ Displaying Battery Information ❑ Selecting the Display Mode ❑ Display Properties Notes 89 - Sony PCG-GRX550 | VAIO User Guide - Page 90
definition to document title. Displaying the Sony Notebook Setup Screen To display the Sony Notebook Setup screen: 1 Click Start on the Windows® taskbar, and then Control Panel. 2 Click Performance and Maintenance, and then Sony Notebook Setup. Sony Notebook Setup Screen 3 Select the tab for - Sony PCG-GRX550 | VAIO User Guide - Page 91
Displaying the Sony Notebook Setup Screen Sony Notebook Setup tabs Tab Description About This Computer Display system information, including memory capacity, serial number, and BIOS version. Printer Select printer port mode settings. Initial Setting Change the volume of the sounds that play - Sony PCG-GRX550 | VAIO User Guide - Page 92
. To activate a profile or command, see "Displaying Battery Information" for more information. Viewing the Power Management status icons The Power Management status icons are displayed in the taskbar at the lowerright corner of your screen. Move the pointer over the Battery icon to see the tool tip - Sony PCG-GRX550 | VAIO User Guide - Page 93
profiles The PowerPanel™ utility provides several predefined power management profiles. Each profile consists of a group of power management settings that are designed to meet specific power management goals - ranging from maximum power management to no power management. You can change the settings - Sony PCG-GRX550 | VAIO User Guide - Page 94
disable this feature. Games Disables the display and the Hard Disk Standby timer. Presentation Keeps the display on at all times while it conserves power. This option is ideal for slide show presentations. You can establish settings for LCD (Video) Standby, Hard Disk Standby, and Standby mode to - Sony PCG-GRX550 | VAIO User Guide - Page 95
on the hard disk and display screen. You can also establish settings for LCD (Video) Standby, Hard Disk Standby, and Standby mode to optimize power management for your system. Spreadsheet Optimizes performance and power requirements for spreadsheet applications. Communications Extends battery life - Sony PCG-GRX550 | VAIO User Guide - Page 96
the system to the original state, use the power button to turn on power. The system saves the data in the Save to Disk Partition on the hard drive. Conserving battery power When using your notebook with a battery, the LCD display and the hard drive can be set to switch off automatically to conserve - Sony PCG-GRX550 | VAIO User Guide - Page 97
in the taskbar on the lower-right corner of the screen. Battery Information Toolbar ❑ Percentage indicator - Displays the percentage of the remaining charge. ❑ Time indicator - Displays estimated time (hours : minutes) remaining before the battery fully discharges, also known as the time-to-empty - Sony PCG-GRX550 | VAIO User Guide - Page 98
Change text in this variable definition to document title. Battery icon descriptions Battery icon Battery status Charging Fully charged Discharging No battery 98 - Sony PCG-GRX550 | VAIO User Guide - Page 99
Displaying Battery Information Displaying detailed battery information Double-click the battery icon on the taskbar to display the Battery Information window. The Battery tab contains information such as battery charging time and duration of the battery charge. Battery Information Window Customizing - Sony PCG-GRX550 | VAIO User Guide - Page 100
the ATI video controller. You can select which display is used when the notebook is connected to an external monitor. When you connect an external display, you can switch the display mode between your notebook's LCD display and the external monitor. 1 Click Start, point to Control Panel, and click - Sony PCG-GRX550 | VAIO User Guide - Page 101
Properties" dialog box appears. (Multiple Monitors) and Mobility Radeon Properties screen 4 Click the Displays tab and select the display settings by clicking the icon on the panel of your display choice. For more information, click the Help button. ✍ If you cannot see your movie or DVD on the - Sony PCG-GRX550 | VAIO User Guide - Page 102
are using. Turn on the notebook after you connect the external display. Changing the window design of Sony software To change the window design 1 Click the Start button, and then click Control Panel. 2 In the left window pane of Control panel, click "Switch to Classic View." 3 Double-click UI Design - Sony PCG-GRX550 | VAIO User Guide - Page 103
Notes If you change the factory display screen settings to 1600 x 1200 pixels, you can increase the display font size as well. To increase the display font size 1 Click Start, point to Control Panel, and click Appearance and Themes. 2 Click Display. The Display Properties window appears. 3 Click the - Sony PCG-GRX550 | VAIO User Guide - Page 104
Change text in this variable definition to document title. 104 - Sony PCG-GRX550 | VAIO User Guide - Page 105
with your notebook for the amount of memory preinstalled. Expansion memory modules are available as options. For memory upgrades and information on which memory modules to use, refer to the Specifications sheet. This section describes how to replace memory modules in your computer. ❑ Precautions and - Sony PCG-GRX550 | VAIO User Guide - Page 106
modules in your notebook. See the bulleted list below. Be careful when adding memory. Mistakes made when installing or removing a memory module may cause a malfunction. ❑ Disconnect your system from its power source and from any telecommunications links, networks, or modems before you open the - Sony PCG-GRX550 | VAIO User Guide - Page 107
Typical expansion memory configuration Typical expansion memory configuration Models with 256 MB Memory Total System Memory (MB)Slot 1 (MB) 256 256 384 256 512 256 Slot 2 (MB) 128 256 107 - Sony PCG-GRX550 | VAIO User Guide - Page 108
the battery pack(s). 3 After your notebook has cooled, loosen and remove the screw that secures the cover of the memory bay on the bottom of your notebook. Use an appropriate screwdriver. Removing the memory module cover Screwdriver Screw 4 Touch a metal object (such as the connector panel - Sony PCG-GRX550 | VAIO User Guide - Page 109
minotdhuelediirsercetlieoansoefdth. e arrow 2tPhuelldtirheecmtioenmoofrythme oadrruolewi.n 6 Tighten the screw on the memory bay cover. ✍ Your notebook comes with a memory module installed in the memory slot. To upgrade your memory, removal of this module may be necessary before installing your - Sony PCG-GRX550 | VAIO User Guide - Page 110
variable definition to document title. Installing a memory module 1 Follow steps 1 to 4 of "Removing a memory module" for removing the preinstalled memory. 2 Remove the new memory module from its packaging. 3 Install the memory module by sliding it into the memory module slot. Push the module into - Sony PCG-GRX550 | VAIO User Guide - Page 111
amount of system memory. If the additional memory is not shown, remove and reinstall the memory module. ✍ The amount of memory displayed in the Sony Notebook Setup screen is not always correct. The video adapter uses some system memory, and that amount of memory does not appear as part of the total - Sony PCG-GRX550 | VAIO User Guide - Page 112
Change text in this variable definition to document title. 112 - Sony PCG-GRX550 | VAIO User Guide - Page 113
About the Software on Your Notebook Your VAIO® notebook is ready to help you work, play, learn, and communicate as soon as you turn it on. This section provides you with information on the following topics: ❑ Software Overview ❑ Application, Driver, and System Recovery CDs ❑ Using Your Recovery CDs - Sony PCG-GRX550 | VAIO User Guide - Page 114
Systems Inc. Adobe Premiere LE software offers interface and editing tools for producing movies for video, multimedia, or the Web. View source clips and edited footage simultaneously on-screen. You can create your own personal video clips that are up to three hours in length, with complete audio - Sony PCG-GRX550 | VAIO User Guide - Page 115
, and much more. DigitalPrint Sony Electronics Inc. This image management Sony Electronics Inc. Connect a digital video camera recorder to the i.LINK® port and capture your own video clips and still images. You can edit clips from your video , Inc. An Internet Service Provider that supplies access, - Sony PCG-GRX550 | VAIO User Guide - Page 116
title. EverQuest (on selected models) Sony Online Entertainment Inc. This introductory edition Office XP system you'll find a powerful new technology that will help you get work done more quickly that enable you to continually integrate additional services into Office and access information anytime. - Sony PCG-GRX550 | VAIO User Guide - Page 117
Video Recorder, and, if a Giga Pocket Server is available on your home network, watch TV streamed from the Giga Pocket Server and remotely control the Giga Pocket Server's TV programming functions. PictureGear™ Sony Electronics Inc. This image management software displays images from your hard drive - Sony PCG-GRX550 | VAIO User Guide - Page 118
. Smart Capture manages the i.LINK® connection between your notebook and a Sony Digital Handycam® Camcorder that supports the i.LINK interface. It allows you to capture compressed video or still images and save them to your hard disk drive or share via e-mail. A smart solution for computer, digital - Sony PCG-GRX550 | VAIO User Guide - Page 119
fine-tuning audio playback. Sony ScreenBlast™ ACID (On selected models) Sony Pictures Digital Entertainment With the powerful Sony ScreenBlast ACID software you and more. VAIO Support Agent Sony Electronics Inc. VAIO Support Agent provides immediate, interactive, online support with information about - Sony PCG-GRX550 | VAIO User Guide - Page 120
Electronics Inc. VisualFlow software is a state-of-the-art Sony multimedia browser designed specifically for Memory Stick® media. It displays any still picture, movie or sound file stored in a Memory Stick media in a visually pleasing, artistic manner. VisualFlow software not only plays a selected - Sony PCG-GRX550 | VAIO User Guide - Page 121
or are erased. Driver Recovery CD(s) Sony Electronics Inc. This CD enables you to reinstall individual device drivers if they become corrupted or are erased. System Recovery CD(s) Sony Electronics Inc. so user data and applications installed since you started using your computer will be lost. 121 - Sony PCG-GRX550 | VAIO User Guide - Page 122
of your hard drive. If you need to reinstall all the software titles that shipped with your notebook, use the System Recovery CD(s). See "To use the System Recovery CD(s)" for more information. If you have any questions on using the Application Recovery CD, contact Sony Customer Support. ✍ You must - Sony PCG-GRX550 | VAIO User Guide - Page 123
erased. You can reinstall an individual driver to correct a problem that you are experiencing with your notebook, hardware, or software application. VAIO Support Agent, an application repair utility, uses a vault feature on the Driver Recovery CD(s) to repair software applications. ✍ If you need to - Sony PCG-GRX550 | VAIO User Guide - Page 124
Properties. The Properties dialog box for that device appears. Properties dialog box 8 Click Reinstall Driver. The Hardware Update Wizard appears. 9 Click next. The wizard will search for the correct driver on your Driver Recovery CD. 10 When the recovery process is complete, click Finish. Some - Sony PCG-GRX550 | VAIO User Guide - Page 125
or erased. You may not need to reinstall the entire contents of your hard drive. If you experience a problem with your notebook, reinstalling an individual device driver or software title may correct the problem. Use the Application Recovery CD(s) to reinstall individual applications or use the - Sony PCG-GRX550 | VAIO User Guide - Page 126
from the hard disk drive. All original screen instructions. If your notebook does not start from the Recovery CD 1 Press the power button and hold it for more than 4 seconds to turn off the notebook. 2 Turn on the notebook. When the Sony logo is displayed, press the F2 key. The BIOS setup menu screen - Sony PCG-GRX550 | VAIO User Guide - Page 127
. Insert the Application Recovery CD to automatically complete recovery of your system. Updating the task tray (Windows 2000) In the event that a system recovery system using the System Recovery CD, Microsoft® Word will not be recovered. Use the supplied Word CD-ROM to recover this application. 127 - Sony PCG-GRX550 | VAIO User Guide - Page 128
Change text in this variable definition to document title. 128 - Sony PCG-GRX550 | VAIO User Guide - Page 129
notebook. Many problems have simple solutions, so try these suggestions before you visit the Sony Computing Support Web site at http://www.sony.com/pcsupport. ❑ Troubleshooting Your Notebook ❑ Troubleshooting the LCD Screen ❑ Troubleshooting the Mouse and Touchpad ❑ Troubleshooting Drives, PC Cards - Sony PCG-GRX550 | VAIO User Guide - Page 130
VAIO® Notebook Quick Start Troubleshooting Your Notebook My notebook does not start. ❑ Check that the notebook is plugged into a power source and that it is turned on. Check that the power indicator on the front panel of the notebook indicates that the power is on. ❑ Check that the battery packs are - Sony PCG-GRX550 | VAIO User Guide - Page 131
drive, make sure there is no floppy disk in the floppy disk drive (non-bootable). ❑ If a non-bootable floppy disk is in a connected floppy disk drive the notebook on again. 4 Press the F2 key when the Sony logo appears. The BIOS setup menu screen appears. 5 Set the date (month/day/year). Press the - Sony PCG-GRX550 | VAIO User Guide - Page 132
VAIO® Notebook Quick Start 11 Select Yes, then press the Enter key. The notebook restarts. If your notebook continues to display user data and applications will be lost. My screen. ❑ If the previous step does not work, press and hold the power button for at least four seconds. This turns off the power - Sony PCG-GRX550 | VAIO User Guide - Page 133
Troubleshooting Your Notebook 1 Close all open applications. 2 Restart the notebook by pressing the Ctrl+Alt+Delete keys simultaneously and then selecting Restart from the drop-down list. ✍ If this procedure does not work, press and hold the power button Properties dialog box display a slower CPU speed - Sony PCG-GRX550 | VAIO User Guide - Page 134
VAIO® Notebook Quick Start Troubleshooting the LCD Screen My LCD screen is blank. ❑ Check that the notebook is plugged into a power source and that it is turned on. ❑ Check that the power indicator on the notebook is on. ❑ Check that the battery pack is inserted properly and that it is charged. ❑ - Sony PCG-GRX550 | VAIO User Guide - Page 135
Troubleshooting the LCD Screen I changed the display screen settings to 1600 x 1200 pixels, but now the fonts are too small. How do I increase the display font size? To increase the display font size, see "Display Properties Notes" for more information. 135 - Sony PCG-GRX550 | VAIO User Guide - Page 136
select Control Panel, and then Mouse. 2 Change the button assignments in the Mouse Properties dialog box. (One of the buttons is assigned to the double-click action.) ❑ If you are still experiencing problems, check that another mouse was not installed. ❑ You may need to use your Driver Recovery CD - Sony PCG-GRX550 | VAIO User Guide - Page 137
Troubleshooting described in the step above, press and hold the power button for more than four seconds to turn off the problems, check that another mouse was not installed. ❑ You may need to use your supplied Driver Recovery CD to reinstall the touchpad or mouse drivers. See "To use the Driver - Sony PCG-GRX550 | VAIO User Guide - Page 138
Troubleshooting Drives, PC Cards, and Peripheral Devices I cannot establish a connection between two VAIO software is installed according to the manufacturer's instructions. ❑ A dirty or damaged disc may see video but can not hear audio, check all of the following: * i.LINK is a Sony trademark used - Sony PCG-GRX550 | VAIO User Guide - Page 139
, check the volume settings, and then check the connections between your external speakers and the notebook. 1 Click Start, Control Panel, System, and then Device Manager. Check that the correct drivers are installed properly. ❑ Do not use adhesive labels to identify the CD. The label may come - Sony PCG-GRX550 | VAIO User Guide - Page 140
Setup utility to disable devices you are not currently using. ❑ If you are using two PC Cards, use the Sony Notebook Setup utility to disable the devices you are not currently using. ❑ Check that any necessary drivers were installed properly. See "Using Your Recovery CDs" for more information. 140 - Sony PCG-GRX550 | VAIO User Guide - Page 141
ROM drives or drivers may experience problems when using this feature. For more information about this issue, visit the RealNetworks Service and Support Web site at http://service.real.com. I cannot use the DVgate™ software. ❑ If your notebook is using the Ultimate Battery Life profile for its power - Sony PCG-GRX550 | VAIO User Guide - Page 142
are using is compatible with the notebook's modem. (All preinstalled Sony programs are compatible.) ❑ If you are still experiencing problems, use your supplied Driver Recovery CD to reinstall the modem drivers. See "To use the Driver Recovery CD(s)" for more information. My modem connection is slow - Sony PCG-GRX550 | VAIO User Guide - Page 143
mute button, make sure it is off. If the speakers are powered by batteries, check that the batteries are inserted properly and that they are charged. ❑ If you have connected an audio cable to the Headphone jack, disconnect the cable. ❑ If you are still experiencing problems, use the supplied Driver - Sony PCG-GRX550 | VAIO User Guide - Page 144
VAIO® Notebook Quick Start My microphone does not work. If you are using an external microphone, check that the microphone is plugged into the Microphone jack. See "Connecting an External Microphone" for more information. 144 - Sony PCG-GRX550 | VAIO User Guide - Page 145
the Printer Troubleshooting the Printer I cannot print. ❑ Make sure the power to the printer is on, and after the notebook resumes from a power saving mode. If this occurs, follow these steps to reset the printer connection: 1 Click Start and then Control Panel. 2 Click Printers and other Hardware - Sony PCG-GRX550 | VAIO User Guide - Page 146
Troubleshooting Wireless LAN The computer cannot connect to a Wireless LAN Access Point. ❑ Make sure the Wireless LAN PC card is properly installed in the PC card slot on the left side of the notebook. ❑ Make sure power to the access point is turned on. ❑ Make sure the access point is displayed - Sony PCG-GRX550 | VAIO User Guide - Page 147
Troubleshooting Wireless LAN ❑ Check the access point settings. Refer to the instructions supplied with the access point. ❑ Move your notebook away from obstructions or closer to status. 3 Change the settings temporarily by performing the following actions: 1 Click Start, and then Control Panel. 147 - Sony PCG-GRX550 | VAIO User Guide - Page 148
VAIO® Notebook Quick Start 2 Click Network and Internet Connections, then Network Connections. 3 Right-click Wireless Network Connection and select Properties. The Wireless Network Connection Properties dialog - Sony PCG-GRX550 | VAIO User Guide - Page 149
Getting Help Sony provides you with several support resources to answer questions about your VAIO® notebook or the preinstalled software. Refer to these resources in the order they are listed. 149 - Sony PCG-GRX550 | VAIO User Guide - Page 150
desktop. Using advanced diagnostic technology, Sony's VAIO Support Agent runs scheduled protections of your applications, network settings, and other important software settings. When your software is protected, you can use VAIO Support Agent to repair software problems by restoring your software to - Sony PCG-GRX550 | VAIO User Guide - Page 151
to information on commonly encountered problems. Enter a description of your problem and the Knowledge Database searches for the corresponding solutions online. You can access Sony Computing Support at: http://www.sony.com/pcsupport. 6 Sony Fax-on-Demand This service, which requires a fax machine or - Sony PCG-GRX550 | VAIO User Guide - Page 152
® Elements, Premiere® LE (Adobe Systems Inc.) Web site e-mail phone fax hours http://www.adobe.com/ [email protected] 206-675-6126 (fee-based support) 206-628-5737 M-F, 6 AM-5 PM (PST) America Online® (America Online, Inc.) Web site phone hours http://www.aol.com/ 800-827-6364 7 days a week - Sony PCG-GRX550 | VAIO User Guide - Page 153
.real.com/rjoptions.html http://service.real.com/help/call.html (online email form) Sony Applications (Sony Electronics Inc.) Web site phone hours http://www.sony.com/pcsupport 888-4-SONY-PC (888-476-6972)* 7 days a week, 24 hours a day * Support from 1-888-4-SONY-PC is free of charge for 90 - Sony PCG-GRX550 | VAIO User Guide - Page 154
Change text in this variable definition to document title. Sony Service Center For the Sony Service Center nearest you, call 1-888-4-SONY-PC (1-888-476-6972) or find Sony Customer Service on the Web at http://www.sony.com/pcsupport. 154 - Sony PCG-GRX550 | VAIO User Guide - Page 155
13 audio connecting 67 connecting external speakers 84 external microphone 85 troubleshooting 143 Audio tab 91 audio-video (AV) connecting 69 B Basic/Advanced tab 91 Battery Information toolbar 97 battery pack Battery Information toolbar 97 power management settings 92 power saving modes 45 using - Sony PCG-GRX550 | VAIO User Guide - Page 156
your computer 89 D digital video camera 81 disconnecting port replicator 63 display mode 100 options 78 selecting 78 Driver Recovery CD 123 drives floppy disk 58, 138 installing additional hard disk 32 optical 26 DV In/Out 81 E Eject button 26, 27, 59 ejecting battery packs 42 CD/DVD discs - Sony PCG-GRX550 | VAIO User Guide - Page 157
16 Insert key 13 installing hard drives 32 hardware 57 memory module 110 peripherals 57 J Jog Dial using 22 VAIO Action Setup 21 K keyboard key combinations 14, 17 PS/2 65 using 12 L LAN see Local Area Network Launcher Mode 23 LCD selecting to display output 78 troubleshooting 134 Local Area Network - Sony PCG-GRX550 | VAIO User Guide - Page 158
94 Maximum Battery Life 94 Maximum Performance 94 Power Management Off 94 Standby 96 PowerPanel customizing toolbar 94, 96 Print Screen key 13 printer connecting 73-74 port 73-74 troubleshooting 145 Printer tab 91 projector 77 PS/2 mouse or keyboard 65 R Recovery CD 122 removing floppy disk drive 60 - Sony PCG-GRX550 | VAIO User Guide - Page 159
support information 152 troubleshooting 141 Software list 113 Sony Fax-on-Demand service 151 Sony Notebook Setup screen 90 Sony Service Center 153, 154 speakers external 84 switching 17 troubleshooting 143 volume 17 Standby mode 45, 96 support software 152 support, technical 149 switching display - Sony PCG-GRX550 | VAIO User Guide - Page 160
help 14 VAIO Action Setup 21 video camera 81 viewing the amount of memory 111 volume control 17 W weight saver attaching 40 connecting 43 removing 44 using 43 window design of Sony software 100 Windows Explorer 14 key 13 key combinations 14 taskbar 132 Wireless LAN 50 Wireless LAN Access Point 86
-
 1
1 -
 2
2 -
 3
3 -
 4
4 -
 5
5 -
 6
6 -
 7
7 -
8
-
9
-
10
-
11
-
12
-
13
-
14
-
15
-
16
-
17
-
18
-
19
-
20
-
21
-
22
-
23
-
24
-
25
-
26
-
27
-
28
-
29
-
30
-
31
-
32
-
33
-
34
-
35
-
36
-
37
-
38
-
39
-
40
-
41
-
42
-
43
-
44
-
45
-
46
-
47
-
48
-
49
-
50
-
51
-
52
-
53
-
54
-
55
-
56
-
57
-
58
-
59
-
60
-
61
-
62
-
63
-
64
-
65
-
66
-
67
-
68
-
69
-
70
-
71
-
72
-
73
-
74
-
75
-
76
-
77
-
78
-
79
-
80
-
81
-
82
-
83
-
84
-
85
-
86
-
87
-
88
-
89
-
90
-
91
-
92
-
93
-
94
-
95
-
96
-
97
-
98
-
99
-
100
-
101
-
102
-
103
-
104
-
105
-
106
-
107
-
108
-
109
-
110
-
111
-
112
-
113
-
114
-
115
-
116
-
117
-
118
-
119
-
120
-
121
-
122
-
123
-
124
-
125
-
126
-
127
-
128
-
129
-
130
-
131
-
132
-
133
-
134
-
135
-
136
-
137
-
138
-
139
-
140
-
141
-
142
-
143
-
144
-
145
-
146
-
147
-
148
-
149
-
150
-
151
-
152
-
153
-
154
-
155
-
156
-
157
-
158
-
159
-
160
 |
 |

1
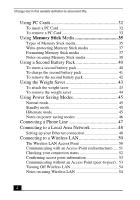
Contents
Welcome
.......................................................
9
Using Your VAIO Notebook
......................
11
Using the Keyboard
...................................................
12
Combinations and functions with the Windows key
.........
14
Indicators
...........................................................................
15
Indicator lights
...................................................................
16
Combinations and functions with the Fn key
....................
17
Using the Touchpad
..................................................
19
VAIO Action Setup
...................................................
21
Using the Center Jog Dial Control
............................
22
Using the center Jog Dial control
......................................
22
Launcher mode
..................................................................
23
Guide mode
........................................................................
24
Center Jog Dial back button
...............................................
24
Using the center Jog Dial control with Sony software
......
25
Using the center Jog Dial control with other software
......
25
Using the Optical Disc Drive
....................................
26
To insert a disc
...................................................................
26
To eject a disc
....................................................................
27
To play a DVD
...................................................................
28
To play an audio CD
..........................................................
29
Notes on CD and DVD discs
.............................................
30
To write data to a CD-RW or CD-R disc
...........................
30