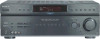
Sony STR-DE598 Operating Instructions - Page 21
: Adjusting the speaker levels and balance, — TEST TONE - remote
 |
View all Sony STR-DE598 manuals
Add to My Manuals
Save this manual to your list of manuals |
Page 21 highlights
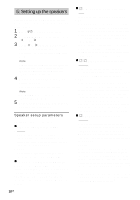
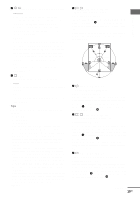
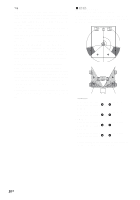
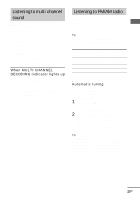
Getting Started Tip Surround speaker position is designed specifically for implementation of the Cinema Studio EX modes. For other sound fields, speaker position is not so critical. Those sound fields were designed under the premise that the surround speakers would be located behind the listening position, but presentation remains fairly consistent even with the surround speakers positioned at a rather wide angle. However, if the speakers are pointing toward the listener from the immediate left and right of the listening position, the surround effects becomes unclear unless set to "SIDE/LO" or "SIDE/HI". Nevertheless, each listening environment has many variables, such as wall reflections, and you may obtain better results using "BEHD/HI" if your speakers are located high above the listening position, even if they are to the immediate left and right. Therefore, although it may result in a setting contrary to the above explanation, we recommend that you playback multi channel surround encoded software and select the setting that provides a good sense of spaciousness and that best succeeds in forming a cohesive space between the surround sound from the surround speakers and the sound of the front speakers. If you are not sure which sounds best, select "BEHD/LO" or "BEHD/HI" and then use the speaker distance parameter and speaker level adjustments to obtain proper balance. x SP > XXX Hz (Speaker crossover frequency)* Initial setting: 100 Hz Lets you adjust the bass crossover frequency of speakers in SET UP menu. You can adjust the bass crossover frequency from 40 Hz to 160 Hz in 9 steps. * This setup item is only available when at least one speaker is set to "SMALL" and the corresponding speaker segment flashes in the display. 6: Adjusting the speaker levels and balance - TEST TONE Adjust the speaker levels and balance while listening to the test tone from your listening position. Use the remote for the operation. Tip The receiver employs a test tone with a frequency centered at 800 Hz. 1 Press ?/1 to turn on the receiver. 2 Press TEST TONE. "T. TONE" appears in the display and the test tone is output from each speaker in sequence. Front (left) t Center t Front (right) t Surround (right) t Surround back t Surround (left) t Sub woofer 3 Adjust the speaker levels and balance using the LEVEL menu so that the level of the test tone sounds the same from each speaker. For details on the LEVEL menu settings, see page 37. Tips • To adjust the level of all speakers at the same time, press MASTER VOL +/- on the remote or turn MASTER VOLUME -/+ on the receiver. • The adjusted value are shown in the display during adjustment. 4 Press TEST TONE again after adjustment. The test tone turns off. Notes • The test tone cannot be used when MULTI CH IN function is used. • Although these adjustments can also be made via the front panel using the LEVEL menu (when the test tone is output, the receiver switches to the LEVEL menu automatically), we recommend you follow the procedure described above and adjust the speaker levels from your listening position using the remote. 21GB
-
 1
1 -
2
-
3
-
4
-
5
-
6
-
7
-
8
-
9
-
10
-
11
-
12
-
13
-
14
-
15
-
 16
16 -
 17
17 -
 18
18 -
 19
19 -
 20
20 -
 21
21 -
 22
22 -
 23
23 -
 24
24 -
 25
25 -
 26
26 -
27
-
28
-
29
-
30
-
31
-
32
-
33
-
34
-
35
-
36
-
37
-
38
-
39
-
40
-
41
-
42
-
43
-
44
-
45
-
46
-
47
-
48
-
49
-
50
-
51
-
52
-
53
-
54
-
55
-
56
 |
 |