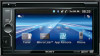
Sony XAV-602BT Operating Instructions 1 - Page 8
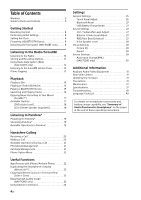
Getting Started, Resetting the Unit, Performing Initial Settings, Setting the Clock
 |
View all Sony XAV-602BT manuals
Add to My Manuals
Save this manual to your list of manuals |
Page 8 highlights
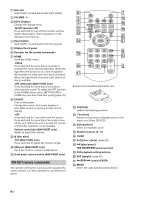
Getting Started Resetting the Unit Before operating the unit for the first time, or after replacing the car battery or changing connections, you must reset the unit. 1 Press the reset button on the unit. Use a pointed object, such as a ballpoint pen. Note Pressing the reset button will erase the clock setting and some stored contents. Performing Initial Settings After resetting, the initial setting display appears. Setting the Clock 1 Press HOME, then touch [Settings]. 2 Touch , then touch [Date & Time]. 3 Touch [Select Time Zone]. The setting display appears. To return to the [Date & Time] display, touch . 4 Touch [Set Date], then set the year, month and day. 5 Touch [Set Time], then set the hour and minute. 6 Touch [AM] or [PM]. 7 Touch [OK]. The setting is complete. To delete an entered number, touch [Clear]. For XAV-602BT To activate/deactivate the CT function (page 12), touch [CT] in step 4. 1 Touch [No] on the demo setting display. 2 Touch [Language] to set the display language. Move the scrollbar up and down, then select the desired language. 3 Touch [Subwoofer] to set the subwoofer connection status. Set to [ON] if a subwoofer is connected, or [OFF] if not. 4 Touch [Listening Position] to set the listening position. Set to [Front L] if your listening position is front left, or [Front R] if front right. To return to the initial setting display, touch . 5 Touch [OK]. The setting is complete. This setting can then be further configured in the setting menu (page 25). 8GB Preparing a BLUETOOTH Device You can enjoy music, or perform handsfree calling, by connecting a suitable BLUETOOTH device (cellular phone, audio device, etc.). For details on connecting a BLUETOOTH device, refer to the operating instructions supplied with the device. Before connecting, turn down the volume of this unit; otherwise, loud sound may result. Pairing and connecting with a BLUETOOTH device When connecting a BLUETOOTH device for the first time, mutual registration (called "pairing") is required. Pairing enables this unit and other devices to recognize each other. 1 Press HOME, then touch [Settings]. 2 Touch , and move the scrollbar up and down. 3 Touch [Bluetooth Connection], then set the signal to [ON]. The BLUETOOTH signal of this unit is activated and appears on the status bar. 4 Touch [Pairing >]. The unit enters pairing standby mode. 5 Perform the pairing procedure on the BLUETOOTH device to detect this unit.
-
 1
1 -
2
-
 3
3 -
 4
4 -
 5
5 -
 6
6 -
 7
7 -
 8
8 -
 9
9 -
 10
10 -
 11
11 -
 12
12 -
 13
13 -
14
-
15
-
16
-
17
-
18
-
19
-
20
-
21
-
22
-
23
-
24
-
25
-
26
-
27
-
28
-
29
-
30
-
31
-
32
-
33
-
34
-
35
-
36
-
37
-
38
-
39
-
40
-
41
-
42
-
43
-
44
-
45
-
46
-
47
-
48
-
49
-
50
-
51
-
52
-
53
-
54
-
55
-
56
-
57
-
58
-
59
-
60
-
61
-
62
-
63
-
64
-
65
-
66
-
67
-
68
-
69
-
70
-
71
-
72
-
73
-
74
-
75
-
76
-
77
-
78
-
79
-
80
-
81
-
82
-
83
-
84
-
85
-
86
-
87
-
88
-
89
-
90
-
91
-
92
-
93
-
94
-
95
-
96
-
97
-
98
-
99
-
100
-
101
-
102
-
103
-
104
-
105
-
106
-
107
-
108
-
109
-
110
-
111
-
112
-
113
-
114
-
115
-
116
-
117
-
118
-
119
-
120
-
121
-
122
-
123
-
124
-
125
-
126
-
127
-
128
-
129
-
130
-
131
-
132
-
133
-
134
-
135
-
136
-
137
-
138
-
139
-
140
-
141
-
142
-
143
-
144
-
145
-
146
-
147
-
148
-
149
-
150
-
151
-
152
-
153
-
154
-
155
-
156
-
157
-
158
-
159
-
160
-
161
-
162
-
163
-
164
 |
 |
