TP-Link RPS150 RPS150 V1 IG - Page 12
Installation Tools, Product Installation
 |
View all TP-Link RPS150 manuals
Add to My Manuals
Save this manual to your list of manuals |
Page 12 highlights
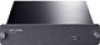
Redundant Power Supply 2222 Installation Tools ■■ Phillips Screwdriver ■■ ESD-preventive wrist wrap 2222 Product Installation The RPS150 can be installed either in a standard 19-inch rack via RPS2 or directly on a tabletop. ■■ Desktop Installation To install the device on the desktop, please follow the steps: Caution: ■■ Please set 5~10cm gaps around the device for heat dissipation and air circulation. ■■ Please avoid any heavy thing placed on the device. 111Set the device upside down on the flat desktop strong enough to support the entire weight of the device with all fittings. 222Remove the adhesive backing papers from the supplied rubber feet and attach the rubber feet to the recessed areas on the bottom at each corner of the device. 333Turnover the device and place it stably on the tabletop. Feet Bottom of the Device Notch FFFFFFFFFFF Desktop Installation ■■ Rack Installation RPS150 can be installed in the standard rack via the RPS2 chassis. One RPS2 chassis is designed to hold up to 2 RPS150. You should install the RPS2 chassis to the rack first, and then insert RPS150 into the RPS2. The detailed instructions are described below: 111Check the grounding and stability of the rack. 222Place the RPS2 horizontally to an appropriate position in the rack and then support it with bracket. 07 Installation
-
 1
1 -
2
-
3
-
4
-
5
-
6
-
 7
7 -
 8
8 -
 9
9 -
 10
10 -
 11
11 -
 12
12 -
 13
13 -
 14
14 -
 15
15 -
 16
16 -
 17
17 -
18
-
19
-
20
 |
 |
