TP-Link TL-WR841ND User Guide - Page 27
TL-WR841N/TL-WR841ND, Press the button of the new device in two minutes, Connect - tl wr841n access point
 |
UPC - 813120012903
View all TP-Link TL-WR841ND manuals
Add to My Manuals
Save this manual to your list of manuals |
Page 27 highlights
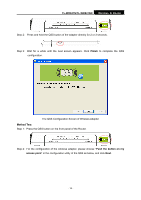
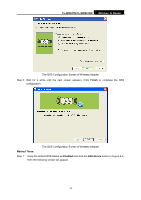
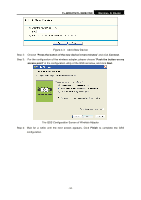
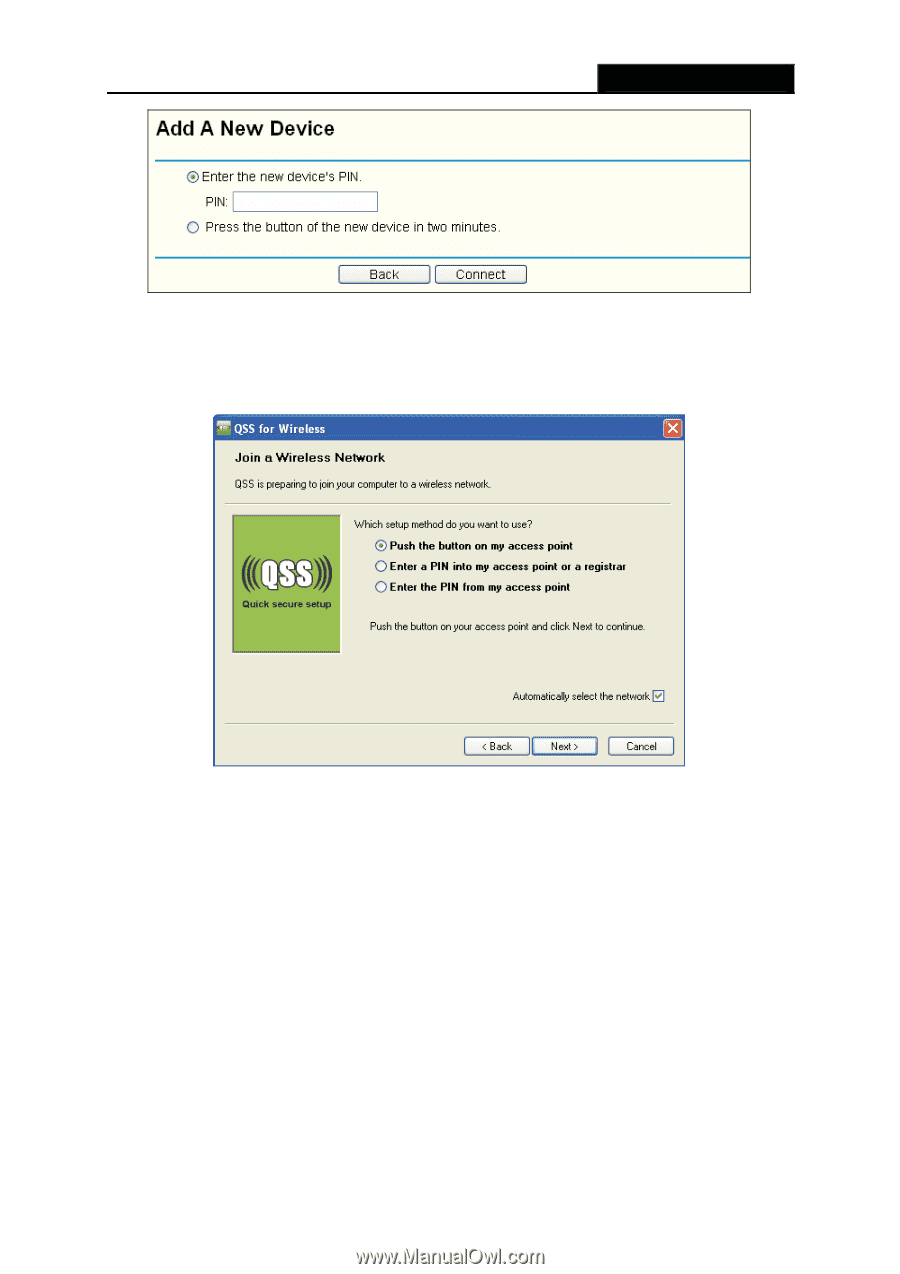
TL-WR841N/TL-WR841ND Wireless N Router Figure 4-3 Add A New Device Step 2: Choose "Press the button of the new device in two minutes" and click Connect. Step 3: For the configuration of the wireless adapter, please choose "Push the button on my access point" in the configuration utility of the QSS as below, and click Next. The QSS Configuration Screen of Wireless Adapter Step 4: Wait for a while until the next screen appears. Click Finish to complete the QSS configuration. - 20 -
-
 1
1 -
2
-
3
-
4
-
5
-
6
-
7
-
8
-
9
-
10
-
11
-
12
-
13
-
14
-
15
-
16
-
17
-
18
-
19
-
20
-
21
-
 22
22 -
 23
23 -
 24
24 -
 25
25 -
 26
26 -
 27
27 -
 28
28 -
 29
29 -
 30
30 -
 31
31 -
 32
32 -
33
-
34
-
35
-
36
-
37
-
38
-
39
-
40
-
41
-
42
-
43
-
44
-
45
-
46
-
47
-
48
-
49
-
50
-
51
-
52
-
53
-
54
-
55
-
56
-
57
-
58
-
59
-
60
-
61
-
62
-
63
-
64
-
65
-
66
-
67
-
68
-
69
-
70
-
71
-
72
-
73
-
74
-
75
-
76
-
77
-
78
-
79
-
80
-
81
-
82
-
83
-
84
-
85
-
86
-
87
-
88
-
89
-
90
-
91
-
92
-
93
-
94
-
95
-
96
-
97
-
98
-
99
-
100
-
101
-
102
-
103
-
104
-
105
-
106
-
107
-
108
 |
 |
TL-WR841N/TL-WR841ND
Wireless N Router
- 20 -
Figure 4-3
Add A New Device
Step 2:
Choose “
Press the button of the new device in two minutes
” and click
Connect
.
Step 3:
For the configuration of the wireless adapter, please choose “
Push the button on my
access point
” in the configuration utility of the QSS as below, and click
Next
.
The QSS Configuration Screen of Wireless Adapter
Step 4: Wait for a while until the next screen appears. Click
Finish
to complete the QSS
configuration.