Toshiba 62MX195 Owner's Manual - English
Toshiba 62MX195 - 62" Rear Projection TV Manual
 |
UPC - 022265251218
View all Toshiba 62MX195 manuals
Add to My Manuals
Save this manual to your list of manuals |
Toshiba 62MX195 manual content summary:
- Toshiba 62MX195 | Owner's Manual - English - Page 1
the picture to appear on-screen if the TV is powered off and then on again quickly when the lamp unit is hot. This is a property of DLP TV lamp technology and is NOT a sign of malfunction. For details, see "IMPORTANT NOTICE ABOUT HOT LAMP RESTART" on page 5. 56MX195 62MX195 72MX195 © 2005 TOSHIBA - Toshiba 62MX195 | Owner's Manual - English - Page 2
product use and user settings. If you use the lamp beyond its service life: • you may notice a reduction in the colors and/or brightness of the picture, at which time you should replace the lamp unit; and • the strength of the quartz glass in the lamp will be reduced and the lamp may rupture. If the - Toshiba 62MX195 | Owner's Manual - English - Page 3
completely to prevent blade exposure. 16) WARNING: This product contains a lamp to project the picture, and requires special safety precautions: • See pages 128-130 for instructions on lamp unit replacement and care. • DO NOT attempt to service this product except as specified on pages 128-130. The - Toshiba 62MX195 | Owner's Manual - English - Page 4
or continuous, unplug the power cord and contact a Toshiba Authorized Service Center. 35) Special care for DLP™ (Digital Light Processing) units: • The lamp unit in this product has a limited service life. The length of service life varies depending on product use or user settings. If you use the - Toshiba 62MX195 | Owner's Manual - English - Page 5
a limited service life. When the lamp wears out, the picture may become dark or black or the lamp may fail, at which time you must replace the lamp unit. See "Lamp unit replacement and care" on pages 128-130. 2) If you set the lamp mode to Low Power, each time you turn on the TV, the lamp will start - Toshiba 62MX195 | Owner's Manual - English - Page 6
program guide 58 Setting up the TV Guide On Screen™ system 58 Navigating the TV Guide On Screen™ system 59 TV Guide On Screen™ remote control functions ........ 59 Video Window 60 Panel Menus 60 Info Box 61 TV Guide On Screen™ Icons 61 TV Guide On Screen™ Services 62 LISTINGS screen - Toshiba 62MX195 | Owner's Manual - English - Page 7
119 Home network troubleshooting 122 LED indications 124 TV Guide On Screen™ FAQ 125-127 Chapter 13: Appendix 128 Lamp unit replacement 128-130 Specifications 131 Limited United States Warranty 132 Limited Canada Warranty 133 Index 135 Copyright © 2005 TOSHIBA CORPORATION. All rights - Toshiba 62MX195 | Owner's Manual - English - Page 8
about your DLP™ projection TV" on page 5. • This manual applies to models 56MX195, 62MX195, and 72MX195. Before you start reading, check the model number on the back of your TV. • Instructions in this manual are based on using the remote control. You also can use the controls on the TV's front and - Toshiba 62MX195 | Owner's Manual - English - Page 9
the remote control is usable. When the yellow LED stops blinking, press POWER to turn on the TV. See "LED indications" on page 124. 12. See "Menu layout and navigation" for a quick overview of navigating the TV's menu system (pages 40-41). 13. See Chapter 5 for details on setting up the TV Guide On - Toshiba 62MX195 | Owner's Manual - English - Page 10
program guide.) 0 Blue and Yellow LEDs When the blue LED lights solid (not blinking), it indicates that the TV power cord is plugged in. When the yellow LED lights solid (not blinking), it indicates that recording is in progress. See "LED indications" on page 124 for additional information. !¡ VIDEO - Toshiba 62MX195 | Owner's Manual - English - Page 11
the devices using the TV's IR pass-through or TheaterNet™ (on-screen device control) features. See pages 22 and 50. TheaterNet™ (IR) IN - For connecting to IR OUT on other devices. See page 23. 8 Digital Audio OUT - Optical audio output in Dolby Digital or PCM (pulse-code modulation) format for - Toshiba 62MX195 | Owner's Manual - English - Page 12
Home Interactive Network Connection) The RJ-45 (Ethernet) port allows your Toshiba Cinema Series TV to connect to your home network. This revolutionary home entertainment networking system lets you access MP3 audio files and JPEG picture files that are stored on a networked PC (as shared files) and - Toshiba 62MX195 | Owner's Manual - English - Page 13
(composite) video cable or the picture performance will be unacceptable. ● Component video cables come in sets of three and are for use with video devices with component video output. (ColorStream® is Toshiba's brand of component video.) These cables are typically color-coded red, green, and blue - Toshiba 62MX195 | Owner's Manual - English - Page 14
programming. Certain advanced and interactive digital cable services (such as video-on-demand, a cable operator's enhanced program guide, and data-enhanced television services) will not work with the use of a CableCARD™ and may require the use of a separate set-top box from your cable operator. For - Toshiba 62MX195 | Owner's Manual - English - Page 15
to the instructions on page 28. 2. Make sure the VCR is connected to the A/V OUT terminals on the TV (see illustration). 3. Set the VCR to the appropriate line input (refer to your VCR owner's manual for details), and then turn OFF the VCR. 4. See Chapter 5 for details on setting up the TV Guide On - Toshiba 62MX195 | Owner's Manual - English - Page 16
to the instructions on page 28. 2. Make sure the VCR is connected to the A/V OUT terminals on the TV (see illustration). 3. Set the VCR to the appropriate line input (refer to your VCR owner's manual for details), and then turn OFF the VCR. 4. See Chapter 5 for details on setting up the TV Guide On - Toshiba 62MX195 | Owner's Manual - English - Page 17
to the instructions on page 28. 2. Make sure the VCR is connected to the A/V OUT terminals on the TV (see illustration). 3. Set the VCR to the appropriate line input (refer to your VCR owner's manual for details), and then turn OFF the VCR. 4. See Chapter 5 for details on setting up the TV Guide On - Toshiba 62MX195 | Owner's Manual - English - Page 18
to the instructions on page 28. 2. Make sure the VCR is connected to the A/V OUT terminals on the TV (see illustration). 3. Set the VCR to the appropriate line input (refer to your VCR owner's manual for details), and then turn OFF the VCR. 4. See Chapter 5 for details on setting up the TV Guide On - Toshiba 62MX195 | Owner's Manual - English - Page 19
to the instructions on page 28. 2. Make sure the VCR is connected to the A/V OUT terminals on the TV (see illustration). 3. Set the VCR to the appropriate line input (refer to your VCR owner's manual for details), and then turn OFF the VCR. 4. See Chapter 5 for details on setting up the TV Guide On - Toshiba 62MX195 | Owner's Manual - English - Page 20
to the instructions on page 28. 2. Make sure the VCR is connected to the A/V OUT terminals on the TV (see illustration). 3. Set the VCR to the appropriate line input (refer to your VCR owner's manual for details), and then turn OFF the VCR. 4. See Chapter 5 for details on setting up the TV Guide On - Toshiba 62MX195 | Owner's Manual - English - Page 21
). See "Setting the HDMI™ audio mode" on page 55. DVI device VIDEO AUDIO DVI / HDCP OUT L R IN L R OUT R TV ___________ HDMI, the HDMI logo and High-Definition Multimedia Interface are trademarks or registered trademarks of HDMI Licensing LLC. Copyright © 2005 TOSHIBA CORPORATION. All - Toshiba 62MX195 | Owner's Manual - English - Page 22
at which the remote control touched the device is the location of the sensor. 4. If the device does not turn on, move the remote control slightly to the right and press POWER again. 5. Repeat step 4 until you locate the device's infrared sensor. 22 Copyright © 2005 TOSHIBA CORPORATION. All rights - Toshiba 62MX195 | Owner's Manual - English - Page 23
many IR remotecontrolled devices and IEEE1394 devices using the on-screen control icons. See pages 50-54 for details on setting up and using TheaterNet. See pages 25-27 for details on connecting IEEE1394 devices. Toshiba Video 3 TOP MENU ENTER EXIT Note: The TheaterNet on-screen icons are - Toshiba 62MX195 | Owner's Manual - English - Page 24
smaller "mini-optical" connector.) To control the audio: Turn on the TV and the digital audio device. Press MENU on the TV's remote control and open the AUDIO menu. Highlight Audio Setup and press ENTER. Audio Audio Settings Advanced Audio Settings Audio Setup In the Optical Output Format field - Toshiba 62MX195 | Owner's Manual - English - Page 25
(see "Using analog-compatible IEEE1394 devices" below). TV back panel Supported signals The IEEE1394 ports support only the signals listed below. Even though incompatible video, audio, and digital control signals cannot be decoded by the TV, these signals may be passed through the IEEE1394 cable - Toshiba 62MX195 | Owner's Manual - English - Page 26
the TV: • The remote control keys (Live, REW, PAUSE, PLAY, FF, etc.) are automatically activated to allow control of live TV. • The TV Guide On Screen™ system is automatically configured to allow recording to the device.* See Chapters 5 and 7 for details. Also see page 55 for details on setting the - Toshiba 62MX195 | Owner's Manual - English - Page 27
is not marked with an "S" number, look in the device's user manual or call the device manufacturer's technical support number. • If your IEEE1394 device has a two-position power switch, always place the device at the end of the chain and turn ON the power switch when any device is used. If the - Toshiba 62MX195 | Owner's Manual - English - Page 28
at which the remote control touched the device is the location of the sensor. 4. If the device does not turn on, move the remote control slightly to the right and press POWER again. 5. Repeat step 4 until you locate the device's infrared sensor. 28 Copyright © 2005 TOSHIBA CORPORATION. All rights - Toshiba 62MX195 | Owner's Manual - English - Page 29
To use a PC, set the monitor output resolution on the PC before connecting it to the TV. The following signals picture, use the PC setting feature. (see "Using the PC setting feature" on page 94). TV models cannot be connected to this TV. • An adapter is not Video, some scenes may be skipped - Toshiba 62MX195 | Owner's Manual - English - Page 30
set up Internet/e-mail service. • See Chapter 2 for recording device connection instructions. See Chapters 10 and 11 for details on configuring and using e-mail scheduling, file sharing, the JPEG Picture Viewer, and the MP3 Audio Player. Note: • The TV router/switch may be part of your DSL or - Toshiba 62MX195 | Owner's Manual - English - Page 31
channel list (page 49). INPUT selects the video input source (page 72). MODE cycles through the six remote control device modes: TV, CBL/SAT, VCR/PVR, DVD, AUDIO1, and AUDIO2. The mode indicator light will remain lit for a few seconds (page 33). PIC SIZE cycles through the five pictures sizes - Toshiba 62MX195 | Owner's Manual - English - Page 32
SPLIT turns the POP feature on and off (page 81) or locks/unlocks the TV Guide On Screen™ video window (page 60). PIC MODE selects the picture mode (page 84). FAV SCAN accesses the favorite channel search function (page 83). FREEZE accesses the freeze feature (page 83). Remote control effective - Toshiba 62MX195 | Owner's Manual - English - Page 33
Toshiba TV 2) CBL/SAT 3) VCR/PVR 4) DVD Multi-brand video/audio devices 5) AUDIO 1 6) AUDIO 2 You can directly select the device mode by pressing the corresponding number button (1-6) while pressing the MODE button. Number (1-6) MODE Note: Although your new TV's remote control includes codes - Toshiba 62MX195 | Owner's Manual - English - Page 34
Chapter 3: Using the remote control Remote Control functional key chart Key Label Toshiba TV Cable Satellite (TV) (CBL/SAT) (CBL/SAT) VCR DVD/LD Receiver CD (AUDIO) (AUDIO) PVR (VCR) MODE Remote control device mode selection LIGHT Lights the remote key, and toggles between enabled and - Toshiba 62MX195 | Owner's Manual - English - Page 35
Chapter 3: Using the remote control Remote Control functional key chart (continued) Key Label Toshiba TV Cable Satellite (TV) (CBL/SAT) (CBL/SAT) VCR DVD/LD Receiver CD (AUDIO) (AUDIO) PVR (VCR) MUTE Sound mute*2 Sound mute*2 Sound mute*2 Sound mute*2 Sound mute*2 Sound - Toshiba 62MX195 | Owner's Manual - English - Page 36
blink three times. The remote control will begin to cycle through the available codes again. If no key is pressed within 10 seconds while programming, the remote control will exit the program mode and return to the previous code. POWER Numbers MODE y CH y VOL y RECALL 36 Copyright © 2005 TOSHIBA - Toshiba 62MX195 | Owner's Manual - English - Page 37
RECALL, press 8 - 0 - 0 - 0. 2. Press VOL z. The mode light will blink four times (unlocked). Operational feature reset (8900) This feature clears all programmed remote control features not related to "Device code setup" and resets the Volume Lock to "TV." To reset the features: While holding down - Toshiba 62MX195 | Owner's Manual - English - Page 38
remote control Multi-brand remote control device codes VCRs/PVRs Brand ADMIRAL AIWA AKAI AUDIO DYNAMIC BELL&HOWELL BROKSONIC CANON CCE CITIZEN CRAIG CURTIS MATHES DAEWOO DBX DIMENSIA EMERSON FISHER FUNAI GE GO VIDEO THOMSON 0179, 0183 Tivo 7100, 7101 TOSHIBA 0101, 0146, 0166, 0160 VECTOR - Toshiba 62MX195 | Owner's Manual - English - Page 39
Chapter 3: Using the remote control Multi-brand remote control device codes (continued) CD players Brand Code ADMIRAL 6126 AIWA NEC PANASONIC PHILIPS PIONEER PROSCAN QUASAR RCA SAMSUNG SANYO SHARP SONY TEAC TOSHIBA YAMAHA Code 5114 5100 5102, 5103 5101 5114 5114, 5118, 5119 5114 5104 - Toshiba 62MX195 | Owner's Manual - English - Page 40
on the remote control or TV control panel. Applications ➞ TV Guide On Screen™ ➞ Launch Gemstar / TV GUIDE ➞ Audio Player ➞ Launch MP3 audio player ➞ Picture Viewer ➞ Launch the picture viewer ➞ Digital CC / Audio Selector ➞ Launch the ATSC Digital CC Selector ➞ CableCARD™ ➞ Dynamic list of items - Toshiba 62MX195 | Owner's Manual - English - Page 41
down/left/right arrow buttons (yzx •) on the remote control or TV control panel to move in the corresponding direction in a menu. • Press ENTER to save your menu settings or select a highlighted item. (A highlighted menu item appears in a different color in the menu.) • All menus close automatically - Toshiba 62MX195 | Owner's Manual - English - Page 42
and program listings for your area. The listings are automatically updated several times a day. Note: • You must first set up your TV according to the applicable connection instructions in Chapter 2. • If you connected a Toshiba AVHD Recorder, you must perform the following TV Guide On Screen - Toshiba 62MX195 | Owner's Manual - English - Page 43
5: TV Guide On Screen™ setup Setting up the TV Guide On Screen™ system (continued) Screen 5: Which TV input is your cable box plugged into? If you select ANT 1, screen 6 appears. If you select Video 1, screen 7 appears. Screen 9: To allow the TV Guide On Screen™ system to find the correct code - Toshiba 62MX195 | Owner's Manual - English - Page 44
. Note: Read the on-screen information regarding the amount of time it may take for listing information to download from the TV Guide On Screen™ service. Press ENTER to display screen 15. Screen 18: Turn on your VCR, insert a tape (either blank or previously recorded), and then press PLAY. Screen - Toshiba 62MX195 | Owner's Manual - English - Page 45
Reminder The TV Guide On Screen™ system receives program listing data through your Cable or over-the-air video signal. In order to receive regular program listing updates, remember to do the following: 1. Leave the TV in standby mode when it is not in use by turning it OFF but leaving the power cord - Toshiba 62MX195 | Owner's Manual - English - Page 46
Setting up your TV For menu navigation instructions, see Chapter 4. Selecting the menu language You can choose from three different languages (English, French and Spanish) for the on-screen display of menus and messages. (The TV Guide of the VIDEO modes is the current input during TV Guide On - Toshiba 62MX195 | Owner's Manual - English - Page 47
set of programmed channels. To remove a channel from the memory, you must manually delete it (see next page). • To tune the TV to a channel not programmed in the channel memory, you must use the Channel Number buttons on the remote control TV service list into the TV's TV will automatically cycle - Toshiba 62MX195 | Owner's Manual - English - Page 48
press ENTER to check the box. To manually add digital subchannels on a physical channel: Use the Channel Numbers and the Dash (-/100) on the remote control to enter the channel number (for example, 56-1). If the channel is found, the number will be added to the list and the box will be checked. If - Toshiba 62MX195 | Owner's Manual - English - Page 49
settings in the selected input. (This will not change the TV's To clear your favorite channel lists: 1. Press MENU and --9 --- To quickly scan through your favorite channels in a nine picture multi-window (for the current ANT input): Press FAV SCAN. See TOSHIBA CORPORATION. All rights reserved. 49 - Toshiba 62MX195 | Owner's Manual - English - Page 50
Input Type Brand IR List IR Code Video 1 Cable General Instrum... 0000 0000 Test Reset Done Select device type, brand, and IR code from owners manual. Using the x • buttons, select the Input the device is connected to. Note: When the input is changed, all unsaved settings will be lost - Toshiba 62MX195 | Owner's Manual - English - Page 51
DEVICE on the remote control to display the device control selection screen. The following are examples of the TheaterNet on-screen control icons for various devices. Toshiba Symbio™ AVHD Recorder control* * If you connected a Toshiba TM AVHD Recorder, you must set up the TV Guide On Screen - Toshiba 62MX195 | Owner's Manual - English - Page 52
Chapter 6: Setting up your TV TheaterNet™ IR device codes Amplifiers Brand Aiwa Bose Carver Curtis Mathes Supercable 0276 Tocom 0012 Torx 0003 Toshiba 0000 Tusa 0015 United Artists 0007 Zenith 0000, 0525, 0899 CD players Brand Code Aiwa 0157, 0124 Burmester 0420 California - Toshiba 62MX195 | Owner's Manual - English - Page 53
Chapter 6: Setting up your TV TheaterNet™ IR device codes (continued) Video accessory (HDTV decoder) Brand Code Panasonic 1120 Pioneer 1010 Princeton 0113, 0295 Samsung 1190 Sensory Science 1126 Sharp 1010 Receivers Brand Code ADC 0531 Aiwa 1089, 1405, 0121, 0158, 0189, 0405, - Toshiba 62MX195 | Owner's Manual - English - Page 54
Chapter 6: Setting up your TV TheaterNet™ IR device codes (continued) VCRs (cont.) Brand Magnavox Magnin Thomas 0000 Tivo 0618, 0636 Toshiba 0045, 0043, 0845 Totevision 0037, 0240 Unitech 0240 Vector 0045 Vector Research 0038 Video Concepts 0045 Videomagic 0037 Videosonic 0240 - Toshiba 62MX195 | Owner's Manual - English - Page 55
lose the time and date settings when the power is restored. • If you manually set the time and date and then perform TV Guide On Screen™ setup, the manual time and date settings will be overridden by the TV Guide On Screen™ settings. Copyright © 2005 TOSHIBA CORPORATION. All rights reserved. 55 - Toshiba 62MX195 | Owner's Manual - English - Page 56
take several seconds for the picture to appear when you turn on the TV again. See "IMPORTANT NOTICE ABOUT HOT LAMP RESTART," below. If Quick Restart is set to On and you turn off the TV, the following will occur for a few minutes: • The screen (lamp) lights dimly. • The fans continue to run. This is - Toshiba 62MX195 | Owner's Manual - English - Page 57
listed in the Signal Meter screen may not correspond to a virtual TV Model: IEEE1394 GUID: Toshiba 62MX195 00003914- code (or 0000 if no PIN code has been set). 4. Highlight Yes and press ENTER. The TV will turn off automatically after a few seconds. After the TV turns off, unplug the TV power - Toshiba 62MX195 | Owner's Manual - English - Page 58
when you turn on the TV. To turn off this feature, see page 45. Setting up the TV Guide On Screen™ system Follow these instructions to set up the TV Guide On Screen™ system so it can receive current program data for your area. Note: If you move the TV to a different ZIP/postal code, you will - Toshiba 62MX195 | Owner's Manual - English - Page 59
downloaded from the TV Guide On Screen™ service to your TV. • The TV Guide On Screen™ interactive program guide supports cable-ready, cable box, and digital cable services, as well as over-the-air broadcasts. It does not provide listings for satellite services. TV Guide On Screen™ remote control - Toshiba 62MX195 | Owner's Manual - English - Page 60
indicates the status of the Video Window. • You can set the Video Window to remain on a single channel (locked) or to change channels (unlocked) as you navigate through listings. To lock/unlock the Video Window: Press the SPLIT button on the remote control to toggle between locking and unlocking - Toshiba 62MX195 | Owner's Manual - English - Page 61
). • An Info Box for a program in the LISTINGS screen can have up to three sizes: Small, Large, or "No." - Press INFO on the remote control to cycle among the sizes. - The default Info Box size is Small. To change the default size, open the SETUP Service screen (see page 70). • The Info Button - Toshiba 62MX195 | Owner's Manual - English - Page 62
sure to follow the instructions under "TV Guide On Screen™ Reminder" on page 45. LISTINGS screen • When you open the TV Guide On Screen™ system, LISTINGS is always the first service displayed. • Use the Number keys on the remote control to jump to a specific channel's listings. • To watch a show - Toshiba 62MX195 | Owner's Manual - English - Page 63
Chapter 7: Using the TV Guide On Screen™ interactive program guide TV Guide On Screen™ Services (continued) SEARCH screen • SEARCH allows you to find shows by keyword, alphabetically, or by category (HDTV, Movies, Sports, Children, Educational, News, Variety, Series). Example: Category search 1. - Toshiba 62MX195 | Owner's Manual - English - Page 64
Using the TV Guide On Screen™ interactive program guide TV Guide On Screen™ Services (continued) listing and press ENTER to watch (if on now) or press MENU to display the Episode Options panel menu. From the Episode Options menu, you can choose to set TOSHIBA CORPORATION. All rights reserved. - Toshiba 62MX195 | Owner's Manual - English - Page 65
Chapter 7: Using the TV Guide On Screen™ interactive program guide TV Guide On Screen™ Services (continued) RECORDINGS screen The RECORDINGS service screen displays a list of previously recorded or currently recording shows on an IEEE1394 recording device connected to the TV (see Chapter 2). Note: - Toshiba 62MX195 | Owner's Manual - English - Page 66
Chapter 7: Using the TV Guide On Screen™ interactive program guide TV Guide On Screen™ Services (continued) SCHEDULE screen The SCHEDULE service screen allows you to review, edit, or delete Record and Remind events you set previously. • With SCHEDULE highlighted in the Service Bar, press INFO to - Toshiba 62MX195 | Owner's Manual - English - Page 67
Using the TV Guide On Screen™ interactive program guide TV Guide On Screen™ Services (continued) Record features (continued) 3) Manually set a show to Record 1. Highlight SCHEDULE in the Service Bar, and press MENU to display the Schedule Options panel menu. 2. Highlight NEW MANUAL RECORDING and - Toshiba 62MX195 | Owner's Manual - English - Page 68
TV Guide On Screen™ interactive program guide TV Guide On Screen™ Services (continued) Remind features You can set a Reminder to perform the following functions: • Automatically turn on the TV (if off ) at the scheduled reminder time, and tune the TV . Note: Manual reminders are listed by channel - Toshiba 62MX195 | Owner's Manual - English - Page 69
Chapter 7: Using the TV Guide On Screen™ interactive program guide TV Guide On Screen™ Services (continued) Remind features (continued) Reminder notification banner Based on your option settings, a notification banner will appear on-screen, if your TV is on at the scheduled Reminder time. At that - Toshiba 62MX195 | Owner's Manual - English - Page 70
the initial TV Guide On Screen™ setup (as described in Chapter 5), you can change the following settings: • Change system settings • Change channel display • Change default options Highlight a choice, press ENTER, and follow the on-screen instructions. With SETUP highlighted in the Service Bar - Toshiba 62MX195 | Owner's Manual - English - Page 71
remote control when the TV Guide On Screen™ system is open. Choices are No Only, Small Only, Large Only, No & Small, No & Large, Small & Large, and All (default). • AUTO GUIDE: Automatic entry into the TV Guide On Screen™ system when the TV is powered on. Choices are On (default) and Off. Note: Set - Toshiba 62MX195 | Owner's Manual - English - Page 72
specific devices you have connected to the TV (see "Labeling the video input sources" on the next page). • The source can be "hidden." See page 73 for details. Remote control TV control panel CHANNEL { Numbers INPUT y z TV/VIDEO 72 Copyright © 2005 TOSHIBA CORPORATION. All rights reserved. - Toshiba 62MX195 | Owner's Manual - English - Page 73
you set up a cable box in VIDEO 1, that input will be labeled automatically and cannot be relabeled until you remove the device from the TV Guide On input to be "grayed out" in the input list and skipped over when you press the INPUT button on the remote control. Note: If you select "Hide" for all - Toshiba 62MX195 | Owner's Manual - English - Page 74
). • Set a "HOME" channel for the ANT 1, ANT 2, and Cable Box inputs. To open the Channel Browser banner: Press x or ENTER on the remote control. - The "Current mode" field on the Channel Browser banner will flash green. Note: The Channel Browser banner opens in Browse mode by default. - Toshiba 62MX195 | Owner's Manual - English - Page 75
history. Clearing channels from the channel history • Turning off the TV will clear all three channel histories (ANT 1, remote control for 3 seconds. When the Home channel is saved, the Channel Browser banner will appear at the bottom of the screen with the home icon flashing green. Note: You can set - Toshiba 62MX195 | Owner's Manual - English - Page 76
have to tune the RF channel using the Channel Number and Dash buttons on the remote control. Switching between two channels using Channel Return The Channel Return feature allows you to Channel Numbers - (dash) 76 CH RTN Copyright © 2005 TOSHIBA CORPORATION. All rights reserved. CHANNEL yz - Toshiba 62MX195 | Owner's Manual - English - Page 77
Done and press ENTER. Theater Settings Picture Size Picture Scroll Cinema Mode Auto Aspect Ratio Reset Natural -- Film On Done Conventional picture on a conventional TV screen Conventional picture in Natural size on your wide-screen TV Copyright © 2005 TOSHIBA CORPORATION. All rights reserved - Toshiba 62MX195 | Owner's Manual - English - Page 78
16:9 [480i, 480p] source programs only) • If receiving a squeezed 4:3 format program, the picture is stretched wider to fill the width of the screen, but not stretched taller. • None of the picture is hidden. 78 Full picture size example Copyright © 2005 TOSHIBA CORPORATION. All rights reserved. - Toshiba 62MX195 | Owner's Manual - English - Page 79
the Freeze mode is active, or the TV Guide On Screen™ system is open. To turn on the auto aspect ratio feature: 1. Press MENU and open the Video menu. 2. Highlight Theater Settings and press ENTER. Video Picture Settings Advanced Picture Settings Theater Settings Navigate Select CH RTN Back EXIT - Toshiba 62MX195 | Owner's Manual - English - Page 80
Low Power mode reduces wear on the projection lamp. Using this mode should result in longer lamp life. See "Lamp unit replacement and care" on page 128-130. To select the lamp mode: 1. Press MENU and open the Video menu. 2. Highlight Advanced Picture Settings and press ENTER. Video Picture Settings - Toshiba 62MX195 | Owner's Manual - English - Page 81
POP window Green border ( window is in Video 1/2/3, ColorStream HD1/ picture. To close the POP window: Press SPLIT or EXIT. Notes about recording: • If the POP window is open and you attempt to start recording, the POP window will close and recording will start. • If you use the TV's remote control - Toshiba 62MX195 | Owner's Manual - English - Page 82
is output from the TV speakers (and from the VARIABLE AUDIO OUT terminals). The window with the active sound is outlined with a green border. Example: Press x Example: Press • x • POP double-window aspect ratio The POP double-window feature displays each picture - Toshiba 62MX195 | Owner's Manual - English - Page 83
highlight the window. The highlighted window will display as a moving picture. 3. Press ENTER to tune the TV to the highlighted channel and close the multi-window. 2 4-1 4-2 6 11 13 18 31 36 Copyright © 2005 TOSHIBA CORPORATION. All rights reserved. y x • z ENTER EXIT FREEZE FAV SCAN 83 - Toshiba 62MX195 | Owner's Manual - English - Page 84
the remote control. The following popup menu appears onscreen. Picture Settings Mode Mode: Standard Standard Repeatedly press PIC MODE to cycle among the modes or use x or • to PIC select the modes. MODE To select the picture mode using the menu system: 1. Press MENU and open the Video menu - Toshiba 62MX195 | Owner's Manual - English - Page 85
Picture Settings and press ENTER. Video Picture Settings Advanced Picture Settings Theater Settings 3. In the CableClear/DNR field, select your desired setting. Advanced Picture Settings Dynamic Contrast MPEG Noise Reduction CableClear Color Temperature Lamp Mode On Low Auto Cool Low Power - Toshiba 62MX195 | Owner's Manual - English - Page 86
defaults, highlight Reset and press ENTER. Video Picture Settings Advanced Picture Settings Theater Settings 3. In the Dynamic Contrast field, select either On or Off. Advanced Picture Settings Dynamic Contrast MPEG Noise Reduction CableClear Color Temperature Lamp Mode Reset On Low Auto Cool - Toshiba 62MX195 | Owner's Manual - English - Page 87
mode has two options: • Captions-An on-screen display of the dialogue, narration, and sound effects of TV programs and videos that are closed captioned (usually marked "CC" in program guides). • Text-An on-screen display of information not related to the current program, such as weather or stock - Toshiba 62MX195 | Owner's Manual - English - Page 88
list of services. If the selected service is not available, the next best service will be used instead. To select digital closed captions: 1. Press MENU and open the Applications menu. 2. Highlight Digital CC/Audio Selector and press ENTER. Applications TV Guide On Screen Audio Player Picture - Toshiba 62MX195 | Owner's Manual - English - Page 89
the desired service. Applications TV Guide On Screen Audio Player Picture Viewer Digital CC is not available when the TV is in VIDEO mode. When the TV receives a stereo or SAP Settings Advanced Audio Settings Audio Setup 3. In the MTS field, select Stereo. Audio Setup MTS Language Speakers Optical - Toshiba 62MX195 | Owner's Manual - English - Page 90
increase in volume that often happens when a TV program switches to a commercial). To turn on the StableSound® feature: 1. Press MENU and open the Audio menu. 2. Highlight Audio Settings and press ENTER. Audio Audio Settings Advanced Audio Settings Audio Setup Navigate Select CH RTN Back EXIT - Toshiba 62MX195 | Owner's Manual - English - Page 91
enjoy virtual surround sound from the TV's speakers. The Dolby Virtual TruSurround feature is enabled only when receiving digital broadcasts. To turn on the Dolby Virtual surround sound feature: 1. Press MENU and open the Audio menu. 2. Highlight Advanced Audio Settings and press ENTER. Audio Audio - Toshiba 62MX195 | Owner's Manual - English - Page 92
English On Dolby Digital Done 4. To save the new settings, highlight Done and press ENTER. To revert to the factory defaults, highlight Reset and press ENTER. To turn on the built-in speakers: Select On in step 3 above. Selecting the optical audio output format Use this feature to select the - Toshiba 62MX195 | Owner's Manual - English - Page 93
Not Set You can set the sleep timer to turn off the TV after a set length of time (maximum of 3 hours). The sleep timer turns off the TV one time only, as opposed to the On/Off Timer, which turns off the TV on a recurring basis. To set the sleep timer: Press SLEEP on the remote control to set the - Toshiba 62MX195 | Owner's Manual - English - Page 94
TV (See "Connecting a personal computer (PC)" on page 29.) To set the PC setting video input source to view " on page 72.) 3. Press MENU and open the Setup menu. 4. Highlight PC Settings and press ENTER. Setup Installation Sleep Timer On/Off Timer PC Settings picture width of Horizontal and picture - Toshiba 62MX195 | Owner's Manual - English - Page 95
on-screen using RECALL Understanding the auto power off feature To display TV setting information on-screen: Press RECALL on the remote control. The following information will display on-screen (if applicable): • Current input (ANT 1, ANT 2, VIDEO 1, etc.) • If ANT 1 or ANT 2 is the - Toshiba 62MX195 | Owner's Manual - English - Page 96
a 4 digit PIN code **** Confirm PIN code **** Cancel Done Locks Enable Rating Blocking Off Edit Rating Limits Channels Block Input Lock Off Front Panel Lock Off Game Timer Off New PIN Code Navigate Select CH RTN Back EXIT Exit 96 Copyright © 2005 TOSHIBA CORPORATION. All rights - Toshiba 62MX195 | Owner's Manual - English - Page 97
in the RECALL screen and ratings blocking will not take effect. • To display the rating of the program you are watching, press RECALL on the remote control. If it is not rated, the word "NONE" appears. TV - PG L V NONE Copyright © 2005 TOSHIBA CORPORATION. All rights reserved. 97 - Toshiba 62MX195 | Owner's Manual - English - Page 98
program lock mode is released and the normal picture appears. Locks Active Enter PIN code to temporaily unblock. **** All locking is disabled until the TV is turned Cancel Done off, and will be enabled when the TV is turned on again. Locking video inputs You can use the Input Lock feature - Toshiba 62MX195 | Owner's Manual - English - Page 99
your settings from being changed accidentally (by children, for example). When the control panel lock is On, none of the controls on the TV control panel will operate except POWER. To lock the control panel: 1. Press MENU and highlight the Locks menu icon. 2. Press z to display the PIN code entering - Toshiba 62MX195 | Owner's Manual - English - Page 100
or turn off the TV while TV. SUCH DAMAGE IS NOT COVERED BY YOUR TOSHIBA WARRANTY. See "Memory card care and handling" on page 105. • The technical criteria set out in this owner's manual are meant as a guide only. • You must obtain any required permission from copyright owners to download Picture - Toshiba 62MX195 | Owner's Manual - English - Page 101
MP3 files may be in a format that is not compatible with the TV. - MP3 files must be in the following format: • MPEG1 (ISO ASCII/ Western European) character sets - MP3 files stored on a memory card or networked PC that are xD-Picture Card is a trademark of Fuji Photo Film Co., Ltd. • Toshiba - Toshiba 62MX195 | Owner's Manual - English - Page 102
use the Picture Viewer and Audio Player at the same time. • You must obtain any required permission from copyright owners to download or use copyrighted content. Toshiba cannot and does not grant such permission. Accessing JPEG files stored on a networked PC 1. Make sure you have correctly set up - Toshiba 62MX195 | Owner's Manual - English - Page 103
the slide show and return to the regular TV screen, press EXIT. To set the slide show interval: 1. Press EXIT to close the Picture Viewer (if it is open). 2. Applications menu. 2. Highlight Picture Viewer and press ENTER. Applications TV Guide On Screen Audio Player Picture Viewer Digital CC/Audio - Toshiba 62MX195 | Owner's Manual - English - Page 104
use the Picture Viewer and Audio Player at the same time. • You must obtain any required permission from copyright owners to download or use copyrighted content. Toshiba cannot and does not grant such permission. Accessing MP3 files stored on a networked PC 1. Make sure you have correctly set up - Toshiba 62MX195 | Owner's Manual - English - Page 105
card with your hands or otherwise handle it with anything other than a soft, dry, lint-free, anti-static cloth. Note: Toshiba is not liable for any damage caused by the use of any memory card with this TV. Toshiba will not compensate for any lost data or recordings caused by the use of such - Toshiba 62MX195 | Owner's Manual - English - Page 106
page 111) to set up and use the TV's home network features. A. Connect the TV to your home network 1. Connect the TV to your home network via the TV's RJ45 port. See page 30 for connection instructions. 2. If you want to use file sharing only and do not have Internet service in your home: Skip - Toshiba 62MX195 | Owner's Manual - English - Page 107
. b) Make sure your home network is set up properly. See page 30 for TV connection information. Also consult the owner's manuals for your other components. c) Make sure the DHCP and security settings on your home router are correct. Consult the owner's manual for your router. d) Retry the automatic - Toshiba 62MX195 | Owner's Manual - English - Page 108
and then use the Number buttons on the remote control to input the IP address. Basic Network troubleshooting tips, see pages 122-123. Note: • If you used an Ethernet crossover cable to connect your PC directly to the TV, you will not be able to use the automatic setup. You will have to manually set - Toshiba 62MX195 | Owner's Manual - English - Page 109
to "Full Control." c) Click "Apply." d) Click "OK" to close the window. ___________ Microsoft and Windows are registered trademarks of Microsoft Corporation in the United States and/or other countries. 4. Go to section D, "Set up file sharing on the TV." Copyright © 2005 TOSHIBA CORPORATION. All - Toshiba 62MX195 | Owner's Manual - English - Page 110
to check "Allow" next to "Full Control." c) Click "Apply." d) Click "OK" (which closes the Permissions window). 6. Go to section D, "Set up file sharing on the TV" on page 111. For home network troubleshooting tips, see pages 122-123. 110 Copyright © 2005 TOSHIBA CORPORATION. All rights reserved. - Toshiba 62MX195 | Owner's Manual - English - Page 111
settings, highlight Done and press ENTER. To exit the window without saving your settings, highlight Cancel and press ENTER. E. Viewing/playing shared files on the TV See Chapter 10, "Using the Picture to the previous Setup window. Copyright © 2005 TOSHIBA CORPORATION. All rights reserved. 111 - Toshiba 62MX195 | Owner's Manual - English - Page 112
so, follow the instructions in sections A and B , pages 106-108, before proceeding. • Before you can schedule recordings, the time and date in the TV Guide On Screen feature must be set. See "Setting the time and date" on page 55. Required information and services Before you can set up the e-mail - Toshiba 62MX195 | Owner's Manual - English - Page 113
Chapter 5 for details on setting up the TV Guide On Screen system. If you experience any issues with e-mail scheduling, please contact Toshiba Consumer Solutions by calling 1-800-631-3811 or by visiting http://www.tacp.com/customersupport/contact.asp. Code Description -1 The TV was able to connect - Toshiba 62MX195 | Owner's Manual - English - Page 114
Setup" window For instructions on entering data in these fields, see step 5 under "Setting up e-mail scheduling" TV is set to record), it is recommended that you not change these settings unless you need to diagnose a problem or deal with a unique user situation. 114 Copyright © 2005 TOSHIBA - Toshiba 62MX195 | Owner's Manual - English - Page 115
"E-mail Authorization" field to On. - This field can be left blank if you have the "E-mail Authorization" field set to Off. Also see the "Security settings" table on page 114. For home network troubleshooting tips, see pages 122-123. Copyright © 2005 TOSHIBA CORPORATION. All rights reserved. 115 - Toshiba 62MX195 | Owner's Manual - English - Page 116
be recorded. • Toshiba is not responsible for, nor has any control over, any content recorded TV, the TV will recognize only the tags listed below. These tags (and their accompanying data) must be listed in the body of the request e-mail in the following order: ID* Your ID (required only if you set - Toshiba 62MX195 | Owner's Manual - English - Page 117
is set to is set to [TV's [TV's email address] To: [TV's email TYPE RECORD To: [TV's email address] Subject TV, you will receive a reply e-mail that lists mail: To: [TV's email address] set the "ID Required" field to On. If you set the "ID Required" field to Off, you do not need to include the ID tag line - Toshiba 62MX195 | Owner's Manual - English - Page 118
line of text referenced in the error message. Correct the text and send the e-mail. • FAILED - NO DEVICE AVAILABLE Make sure you have a recording device connected to the TV . For home network troubleshooting tips, see pages 122-123. 118 Copyright © 2005 TOSHIBA CORPORATION. All rights reserved. - Toshiba 62MX195 | Owner's Manual - English - Page 119
General troubleshooting Before calling a service technician, please check the following table for a possible cause of the symptom and some solutions you can try. TV will not turn on • Make sure the power cord is plugged in, and then press POWER. • The remote control batteries may be dead. Replace - Toshiba 62MX195 | Owner's Manual - English - Page 120
is set to the correct device mode (page 33). • Remove all obstructions between the remote control and the TV. • The remote control batteries may be dead. Replace the batteries (page 33). • Your TV remote control may not operate certain features on your external device. Refer to the owner's manual - Toshiba 62MX195 | Owner's Manual - English - Page 121
and/or video may not be what you intended to record. See pages 72 and 76. • If you connected a Symbio™ AVHD recorder, in order to use its full functionality, you must first set up the TV Guide On Screen® system (page 26 and Chapter 5). Memory card problems • Make sure you are using a supported or - Toshiba 62MX195 | Owner's Manual - English - Page 122
General troubleshooting (continued) Picture Viewer problems "No pictures found" message is displayed. • Media card is not inserted or does not contain valid jpg. Please insert media card containing valid jpg files. • Network jpg share is not correctly setup. Check PC share and security settings - Toshiba 62MX195 | Owner's Manual - English - Page 123
MAIL VERIFICATION ID reply • Mail verification ID is not specified or is different from the TV settings. Command succeeded but recording or reminder did not work. • The time and date in the TV Guide On Screen™ system are not set. Copyright © 2005 TOSHIBA CORPORATION. All rights reserved. 123 - Toshiba 62MX195 | Owner's Manual - English - Page 124
BUS line. Turn OFF the TV and unplug the power cord. Plug the power cord in again and turn ON the TV. If the problem persists, contact a Toshiba Authorized Service Center. 7) Yellow is OFF; The color wheel has stopped. Blue blinks at 0.2-second intervals 3 times (repeat). Turn OFF the TV and - Toshiba 62MX195 | Owner's Manual - English - Page 125
the problem. After you set up the TV Guide On Screen™ system (Chapter 5), the program guide opens automatically by default when you turn on the TV. You can turn off the automatic program guide (see page 45) and instead press the TV GUIDE button on the remote control to manually open the TV Guide On - Toshiba 62MX195 | Owner's Manual - English - Page 126
Display. Follow the on-screen instructions. 16. Q: Why do all my channels display "No Listing?" A: The TV Guide On Screen™ system has not yet received its data download. The phrase "No Listing" will be replaced with program information during the next download cycle, which will occur within the - Toshiba 62MX195 | Owner's Manual - English - Page 127
's manual or contact your Cable TV company for proper wiring procedures. 32. Q: Is Help available in the TV Guide On Screen™ system? If so, how do I find it? A: Yes. Highlight any of the five main Services (Listings, Schedule, Recordings, Setup, Search) and press the INFO key on the remote control - Toshiba 62MX195 | Owner's Manual - English - Page 128
consumer electronics dealer. In Canada Locate a Toshiba parts distributor by visiting www.toshiba.ca. Click "Home Entertainment" and then click "Support." Use only the replacement lamp unit model listed below. Using any other lamp may damage the TV and/or lamp. SUCH DAMAGE IS NOT COVERED UNDER - Toshiba 62MX195 | Owner's Manual - English - Page 129
tools: Lint-free gloves; manual screwdrivers (Phillips and slotted). Optional tool: 5/16" nut driver 1. Turn off the TV and unplug the power cord. WARNING: Eye damage may result from directly viewing the light produced by this lamp. Always turn off the TV and unplug the power cord before opening - Toshiba 62MX195 | Owner's Manual - English - Page 130
that the lamp unit and lamp unit door are installed correctly: • No picture • Dark picture • TV will not turn on If, after repeating steps 1-9, the problem still exists: • In the U.S., call TACP consumer solutions at 1-800-631-3811. • In Canada, locate the nearest Toshiba authorized service depot by - Toshiba 62MX195 | Owner's Manual - English - Page 131
DIGITAL AUDIO OUTPUT: Optical type PC IN: 72MX195: 122 lbs (55.3 kg) Supplied Accessories • Two dual-wand IR blaster cables • Remote control with two size "AA" alkaline batteries • Owner's Manual (this book) Optional Stands 56MX195: ST 5695 62MX195: ST 6295 72MX195: ST 7295 Copyright © 2005 TOSHIBA - Toshiba 62MX195 | Owner's Manual - English - Page 132
the operating instructions in this manual and reviewing the section titled "Troubleshooting," you find that service is needed: (1) To find the nearest TACP Authorized Service Station, visit TACP's website at www.tacp.toshiba.com/service or contact TACP's Consumer Solution Center toll free at 1-800 - Toshiba 62MX195 | Owner's Manual - English - Page 133
'S OPTION, REPAIR OR REPLACE A DEFECTIVE PART WITH A NEW OR REFURBISHED PART WITHOUT CHARGE TO YOU. ON-SITE SERVICE ONLY APPLIES WITHIN 100 KILOMETERS OF AN AUTHORIZED TCL SERVICE DEPOT. Owner's Manual and Product Registration Read this owner's manual thoroughly before operating this DLP™ television - Toshiba 62MX195 | Owner's Manual - English - Page 134
1998-2000 the OpenSSL Project. All Rights reserved. Redistribution and use in source and binary forms, with or without modification, are permitted provided that the following conditions are met: 1. Redistributions of source code must retain the above copyright notice, this list of conditions and the - Toshiba 62MX195 | Owner's Manual - English - Page 135
™ DEVICE and CONTROL buttons 51 TheaterNet™ control 25 TheaterNet IR device codes 52-54 TheaterWide® picture size 78 TheaterNet™ setup 50 THINC™ system 12 Time and date setting 55 Troubleshooting 119-123 TruBass 91 TV-Guide Email 112 TV Guide On Screen™ 9, 42, 58 TV/VIDEO button 72, 73 V V-Chip - Toshiba 62MX195 | Owner's Manual - English - Page 136
Cinema Series, ColorStream, StableSound, and TheaterWide are registered trademarks of Toshiba America Consumer Products, L.L.C. Channel Browser, GameTimer, SurfLock, Symbio, Quick Restart, TheaterNet, and THINC are trademarks of Toshiba America Consumer Products, L.L.C. Digital Light Processing, DLP
-
 1
1 -
 2
2 -
 3
3 -
 4
4 -
 5
5 -
 6
6 -
 7
7 -
8
-
9
-
10
-
11
-
12
-
13
-
14
-
15
-
16
-
17
-
18
-
19
-
20
-
21
-
22
-
23
-
24
-
25
-
26
-
27
-
28
-
29
-
30
-
31
-
32
-
33
-
34
-
35
-
36
-
37
-
38
-
39
-
40
-
41
-
42
-
43
-
44
-
45
-
46
-
47
-
48
-
49
-
50
-
51
-
52
-
53
-
54
-
55
-
56
-
57
-
58
-
59
-
60
-
61
-
62
-
63
-
64
-
65
-
66
-
67
-
68
-
69
-
70
-
71
-
72
-
73
-
74
-
75
-
76
-
77
-
78
-
79
-
80
-
81
-
82
-
83
-
84
-
85
-
86
-
87
-
88
-
89
-
90
-
91
-
92
-
93
-
94
-
95
-
96
-
97
-
98
-
99
-
100
-
101
-
102
-
103
-
104
-
105
-
106
-
107
-
108
-
109
-
110
-
111
-
112
-
113
-
114
-
115
-
116
-
117
-
118
-
119
-
120
-
121
-
122
-
123
-
124
-
125
-
126
-
127
-
128
-
129
-
130
-
131
-
132
-
133
-
134
-
135
-
136
 |
 |
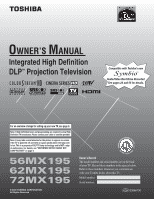
Integrated High Definition
DLP
™
Projection Television
O
WNER’S
M
ANUAL
© 2005 TOSHIBA CORPORATION
All Rights Reserved
56MX195
62MX195
72MX195
Owner’s Record
The model number and serial number are on the back
of your TV. Record these numbers in the spaces below.
Refer to these numbers whenever you communicate
with your Toshiba dealer about this TV.
Model number:
Serial number:
HIGH
-DEFINITION TELEVISION
I
S
O
1
4
0
0
1
F
I
L
E
N
o
.
A
9
6
4
5
T
O
S
H
I
B
A
A
M
E
R
I
C
A
C
O
N
S
U
M
E
R
P
R
O
D
U
C
T
S
,
L
.
L
.
C
.
YC/N
23566730
For an overview of steps for setting up your new TV, see page 9.
Note: It may take several minutes for the picture to appear on-screen
if the TV is powered off and then on again quickly when the lamp unit
is hot. This is a property of DLP TV lamp technology and is NOT a sign
of malfunction. For details, see
“
IMPORTANT NOTICE ABOUT HOT
LAMP RESTART
”
on page 5.
Note: A high definition tuner and programming are required to view High
Definition TV broadcasts. Please contact your cable or satellite provider.
Compatible with Toshiba’s new
Audio/Video Hard Drive Recorder!
See pages 26 and 55 for details.
TM