Toshiba RS-TX60 User Guide
Toshiba RS-TX60 Manual
 |
View all Toshiba RS-TX60 manuals
Add to My Manuals
Save this manual to your list of manuals |
Toshiba RS-TX60 manual content summary:
- Toshiba RS-TX60 | User Guide - Page 1
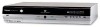
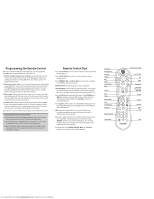
Toshiba Digital Media Server Viewer's Guide Viewer's Guide Setting up your Toshiba Digital Media Server Enjoying the TiVo® service The On-Screen Menus and the Remote Control Arrow Buttons Select Select To navigate the Digital Media Server's on-screen menus, use the arrow buttons on the remote - Toshiba RS-TX60 | User Guide - Page 2
TV brand. Press the TiVo button on the remote control to go to TiVo Central®. Select Messages & Setup, then Settings, then Remote Control & DMS Front, then Remote Control - TV (power, volume, mute). 2. Prepare the remote control. Point the remote away from your Digital Media Server (DMS) and cover - Toshiba RS-TX60 | User Guide - Page 3
Welcome! Downloaded from www.Manualslib.com manuals search engine - Toshiba RS-TX60 | User Guide - Page 4
,577; D435,561; and D445,801. Other patents pending. DIRECTV is a registered trademark of DIRECTV Inc. "Dolby" and the double-D symbol are trademarks of Dolby Laboratories. All other trademarks are the properties of their respective owners. ii Downloaded from www.Manualslib.com manuals search engine - Toshiba RS-TX60 | User Guide - Page 5
TV. Your new Toshiba Digital Media Server with TiVo® service combines a TiVo® Digital Video Recorder (DVR) with a DVD recorder. It comes with TiVo BasicTM service, so you can immediately enjoy: • Digital recording. Because it's all-digital, TiVo saves your recorded programs on a hard drive and lists - Toshiba RS-TX60 | User Guide - Page 6
vi Chapter 1: Connecting Your Digital Media Server 1 Getting Started 2 Cables and Accessories 3 Choosing a Setup Example 9 Watching One Channel & Recording Another 18 Chapter 2: Guided Setup 21 Completing Guided Setup 22 TiVo Central 26 Chapter 3: TiVo BasicTM Service in Five Short Tours 27 - Toshiba RS-TX60 | User Guide - Page 7
67 Remote Control & DMS Front Lights 76 Phone & Network Setup 82 System Information 87 Troubleshooting 88 Restart or Reset System 89 Standby 90 Chapter 7: Features of TiVo PlusTM Service 91 Chapter 8: Connecting to a Home Network for Home Media Features 111 Chapter 9: Troubleshooting 129 - Toshiba RS-TX60 | User Guide - Page 8
overview of the features. Basic terms. These are terms used in this guide when we talk about the rest of the service: DMS. The Toshiba Digital Media Server with TiVo® service combines a TiVo® Digital Video Recorder (DVR) with a DVD recorder. This guide uses "DMS" to refer to it. Live TV. If you're - Toshiba RS-TX60 | User Guide - Page 9
CHAPTER 1 Connecting Your Digital Media Server Getting Started 2 Cables and Accessories 3 Choosing a Setup Example 9 Watching One Channel & Recording Another 18 Another (Antenna or Cable) Downloaded from www.Manualslib.com manuals search engine - Toshiba RS-TX60 | User Guide - Page 10
DVD player, and a game system connected to your TV, in addition to your Toshiba Digital Media Server with TiVo® service (DMS). However, one thing has remained the same: you still need to get audio and video until it reaches your TV. 2 Downloaded from www.Manualslib.com manuals search engine - Toshiba RS-TX60 | User Guide - Page 11
will find your new Digital Media Server (DMS), the Remote Control, and two bags of cables (contents listed below), along with this Viewer's Guide and the Start Here poster. DMS T T t u TV Power Live TV Guide V Inpu DVD Info Angle Select Vol Mute Chan Page Record Play Slow op Men - Toshiba RS-TX60 | User Guide - Page 12
cable for video (see below). (yellow) ᕢ S-Video cable & jack (video only) The Digital Media Server's back panel also has jacks for S-Video (ᕢ). S-Video provides a higher quality video signal than composite. If you have equipment that supports this connection, you can purchase an S-Video cable to - Toshiba RS-TX60 | User Guide - Page 13
jack on the DMS. After setting up your DMS, including the control cable ® 1 connection, you can change channels using only your DMS remote control. Serial Control cable 15-pin adapter (not included) Home Control cable (not included) 5 Downloaded from www.Manualslib.com manuals search engine - Toshiba RS-TX60 | User Guide - Page 14
including the IR emitters. (See the diagram on page 7.) Do not block the Digital Media Server's IR window. Try changing channels several times with the TiVo remote. If channels change more reliably this way, you may want to build an IR tent. Downloaded from www.Manualslib.com manuals search engine - Toshiba RS-TX60 | User Guide - Page 15
below will guide you. controls, nor will you be able to control the cable or satellite box with its remote. However, we recommend using only your TiVo remote Control cable's emitters. ᕢ Secure the material, making sure that it fits snugly. 7 Downloaded from www.Manualslib.com manuals search engine - Toshiba RS-TX60 | User Guide - Page 16
into the wall jack, then plug both phone cords into the splitter. 8 Connecting Your DMS Connecting to a Phone Line During Guided Setup, the Digital Media Server uses a standard phone line to connect to the TiVo® service (see Chapter 2). After Guided Setup, your DMS needs to make regular connections - Toshiba RS-TX60 | User Guide - Page 17
provides examples for connecting your Digital Media Server to your program source (antenna, cable, or satellite) and your TV. From the list below, choose a setup based on your program source. Setups with more than one program source are only available with TiVo PlusTM service. After you get your - Toshiba RS-TX60 | User Guide - Page 18
® The audio/video cables shown here are for example only. For help choosing cables, see page 4. Other kinds of A/V equipment, such as a DVD player or game Box) Digital Media Server ® 1 4 3 2 Television INPUT R L VIDEO Antenna In 10 Downloaded from www.Manualslib.com manuals search engine - Toshiba RS-TX60 | User Guide - Page 19
to connect to the TiVo service. See Chapter 8. ᕤ Plug in all power cords and turn on your TV. Set your TV to display video from the input jacks you used in step ᕢ. You may have to find the correct TV input setting by pressing the Input or TV/Video button on your TV's remote control until you see - Toshiba RS-TX60 | User Guide - Page 20
® The audio/video cables shown here are for example only. For help choosing cables, see page 4. Other kinds of A/V equipment, such as a DVD player or game AUDIO/VIDEO OUT Digital Media Server ® 2 6 6 4 3 Television INPUT R L VIDEO Antenna In 12 Downloaded from www.Manualslib.com manuals - Toshiba RS-TX60 | User Guide - Page 21
of a phone line to connect to the TiVo service. See Chapter 8. end into the Control Out-Serial connector (the upper ᕥ Connect a channel changing cable (see the diagrams to the right). ᕦ Plug in all power cords and turn on your TV. Set your TV to display video from the input jacks you used in step - Toshiba RS-TX60 | User Guide - Page 22
Digital Media Server ® 2 7 3 7 5 4 Television INPUT R L VIDEO Antenna In *TiVo Plus service required. Setups with more than one program source like this one 14 are only available after upgrading to TiVo Plus service. Visit www.tivo.com/upgrade. Downloaded from www.Manualslib.com manuals - Toshiba RS-TX60 | User Guide - Page 23
Guided Setup. If you need 1.5 inches directly in front of the IR sensor. Use the help, see Chapter 2. provided adhesive strips to hold the emitters in place. Cable or Satellite Box c b Digital Media Server ® IR Control cable connection a 15 Downloaded from www.Manualslib.com manuals - Toshiba RS-TX60 | User Guide - Page 24
/VIDEO OUT Digital Media Server ® 7 5 2 7 Cable Box RF Out RF In Serial AUDIO/VIDEO Phone OUT 3 7 4 1 Television INPUT R L VIDEO Antenna In *TiVo Plus service required. Setups with more than one program source like this one are only available after upgrading to TiVo Plus service - Toshiba RS-TX60 | User Guide - Page 25
in all power cords and turn on your TV. Set your TV to display video from the input jacks you used in step ᕤ. You may have to find the correct TV input setting by pressing the Input or TV/Video button on your TV's remote control until you see the Welcome screen. (For more help, see page - Toshiba RS-TX60 | User Guide - Page 26
channel while the DMS records another, put the DMS into Standby mode. To do this, press the ON/ STANDBY button on the Digital Media Server's front panel. Then use your TV's remote to change channels. Because this signal simply passes through the DMS, it has no TiVo service functionality (so you can - Toshiba RS-TX60 | User Guide - Page 27
Watching One Channel & Recording Another Cable with a Cable Box Cable Box Serial Phone AUDIO/VIDEO OUT RF Out RF In Digital Media Server ® 6 5 6 3 4 Television INPUT R L VIDEO Antenna In 2 2 1 OUT IN OUT RF Splitter (not included) ᕡ Connect the cable from the wall to the input jack of - Toshiba RS-TX60 | User Guide - Page 28
no TiVo service functionality (so you can't pause or rewind live TV). • To watch video from the DMS again, press the TiVo button on the DMS remote, then press the Input, Source, or TV/Video button on your TV remote or TV until you see TiVo Central®. b Digital Media Server ® a IR Control cable - Toshiba RS-TX60 | User Guide - Page 29
CHAPTER 2 Guided Setup Completing Guided Setup 22 TiVo Central® 26 Downloaded from www.Manualslib.com manuals search engine - Toshiba RS-TX60 | User Guide - Page 30
TV, play DVDs and CDs, record DVDs, and use TiVo BasicTM service features to control live TV. You will have to wait a few hours while the DMS organizes information before you can schedule recordings. Guided Setup Tips and Troubleshooting ZIP Code. Your ZIP code helps the TiVo service determine the - Toshiba RS-TX60 | User Guide - Page 31
troubleshooting steps. Dial-In Number. The DMS uses the number you choose for phone connections to the TiVo service channels (such as, DIRECTV-Sacramento, CA). Cable , make your best guess. Later in Guided Setup, you can check the Channels You Downloaded from www.Manualslib.com manuals search engine - Toshiba RS-TX60 | User Guide - Page 32
as a ® shortcut to go up or down a whole screen at a time. If you upgrade to TiVo Plus service, ® you'll be able to use more than one program source with your DMS (such as satellite and cable together). 24 Guided Setup may have this information. If you still aren't sure, make your best guess - Toshiba RS-TX60 | User Guide - Page 33
for troubleshooting steps. Program Call. During this call, the TiVo service downloads all recordings and view information in the program guide. Press the TiVo button on the DMS remote to go to TiVo Central® and begin enjoying the TiVo Basic service. 25 Downloaded from www.Manualslib.com manuals - Toshiba RS-TX60 | User Guide - Page 34
of TiVo Central. 26 Guided Setup TiVo Central® Almost everything you do with the TiVo service starts from TiVo Central. You can schedule recordings, watch live TV or recorded programs, play DVDs or CDs, and more. To get to TiVo Central, press the TiVo button on your remote control. Occasionally - Toshiba RS-TX60 | User Guide - Page 35
CHAPTER 3 TiVo BasicTM Service in Five Short Tours Tour One: Play with Live TV 28 Tour Two: Find and Record Programs 30 Tour Three: Now Playing and Save To DVD 32 Tour Four: Playing a DVD or CD 34 Tour Five: Finding New Programs 36 Cool Things You Can Do 37 Downloaded from www. - Toshiba RS-TX60 | User Guide - Page 36
time. 28 TiVo Basic Service in Five Short Tours Tour One: Play with Live TV In this tour, you'll learn how to control live TV. So turn on your TV and grab your Digital Media Server remote! To watch . Presto! You're caught up to live TV. Downloaded from www.Manualslib.com manuals search engine - Toshiba RS-TX60 | User Guide - Page 37
small icons on the right side. Each symbol represents a useful feature, like recording or Parental Controls. Press the UP and DOWN arrows to highlight different icons. Pressing SELECT while where you are. channel banner selectable icons 29 Downloaded from www.Manualslib.com manuals search engine - Toshiba RS-TX60 | User Guide - Page 38
of it has already been saved. The Program Guide Your Digital Media Server's program guide lets you see what's on up to three days in advance, change channels, schedule recordings, and more-all while you're watching live TV. Press the GUIDE button to see the program guide. On the left side of the - Toshiba RS-TX60 | User Guide - Page 39
from live TV, from the program guide, and by creating a manual recording. Now wouldn't it be useful to know how to watch those recordings? That, and more, is explained in the very next tour. Get More with TiVo Plus™ service! With TiVo Plus service you can search for programs by title, actor - Toshiba RS-TX60 | User Guide - Page 40
Chapter 3 32 TiVo Basic Service in Five Short Tours Tour Three: Now Playing and Save To DVD The last tour showed you how to find and record programs. Once a program has started recording, it appears in Now Playing-a list of all the programs stored on your Digital Media Server. To view your Now - Toshiba RS-TX60 | User Guide - Page 41
Tour Three: Now Playing and Save To DVD Saving a Program from Now Playing to a DVD Your Digital Media Server not only records programs to Now Playing, it can also save recordings from Now Playing to a recordable DVD. The rest of this tour shows you how. If you don't want to create a disc with the - Toshiba RS-TX60 | User Guide - Page 42
34 TiVo Basic Service in Five Short Tours Tour Four: Playing a DVD or CD You must complete Guided Setup before you can play CDs, and play or record DVDs. For instructions, see "Completing Guided Setup" on page 22. Playing a DVD or CD in the Digital Media Server does not interfere with recording TV - Toshiba RS-TX60 | User Guide - Page 43
control (such as FORWARD, REWIND and INSTANT REPLAY) is not available for MP3 files larger than 10 megabytes that were recorded with VBR (variable bit rate). For more information, see "Compatibility and Copy Protected Material" on page 48. 35 Downloaded from www.Manualslib.com manuals - Toshiba RS-TX60 | User Guide - Page 44
If you get the channel on which the program airs, you can set up a recording here-it's that easy! Showcases and TiVolution Magazine are updated during your Digital Media Server's regular connection to the TiVo service. Feel free to watch some programs from Now Playing-but come back for "Cool Things - Toshiba RS-TX60 | User Guide - Page 45
You've already seen how cool TiVo Basic service is by taking the five tours. Here are some tips to help you enjoy your Digital Media Server even more. • Never be late for your favorite shows. Stuck in traffic? Working late? Don't worry! If you've set up a recording, the program will be waiting for - Toshiba RS-TX60 | User Guide - Page 46
Chapter 3 38 TiVo Basic Service in Five Short Tours Upgrade to TiVo Plus™ service Things get even cooler when you upgrade to TiVo Plus. Here's just some of what you get: • Skip reruns with a Season PassTM recording. A Season Pass automatically records every episode of a series on a specific channel - Toshiba RS-TX60 | User Guide - Page 47
CHAPTER 4 Recording Programs and DVDs Recording Programs 40 To Do List 42 Record from a Video Camera or VCR 43 Recording a DVD 45 Compatibility and Copy Protected Material 48 Downloaded from www.Manualslib.com manuals search engine - Toshiba RS-TX60 | User Guide - Page 48
a TV program with TiVo BasicTM service. (If you upgrade to TiVo PlusTM service, you'll have even more ways to find and record programs. See Chapter 7 for details.) Recording From Live TV You can always record the program you're watching by pressing the RECORD button on your remote control. On the - Toshiba RS-TX60 | User Guide - Page 49
Recording Programs Manually Record by Time/Channel With TiVo BasicTM service, you can schedule a manual recording on a specific channel at a specific time (just as you would with a VCR). You can also create a manual repeating recording here by setting the recording to repeat every week, every day, - Toshiba RS-TX60 | User Guide - Page 50
with TiVo Plus! If you upgrade to TiVo PlusTM service, you'll have access to Recording Options, which allow you to View Upcoming Episodes. When a conflict occurs, use this feature to find an episode that doesn't conflict with other scheduled recordings. (For details, see page 94.) Downloaded from - Toshiba RS-TX60 | User Guide - Page 51
Record from a Video Camera or VCR Record from a Video Camera or VCR In addition to recording your favorite TV programs, your Digital Media Server can also record from a video camera or VCR-the first step in transferring your old home movies to DVD. These recordings appear on the Now Playing List, - Toshiba RS-TX60 | User Guide - Page 52
Recorder gives you a 15 second countdown before recording begins. Press PLAY on your video camera or VCR when the countdown reaches zero. When the recording is complete, you will find its title (the name you gave to the recording) on the Now Playing list. Downloaded from www.Manualslib.com manuals - Toshiba RS-TX60 | User Guide - Page 53
Recording a DVD Your Digital Media Server can save programs from the Now Playing list to a recordable DVD. Some content may not be saved due to copy protection rights over the material. For more details, See "Copy Protected Material" on page 48. Saving to DVD does not interfere with recording TV - Toshiba RS-TX60 | User Guide - Page 54
recorded DVD, use the arrow buttons on the remote to highlight a character, and press SELECT to enter it. You can use the THUMBS UPTM and THUMBS DOWNTM buttons to change to uppercase or lowercase letters. Select "Done entering name" when you are finished. Downloaded from www.Manualslib.com manuals - Toshiba RS-TX60 | User Guide - Page 55
The closed captioning of the original program is maintained. After the DVD is finalized, you're done! To play your new DVD, press the DVD button on your remote, then press PLAY. For more about playing DVDs, see page 56. Recording a DVD 4 47 Downloaded from www.Manualslib.com manuals search engine - Toshiba RS-TX60 | User Guide - Page 56
You Record This DVD recorder records in Video Mode, which is the use of the DVD-Video format for recording on DVD-R and DVD-RW discs. DVD discs saved using this Digital Media Server can be played on regular DVD players, including computer DVD drives compatible with DVD-Video format. However, support - Toshiba RS-TX60 | User Guide - Page 57
CHAPTER 5 Watching Programs and Playing Discs Using the Control Buttons 50 The Status Bar 51 The Channel Banner 52 Watching Live TV 53 Watching Programs from Now Playing 55 Playing a DVD or CD 56 Disc Compatibility 63 Downloaded from www.Manualslib.com manuals search engine - Toshiba RS-TX60 | User Guide - Page 58
fun of watching programs with the Digital Media Server is the ability to control what you're watching. The best part is-the pause, instant replay, slow motion, and other control features work whether you're watching live TV, recorded programs or DVDs. RECORD. Records a program when you're watching - Toshiba RS-TX60 | User Guide - Page 59
bar, the program guide, the channel banner, and anything else that is not part of the program. 5 Tick marks Status Bar for a twohour recording or DVD. This symbol shows you are controlling live TV (here, you should not change the channel. 51 Downloaded from www.Manualslib.com manuals search engine - Toshiba RS-TX60 | User Guide - Page 60
remote. This works when you're watching live TV, recorded programs or DVDs, Record a program (or stop a current recording). If a recording is in progress, the icon appears bright. Go to Parental Controls. If Parental Controls TiVo® service. Downloaded from www.Manualslib.com manuals search engine - Toshiba RS-TX60 | User Guide - Page 61
're looking for, such as cooking shows or comedy movies. For more about Guide Options available with TiVo Plus service, see page 98. Watching Live TV 5 You can use your Digital Media ® Server's remote to control the power, volume, mute, and TV input settings on your TV. For information on setting - Toshiba RS-TX60 | User Guide - Page 62
side. The right side has a list of upcoming programs on the highlighted channel. Moving Around the Guide: • Press the UP and DOWN arrows to highlight channels or programs. • Use the LEFT and RIGHT on this time period the selected channel Downloaded from www.Manualslib.com manuals search engine - Toshiba RS-TX60 | User Guide - Page 63
you record with the DMS are listed in Now Playing. To go to Now Playing, press the TiVo button twice, or select Now Playing List from TiVo Central®. As soon as a recording starts, about the program, such as actors, writers, producers, etc. 55 Downloaded from www.Manualslib.com manuals search engine - Toshiba RS-TX60 | User Guide - Page 64
you can play CDs, and play or record DVDs. For instructions, see "Completing Guided Setup" on page 22. If you finished "Tour Four: Playing a DVD or CD" on page 34, then you already know the basics of playing a DVD or CD with your Digital Media Server. This section provides a bit more detail and - Toshiba RS-TX60 | User Guide - Page 65
and use SELECT on the remote control to select options. Some DVDs also allow you to use the number buttons on the remote to select an option on a menu screen. DVD Information and Playback Settings DVD Banner. Press the INFO button while a video DVD is playing to show the DVD banner. You can hide the - Toshiba RS-TX60 | User Guide - Page 66
Disc screen, select a title number, a title and chapter number, or a title number and time. Press SELECT when done. Search Via Remote Control. • DVD. Press the number buttons while the disc is stopped and the Recorder goes to that title. Press the number buttons while the disc is playing and the - Toshiba RS-TX60 | User Guide - Page 67
don't want to see the angle indicator icon when watching DVDs, you can turn this feature off. See page 70 for details. Control Buttons The remote's control buttons control DVDs and CDs much the same way they control live TV and recorded programs. Some exceptions are listed below. For more on using - Toshiba RS-TX60 | User Guide - Page 68
TiVo music CD makes a "Play music" option available on the DVD menu. Highlight "Play music" and press SELECT to browse the information. If you do not press a button on the remote or the front panel, the song info banner will change positions Downloaded from www.Manualslib.com manuals search engine - Toshiba RS-TX60 | User Guide - Page 69
CD Playing a Photo CD You can use your Digital Media Server to view digital photos in JPEG format from a CD. Browsing a Photo Disc. When you insert a photo CD, highlight "View photos" on the DVD screen and press SELECT to browse the contents of the disc. Photos and folders are displayed in a grid - Toshiba RS-TX60 | User Guide - Page 70
the photo needs additional rotation. When viewing a single photo, you can also use the INSTANT REPLAY button ( ) to quickly rotate a photo 90° counter-clockwise. 62 Downloaded from www.Manualslib.com manuals search engine - Toshiba RS-TX60 | User Guide - Page 71
many factors, this should not be an issue for most discs created on a PC. Some discs recorded using a ® different DVD recorder, CD recorder, or personal computer may not be playable in the Digital Media Server even though they were made with software that is compatible with the DMS. Some possible - Toshiba RS-TX60 | User Guide - Page 72
to make them visible, see the Help utility for your Windows operating system. Watching Programs and Playing Discs DVD Regions. DVDs and DVD players are manufactured for different regions of become noticeably worse at lower bit rates. 64 Downloaded from www.Manualslib.com manuals search engine - Toshiba RS-TX60 | User Guide - Page 73
CHAPTER 6 Messages & Setup Messages 66 Settings 67 Remote Control & DMS Front Lights 76 Phone & Network Setup 82 System Information 87 Troubleshooting 88 Restart or Reset System 89 Standby 90 Downloaded from www.Manualslib.com manuals search engine - Toshiba RS-TX60 | User Guide - Page 74
TiVo service or internal alerts from your Digital Media Server. When you receive a new message, TiVo Central® will show the option, "Read New Messages & Setup." To read the messages: 1. Go to TiVo a message if it doesn't fit on the screen. 66 Downloaded from www.Manualslib.com manuals search engine - Toshiba RS-TX60 | User Guide - Page 75
With the options in Settings, you can make the Digital Media Server work more to your liking. Use these screens to set your default preferences for recording quality, Parental Controls, and more. Audio Settings Your DMS can send an analog or digital audio signal to your TV or A/V receiver. To enjoy - Toshiba RS-TX60 | User Guide - Page 76
buttons on the remote control). The default setting is Medium. Television Audio. This option lets you select the Digital Media Server's default audio output option. You can choose to have the default audio in stereo or mono, or have a secondary audio program (SAP) recorded when one is available - Toshiba RS-TX60 | User Guide - Page 77
5), • your cable or satellite box is replaced by a new make or model, • or if you are having trouble with channel changing (see page 136 for troubleshooting.) Channels You Receive. The Channels You Receive list starts with all the channels included in your service package. It can be customized to - Toshiba RS-TX60 | User Guide - Page 78
(default is English). If that language is available on a DVD, the DMS will use it instead of any others. You can also change the subtitle settings: • Subtitle language. (Default is English.) • Subtitle display. On or Off. (Default is Off.) 70 Downloaded from www.Manualslib.com manuals search engine - Toshiba RS-TX60 | User Guide - Page 79
, then entering the password. This temporarily turns off Parental Controls. To turn on Parental Controls and define a password ( ): Select "Turn on Parental Controls." Use the number buttons on the remote control to enter a four-digit password, then enter the same password again for confirmation - Toshiba RS-TX60 | User Guide - Page 80
remote. Parental Controls won't relock in the middle of a show. By default, the Auto Re-lock option is on. DVD Country Setting. DVD ratings may differ from country to country. When Parental Controls content so there is nothing to block.) Downloaded from www.Manualslib.com manuals search engine - Toshiba RS-TX60 | User Guide - Page 81
no rating information. From Rating Settings, select Block Unrated to choose how the Digital Media Server's Parental Controls will treat unrated movies and TV programs. DVD Rating Limit. You can block playback of DVDs that exceed the rating limit you set using this screen. Channel Lock for Live - Toshiba RS-TX60 | User Guide - Page 82
when recording starts. Get More with TiVo Plus! With TiVo PlusTM service, you'll have access to Recording Options. Each time you schedule a recording, you can specify which recording quality setting to use. For details, see page 94. Downloaded from www.Manualslib.com manuals search engine - Toshiba RS-TX60 | User Guide - Page 83
picture to fit on the screen without shrinking. Settings If you change video sources, for ® example, by changing from cable to satellite service, you should repeat Guided Setup (go to Messages & Setup, then Restart or Reset System, then Repeat Guided Setup). 6 75 Downloaded from www.Manualslib.com - Toshiba RS-TX60 | User Guide - Page 84
can include video from a VCR, DVD player, DVR, or a video camera. 76 Messages & Setup Remote Control & DMS Front Lights To change the settings of the lights on the Digital Media Server's front panel, see page 81. For information about the individual buttons on the TiVo remote control, please refer - Toshiba RS-TX60 | User Guide - Page 85
). To Control: Press the: TV power, volume, and mute TV POWER and TiVo buttons TV input TV INPUT and TiVo buttons A/V receiver power, volume, and mute TV POWER and TiVo buttons A/V receiver volume and mute only MUTE and TiVo buttons 77 Downloaded from www.Manualslib.com manuals search engine - Toshiba RS-TX60 | User Guide - Page 86
). To Control: Press the: TV power, volume, and mute TV POWER and TiVo buttons TV input TV INPUT and TiVo buttons A/V receiver power, volume, and mute TV POWER and TiVo buttons A/V receiver volume and mute only MUTE and TiVo buttons Downloaded from www.Manualslib.com manuals search engine - Toshiba RS-TX60 | User Guide - Page 87
the end of the available codes. Unfortunately, due to the great variety of TVs and A/V receivers, some makes and models are not compatible with your Digital Media Server's remote control. If you reach the end of the available codes without finding a code that works with your device, you will need - Toshiba RS-TX60 | User Guide - Page 88
becoming accidentally "locked out" of controlling your TiVo DVRs. Remote Address Messages & Setup Setting the Remote Address If you have more than one Digital Media Server in your home, or if you have another model of TiVo DVR in addition to your Digital Media Server, you can match a particular DMS - Toshiba RS-TX60 | User Guide - Page 89
remote control comes on, remains steady, then stays on when you release the buttons. Front Panel Lights You can change the settings of the lights on the Digital Media Server's front panel. 6 DMS Front - Clock Light. You don't have to set the clock on the front of the DMS-the TiVo service sets - Toshiba RS-TX60 | User Guide - Page 90
Digital Media Server makes regular connections to the TiVo service to get updates to the TiVo service, program information for the program guide , a test connection to the TiVo service will start automatically. You may wish to use this option for troubleshooting or other unusual circumstances. Test - Toshiba RS-TX60 | User Guide - Page 91
to the TiVo service manually. However, for troubleshooting or other unusual circumstances, you may wish to use this option. After you start the connection, the status indicator reads "Starting Up" and will change as it goes through several stages. You can watch live TV, set up recordings, and search - Toshiba RS-TX60 | User Guide - Page 92
Area Code screen appears. 2. Use the number keypad on the remote to set the area code, then press SELECT. If you hours, the Update Numbers screen appears and the DMS calls the TiVo service to retrieve a list of local dial-in numbers. After Downloaded from www.Manualslib.com manuals search engine - Toshiba RS-TX60 | User Guide - Page 93
need to dial "9" to get an outside line). Use the number keys on the remote control to enter the prefix. Press the PAUSE button after you have entered the prefix. This be disrupted if the DMS attempts to call the TiVo service. If you have a standard dial tone, and 'Phone Avail.' Detection is off, - Toshiba RS-TX60 | User Guide - Page 94
if you happen to be talking on the phone when the DVR tries to call you will hear the modem dial and try to connect to the TiVo service. Messages & Setup If you are experiencing "Failed, Line phone call, select "Restore previous options." 86 Downloaded from www.Manualslib.com manuals search engine - Toshiba RS-TX60 | User Guide - Page 95
The System Information screen provides general information about your Digital Media Server, including its service number, manufacturer, model number, software version used, storage capacity, and information about recent connections to the TiVo® service. You'll need some of this information if you - Toshiba RS-TX60 | User Guide - Page 96
tips to help you with your Digital Media Server's network connection. See Chapter 8 for more information. • Transfer Troubleshooting appears when you upgrade to TiVo PlusTM service. See Chapter 8 for more about Multi-Room Viewing. 88 Downloaded from www.Manualslib.com manuals search engine - Toshiba RS-TX60 | User Guide - Page 97
ENTER to proceed. Restart the Digital Media Server. Shuts down the DMS and starts it up again. It will not affect recordings in Now Playing, upcoming Season PassTM recordings, WishListTM searches, or TiVo Suggestions. Any recording in progress will be interrupted. Repeat Guided Setup. You will have - Toshiba RS-TX60 | User Guide - Page 98
or are scheduled to record will still be recorded. (If a program is being recorded, the red light will turn on.) • Any antenna or cable signal connected to the Digital Media Server's RF In jack will continue to be passed through to the RF Out jack. There is no TiVo service functionality on any - Toshiba RS-TX60 | User Guide - Page 99
of TiVo PlusTM Service Introduction 92 Season Pass, Recording Options, To Do List 93 Find Your Favorite Programs 98 Find Programs That Match Your Interests 103 Finding New Programs 108 Sorting & Grouping Programs 109 Save to VCR 110 Downloaded from www.Manualslib.com manuals search - Toshiba RS-TX60 | User Guide - Page 100
www.tivo.com/upgrade) or call TiVo Customer Support at 1-877-367-8486. To upgrade to TiVo Plus service, you will need your TiVo service number, found on the System Information screen. Go to TiVo Central and select Messages & Setup, then System Information. Downloaded from www.Manualslib.com manuals - Toshiba RS-TX60 | User Guide - Page 101
PassTM recordings. Records every episode of a series that airs on a certain channel-even if the day or time changes! It's automatic and easy to set up. Just select a program (in the program guide, or search results) and choose "Get a Season Pass." • Manual Repeating Recording. Records on a specific - Toshiba RS-TX60 | User Guide - Page 102
are kept in Now Playing. You can change this setting; see page 95. • Resolving conflicts. The TiVo service resolves scheduling conflicts between repeating recordings by comparing recording priorities. You can change recording priorities with the Season Pass Manager. (See page 95 for more details - Toshiba RS-TX60 | User Guide - Page 103
option is available only for a repeating recording.) Keep At Least. You can set the minimum amount of time the DVR keeps a recording. The default setting is "Until Space DMS will ignore them and record episodes of the second program. 95 Downloaded from www.Manualslib.com manuals search engine - Toshiba RS-TX60 | User Guide - Page 104
TiVo Plus Service Season Pass Manager Say you have a Season Pass to ER and an auto-recording WishList for movies with Julia Roberts. What if a Julia Roberts movie happens to air at the same time as ER? The DVR then "Cancel this Season Pass." Downloaded from www.Manualslib.com manuals search engine - Toshiba RS-TX60 | User Guide - Page 105
Cancel only this episode/showing. Cancel a single recording or a single episode from a Season Pass. • Cancel/edit the Season Pass/manual repeat recording. Cancel the Season Pass or manual repeat recording, view upcoming programs, or change recording options. 7 97 Downloaded from www.Manualslib.com - Toshiba RS-TX60 | User Guide - Page 106
day and time. Style. Choose between the TiVo Live Guide and Grid Guide styles. Filtering. Turns filtering on or off. (Choosing a filter is explained below.) When you want to see all channels and programs in the guide, turn filtering off. Downloaded from www.Manualslib.com manuals search engine - Toshiba RS-TX60 | User Guide - Page 107
changes by pressing SELECT or GUIDE. To cancel your changes, use the remote for some functions too. The CLEAR button on the remote erases a Season Pass, or record an individual showing. When using Search by Title, replace hyphens ( - ), slashes Downloaded from www.Manualslib.com manuals search engine - Toshiba RS-TX60 | User Guide - Page 108
Plus Service apostrophes ( ' ), asterisks ( * ) and ampersands ( & ) are ignored. For example, you would use 6 OCLOCK NEWS to search for the title "6 O'Clock News." Using Online Scheduling to Find Programs (TiVo Central Online) With TiVo Plus, you can schedule recordings on your Digital Media Server - Toshiba RS-TX60 | User Guide - Page 109
RIGHT arrow to bring up the list of programs and move to the list at the same time. 6. When you find a program you want to record, highlight it, and press SELECT to bring up the Program Information screen. Then you can view upcoming episodes, get a Season Pass, or - Toshiba RS-TX60 | User Guide - Page 110
of TiVo Plus Service Browse to select a channel. (You can also use the number buttons on the remote control to type in a channel, then press ENTER.) 4. Press SELECT to bring time. 5. When you find a program you want to record, highlight it, and press SELECT to bring up the Program Information screen. Then - Toshiba RS-TX60 | User Guide - Page 111
each time your DVR connects to the TiVo service. • You record every documentary, but you could occasionally browse the WishList and choose the ones you do want to record.The more specific a WishList is, the better suited it is to auto-recording. 7 103 Downloaded from www.Manualslib.com manuals - Toshiba RS-TX60 | User Guide - Page 112
Chapter 7 104 Features of TiVo Plus Service Creating a WishList Search From Search Using a WishList, select "Create new WishList." Next, select the type of name exactly, and you must use a comma (available in the grid under the letter W). Downloaded from www.Manualslib.com manuals search engine - Toshiba RS-TX60 | User Guide - Page 113
very similarly, but the TiVo service only searches program and asterisk (*) as a special symbol that replaces the endings of words. For example Slow ) 7 button on the remote. The asterisk can be helpful when you're looking for a range Downloaded from www.Manualslib.com manuals search engine - Toshiba RS-TX60 | User Guide - Page 114
"Arts" and the SubCategory "Music." Features of TiVo Plus Service Tips for entering keywords: • To specify an by selecting SP on the grid of letters or by pressing FORWARD ( ). • Replace hyphens ( - ), slashes ( / ) and periods ( . ) with Downloaded from www.Manualslib.com manuals search engine - Toshiba RS-TX60 | User Guide - Page 115
record WishList programs." This means every program the WishList finds will be automatically recorded. Each auto-recording WishList and its upcoming recordings auto-recording WishList finds are recorded, give the auto-recording WishList If you set up an auto-recording ® WishList for sports, consider - Toshiba RS-TX60 | User Guide - Page 116
the first programs deleted to make room for recordings you request. You can turn auto-recording of TiVo Suggestions on and off. Just go to TiVo Central, then select messages & Setup, then Settings, then Recording, then TiVo Suggestions. Downloaded from www.Manualslib.com manuals search engine - Toshiba RS-TX60 | User Guide - Page 117
for: • Each television series with more than one recorded episode; • Each auto-recording WishListTM with a recorded program; • TiVo Suggestions (if you have auto-recording of TiVo Suggestions turned on). A using and whether groups are on. 109 Downloaded from www.Manualslib.com manuals search engine - Toshiba RS-TX60 | User Guide - Page 118
can fast forward through the boring parts! The VCR will record the video exactly as it appears, including the status bar, channel banner, and any icons on the screen. Using Save to VCR: 1. Connect a Composite A/V cable from the Digital Media Server's A/V Output jacks to the A/V Input jacks your VCR - Toshiba RS-TX60 | User Guide - Page 119
for Home Media Features Introduction to Home Media Features 112 Home Networks 116 Connecting to a Home Network Using a Wireless Network Adapter 117 Connecting to a Home Network Using Wired (Ethernet) 119 Completing the Network Settings 121 Downloaded from www.Manualslib.com manuals search - Toshiba RS-TX60 | User Guide - Page 120
are available with TiVo PlusTM service. • Multi-Room Viewing - Record programs in the living room and watch them in the bedroom-or vice versa. See page 113. If you don't have a home network, you can connect two Series2TM DVRs to each other for Multi-Room Viewing. (Your Digital Media Server is also - Toshiba RS-TX60 | User Guide - Page 121
as it is transferring, you might experience intermittent delays in the transfer. You may want to complete the transfer before viewing the program. Your Toshiba Digital Media Server is ® also a TiVo Series2 Digital Video Recorder (DVR). 8 113 Downloaded from www.Manualslib.com manuals search engine - Toshiba RS-TX60 | User Guide - Page 122
Chapter 8 For more details about using these ® features, download the Home Media Features Guide at www.tivo.com/guides. 114 Connecting to a Home Network Digital Music & Photos The Digital Music Player and Digital Photo Viewer let you use your DMS to play MP3 music files and playlists, and view - Toshiba RS-TX60 | User Guide - Page 123
a list of music you published with TiVo Desktop. Select the music you want to TiVo Desktop application to "publish" photos that you want to access through your DMS. (Publishing is a process that 8 makes digital a list of the photos you published with TiVo Desktop. Select the photos you want to - Toshiba RS-TX60 | User Guide - Page 124
check www.tivo.com/adapters for the latest information. Connecting to a Home Network Home Networks When we refer to a "home network," we mean two or more devices (probably computers), connected to a router. USB Ports, Wireless and Wired Network Adapters On the back of your Digital Media Server, you - Toshiba RS-TX60 | User Guide - Page 125
. The power light on the wireless adapter may come on before the cable is completely inserted into the USB slot. Make sure you push the cable all the way into the USB slot. 8 The cable may already be attached ® to your wireless network adapter. 117 Downloaded from www.Manualslib.com manuals search - Toshiba RS-TX60 | User Guide - Page 126
entertainment center. Do not place the wireless adapter near the Digital Media Server's power supply or on a power strip or surge protector. Doing so can cause signal interference or reduce signal strength. 4. Firmware update. When you first connect a wireless network adapter to your DMS, you may - Toshiba RS-TX60 | User Guide - Page 127
. 2. Connect Ethernet to the adapter. Plug one end of an Ethernet cable into the Ethernet adapter. 3. Connect Ethernet to the hub or router. Plug the other end of the Ethernet cable into your home network's hub or router. EthUeSrBn-et 8 119 Downloaded from www.Manualslib.com manuals search engine - Toshiba RS-TX60 | User Guide - Page 128
8 Connecting to a Home Network 4. Important message. The first time you press the TiVo button after connecting a network adapter, you will see an Important Message. Review it, then press SELECT on the remote control to go to TiVo Central. 5. Next Step. If your home network has DHCP, wait for a few - Toshiba RS-TX60 | User Guide - Page 129
If you have a wireless home network, and have connected a wireless network adapter to your DMS, as described on page 117, you are ready to complete Wireless Settings for a home network. To get to Wireless Settings: press the TiVo button on the remote control to go to TiVo Central, then select - Toshiba RS-TX60 | User Guide - Page 130
wireless networks that your DMS has been able to identify. If you have a wireless router (or wireless wireless network": On the Wireless Network Name screen, enter the name of your network using the arrow buttons on your remote wireless network does not use encryption (WEP) you will wireless - Toshiba RS-TX60 | User Guide - Page 131
described on page 124. Wireless Password - Alphanumeric or Hexadecimal 8 • Hexadecimal (preferred). Enter a hexadecimal password using the arrow buttons on the remote to highlight a character. entering text" when you are finished. 123 Downloaded from www.Manualslib.com manuals search engine - Toshiba RS-TX60 | User Guide - Page 132
correct. For steps you can take to troubleshoot issues with your wireless connection, see "Questions About Networking" on page 149. Change Connection Type. You see this screen if you are not using a shared Internet connection to connect to the TiVo service. If your network has access to an always - Toshiba RS-TX60 | User Guide - Page 133
last number has to be unique. For example, two IP addresses for devices on the same network might be '192.168.1.5' and '192.168.1.6'. 8 125 Downloaded from www.Manualslib.com manuals search engine - Toshiba RS-TX60 | User Guide - Page 134
Begin TCP/IP Settings To get to TCP/IP Settings: press the TiVo button on the remote control to go to TiVo Central, then select Messages & Setup, then Settings, then Phone & to "Confirm Settings. Review the settings and select "Accept these Downloaded from www.Manualslib.com manuals search engine - Toshiba RS-TX60 | User Guide - Page 135
(If you are having trouble getting this information, contact your Internet service provider.) In addition, you can use your computer's IP address to help create an IP address for your DMS. For example, if your computer's IP address is '192.168.1.2' then your Digital Media Server's IP address should - Toshiba RS-TX60 | User Guide - Page 136
see this screen if you are not using a shared Internet connection to connect to the TiVo service. If your network has access to an always-on broadband connection, select "Yes" to use it to connect to the TiVo service instead of a phone line. Downloaded from www.Manualslib.com manuals search engine - Toshiba RS-TX60 | User Guide - Page 137
CHAPTER 9 Troubleshooting Customer Support 130 Troubleshooting 131 Downloaded from www.Manualslib.com manuals search engine - Toshiba RS-TX60 | User Guide - Page 138
TiVo service • Your TiVo service account and billing issues • Audio and video, channel changing, and the remote control • Online scheduling and Home Media Features www.tacp.toshiba.com/service 130 1-800-631-3811 www.tivo.com/support 1-877-367-8486 Downloaded from www.Manualslib.com manuals - Toshiba RS-TX60 | User Guide - Page 139
Guided Setup, you can connect your DMS to a home network and use a broadband Internet connection instead of 9 a phone line to connect to the TiVo service. See Chapter 8 for details. My TiVo remote control doesn't control my TV's power, volume, etc. • You can program the TiVo remote control - Toshiba RS-TX60 | User Guide - Page 140
from your DMS without your prior consent. Without your consent, the TiVo service has no way of knowing what shows you-as an individual or household-have watched or recorded. For more information, read the TiVo Privacy Policy on page 154. 132 Downloaded from www.Manualslib.com manuals search engine - Toshiba RS-TX60 | User Guide - Page 141
TiVo service will not interfere with other needs for the phone line, and periodic connections will keep the Digital Media Server or not your problem was solved. Phone Connection Troubleshooting Tips: • prefix, select "Set Dial Prefix," then follow instructions on the screen. For example, if you must - Toshiba RS-TX60 | User Guide - Page 142
the TiVo service, and is available as a local call in most areas. In some areas, however, local and long distance toll charges may apply. You are responsible for any phone charges. Questions About DVDs and CDs I cannot play DVDs or CDs on the Digital Media Server. • You must complete Guided Setup - Toshiba RS-TX60 | User Guide - Page 143
• Check that there wasn't a power outage during the recording. I can't play a DVD disc that I recorded using my Digital Media Server in another DVD player. • Not all DVD players will play all discs, even if the disc has been finalized. 135 Downloaded from www.Manualslib.com manuals search engine - Toshiba RS-TX60 | User Guide - Page 144
in. If you have a cable or satellite box and used the IR Control cable: • Make sure the cable or satellite box is turned on. • Make sure you are using the DMS's remote control, and that you hold it so the TiVo button points toward the DMS, not at the cable or satellite box. • Refer - Toshiba RS-TX60 | User Guide - Page 145
's power cord, then plug it back in. Then try changing channels with the TiVo remote again. • Try using the cable or satellite box's remote to change the channel. If it doesn't work, contact the manufacturer or service provider. • Serial control of a Motorola/General Instruments DCT2000 series cable - Toshiba RS-TX60 | User Guide - Page 146
TiVo Central, select Messages & Setup, then Restart or Reset System, then Repeat Guided Setup. Press THUMBS DOWN three times, and then press ENTER. You may need to check all of the available selections to find the right one since cable providers often change their lineups. For complete instructions - Toshiba RS-TX60 | User Guide - Page 147
it was more than 36 hours ago, your DMS may be having trouble connecting to the TiVo service. Select "Test connection" to test the current settings. If the test connection does not succeed, see page 132 for connection troubleshooting. Once you have made a successful test connection, start a regular - Toshiba RS-TX60 | User Guide - Page 148
Record. The DMS says it is organizing program information. • Your DMS may not have all its program information yet. The first time you go through Guided Setup, the DMS downloads program information from the TiVo service to the TiVo service, and then will start again. If your DMS lost power while it - Toshiba RS-TX60 | User Guide - Page 149
Controls.) To record the program, search for it in Browse by Time. If there are no listings for Pay Per View events, record the showing with the Manually Record Time/Channel option under TiVo Central, then Pick Programs to Record, then Record Time/Channel. Some content may not be saved to DVD - Toshiba RS-TX60 | User Guide - Page 150
recover a recorded program that was deleted? • No. There is no way to bring back a program that has been deleted from Now Playing. You can choose to keep programs as long as you want (see page 55) or save programs recordable DVDs (see page 45). 142 Downloaded from www.Manualslib.com manuals search - Toshiba RS-TX60 | User Guide - Page 151
Questions About Now Playing Can I copy or archive programs to a Zip drive, or any other computer storage media? • The TiVo Series2 DMS does not save or archive recordings to any device other than a VCR or its internal DVD recorder. I haven't scheduled enough programs to fill my DMS, but when I - Toshiba RS-TX60 | User Guide - Page 152
owner's manual for instructions. • You may be using a channel list that does not include the channel you want. Use the number buttons on the remote control to enter the channel number, then press the ENTER/JUMP button. For more information on using a channel list see page 68. 144 Downloaded from - Toshiba RS-TX60 | User Guide - Page 153
audio and video by pressing the INSTANT REPLAY button on the remote control. • Press the TiVo button to go to TiVo Central, then press the LIVE TV button to return to live TV. • You can also try restarting your DMS. From TiVo Central, select Messages & Setup, then Restart or Reset System, then - Toshiba RS-TX60 | User Guide - Page 154
Chapter 9 Troubleshooting • Check to make sure all of the appropriate cables are firmly connected to your DMS, television and other audio/video equipment. For help with your cable connections, see the Start Here booklet and Chapter 1 of this guide. My audio system is set up to play in stereo, but - Toshiba RS-TX60 | User Guide - Page 155
to use my Digital Media Server? • No. The Digital Media Server comes with TiVo BasicTM service included. TiVo Basic does not require any subscription fee. What is TiVo Basic service? • TiVo Basic service allows you to control live TV (pause, fast forward, instant replay), and record programs from - Toshiba RS-TX60 | User Guide - Page 156
schedule recordings from an on-screen guide that includes detailed program information, including show summaries and ratings, for up to 14 days of programming. • More smart features. TiVo Plus skips reruns, tracks schedule changes, and more! Will the Digital Media Server work without TiVo service - Toshiba RS-TX60 | User Guide - Page 157
type." • If your DMS is having trouble connecting via a broadband Internet connection: • Check that the Internet connection is available, then troubleshoot. There are two links in the chain between your DMS and the Internet: your Digital Media Server's connection to your home network, and your - Toshiba RS-TX60 | User Guide - Page 158
If your DMS is having trouble connecting over a regular phone line: • Use broadband. If you have a home network with a broadband Internet connection, try allowing your DMS to use it to connect to the TiVo service over the Internet. Doing this eliminates the Digital Media Server's need to use a phone - Toshiba RS-TX60 | User Guide - Page 159
the way in. Unplug the side of the USB cable connected to the adapter and then plug it back in. 3. Restart the DMS. Press the TiVo button on the remote control to go to TiVo Central, then select Messages & Setup, then Restart or Reset System, then Restart the DMS. Press THUMBS DOWN three times, then - Toshiba RS-TX60 | User Guide - Page 160
(from TiVo Central, select Messages & Setup, then Settings, then Phone & Network Setup), check the wireless signal strength. The following tips may improve wireless signal strength: • Make sure the wireless adapter is placed well away from the Digital Media Server's power supply, or power strips - Toshiba RS-TX60 | User Guide - Page 161
154 TiVo BasicTM Service Agreement 162 TiVo PlusTM Service Agreement 164 Toshiba Digital Media Server Limited Warranty 172 FCC Information 174 Safety Instructions 175 GNU General Public License 177 Linux and Other Important Information 182 Downloaded from www.Manualslib.com manuals - Toshiba RS-TX60 | User Guide - Page 162
Policy. Where the Privacy Policy differs depending on the type of service you have, that difference will be noted. Use of your TiVo® Digital Video Recorder (referred to in this Privacy Policy as your "TiVo DVR") with the TiVo service will signify your acceptance of this Privacy Policy. Thank you for - Toshiba RS-TX60 | User Guide - Page 163
TiVo Digital Video Recorder (referred to in this Privacy Policy as your "TiVo DVR") in your house and to us at TiVo enables your TiVo DVR to select programs you want it to record and, if you are TiVo Plus service user, to suggest programs you might enjoy. By using your TiVo DVR and the TiVo service - Toshiba RS-TX60 | User Guide - Page 164
DVR is receiving the TiVo Basic service, you may not opt out of TiVo's collection of Diagnostic Information from that TiVo DVR. 1.5 "Commerce Information" means personally identifiable information that enables a commerce partner to fulfill your request to Downloaded from www.Manualslib.com manuals - Toshiba RS-TX60 | User Guide - Page 165
information to tune, schedule, and record programs. If you have the TiVo Plus service, your TiVo DVR also uses your viewing information to recommend programs for you. Your TiVo DVR may also use this viewing information to select 10 157 Downloaded from www.Manualslib.com manuals search engine - Toshiba RS-TX60 | User Guide - Page 166
the TiVo Plus service is terminated. NOTE: Your TiVo DVR may not be eligible to receive the TiVo Basic service. Consult your User's Guide to determine if your TiVo DVR is eligible to receive the TiVo Basic service. 2.9 TiVo Customers with Multiple TiVo DVRs. TiVo will cause all of the TiVo DVRs on - Toshiba RS-TX60 | User Guide - Page 167
Depending on your level of TiVo service and the model of your TiVo DVR, such features may not be available to you. 3.6 Factors Beyond Our Control. Your privacy is very important to us. Due to factors beyond our control, however, we cannot fully ensure that your User Information will not be disclosed - Toshiba RS-TX60 | User Guide - Page 168
receiving the TiVo Basic service. In such a case, TiVo may maintain your TiVo Plus service Account Information until such time as your TiVo Basic service is terminated. Consult your User's Guide to If you are a TiVo Plus customer and you would like to change your determine if your TiVo DVR is - Toshiba RS-TX60 | User Guide - Page 169
TiVo, can fully eliminate security risks associated with User Information. 8 General 8.1 Future Features, Services, and Amendments to this Privacy Policy. We may add to or upgrade the TiVo service into the TiVo Basic Service 10 161 Downloaded from www.Manualslib.com manuals search engine - Toshiba RS-TX60 | User Guide - Page 170
and conditions in this agreement ("Agreement"). THE TIVO BASIC SERVICE AND THE PRIVACY POLICY 1 Terms of Service. The TiVo logo on your Pioneer DVD Recorder with TiVo and Toshiba Digital Media Server (referred to in this TiVo Basic Service Agreement as your "TiVo DVR") means that it can receive the - Toshiba RS-TX60 | User Guide - Page 171
transfer the TiVo Basic service to another DVR. By using the TiVo Basic service, you agree to receive all software updates and upgrades that TiVo sends to your TiVo DVR. If your TiVo DVR accesses the TiVo Basic service, you acknowledge and agree that you are a user of the TiVo Basic service and are - Toshiba RS-TX60 | User Guide - Page 172
THE TIVO PLUS SERVICE AND THE PRIVACY POLICY 1 Terms of Service. The TiVo logo on your Pioneer DVD Recorder with TiVo and Toshiba Digital Media Server (referred to in this TiVo Plus Service Agreement as your "TiVo DVR") means that it can receive the TiVo Plus service offered and provided by TiVo for - Toshiba RS-TX60 | User Guide - Page 173
means that if you purchase your network-enabled TiVo DVR with Product Lifetime Service from another individual, the seller will be able to schedule recordings to the DVR until you contact TiVo and have the TiVo Plus service subscription for the DVR transferred to your own account. 3.2 Multi-Room - Toshiba RS-TX60 | User Guide - Page 174
music, photographs, video, or other media from third party media from third party sources could subject your DVR and/or home computer to harm and may infringe the copyrights of third parties. 3.4 Note About Privacy and TiVo Desktop Application. Please review TiVo's Privacy Policy located at www.tivo - Toshiba RS-TX60 | User Guide - Page 175
-Party Content! The TiVo Plus service gives you the ability to access audio, video, and other media over which TiVo exercises no editorial or programming control ("Third Party Content"). You understand that: (a) TiVo does not guarantee the access to or the ability to record, display, or transfer - Toshiba RS-TX60 | User Guide - Page 176
extend the expiration date of your 12 Advertising and Promotions. The TiVo Plus service is advertiser 168 credit card in order to ensure continued service. TiVo may, at its supported. The hard disk drive of your TiVo DVR contains reserved Downloaded from www.Manualslib.com manuals search engine - Toshiba RS-TX60 | User Guide - Page 177
receive the TiVo Basic service, in which case only Section 14 ("Termination of Service") applies to you and this section does not. Consult your User's Guide to determine if your TiVo DVR is eligible to receive the TiVo Basic service. 10 169 Downloaded from www.Manualslib.com manuals search engine - Toshiba RS-TX60 | User Guide - Page 178
THE TIVO PLUS SERVICE WILL BE CORRECTED OR THAT THE TIVO DVR OR TIVO PLUS SERVICE WILL BE COMPATIBLE WITH ANY OTHER SPECIFIC HARDWARE OR SERVICE. FURTHER, TIVO DOES NOT WARRANT THAT THE TIVO PLUS SERVICE OR THE TIVO SERVERS THAT PROVIDE YOU WITH DATA AND Downloaded from www.Manualslib.com manuals - Toshiba RS-TX60 | User Guide - Page 179
FOR ANY LOST PROFITS, USE OF USER INFORMATION, LOSS OF DATA, BUSINESS INTERRUPTION, OR OTHER INDIRECT, CONSEQUENTIAL, SPECIAL, OR INCIDENTAL DAMAGES OF ANY NATURE ARISING FROM OR RELATING TO YOUR USE OF THE TIVO PLUS SERVICE OR USE OF THE TIVO PLUS SERVICE THROUGH YOUR ACCOUNT BY ANYONE ELSE, EVEN - Toshiba RS-TX60 | User Guide - Page 180
ALL THE TERMS OF THIS AGREEMENT AS STATED ABOVE. TiVo Plus Service Agreement v20040608 Toshiba Digital Media Server Limited Warranty LIMITED UNITED STATES WARRANTY FOR TOSHIBA RS-TX20/60 DIGITAL MEDIA SERVER Toshiba America Consumer Products, L.L.C. ("TACP") makes the following limited warranties - Toshiba RS-TX60 | User Guide - Page 181
Toshiba Digital Media Server Limited Warranty COMMERCIAL UNITS DMS units sold and used for commercial use have a limited warranty for all parts and labor, which limited warranty begins on the date of original retail purchase and ends ninety (90) days thereafter. OWNER'S MANUAL AND PRODUCT - Toshiba RS-TX60 | User Guide - Page 182
For earlier products, the REN is separately shown on the label. If your Toshiba Digital Media Server causes harm to the telephone network, the telephone company will notify you in advance that temporary discontinuance of service may be required. But if advance notice isn't practical, the telephone - Toshiba RS-TX60 | User Guide - Page 183
until the problem is resolved. DO NOT DISASSEMBLE THIS EQUIPMENT. It does not contain any user serviceable components. We recommend the installation of an AC surge arrester in the AC outlet to which this equipment is connected. Telephone companies report that Safety Instructions electrical surges - Toshiba RS-TX60 | User Guide - Page 184
internal hard disk drive. 20. CAUTION-Danger of explosion if battery is incorrectly replaced. Replace only with the same or equivalent type recommended by the manufacturer. Dispose of used batteries according to the manufacturer's instructions. 176 Downloaded from www.Manualslib.com manuals search - Toshiba RS-TX60 | User Guide - Page 185
is free for all its users. This General Public License applies referring to freedom, not price. Our General Public Licenses are and charge for this service if you wish), that the original, so that any problems introduced by others will not Downloaded from www.Manualslib.com manuals search engine - Toshiba RS-TX60 | User Guide - Page 186
Service a warranty) and that users may redistribute the program under these conditions, and telling the user how to view a copy rather, the intent is to exercise the right to control the distribution of derivative or collective works based on the Downloaded from www.Manualslib.com manuals search engine - Toshiba RS-TX60 | User Guide - Page 187
modules it contains, plus any associated interface definition files, plus the scripts used to control compilation and installation of the executable. However, as a special exception, the source protecting the integrity of the free 10 179 Downloaded from www.Manualslib.com manuals search engine - Toshiba RS-TX60 | User Guide - Page 188
but may differ in detail to address new problems or concerns. Each version is given a for this. Our decision will be guided by the two goals of preserving you assume the cost of all necessary servicing, repair or correction. 12. In no event Downloaded from www.Manualslib.com manuals search engine - Toshiba RS-TX60 | User Guide - Page 189
applications with the library. If this is what you want to do, use the GNU Library General Public License instead of this License 10 181 Downloaded from www.Manualslib.com manuals search engine - Toshiba RS-TX60 | User Guide - Page 190
Chapter 10 Privacy, Service, Warranty, and Licenses Linux and Other Important Information LINUX SOURCE NOTICE TiVo Digital Video Recorders (DVRs) are powered by the Linux operating system. The machine-readable copy of the corresponding source code is available for the cost of distribution. Please - Toshiba RS-TX60 | User Guide - Page 191
APPENDIX A Front and Back Panel Reference & Specifications Front Panel Reference 184 Back Panel Reference 186 Specifications 188 Downloaded from www.Manualslib.com manuals search engine - Toshiba RS-TX60 | User Guide - Page 192
Place DVDs and CDs in the disc tray with the label side facing up. ᕤ HDD indicator light. A red light indicates that a program is recording to the Now Playing list. A yellow light indicates the DMS is responding to the remote or front panel buttons. Downloaded from www.Manualslib.com manuals search - Toshiba RS-TX60 | User Guide - Page 193
watching live TV or recorded programs, the current time is displayed. You can change the brightness of the display, or turn it off. See "Front Panel Lights" on page 81. Ƹ PLAY. Press PLAY to play a DVD or CD. You don't need to set the Digital ® Media Server's clock-the TiVo service does it for you - Toshiba RS-TX60 | User Guide - Page 194
186 ᕡ AC ~ In. (Connects to A/C power.) Use only the power cord supplied with your Digital Media Server. ᕢ Phone Jack. (Connects to phone cord.) The DMS uses the phone line to get program information and other data from the TiVo service. ᕣ Control Out/Serial. Connects to cable or satellite - Toshiba RS-TX60 | User Guide - Page 195
to a phone line. (A phone line is still required for Guided Setup.) See "Home Networks" on page 116. ᕦ Component Video Output. (Connects to TV.) This is the Digital Media Server's highest quality video output. Use a Component Video cable (not supplied). ᕧ Composite A/V Output. (Connects to TV or - Toshiba RS-TX60 | User Guide - Page 196
) Stereo L/R RCA (1 pair) Digital Audio (Optical) F-Connector Female F-Connector Female USB (2) RJ-11 female, 2-wire 3.5mm mini jack sockets (2) 120VAC, 60Hz, 59W 15C to 35C 5% to 80% 16.5" w X 13.25" d X 3.3" h 37 Buttons ATA/IDE Hard Drive Downloaded from www.Manualslib.com manuals search engine - Toshiba RS-TX60 | User Guide - Page 197
Index Downloaded from www.Manualslib.com manuals search engine - Toshiba RS-TX60 | User Guide - Page 198
to DMS setting 75 control buttons using the 50 creating a manual recording 41 custom channel list 69 Customer Support 130 D DHCP Client ID 126 dial prefix setting 86 dial tone detection setting 87 dial-in number changing 85 Guided Setup and 23 Digital Media Server (DMS) back panel reference - Toshiba RS-TX60 | User Guide - Page 199
7 optimizing IR control 6 K Keep Until... 55 L lights on the DMS front panel 82 Linux 182 live TV recording from 40 troubleshooting 138 M Macrovision 182 manual recording, creating 41 manual repeating recording repeating recording features and 93 Messages reading messages from TiVo 66 Multi-Room - Toshiba RS-TX60 | User Guide - Page 200
95 Start Recording 95 Stop Recording 95 recording options Index changing 97 recording quality setting the default 74 recordings cancel 97 remote control incompatibility with some makes and models 80 not working with TV 131 performing a code search 79, 82 programming 77 resetting the programmable - Toshiba RS-TX60 | User Guide - Page 201
about 147 TiVo Service Agreement 162, 164 TiVo Suggestions 108 TiVolution® Magazine 36 To Do List 42 tone/pulse setting 86 troubleshooting screens 88 TV aspect ratio 76 TV INPUT button, programming 78 TV POWER button, programming 78 troubleshooting 145 Video Recording Quality Recording Options and - Toshiba RS-TX60 | User Guide - Page 202
from TiVo. Select to display or turn on Parental Controls. Indicates a playable DVD or photo CD is inserted. Select to read new messages. Indicates a playable music CD is inserted. (Orange with black border) Indicates a DVD is currently recording. Save to VCR Appears as a warning if a remote - Toshiba RS-TX60 | User Guide - Page 203
that is currently recording or transferring. Folder with blue star - contains one or more programs recorded by a WishListTM search. Folder with Thumbs UpTM - contains all programs recorded as TiVo Suggestions. DVR - for a DVR on your network. Downloaded from www.Manualslib.com manuals search engine - Toshiba RS-TX60 | User Guide - Page 204
Toshiba support site or the TiVo support site: Toshiba Customer Support • Using TiVo BasicTM service features • Connecting your DMS to your TV & other equipment • Recording DVDs or playing DVDs and CDs • Audio and video, channel changing, remote control www.tacp.toshiba.com/service TiVo Customer
-
 1
1 -
 2
2 -
 3
3 -
 4
4 -
 5
5 -
 6
6 -
 7
7 -
8
-
9
-
10
-
11
-
12
-
13
-
14
-
15
-
16
-
17
-
18
-
19
-
20
-
21
-
22
-
23
-
24
-
25
-
26
-
27
-
28
-
29
-
30
-
31
-
32
-
33
-
34
-
35
-
36
-
37
-
38
-
39
-
40
-
41
-
42
-
43
-
44
-
45
-
46
-
47
-
48
-
49
-
50
-
51
-
52
-
53
-
54
-
55
-
56
-
57
-
58
-
59
-
60
-
61
-
62
-
63
-
64
-
65
-
66
-
67
-
68
-
69
-
70
-
71
-
72
-
73
-
74
-
75
-
76
-
77
-
78
-
79
-
80
-
81
-
82
-
83
-
84
-
85
-
86
-
87
-
88
-
89
-
90
-
91
-
92
-
93
-
94
-
95
-
96
-
97
-
98
-
99
-
100
-
101
-
102
-
103
-
104
-
105
-
106
-
107
-
108
-
109
-
110
-
111
-
112
-
113
-
114
-
115
-
116
-
117
-
118
-
119
-
120
-
121
-
122
-
123
-
124
-
125
-
126
-
127
-
128
-
129
-
130
-
131
-
132
-
133
-
134
-
135
-
136
-
137
-
138
-
139
-
140
-
141
-
142
-
143
-
144
-
145
-
146
-
147
-
148
-
149
-
150
-
151
-
152
-
153
-
154
-
155
-
156
-
157
-
158
-
159
-
160
-
161
-
162
-
163
-
164
-
165
-
166
-
167
-
168
-
169
-
170
-
171
-
172
-
173
-
174
-
175
-
176
-
177
-
178
-
179
-
180
-
181
-
182
-
183
-
184
-
185
-
186
-
187
-
188
-
189
-
190
-
191
-
192
-
193
-
194
-
195
-
196
-
197
-
198
-
199
-
200
-
201
-
202
-
203
-
204
 |
 |
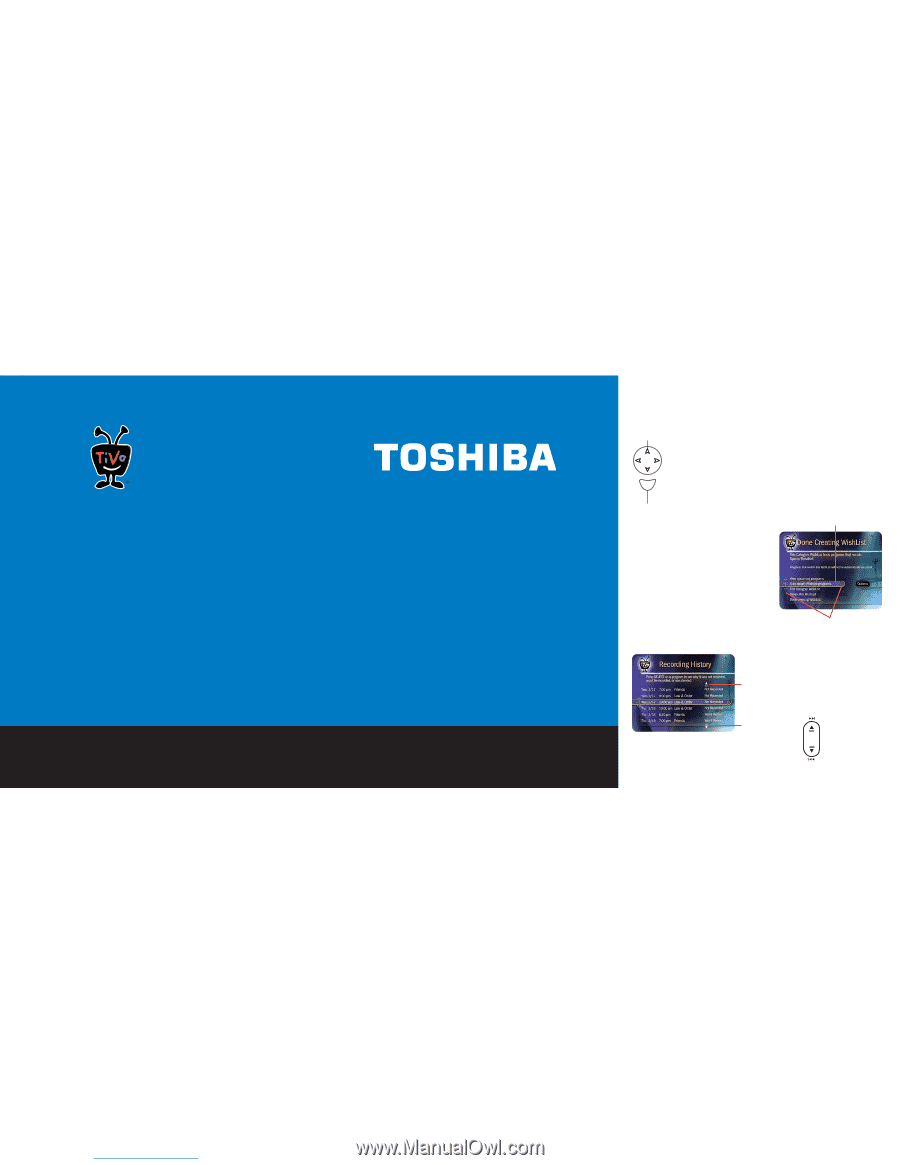
To navigate the Digital Media Server
’
s on-screen
menus, use the arrow buttons on the remote to move
the highlight bar onto an option, then press SELECT.
The LEFT arrow button often takes you to the previous
screen.
S
e
l
e
c
t
Select
Arrow Buttons
Two Types of On-Screen Arrows
The On-Screen Menus and the Remote Control
The arrows that appear beside or near
the highlight bar show possible
directions. For example, on this screen,
you could press the RIGHT arrow to
highlight Options or the DOWN arrow to
highlight
“
Edit Category WishList.
”
Highlight Bar
Arrows Near
Highlight Bar
When you see page up or
page down arrows at the
top or bottom of the screen
(or a list), press the
CHAN/PAGE button to jump
an entire page at a time.
Page Up
Arrow
Page Down
Arrow
CHAN/PAGE
button
Chan
Page
Toshiba Digital Media Server Viewer’s Guide
Viewer’s Guide
Setting up your Toshiba Digital Media Server
Enjoying the TiVo
®
service
Downloaded from
www.Manualslib.com
manuals search engine