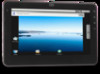
ViewSonic gTablet User Manual
ViewSonic gTablet Manual
 |
UPC - 737839166620
View all ViewSonic gTablet manuals
Add to My Manuals
Save this manual to your list of manuals |
ViewSonic gTablet manual content summary:
- ViewSonic gTablet | User Manual - Page 1
USER GUIDE - ViewSonic gTablet | User Manual - Page 2
you for purchasing the gTablet! QUICK START 1. You must fully charge your gTablet before using for the first time. When fully charged, a green indicator light will display on the gTablet (shown below). 2. Once green indicator light is on, turn system on by pressing the power button (shown below - ViewSonic gTablet | User Manual - Page 3
names other than its own. Information in this manual is subject to change without notice. Product images in this manual are for your reference only. Reproduction without the written consent from the manufacture is strictly prohibited. For Customer Service, please visit www.viewsonic.com/gtablet. 3 - ViewSonic gTablet | User Manual - Page 4
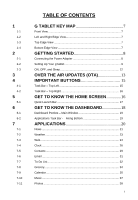
the Power Adapter 8 Setting Up Your gTablet 9 ON, OFF, and Sleep 12 OVER THE AIR UPDATES (OTA 13 IMPORTANT BUTTONS 15 Task Bar - Top Left 15 Task Bar - Top Right 16 GET TO KNOW THE HOME SCREEN 16 Quick Launch Bar 17 GET TO KNOW THE DASHBOARD 18 Dashboard Portlets - Main Window 19 - ViewSonic gTablet | User Manual - Page 5
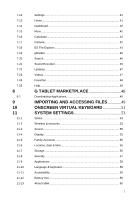
-6 11-7 11-8 11-9 11-10 11-11 11-12 11-13 Settings 41 Home 41 Dashboard 42 More 42 Calculator 42 Camera 42 ES File Explorer 44 gMarket 46 Search 46 Sound Recorder 46 Updates 47 Videos 47 Favorites 48 Help 48 G TABLET MARKETPLACE 48 Downloading Applications 48 IMPORTING AND ACCESSING - ViewSonic gTablet | User Manual - Page 6
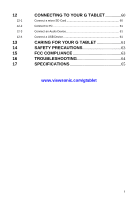
-2 12-3 12-4 13 14 15 16 17 CONNECTING TO YOUR G TABLET 60 Connect a micro SD Card 60 Connect to PC 61 Connect an Audio Device 61 Connect a USB Device 61 CARING FOR YOUR G TABLET 61 SAFETY PRECAUTIONS 63 FCC COMPLIANCE 63 TROUBLESHOOTING 64 SPECIFICATIONS 65 www.viewsonic.com/gtablet 6 - ViewSonic gTablet | User Manual - Page 7
1 G TABLET KEY MAP 1-1 Front View 1. Built-in Camera 2. SEARCH 3. HOME 4. MENU 5. BACK 6. LCD Touch-sensitive Screen 7. Charge Indicator 8. Light sensor Window 1-2 Left and Right Edge View Left Edge 1. Power button 2. Micro SD Port 3. USB (USB2.0) Port 4. Mini-USB Port 5. Speakers 6. Headphone - ViewSonic gTablet | User Manual - Page 8
1. Connect the piece with the plugs to the power cord. 1 2. Plug the DC end of adapter into the power jack of the gTablet. 3. Insert the AC end to the wall outlet. 4. Check the connections above before turning on the gTablet. Your gTablet and the accessories may differ from the pictures shown. 8 - ViewSonic gTablet | User Manual - Page 9
for the first time. gTablet Key Map section). When fully charged, a green indicator light will display on the gTablet (shown in gTablet Key Map section). Once green indicator light is on, turn system on by pressing the power button (shown in Welcome Screen When the gTablet powers on, the Welcome - ViewSonic gTablet | User Manual - Page 10
Networks 3. After setting up your Location, Date and Time, you will be prompted to set up your wireless network, and the following screen will appear. 10 - ViewSonic gTablet | User Manual - Page 11
connect to your network. If it does not, try this process again by tapping on "Previous" to go back. If problem persists, contact your internet service provider or visit www.viewsonic.com/gtablet. Setting Up User Profiles 4. After setting up your Wireless Network, you will be prompted to set up your - ViewSonic gTablet | User Manual - Page 12
most common mode for frequent and daily use for the gTablet is to put the system into "Sleep" mode. This save battery and requires a much shorter boot up time. To put the tablet in sleep mode, simply press the power button briefly. To turn the gTablet on from the sleep mode, also briefly press the - ViewSonic gTablet | User Manual - Page 13
available, follow the instructions to download when you are ready. Important Note: Over the Air Updates may erase some applications which you have downloaded and you will need to reinstall them. It is important that the gTablet be fully charged before downloading updates. Furthermore, you should - ViewSonic gTablet | User Manual - Page 14
Review and accept the End User License Agreement. Wait for download to complete. The progress will be shown on the indicator bar. Once download is complete, you will have the option to "Apply Update" or "Postpone". Applying Update will reboot the tablet. 14 - ViewSonic gTablet | User Manual - Page 15
at the time. 4. BACK - Pressing the back button will always take you 4 back to the previous window displayed. 4-1 Task Bar - Top Left 1 2 The "House" icon (1), will bring you back 3 to either the Home screen or the Dashboard depending on where you were last. This icon is not always visible - ViewSonic gTablet | User Manual - Page 16
for each of these functions. Time Alerts Battery Wireless 5 GET TO KNOW THE HOME SCREEN 1 The gTablet‟s Home screen is a traditional Android user interface commonly used on Android cell phones. To access the Home screen from any application, tap on the "Home" button on the right side of the - ViewSonic gTablet | User Manual - Page 17
your Internet home page. By default, it is se up to go directly to Google. Mail - takes you to the email application. Applications Menu - opens up the Android menu screen where all of your applications and features are listed. Settings - opens up the settings menu for the GTablet. Dashboard - ViewSonic gTablet | User Manual - Page 18
it in your Applications Menu. 6 GET TO KNOW THE DASHBOARD The gTablet‟s Dashboard screen is a user interface that 1 enables user customization. To access the Dashboard from the Home page, tap on the window pane icon. You may also tap on the "Home" button on the right side of the LCD Screen - ViewSonic gTablet | User Manual - Page 19
dropped in a Portlet. With in these applications that you can display in the portlets, some require that you make additional selections. For example, with Photos. You will need to select which photo album you want running in the window by going into the Photo application and under settings, choosing - ViewSonic gTablet | User Manual - Page 20
into the position you want it displayed. As you add applications or buy them, they will be displayed here in the Applications Task Bar expanded view under the "More" button. 7 APPLICATIONS Applications Menu All applications can be accessed from both the Home screen and the Dashboard. To access - ViewSonic gTablet | User Manual - Page 21
came pre-loaded on your gTablet. 7-1 News Tapping on the "News" icon visible from the Home Applications Menu and the Dashboard, brings up the News application in full screen. Here you will see short snippets of the current news constantly being updated as news is created. This main page is the "Top - ViewSonic gTablet | User Manual - Page 22
2 Under settings, you can choose the "Categories" that appear at the top of the news headline page. Under settings, you can also customize your Dashboard portlets (1). This application runs in the large portlet window of the Dashboard. You are able to select which news categories appear in the large - ViewSonic gTablet | User Manual - Page 23
for news will happen. Note that the more frequent updates are, the more it uses up battery power. You can select between 15 minutes to 1 hour intervals. 7-2 Weather Tapping on the "Weather" icon will bring up the Weather page full screen. This application is customizable allowing you to select - ViewSonic gTablet | User Manual - Page 24
3 1 2 Under the "Portlets" window (1), you will select 3 locations using the drop down menus. Remember, from the Dashboard screen, your wireless internet connection during the setup process, you will instantly go to your internet home page. The default home page for the gTablet is www.google.com. 24 - ViewSonic gTablet | User Manual - Page 25
the section System Settings, under "Wireless & networks". By tapping on the "Settings" button (gear icon) (1) at the top right of the internet page, the "Web Settings" screen will appear. This screen allows you to set your default internet home page, manage your content and security settings. 1 1 25 - ViewSonic gTablet | User Manual - Page 26
7-4 Clock Tapping on the "Clock" icon will bring up the Clock, Alarm, and Timers function. 1 Clock To set the time, touch the clock face and "Set Clock" will appear. Select your time zone and save. The master time is set in the System Settings under "Location, date & time". To add additional clocks - ViewSonic gTablet | User Manual - Page 27
Select the time zone by tapping on the clock, as previously described. Delete the clock by tapping on the clock and selecting "Delete". Note the first clock on the left will act as your primary clock - for example, if a clock is used in the Dashboard portlets screen. Alarms Under the "Alarms" tab, - ViewSonic gTablet | User Manual - Page 28
of the alarm clock you wish to cancel to bring open the "Set Alarm" window and tap on "Delete". To simply turn off an alarm, tap on the "ON on the "Timers" tab from the Clock page will bring up a digital timer. To set, touch the timer and the "Set Timer" window will appear. To set the timer, use - ViewSonic gTablet | User Manual - Page 29
the screen (shown at right). 7-5 Contacts Add a Contact Tapping on the "Contacts" icon will bring up your contact list. To add contacts, you can both manually input contacts and / or import them in from your Google mail. To add a new contact, tap on the "+" icon shown at right. Simply fill out - ViewSonic gTablet | User Manual - Page 30
contacts only works with a Gmail (Google email) account similar to an Android based phone. To import contacts, tap on the icon shown at right. of the alphabet along the bottom of the contacts main page (2). Once you have contacts, you can identify favorites by using the star function (3). 1 3 2 30 - ViewSonic gTablet | User Manual - Page 31
Note that the "Contacts" application for the gTablet operates in family mode. All contacts listed will getting started under profiles), and provide a name and description. You will also select how frequently you download emails from 15 minutes to 1 hour. For security, you can select "Only I can see - ViewSonic gTablet | User Manual - Page 32
have one account, the application will open up straight to your email account. 1 To compose an email, tap on the "Compose" button. (1) To view other boxes, tap on "Inbox" and select from the drop down menu - Inbox, Drafts, Outbox, Sent and Trash. (2) To go back to the main email screen and - ViewSonic gTablet | User Manual - Page 33
To add an action (a to-do), tap on the "+" button and input the item you wish to add to the list. (1) You can email your To-Do List by tapping on the envelope. (2) To delete an item, tap on the garbage can. (3) To flag an item as important, tap on the flag. (4) Once you have completed an - ViewSonic gTablet | User Manual - Page 34
7-8 Grocery Tapping on the "Grocery" icon will bring up the application. With the Grocery List application, you can create several lists and actually set up favorites. Tapping on the list in the background that you wish to view will bring it to the foreground. On each list, there is an " - ViewSonic gTablet | User Manual - Page 35
allows for multiple calendars including the "Family" calendar as well as calendars set up for each profile. Note that all calendars are accessible to all users on the gTablet. 4 3 2 5 1 6 To select the calendar you wish to view simply touch the profile name on the left bar. (1) 35 - ViewSonic gTablet | User Manual - Page 36
"Add external calendar", you can also tap on the "+" button on the left bar of the main calendar screen. (6) This brings up the Calendar Settings page. 36 - ViewSonic gTablet | User Manual - Page 37
. You are able to buy music online using the gTablet and play your music with the "Music" application. The easiest way to import your music is by using the mini USB cable connected to your PC. Please refer to section on Importing Files. 1 2 3 4 5 1. Search - Using the search function allows you to - ViewSonic gTablet | User Manual - Page 38
, forward, play / pause, replay, etc. 7-11 Photos Tapping on the "Photos" icon brings up the application. From the main page you can view "All Photos" in albums, view photos on your SD Card, and view your Picasa account. Note that Picasa is tied to your Google account and only photos set to the - ViewSonic gTablet | User Manual - Page 39
your album. If you double tap that photo, the photo will be displayed in full screen. To view more photos, tap on the photos piled right. You can also slide your finger left and right pushing the images to view the next image. To rotate the image, tap on "rotate" in the top right corner. (1) To - ViewSonic gTablet | User Manual - Page 40
account, tap on the settings button in the top right corner from the main photo page (1). 1 This brings up the "Photos Settings" screen. In the top right corner, you can select "Picasa accounts" or "Home portlets". 1 To add a Picasa account tap on the "+" sign and follow the prompts asking for - ViewSonic gTablet | User Manual - Page 41
, display, profiles, date, time, security, language, etc. For detailed information on each of the categories in "Settings", please refer to the System Settings section. 7-13 Home Tapping on the "Home" icon from the Dashboard screen will take you to the traditional Android home screen for the gTablet - ViewSonic gTablet | User Manual - Page 42
will bring up the Dashboard which is an alternative to the Home screen allowing for access to applications and customization of the portlets up the expanded Applications Task Bar showing you all applications installed on your gTablet. 1 7-16 Calculator Tapping on the "Calculator" icon will bring up - ViewSonic gTablet | User Manual - Page 43
the top right of the screen containing a snap shot (last photo taken) (3). This will bring up the "Photos" application. Note: photos taken with your gTablet are saved to your "Photos" application. 3 1 2 Video Mode Tap on the video button to switch to the video application and record motion video - ViewSonic gTablet | User Manual - Page 44
is the "forward slash" (/) screen (which is the "sdcard" file folder open). It has 2 important files - "DCIM" and "download". The home screen in the ES File Explorer application (when the home icon is displayed - icon at right) shows three important files - "sdcard", "sdcard2" and "usbdisk". 44 - ViewSonic gTablet | User Manual - Page 45
button displays the gTablets application list. List icon (6) - tapping on the list icon shows the file explorer window in columns. Tapping on it again displays the icons from left to right. Important File Folders - "Home" Icon 1 2 3 "sdcard" File Folder (1) - Files in the "SD Card" folder - ViewSonic gTablet | User Manual - Page 46
Tapping on the "gMarket" icon will bring up the handango Android applications marketplace online where you can download free and paid Android apps. Please see the gTablet Marketplace section of this document on how to download an app from the marketplace. 7-20 Search Tapping on the "Search" icon - ViewSonic gTablet | User Manual - Page 47
. Here you can see what version your software is, and manually run the update software. Please refer to the Over the Air section for further details. 7-23 Videos Tapping on the "Videos" icon from will bring up all videos saved to your gTablet. This application shows videos captured with the - ViewSonic gTablet | User Manual - Page 48
to the Viewsonic website where you will find resources available to help you such as the users manual. 8 G TABLET MARKETPLACE Tapping on the "gMarket" icon takes you to www.handango.com which is an online application store for Android software. This store has thousands of Android applications - ViewSonic gTablet | User Manual - Page 49
find the application in the ES File Explorer under the "download" folder. 9 IMPORTING AND ACCESSING FILES There are three methods for transferring and accessing files with the gTablet, a mini USB cable connected to your PC, a USB flash memory stick, and a micro SD card. The preferred method and - ViewSonic gTablet | User Manual - Page 50
available to the gTablet as long as the SD card remains inserted into the device. 6. To remove the SD card, you must "unmount" the card by going into "settings", under "Storage", and under SD card, tap on "Unmount SD card". Follow the instructions until it is safe to remove SD card. USB Memory Stick - ViewSonic gTablet | User Manual - Page 51
transfer to your gTablet. Tap on the file and hold for more than 2 seconds. A screen will pop up, tap on "Copy". 6. Tap on the "home" button to bring the keyboard (1). Touching the up arrow key again returns the keyboard to lower case letters. To bring up the numerical keyboard, on the "12&#" key - ViewSonic gTablet | User Manual - Page 52
of the numerical (3). While in the numerical / symbol keyboard, you can touch the up arrow button (1) and additional symbols (4) will appear. To manually remove the onscreen keyboard, touch the button at the top of all keyboards in the center (5 - icon at right). Numerical / Symbol Keyboard - ViewSonic gTablet | User Manual - Page 53
. Battery - shows the percent of battery remaining. Storage - shows total space and available space in memory. Selecting "more" in any of these boxes will take you directly to the category‟s specific settings page. 11-2 Wireless & networks Manage the wireless settings on your gTablet. 53 - ViewSonic gTablet | User Manual - Page 54
wireless access points. Advance settings - access additional settings including MAC address information. Scan for networks Add a Wi-Fi network Bluetooth Set Up 1. Turn the gTablet and your remote device Bluetooth "ON". (1) 2. Tap on "Discoverable" so that your Bluetooth device can see the - ViewSonic gTablet | User Manual - Page 55
. 11-4 Display Allows user to set display settings like brightness and screen timeout. Auto-rotate screen - select to have screen switch orientation automatically when rotating tablet. Auto brightness - selecting automatically adjusts brightness of screen. Brightness - manually control - ViewSonic gTablet | User Manual - Page 56
time Use 24-hour format 11-7 Storage Manage your storage options. Tablet Storage Tablet system storage - shows total and available system storage Tablet data storage - shows total and available data storage - available to user Format tablet data storage - this erases your data permanently 56 - ViewSonic gTablet | User Manual - Page 57
SD card. 11-8 Security Set security features and restore software to factory settings. Visible password - selecting this box shows your password for a second as you type it. It then replaces it with bullet points for privacy. Factory data reset - ERASES all data on the device (except data stored - ViewSonic gTablet | User Manual - Page 58
. System applications - view and control applications pre-loaded on the gTablet. Development - contains settings that are useful for developing Android applications. Most users will NOT need to use this setting. 11-10 Language & keyboard Select language - select the language you wish to - ViewSonic gTablet | User Manual - Page 59
auto capitalize, quick fixes correcting commonly typed mistakes, show suggestions, and auto-complete. 11-11 Accessibility Accessibility is an Android service established for disabled individuals needing additional accessibility such as a "Text to Speech" application. 11-12 Battery Use Shows percent - ViewSonic gTablet | User Manual - Page 60
to and from the micro SD card. The gTablet currently supports up to 64GB micro SD cards. It is recommended that the gTablet be used with at least a 32GB micro SD card to ensure the best user experience. For directions on accessing media files from your micro SD card, please refer to the section - ViewSonic gTablet | User Manual - Page 61
the card in the wrong direction may result in damage. 12-2 Connect to PC The gTablet is designed with a mini-USB port which allows you to connect the unit to a PC. This feature enables you to download files such as, music, photos, video, etc. straight from your PC to the internal storage - ViewSonic gTablet | User Manual - Page 62
"Settings" icon from the applications menu. Then tap on "Display" and under "Brightness" move the slide bar towards the left to decrease brightness. This will save battery power allowing your gTablet to operate longer before needing to charge. Turn your wireless (WiFi) connection to "Off" if you - ViewSonic gTablet | User Manual - Page 63
not support hot-plug. 14. Before cleaning, disconnect the gTablet from the electrical outlet and remove any installed batteries. 15. Keep gTablet away from children. 16. DO NOT disassemble the gTablet. Only a certified service technician should perform repairs on your gTablet. Otherwise, problem may - ViewSonic gTablet | User Manual - Page 64
user‟s authority to operate the device. 16 TROUBLESHOOTING Q: How do I turn off the gTablet when it freezes and cannot warm boot? A: Press the POWER button and hold 4 or 6 seconds to turn off the gTablet. Then restart. Q: Applications that I previously downloaded have disappeared after an OTA update - ViewSonic gTablet | User Manual - Page 65
the battery pack. Disconnect all external devices. 3. DO NOT place the gTablet into the dirty carrying case. 4. DO NOT use a hair dryer on the gTablet. 5. Then, take to a service center for advice. Q: How do I recover the factory status? A: Tap on "Settings"---"Security"---"Factory data reset" to - ViewSonic gTablet | User Manual - Page 66
Aspect ratio Panel manufacturer Panel type Driver system Resolution (480i/480p/720p/1080i) Brightness (cd/m2) Model Frequency Core Model 2D/3D Graphics Processor Video Decode Video Encode Audio Decode Image Processor Nvidia Tegra 2 1GHz Dual ARM Cortex-A9 Yes Yes, Up to HD (1080P) Yes - ViewSonic gTablet | User Manual - Page 67
Flash Mass Memory SD CARD 512MB 16GB iNAND ( up to 32GB ) Option ( up to 64GB ) Mail attachment support Image Document Web Page .jpg、.tiff、.gif .txt .htm、.html Audio Frequency response Formats supported (Decode) Formats supported 1080p DiVX 4/5 XviD - 1080p XviD Home Theater MPEG-2 - D1 MP@ML On2 - ViewSonic gTablet | User Manual - Page 68
USB Jack SD Card Dock 1.7mm 3.5mm stereo Mini USB USB TYPE-A Micro SD HDMI/Headphone/USB Camera Primary Video Conferencing 1.3M Mpix 640 x 480 Battery and Power Battery Capacity Type Rated voltage Dimensions Mass Operating temperature Storage temperature Battery cycle times Battery charging - ViewSonic gTablet | User Manual - Page 69
Play (
-
 1
1 -
 2
2 -
 3
3 -
 4
4 -
 5
5 -
 6
6 -
 7
7 -
8
-
9
-
10
-
11
-
12
-
13
-
14
-
15
-
16
-
17
-
18
-
19
-
20
-
21
-
22
-
23
-
24
-
25
-
26
-
27
-
28
-
29
-
30
-
31
-
32
-
33
-
34
-
35
-
36
-
37
-
38
-
39
-
40
-
41
-
42
-
43
-
44
-
45
-
46
-
47
-
48
-
49
-
50
-
51
-
52
-
53
-
54
-
55
-
56
-
57
-
58
-
59
-
60
-
61
-
62
-
63
-
64
-
65
-
66
-
67
-
68
-
69
 |
 |

USER GUIDE