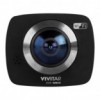
Vivitar DVR 988HD User Manual - Page 36
MACINTOSH OS, TRANSFERRING PHOTOS AND VIDEOS, APPLE IPAD, Apple iPad Camera Connection
 |
View all Vivitar DVR 988HD manuals
Add to My Manuals
Save this manual to your list of manuals |
Page 36 highlights
MACINTOSH OS 1. Use the supplied USB cable to connect your camera to your computer's USB port. 2. Power on the camera. 3. The camera's device icon appears on the desktop. 4. Click on the device icon and open the DCIM folder and the folder inside to view the media files. 5. Select the files and drag them into your computer. Optionally, select the files and choose 'Copy' from the Finder's Edit menu. Then select a folder and choose 'Paste' from the Edit menu. 6. We recommend that you copy the photos into the Pictures folder and the videos into the Movies folder. 7. Do not disconnect the cable during transfer. Doing so will cancel the transfer of any files on their way to your computer. TRANSFERRING PHOTOS AND VIDEOS: APPLE IPAD NOTE: Please check your device packaging for compatibility with the iPad. Apple iPad Camera Connection: 1. For models that are compatible with the iPad, photos and videos can be imported from your digital camera to your iPad by following either one of the options below: 2. Connecting your digital camera to your iPad using an iPad Camera Connector: 3. Plug the Camera Connector into the dock connector port on your iPad, then attach your digital camera using a USB cable (included) to the Camera Connector. NOTE: iPad Camera Connector not included. This may be purchased separately. 4. Using an iPad SD Card Reader: Connect the SD Card Reader to your iPad, then insert your digital camera's Micro SD Memory card into the slot to import photos and videos directly from your camera's SD card. NOTE: iPad SD Card Reader not included. This may be purchased separately. After you make the connection, your iPad automatically opens the Photos application. This allows you choose which photos and videos to import, then organizes them into albums. 35
-
 1
1 -
2
-
3
-
4
-
5
-
6
-
7
-
8
-
9
-
10
-
11
-
12
-
13
-
14
-
15
-
16
-
17
-
18
-
19
-
20
-
21
-
22
-
23
-
24
-
25
-
26
-
27
-
28
-
29
-
30
-
 31
31 -
 32
32 -
 33
33 -
 34
34 -
 35
35 -
 36
36 -
 37
37 -
 38
38 -
 39
39 -
 40
40
 |
 |
