Vtech T2451 User Manual - Page 7
Charge the Handset Battery., Check for Dial Tone., Set the Dial Mode., SELECT - manual
 |
UPC - 735078004826
View all Vtech T2451 manuals
Add to My Manuals
Save this manual to your list of manuals |
Page 7 highlights
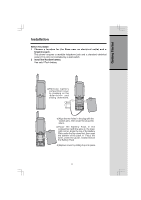
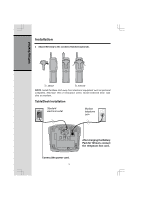
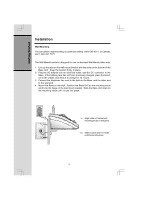
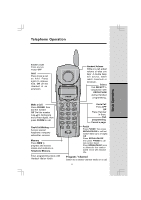
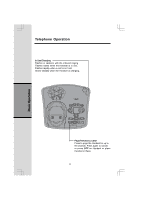
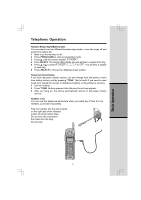
Getting Started Installation 4 Charge the Handset Battery. Place the Handset in the Base. Charge the battery for at least 12 hours the first time. 5 Check for Dial Tone. After the batteries are charged, pick up the handset and press PHONE; you should hear a dial tone. 6 Set the Dial Mode. If you have touch tone service, the phone is ready to use as soon as the batteries are charged. If you have dial pulse (rotary) service, you’ll need to change the dial mode. • Press PROG/CHAN on the Handset to enter programming mode. • Press or until the screen displays DIAL MODE: and the currently selected mode. • Press SELECT. The current setting blinks. • Press to select TONE or PULSE. • Press SELECT to save the displayed mode. 7 Set Time and Date If you subscribe to Caller ID service, the date and time will be set automatically with the first incoming call. If you do not have Caller ID service, you can set the date and time manually. • Press PROG/CHAN, and then press or until DATE/TIME is displayed. Press SELECT. • The month is flashing. Press or until the screen displays the correct month. Press SELECT. • The day is flashing. Press or until the screen displays the correct day. Press SELECT. • The hour is flashing. Press or until the screen displays the correct hour. Press SELECT. • The minute is flashing. Press or until the screen displays the correct minute. Press SELECT. • AM or PM is flashing. Press or to choose between AM or PM. Press SELECT. 8 Set Language Mode • Press PROG/CHAN, and then press or until LANGUAGE is displayed. Press SELECT. • The current setting blinks.Press or until the screen displays the correct language( English, Espanol or French ). • Press SELECT to save the language mode. 7
-
 1
1 -
 2
2 -
 3
3 -
 4
4 -
 5
5 -
 6
6 -
 7
7 -
 8
8 -
 9
9 -
 10
10 -
 11
11 -
 12
12 -
13
-
14
-
15
-
16
-
17
-
18
-
19
-
20
-
21
-
22
-
23
-
24
-
25
-
26
-
27
-
28
-
29
-
30
-
31
-
32
-
33
-
34
-
35
-
36
-
37
-
38
-
39
-
40
-
41
-
42
-
43
-
44
 |
 |