Weider E2000 English Manual - Page 11
hook on the Top Frame 1. Slide the Pulley Bracket
 |
View all Weider E2000 manuals
Add to My Manuals
Save this manual to your list of manuals |
Page 11 highlights
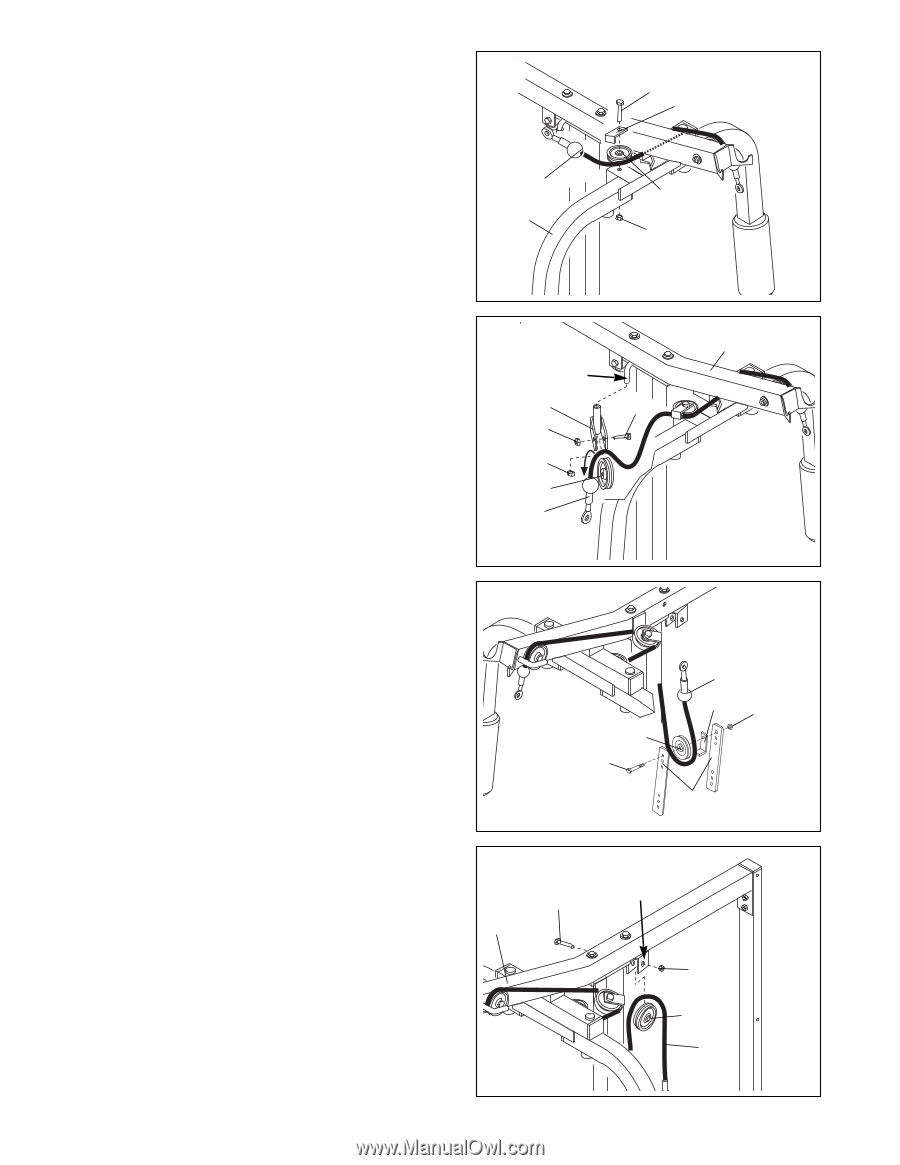
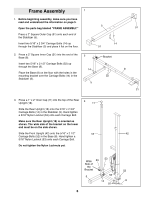
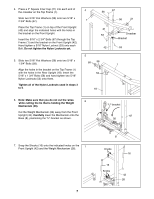
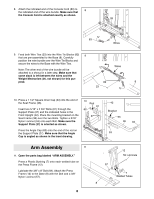
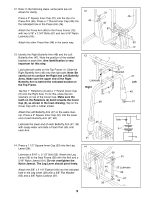
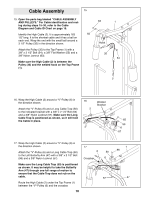
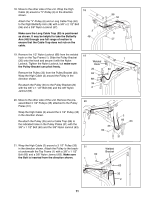
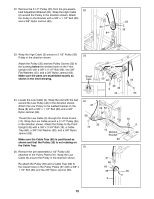
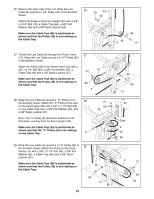
18. Move to the other side of the unit. Wrap the High 18 Cable (2) around a ÒVÓ-Pulley (6) in the direction shown. Attach the ÒVÓ-Pulley (6) and a Long Cable Trap (50) to the Right Butterfly Arm (48) with a 3/8Ó x 2 1/2Ó Bolt (96) and a 3/8Ó Nylon Locknut (57). Make sure the Long Cable Trap (50) is positioned as shown. It may be helpful to take the Butterfly Arm (48) through one full range of motion to ensure that the Cable Trap does not rub on the cable. 2 48 96 50 6 57 19. Remove the 1/2Ó Nylon Locknut (68) from the welded 19 hook on the Top Frame (1). Slide the Pulley Bracket 1 (20) onto the hook and secure it with the Nylon Welded Locknut. Tighten the Nylon Locknut, but make sure Hook the Pulley Bracket can pivot freely. 20 60 Remove the Pulley (35) from the Pulley Bracket (20). 63 Wrap the High Cable (2) around the Pulley in the direction shown. 68 Re-attach the Pulley (35) to the Pulley Bracket (20) 35 with the 3/8Ó x 1 1/2Ó Bolt (60) and the 3/8Ó Nylon 2 Jamnut (63). 20. Move to the other side of the unit. Remove the pre- 20 assembled 3 1/2Ó Pulleys (35) attached to the Pulley Plates (31). Wrap the High Cable (2) around the 3 1/2Ó Pulley (35) in the direction shown. Re-attach the Pulley (35) and a Cable Trap (66) to the indicated holes in the Pulley Plates (31) with the 3/8Ó x 1 1/2Ó Bolt (60) and the 3/8Ó Nylon Jamnut (63). 35 60 2 66 63 31 21. Wrap the High Cable (2) around a 3 1/2Ó Pulley (35) 21 in the direction shown. Attach the Pulley to the brack- et underneath the Top Frame (1) with a 3/8Ó x 1 1/2Ó Bolt (60) and a 3/8Ó Nylon Jamnut (63). Make sure 60 the Bolt is inserted from the direction shown. 1 Welded Bracket 63 35 2 11
-
 1
1 -
2
-
3
-
4
-
5
-
 6
6 -
 7
7 -
 8
8 -
 9
9 -
 10
10 -
 11
11 -
 12
12 -
 13
13 -
 14
14 -
 15
15 -
 16
16 -
17
-
18
-
19
-
20
-
21
-
22
-
23
-
24
-
25
-
26
-
27
-
28
 |
 |