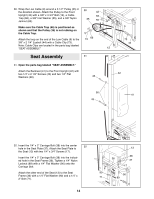
Weider E2000 English Manual - Page 13
Thread the Low Cable 9 through the Press Frame
 |
View all Weider E2000 manuals
Add to My Manuals
Save this manual to your list of manuals |
Page 13 highlights
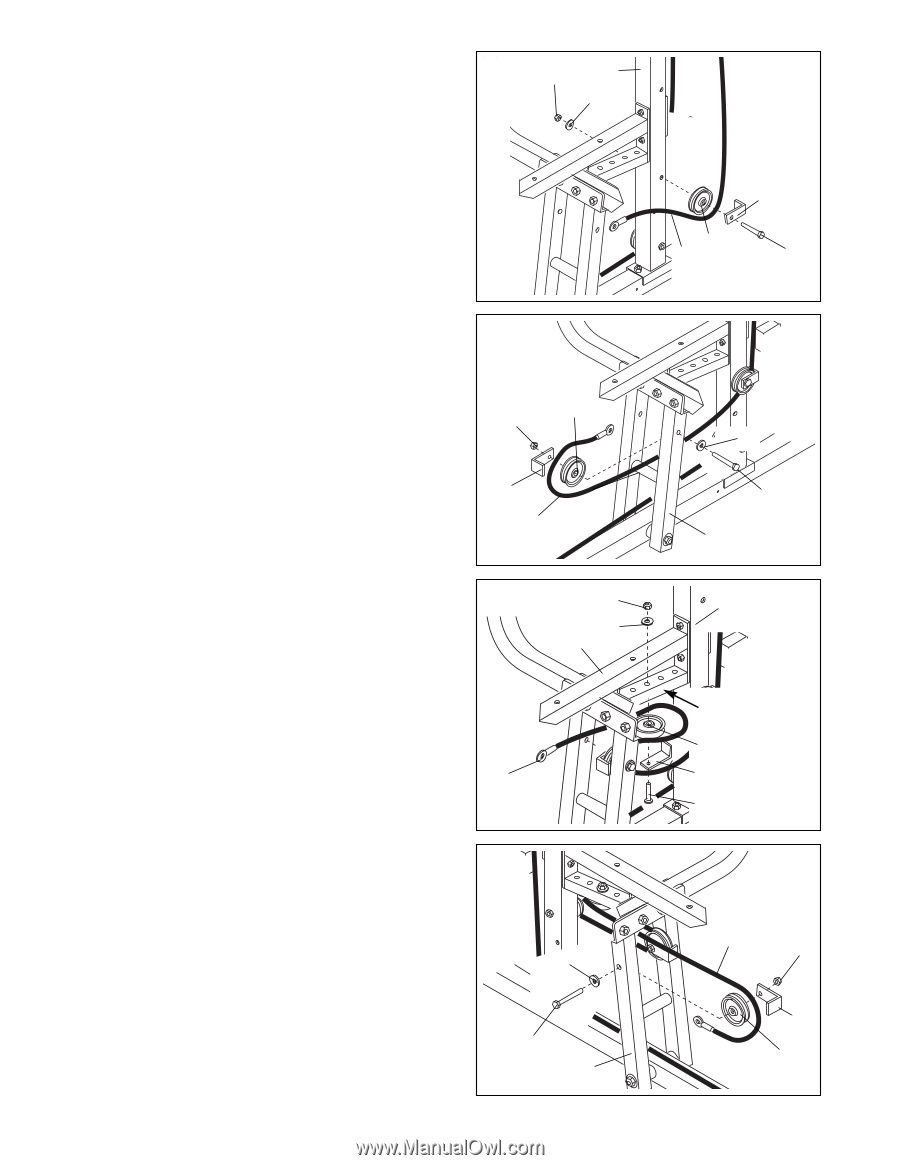
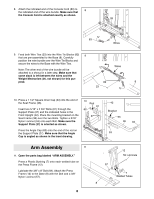
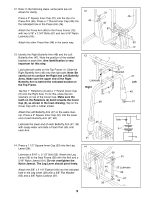
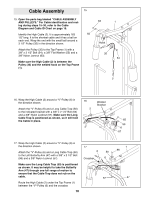
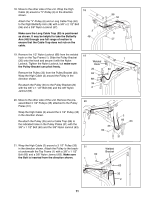
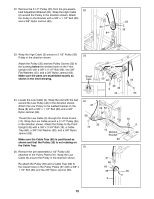
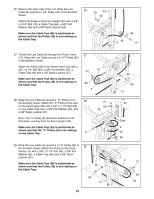
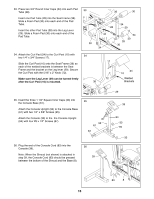
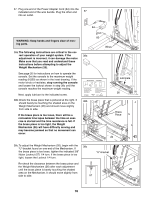
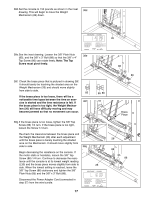
26. Move to the other side of the unit. Wrap the Low 26 Cable (9) around a 3 1/2Ó Pulley (35) in the direction shown. Attach the Pulley to the Front Upright (42) with a 3/8Ó x 3 3/4Ó Bolt (19), a Cable Trap (66), a 3/8Ó Flat Washer (55) and a 3/8Ó Nylon Jamnut (63). Make sure the Cable Trap (66) is positioned as shown and that the Pulley (35) is not rubbing on the Cable Trap. 63 42 55 27. Thread the Low Cable (9) through the Press Frame 27 (12). Wrap the Low Cable around a 3 1/2Ó Pulley (35) in the direction shown. Attach the Pulley (35) to the Press Frame (12) with a 3/8Ó x 3 1/4Ó Bolt (69), a 3/8Ó Flat Washer (55), a Cable Trap (66) and a 3/8Ó Nylon Locknut (57). 35 57 Make sure the Cable Trap (66) is positioned as shown and that the Pulley (35) is not rubbing on the Cable Trap. 66 9 28. Wrap the Low Cable (9) around a ÒVÓ- Pulley (6) in 28 the direction shown. Attach the ÒVÓ-Pulley to the tube on the Seat Frame (36) with a 3/8Ó x 3 1/4Ó Bolt (69), a Long Cable Trap (50), a 3/8Ó Flat Washer (55), and a 3/8Ó Nylon Locknut (57). Note: The ÒVÓ-Pulley (6) should be attached to the third hole, counting from the Front Upright (42). Make sure the Cable Trap (50) is positioned as shown and that the ÒVÓ-Pulley (6) is not rubbing on the Cable Trap. 9 57 55 36 29. Wrap the Low Cable (9) around a 3 1/2Ó Pulley (35) in 29 the direction shown. Attach the Pulley to the Press Frame (12) with a 3/8Ó x 3 1/4Ó Bolt (69), a 3/8Ó Flat Washer (55), a Cable Trap (66) and a 3/8Ó Nylon Locknut (57). Make sure the Cable Trap (66) is positioned as shown and that the Pulley (35) is not rubbing on 55 the Cable Trap. 69 12 13 35 9 66 19 55 69 12 42 Tube 6 50 69 9 57 66 35
-
 1
1 -
2
-
3
-
4
-
5
-
6
-
7
-
 8
8 -
 9
9 -
 10
10 -
 11
11 -
 12
12 -
 13
13 -
 14
14 -
 15
15 -
 16
16 -
 17
17 -
 18
18 -
19
-
20
-
21
-
22
-
23
-
24
-
25
-
26
-
27
-
28
 |
 |