Weider Pro 525 English Manual - Page 10
Locate the Low Cable 24. Lay the Low Cable
 |
View all Weider Pro 525 manuals
Add to My Manuals
Save this manual to your list of manuals |
Page 10 highlights
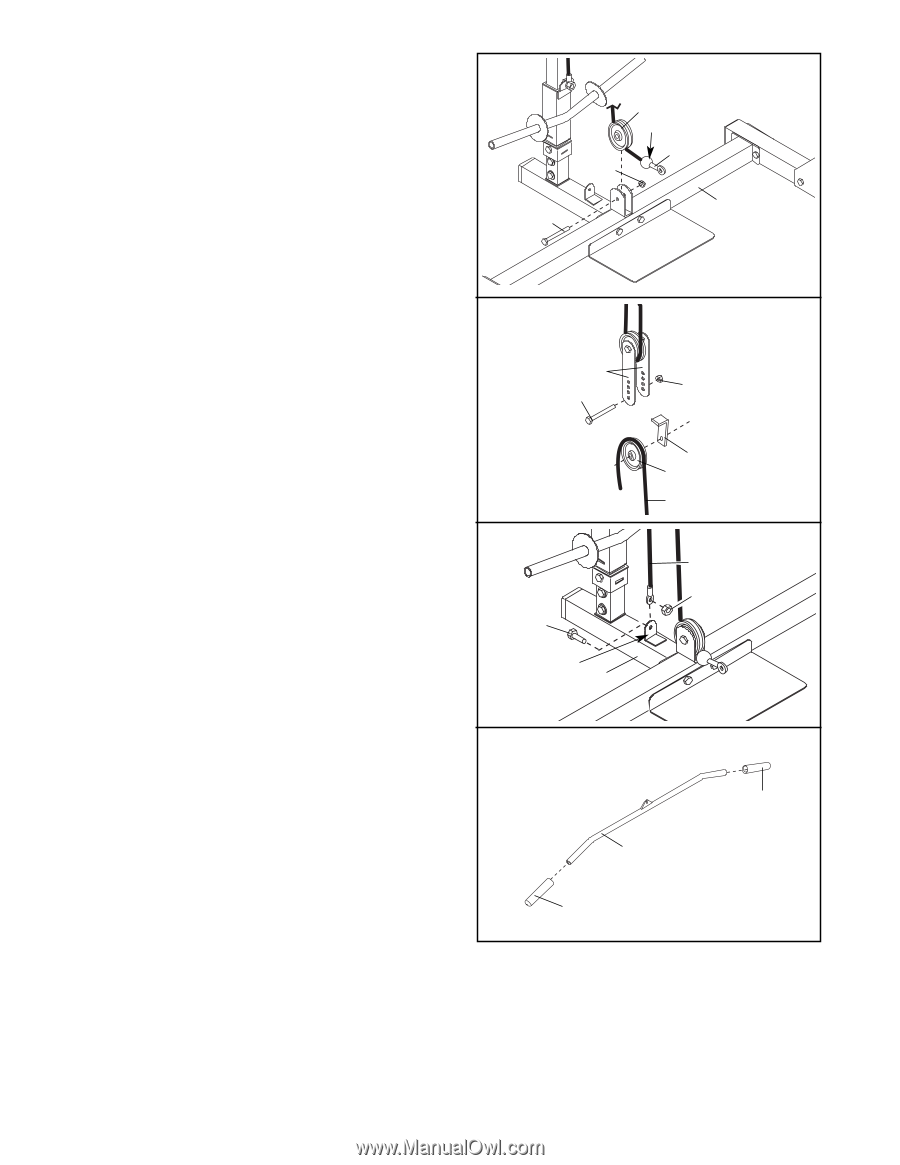
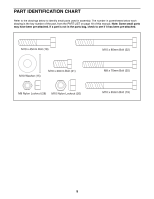
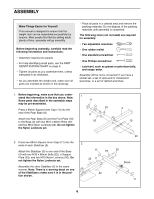
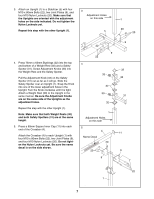
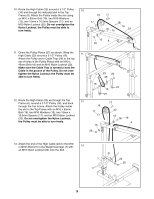
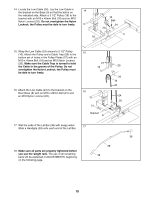
14. Locate the Low Cable (24). Lay the Low Cable in 14 the bracket on the Base (3) so that the ball is on the indicated side. Attach a 3 1/2" Pulley (16) to the bracket with an M10 x 45mm Bolt (18) and an M10 Nylon Locknut (20). Do not overtighten the Nylon Locknut; the Pulley must be able to turn freely. 18 16 Ball 24 20 3 15. Wrap the Low Cable (24) around a 3 1/2" Pulley 15 (16). Attach the Pulley and a Cable Trap (26) to the bottom set of holes in the Pulley Plates (27) with an M10 x 45mm Bolt (18) and an M10 Nylon Locknut (20). Make sure the Cable Trap is turned to hold the Cable in the groove of the Pulley. Do not overtighten the Nylon Locknut; the Pulley must be able to turn freely. 27 18 16. Attach the Low Cable (24) to the bracket on the Rear Base (8) with an M10 x 20mm Bolt (21) and an M10 Nylon Locknut (20). 16 21 Bracket 8 20 26 16 24 24 20 17. Wet the ends of the Lat Bar (38) with soapy water. 17 Slide a Handgrip (39) onto each end of the Lat Bar. 39 18. Make sure all parts are properly tightened before you use the weight rack. The use of all remaining parts will be explained in ADJUSTMENTS, beginning on the following page. 38 39 10
-
 1
1 -
2
-
3
-
4
-
 5
5 -
 6
6 -
 7
7 -
 8
8 -
 9
9 -
 10
10 -
 11
11 -
 12
12 -
 13
13 -
 14
14 -
 15
15 -
16
-
17
-
18
-
19
-
20
 |
 |