Weider Pro 9940 English Manual
Weider Pro 9940 Manual
 |
View all Weider Pro 9940 manuals
Add to My Manuals
Save this manual to your list of manuals |
Weider Pro 9940 manual content summary:
- Weider Pro 9940 | English Manual - Page 1
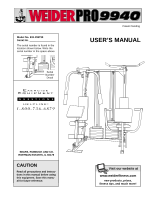
Model No. 831.159730 Serial No. The serial number is found in the location shown below. Write the serial number in the space above. ® Patent Pending USER'S MANUAL Serial Number Decal SEARS, ROEBUCK AND CO. HOFFMAN ESTATES, IL 60179 CAUTION Read all precautions and instructions in this manual - Weider Pro 9940 | English Manual - Page 2
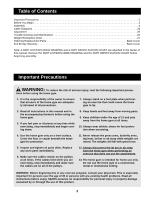
2 Before You Begin 3 Assembly 4 Cable Diagrams 23 Adjustment 25 Trouble-shooting and Maintenance 26 Weight Resistance Chart 27 Ordering Replacement Parts Back Cover Full 90-day Warranty Back Cover Note: A PART LIST/EXPLODED DRAWING and a PART IDENTIFICATION CHART are attached in the center - Weider Pro 9940 | English Manual - Page 3
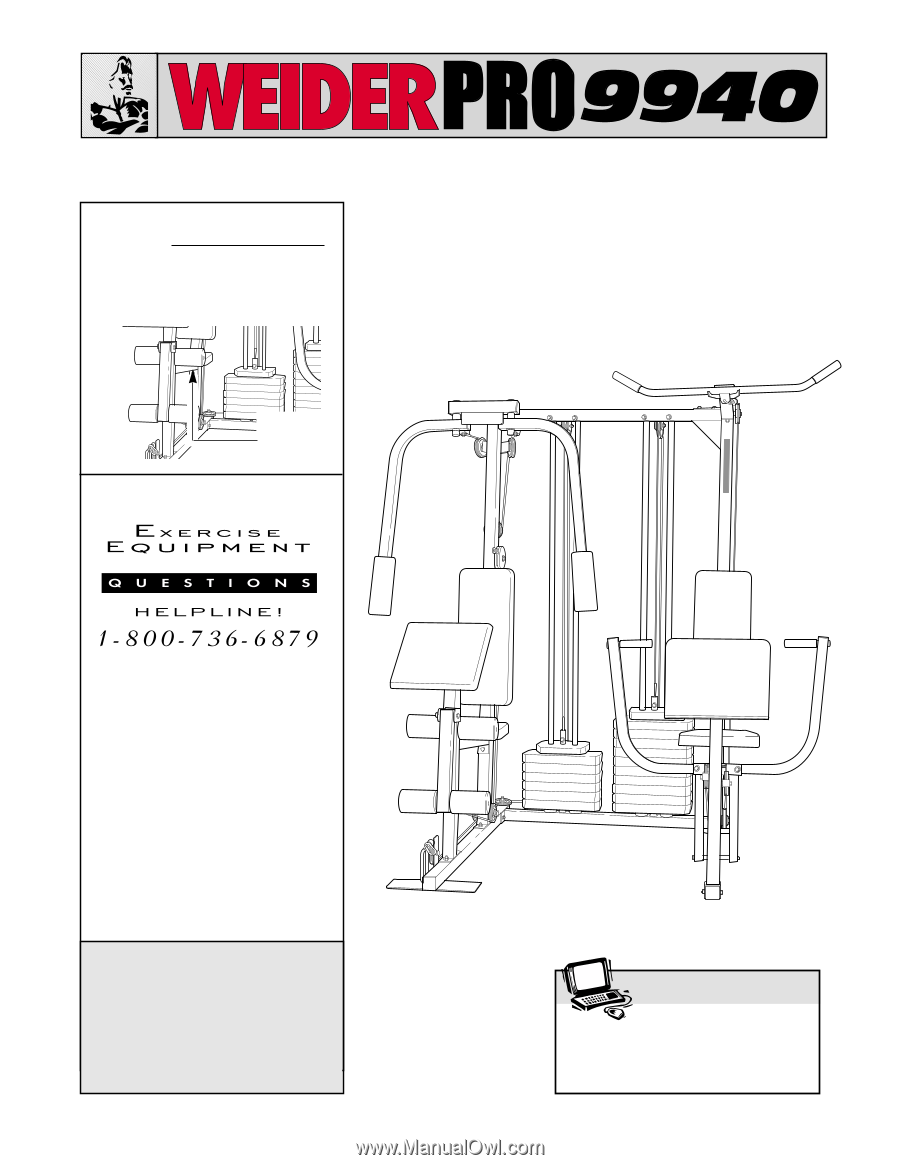
For your benefit, read this manual carefully before using the WEIDER® PRO 9940 Home Gym. If you have additional questions, please call our toll-free Please use the drawing below to familiarize yourself with the major parts and how they fit together. ASSEMBLED DIMENSIONS: Height: 77 in. Width: 80 - Weider Pro 9940 | English Manual - Page 4
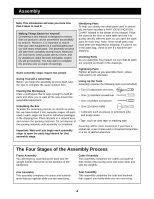
manual is designed to ensure that our products can be assembled successfully by anyone. However, it is important to realize that your new equipment is a sophisticated product with many small parts. The assembly process will take time-possibly several hours. Most people find that by setting aside - Weider Pro 9940 | English Manual - Page 5
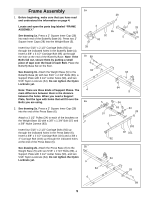
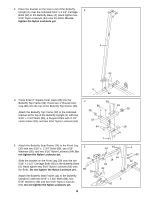
and understood the information on page 4. Locate and open the parts bag labeled "FRAME ASSEMBLY." See drawing 1a. Press a 2" Square Inner Cap (28) into each end of the Butterfly Base (4). Press two 2" Square Inner Caps (28) into the Weight Base (5). Insert four 5/16" x 2 1/2" Carriage Bolts (92) up - Weider Pro 9940 | English Manual - Page 6
33). 89 86 Attach the Butterfly Top Frame (33) to the indicated bracket at the top of the Butterfly Upright (1) with two 5/16" x 2 3/4" Bolts (89), a Support Plate with 3 1/2" center holes (93), and two 5/16" Nylon Locknuts (64). 28 33 64 93 28 28 5. Attach the Butterfly Seat Frame (14) to the - Weider Pro 9940 | English Manual - Page 7
16" Nylon Locknuts (64) onto the Bolts. Do not tighten the Nylon Locknuts yet. Place the bracket on the lower end of the Support Frame (3) over the indicated 3/8" x 2 1/2" Carriage Bolt (101) and the 3/8" x 4" Carriage Bolt (102) in the Press Base (6). Hand tighten a 3/8" Nylon Jamnut (63) onto the - Weider Pro 9940 | English Manual - Page 8
18) into the lower end of the Short Weight Tube (17). Slide the Weight Tube into the center holes in the Weights (21). Slide a Top Weight (16) onto the Weight Guides (15). Note: Make sure the Top Weight is turned so the groove fits over the welded pin on the Weight Tube (17). 11 15 16 Groove Pin - Weider Pro 9940 | English Manual - Page 9
pin grooves point towards the floor. Press a Weight Tube Bumper (18) into the lower end of the Long Weight Tube (70). Slide the Weight Tube into the center holes in the Weights (21). Slide a Top Weight (16) onto the Weight Guides (15). Note: Make sure the Top Weight is turned so the groove fits over - Weider Pro 9940 | English Manual - Page 10
Weight Guides (15) to the Weight Top Frame (66) with a 3/8" x 3 3/4" Bolt (59), a 3/8" Flat Washer (48), and a 3/8" Nylon Locknut (50). Important: Go back and fully tighten all Nylon Locknuts used in steps 1 through 15. 15 59 48 59 15 50 50 48 15 Arm Assembly 16 16. Locate and open the parts - Weider Pro 9940 | English Manual - Page 11
35 33 Axle 35 31 38 29 Cable Assembly 19. Locate and open the parts bag labeled "CABLE 19 ASSEMBLY." For Cable identification and routing during steps 19 to 49, refer to the Cable Diagrams and Cable ID Chart on pages 23 and 24. Identify the Butterfly Cable (73). It is approximately 52" long - Weider Pro 9940 | English Manual - Page 12
in the direction shown. Place two Pulley Covers (47) over the Pulley, so that the slots in the Pulley Covers are placed over the Cable. Attach the Pulley and Pulley Covers to the indicated hole in the Butterfly Upright (1) with a 3/8" x 3 3/4" Bolt (59), two 3/8" Flat Washers (48), and a 3/8" Nylon - Weider Pro 9940 | English Manual - Page 13
25. Remove both 3 1/2" Pulleys (24) from the pre-assembled Adjustable Pulley Plates (23). Wrap the Ab Cable (74) around a 3 1/2" Pulley (24) in the direction shown. Attach the Pulley and a Cable Trap (25) to the top hole in the two Adjustable Pulley Plates (23) with a 3/8" x 2" Bolt (54) and a 3/8" - Weider Pro 9940 | English Manual - Page 14
(74) under the 3 1/2" Pulley (24) that is already mounted on the Weight Base (5). Make sure the Cable is routed in the direction shown. 4 Note: For clarity, this and the following drawings show some parts removed. 29. Wrap the Ab Cable (74) around a 4 1/2" Pulley (82) in 29 the direction shown - Weider Pro 9940 | English Manual - Page 15
and it has a ball on one end and a loop on the other. Route the end with the loop through the slot in the cable guide on the Butterfly Base (4). Route the Low Pulley Cable (75) under a Pro Pulley (26) as shown. Attach the Pro Pulley and a Cable Trap (25) to the bracket on the Butterfly Base (4) with - Weider Pro 9940 | English Manual - Page 16
(72) around a Pro Pulley (26) in the direction shown. Attach the Pulley to the indicated hole in the Press Top Frame (9) with a 3/8" x 3 1/2" Bolt (56), a 3/8" Flat Washer (48), and a 3/8" Nylon Jamnut (63). Make sure the Cable is between the Pulley and the welded pin on the Press Top 37. Route the - Weider Pro 9940 | English Manual - Page 17
steps are not 39 difficult to perform, the correct routing of the cable is critical to the functioning of the home gym. Please make sure that you wrap the cable around the pulleys exactly as shown in each step. Route the Press Cable (72) through the opening in the Press Frame (8), and - Weider Pro 9940 | English Manual - Page 18
is oriented as shown. 45 83 60 25 50 24 8 72 63 46. Wrap the Press Cable (72) around a 3 1/2" Pulley 46 (24) in the direction shown. Attach the Pulley and a Cable Trap (25) to near side of the Press Upright (2). Use the 3/8" x 4 3/4" Bolt (60) that was inserted in step 42 and secure - Weider Pro 9940 | English Manual - Page 19
Pulley (82) 48 in the direction shown. Attach the Pulley inside the indicated bracket on the Weight Top Frame (66) with a 3/8" x 1 3/4" Bolt (57) and a 3/8" Nylon Locknut (50). Make sure the end of the Cable is routed through the bracket, as shown. 50 82 72 57 66 49. Attach the threaded end - Weider Pro 9940 | English Manual - Page 20
50 50. Locate and open the parts bag labeled "SEAT ASSEMBLY." Attach the Backrest (12) to the indicated holes in the Butterfly Upright (1) with two 1/4" x 2 1/2" Bolts (79) and two 1/4" Flat Washers (71). 12 1 79 71 79 - Weider Pro 9940 | English Manual - Page 21
other Seat (13) to the Press Seat Frame (7, not shown) in the same manner. 52 13 45 65 14 49 71 68 71 79 Miscellaneous Assembly 53 43 30 Tube 53. Press 3/4" Round Inner Caps (43) into the ends of the Pad Tube (42) and the indicated tube on the Front - Weider Pro 9940 | English Manual - Page 22
decal. Apply the new decal in the appropriate location. 56 WEIDER PRO 9940 57. Make sure that all parts have been properly tightened. The use of the remaining parts will be explained in ADJUSTMENT, beginning on page 25 of this manual. Before using the home gym, pull each cable a few times to - Weider Pro 9940 | English Manual - Page 23
, that the Pulleys move smoothly, and that the Cable Traps do not touch or bind the Cables. Incorrect cable routing can damage the home gym. Low Pulley Cable (75) Ab Cable (74) 7 3 3 1 2 2 1 4 5 8 5 4 Butterfly Cable (73) 6 4 1 5 2 Cable ID Chart 73, 52" 75, 143.5" 3 74, 224" 72, 389 - Weider Pro 9940 | English Manual - Page 24
Press Cable (72) 14 2 1 15 8 10 5 6 9 4 13 12 3 7 11 24 - Weider Pro 9940 | English Manual - Page 25
The instructions below describe how each part of the home gym can be adjusted. Refer to the exercise poster accompanying this manual to see how the home gym should be set up for each exercise. IMPORTANT: When using an attachment, make sure it is in the correct starting position for the exercise to - Weider Pro 9940 | English Manual - Page 26
20 Trouble-shooting and Maintenance Inspect and tighten all parts each time you use the home gym. Replace any worn parts immediately. The home gym can (2). There are three free holes in the small tube, and you can move the "V"-Pulley to any one of them to tighten the cables. Start by moving the - Weider Pro 9940 | English Manual - Page 27
each exercise station. "Top" refers to the 6 lb. top weight; the other numbers refer to the 12.5 lb. weight plates. Note: The actual resistance at each station may vary due to differences in individual weight plates as well as friction between the cables, pulleys, and weight guides. Weight Plates - Weider Pro 9940 | English Manual - Page 28
1" Retainer Ring (31) 3/4" Round Inner Cap (43) 1" Round Inner Cap (86) 1" Square Inner Cap (98) 1" Round Outer Cap (38) 1" Round Inner Cap (76) 1 3/4" Square Inner Cap (35) 2" Square Inner Cap (28) - Weider Pro 9940 | English Manual - Page 29
Part Identification Chart-Model No. 831.159730 R0800A 1/4" Nylon Locknut (68) 5/16" Nylon Locknut (64) 5/16" x 1 3/4" Bolt (96) 3/8" Nylon Locknut (50) 3/8" Nylon Jamnut (63) 5/16" x 2 1/2" Bolt (87) 5/16" x 2 1/2" Carriage Bolt (92) 1/4" Flat - Weider Pro 9940 | English Manual - Page 30
Part List-Model No. 831.159730 R0800A Key No. Qty. Description Key No. Qty. Description 1 1 Butterfly Upright 55 1 Leg Press Plate 2 1 Press Upright 56 1 3/8" x 3 1/2" Bolt 3 1 Support Frame 57 6 3/8" x 1 3/4" Bolt 4 1 Butterfly Base 58 1 Nylon Strap 5 1 Weight Base 59 - Weider Pro 9940 | English Manual - Page 31
Exploded Drawing-Model No. 831.159730 R0800A 84 37 11 73 94 93 46 28 84 37 63 35 31 38 31 38 35 105 86 73 63 10 29 89 - Weider Pro 9940 | English Manual - Page 32
Model No. 831.159730 QUESTIONS? If you find that: • you need help assembling or operating the WEIDER® PRO 9940 Home Gym • a part is missing • or you need to schedule repair service call our toll-free HELPLINE 1-800-736-6879 Monday-Saturday, 7 am-7 pm Central Time (excluding holidays) The model
-
 1
1 -
 2
2 -
 3
3 -
 4
4 -
 5
5 -
 6
6 -
 7
7 -
8
-
9
-
10
-
11
-
12
-
13
-
14
-
15
-
16
-
17
-
18
-
19
-
20
-
21
-
22
-
23
-
24
-
25
-
26
-
27
-
28
-
29
-
30
-
31
-
32
 |
 |
®
USER’S MANUAL
Model No. 831.159730
Serial No.
The serial number is found in the
location shown below. Write the
serial number in the space above.
CAUTION
Read all precautions and instruc-
tions in this manual before using
this equipment. Save this manu-
al for future reference.
Serial
Number
Decal
Patent Pending
Visit our website at
www.weiderfitness.com
new products, prizes,
fitness tips, and much more!
SEARS, ROEBUCK AND CO.
HOFFMAN ESTATES, IL 60179