Weslo Flex 3xt English Manual - Page 7
Adjustment
 |
View all Weslo Flex 3xt manuals
Add to My Manuals
Save this manual to your list of manuals |
Page 7 highlights
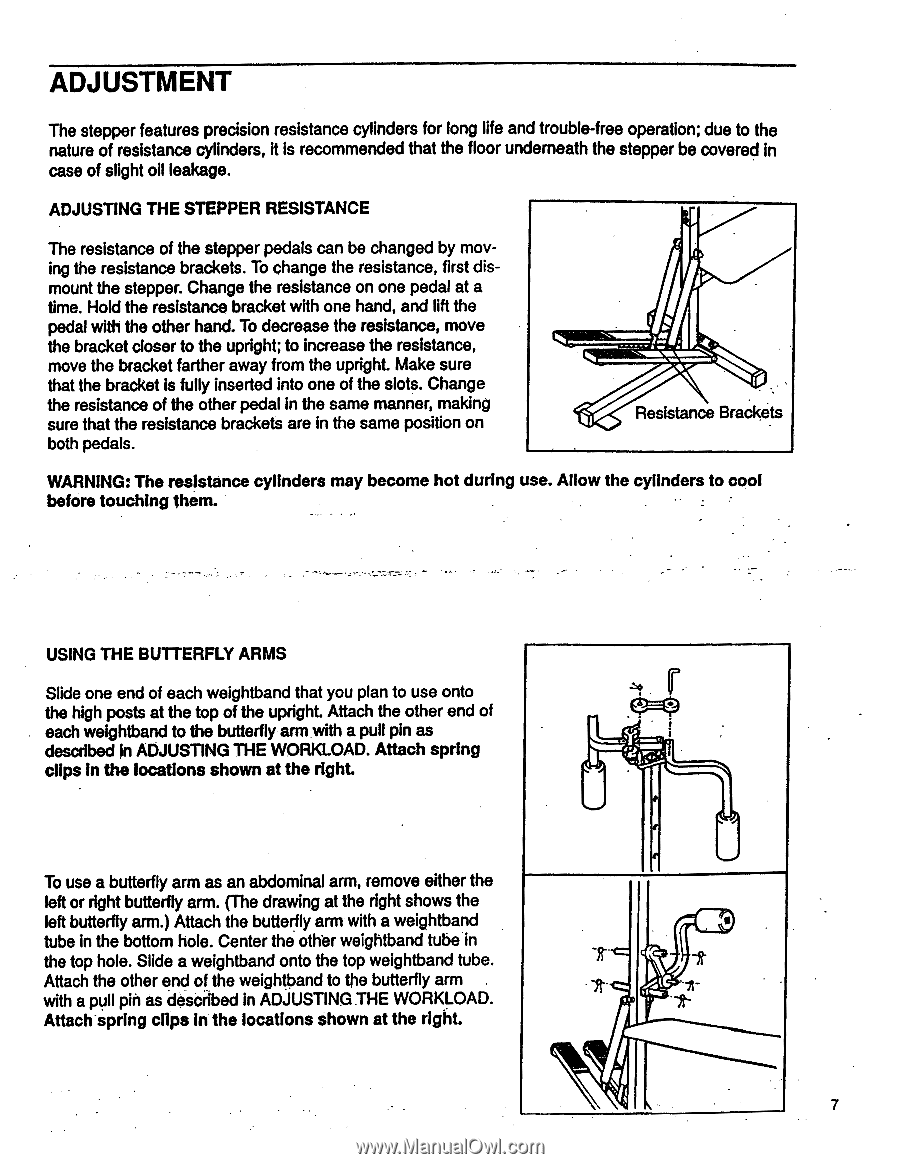
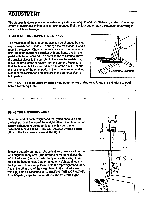
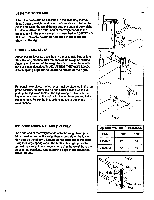
ADJUSTMENT The stepper features precision resistance cylinders for long life and trouble-free operation; due to the nature of resistance cylinders, it is recommended that the floor underneath the stepper be covered in case of slight oil leakage. ADJUSTING THE STEPPER RESISTANCE The resistance of the stepper pedals can be changed by moving the resistance brackets. To change the resistance, first dismount the stepper. Change the resistance on one pedal at a time. Hold the resistance bracket with one hand, and lift the pedal with the other hand. To decrease the resistance, move the bracket closer to the upright; to increase the resistance, move the bracket farther away from the upright. Make sure that the bracket is fully inserted into one of the slots. Change the resistance of the other pedal in the same manner, making sure that the resistance brackets are in the same position on both pedals. Resistance Brackets WARNING: The resistance cylinders may become hot during use. Allow the cylinders to cool before touching them. • USING THE BUTTERFLY ARMS Slide one end of each weightband that you plan to use onto the high posts at the top of the upright. Attach the other end of each weightband to the butterfly arm with a pull pin as described in ADJUSTING THE WORKLOAD. Attach spring clips in the locations shown at the right. To use a butterfly arm as an abdominal arm, remove either the left or right butterfly arm. (The drawing at the right shows the left butterfly arm.) Attach the butterfly arm with a weightband tube in the bottom hole. Center the other weightband tube in the top hole. Slide a weightband onto the top weightband tube. -r - Attach the other end of the weightband to the butterfly arm with a pull pin as described in ADJUSTING.THE WORKLOAD. Attach•spring clips in the locations shown at the right. 7
-
 1
1 -
 2
2 -
 3
3 -
 4
4 -
 5
5 -
 6
6 -
 7
7 -
 8
8 -
 9
9 -
 10
10 -
 11
11 -
 12
12
 |
 |