Western Digital WDXU1200BB User Manual (pdf) - Page 21
Changing Your Automatic Backup Settings, Restoring Files From a Backup, Additional Features
 |
View all Western Digital WDXU1200BB manuals
Add to My Manuals
Save this manual to your list of manuals |
Page 21 highlights
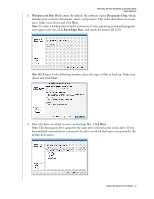
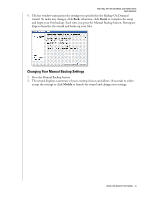
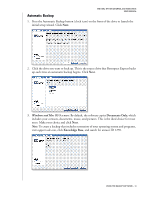
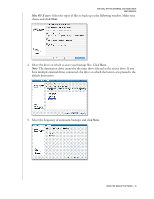
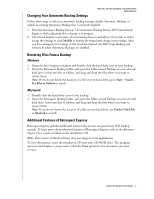
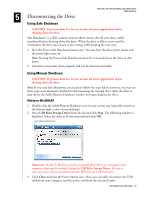
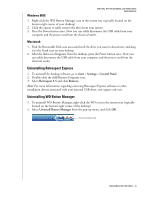
Changing Your Automatic Backup Settings WD DUAL-OPTION EXTERNAL USB HARD DRIVE USER MANUAL Follow these steps to edit your automatic backup settings, disable Automatic Backup, or enable an existing Automatic Backup that is currently disabled. 1. Press the Automatic Backup button. The Automatic Backup button LED immediately begins to flash indicating that a change is in progress. 2. The wizard displays a summary of your existing choices and allows 10 seconds to either accept the settings or click Modify to launch the wizard and change your settings. After you have changed your settings or the timer has expired, the LED stops flashing and remains lit when Automatic Backups are enabled. Restoring Files From a Backup Windows 1. Open the My Computer window and double-click the hard drive icon of your backup. 2. Open the Retrospect Backup folder, and open the folder named Backup on your selected hard drive. Select any files or folders, and drag and drop the files where you want to restore them. Note: If you do not know the location of a file on your hard drive, go to Start > Search > For Files or Folders to search. Macintosh 1. Double-click the hard drive icon of your backup. 2. Open the Retrospect Backup folder, and open the folder named Backup on your selected hard drive. Select any files or folders, and drag and drop the files where you want to restore them. Note: If you do not know the location of a file on your hard drive, use Finder's Find File or Sherlock to search. Additional Features of Retrospect Express Retrospect Express includes additional features that are not integrated into WD backup wizards. To learn more about advanced features of Retrospect Express, refer to the Retrospect Express User's Guide included on the installation CD. Note: This version of Dantz software does not support server applications. To view documents, insert the installation CD into your CD-ROM drive. The program autoruns and displays a setup menu. Click the View option for the document you want to view. USING THE BACKUP SOFTWARE - 17
-
 1
1 -
2
-
3
-
4
-
5
-
6
-
7
-
8
-
9
-
10
-
11
-
12
-
13
-
14
-
15
-
 16
16 -
 17
17 -
 18
18 -
 19
19 -
 20
20 -
 21
21 -
 22
22 -
 23
23 -
 24
24 -
 25
25 -
 26
26 -
27
-
28
-
29
-
30
 |
 |