Whirlpool RBD245PDT Use and Care Guide
Whirlpool RBD245PDT Manual
 |
View all Whirlpool RBD245PDT manuals
Add to My Manuals
Save this manual to your list of manuals |
Whirlpool RBD245PDT manual content summary:
- Whirlpool RBD245PDT | Use and Care Guide - Page 1
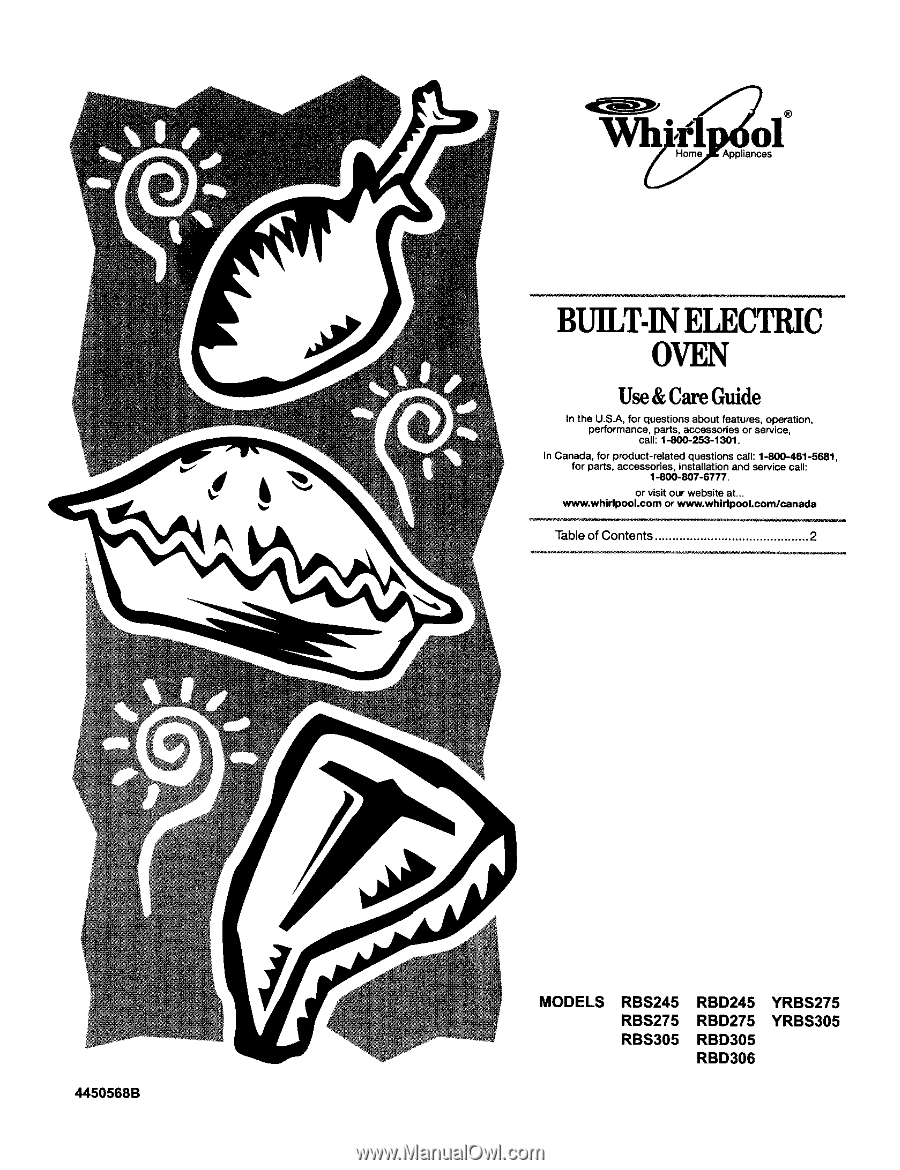
BUILT.INELECTRIC OVEN Use &Care Guide In the U.S.A, for questions about features, operation, performance, parts, accessories or service, call: 1-800-253-t30t. In Canada, for product-related questions call: 1-800-461-568t, for parts, accessories, instal]ation and service call: 1-800-807-6777. or - Whirlpool RBD245PDT | Use and Care Guide - Page 2
and Bakeware 8 Bakeware 8 Meat Thermometer 8 Oven Vent 9 Baking and Roasting 9 Broilingand Custom Broiling 9 Timed Cooking 10 OVEN CARE 11 Self-Cleaning Cycle 11 Cleaning 12 Oven Lights 13 Oven Door 13 TROUBLESHOOTING 14 ASSISTANCE OR SERVICE 15 In the U.S.A 15 In Canada 15 - Whirlpool RBD245PDT | Use and Care Guide - Page 3
follow instructions, You can be killed or seriously injured if you don't follow instructions, All oven. • User Servicing - Do not repair or replace any part of the oven unless specifically recommended in the manual. All other servicing should be referred to a qualified technician. • Storage in Oven - Whirlpool RBD245PDT | Use and Care Guide - Page 4
protective coating of any kind shouldbe used in or around any part of the oven. • Clean Only Parts Listed in Manual. • Before Self-Cleaning the Oven - Remove broiler pan and other utensils. SAVE THESEINSTRUCTIONS The California Safe Drinking Water and Toxic Enforcement Act requires the Governor - Whirlpool RBD245PDT | Use and Care Guide - Page 5
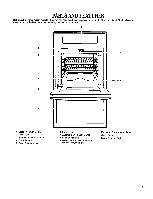
This manual covers different models. The oven you have purchased may have some or all of the items listed. The locations and appearances of the features shown hers may not match your model. J . lllI 1. Electronic Oven Control 2. Oven Vent 3. Broil Element (not shown) 4. Bake Element 5. Oven Door - Whirlpool RBD245PDT | Use and Care Guide - Page 6
except the Timer. If not pressed within 5 seconds after pressing a pad, "START?" will appear on the oven display as a reminder. If not pressed within 5 minutes after pressing a pad, the oven display will return to the time of day mode and the programmed function will be cancelled. Upper Lower Offer - Whirlpool RBD245PDT | Use and Care Guide - Page 7
. It can be changed in Fahrenheit or Celsius. A minus sign means the oven will be cooler by the displayed amount. No sign means the oven will be warmer by the displayed amount. Use the following chart as a guide. ADJUSTMENT OF (ADJUSTMENT °C) COOKS FOOD 5° to 1O°F(3° to 6°C) ...a little more 15 - Whirlpool RBD245PDT | Use and Care Guide - Page 8
space around bakeware and oven walls. Use the following chart as a guide. NUMBEROF PAN(S) POSITION oven. • May need to increase baking time. Stainless steel • Light, golden crusts • Uneven browning Stoneware • Crisp crusts • May need to increase baking time. • Follow manufacturer's instructions - Whirlpool RBD245PDT | Use and Care Guide - Page 9
food in, unless recommended in the recipe. Close the door. 1. On double oven models only,press UPPER OVEN or LOWER OVEN. 2. Press CUSTOM BROIL. 3. Press START/ENTER. The set oven temperature will appear on the oven display until the oven is turned off. 4. Press UPPER OFE LOWER OFF or OFF/CANCEL when - Whirlpool RBD245PDT | Use and Care Guide - Page 10
500°F (260°C). The broilrange can be set between 170°F and 500°F (77°C and 260°C). 4. Press START/ENTER. The set oven temperature will appear on the oven display until the oven is turned off. 5. Press UPPER OFF, LOWER OFF or OFF/CANCEL when finished cooking. BROILING CHART For best results, place - Whirlpool RBD245PDT | Use and Care Guide - Page 11
lock. "DOOR LOCKED", the start time and stop time will appear on the oven display. The door will not unlock until the oven cools. When the cycle is complete and the oven cools, "End" will appear on the oven display and "DOOR LOCKED" will disappear. 4, Press UPPER OFE LOWER OFF or OFF/CANCEL - Whirlpool RBD245PDT | Use and Care Guide - Page 12
Cleaner & Polish (not included): See "Assistance or Service" section to order. • Liquid detergent or all light coating of vegetable oil applied to the rack guides will help them slide. Steel wool pad m Oven cleaner: Follow product label instructions. Porcelain enamel only, not chrome • Dishwasher - Whirlpool RBD245PDT | Use and Care Guide - Page 13
for normal use. However, it can be done if necessary. Before removing or replacing, make sure all controls are off and the oven is cool. The oven door is heavy. Use both hands, do not lift or carry the door by the handle and another person to help is suggested. Use care - Whirlpool RBD245PDT | Use and Care Guide - Page 14
See "Clock" section. a Is the display showing a letter followed by a number?. Clear the display. See "Display(s)" section. If it reappears, call for service. See "Assistance or Service" section. Self-Cleaning cycle will not operate = Is the oven door open? Close the oven door all the way. a Has the - Whirlpool RBD245PDT | Use and Care Guide - Page 15
or service, please check "Troubleshooting." It may save you the cost of a service call. If you still need help, fo,ow the instructions number in your correspondence. Accessories U.S.A To order accessories, call the Whirlpool Customer Interaction Center toll free at 1-800-253-1301 and follow the - Whirlpool RBD245PDT | Use and Care Guide - Page 16
[] [] Installation steps If you need assistance: Check your Use and Care Guide for a toll-free number to call or call the dealer from whom under "Appliances -- Household -- Major -- Service and Repair." Call when you: [] Have questions about built-in oven installation or operation. [] Need to obtain - Whirlpool RBD245PDT | Use and Care Guide - Page 17
in the adjacent right or left cabinet. If installing the junction box on rear wall behind oven, junction box must be recessed and located in the upper or lower right or left corner of cabinet. Oven support surface MUST be solid, level and flush with bottom of cabinet cutout. It is the customer - Whirlpool RBD245PDT | Use and Care Guide - Page 18
,ace .........o..v..e..n...d..o..o..r..s...... Excessive Weight Hazard Use two or more people to move and install oven. Failure to follow this instruction can result in back or other injury. Important: Use both handsto remove oven doors. Do Not use handle or any portion of the front frame or trim - Whirlpool RBD245PDT | Use and Care Guide - Page 19
by a number, appears in the display, contact your dealer or check the "If you need service..." section of this Installation Instructions. To get the most efficient use from your new oven, read your Use and Care Guide. Keep Installation Instructions and Guide close to oven for easy reference. - Whirlpool RBD245PDT | Use and Care Guide - Page 20
Guide for troubleshooting list. If you need assistance: If you have questions about operating, cleaning or maintaining your oven: [] Refer to Use and Care Guide -- Service and Repair." If you need service: Maintain the quality built into your built-in oven by calling an authorized service company. - Whirlpool RBD245PDT | Use and Care Guide - Page 21
States and Canada, this warranty does not apply. Contact your authorized Whirlpool dealer to determine if another warranty applies. If you need service, first see the "Troubleshooting" section of this book. After checking "Troubleshooting," additional help can be found by checking the "Assistance or
-
 1
1 -
 2
2 -
 3
3 -
 4
4 -
 5
5 -
 6
6 -
 7
7 -
8
-
9
-
10
-
11
-
12
-
13
-
14
-
15
-
16
-
17
-
18
-
19
-
20
-
21
 |
 |
BUILT.IN
ELECTRIC
OVEN
Use &Care Guide
In the U.S.A,
for questions
about
features,
operation,
performance,
parts,
accessories
or
service,
call:
1-800-253-t30t.
In
Canada,
for product-related
questions
call: 1-800-461-568t,
for parts,
accessories,
instal]ation
and
service
call:
1-800-807-6777.
or
visit our website
at...
W_',whidpool.com
or ww'w.whirlpool.com/cartada
Table of Contents
............................................
2
MODELS
RBS245
RBD245
YRBS275
RBS275
RBD275
YRBS305
RBS305
RBD305
RBD306
4450568B