Xerox 4510N Advanced Features Guide
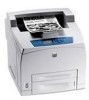
Xerox 4510N - Phaser B/W Laser Printer Manual
 |
UPC - 095205427813
View all Xerox 4510N manuals
Add to My Manuals
Save this manual to your list of manuals |
Xerox 4510N manual content summary:
- Xerox 4510N | Advanced Features Guide - Page 1
Phaser® 4510 laser printer Advanced Features Guide Guide des Fonctions Avancées Guida alle Funzioni Avanzate Handbuch zu Erweiterten Funktionen Guía de Características Avanzadas Guia de Recursos Avançados Handleiding voor Geavanceerde - Xerox 4510N | Advanced Features Guide - Page 2
on the screen such as styles, templates, icons, screen displays, looks, etc. XEROX®, CentreDirect®, CentreWare®, Phaser®, PhaserSMART®, PrintingScout™, and Walk-Up® are trademarks of Xerox Corporation in the United States and/or other countries. Adobe Reader®, Adobe Type Manager®, ATM™, Flash - Xerox 4510N | Advanced Features Guide - Page 3
Personal Print Jobs 1-19 Printing or Deleting Proof and Saved Print Jobs 1-19 Printing or Deleting Personal Saved Jobs 1-20 2 Using Fonts Types of Fonts 2-2 Downloading Fonts 2-3 Printing Font Samples 2-4 Using the Control Panel 2-4 Using CentreWare IS 2-4 Phaser® 4510 Laser Printer i - Xerox 4510N | Advanced Features Guide - Page 4
Printing Security Settings 4-16 Configuring HTTPS 4-16 Managing Certificates 4-16 Configuring 802.1X 4-17 Locking the Control Panel Menus 4-17 Analyzing Printer Usage 4-18 Job Accounting 4-18 Usage Profile Reports 4-19 MaiLinX Alerts 4-20 Xerox Usage Analysis Tool 4-20 Phaser® 4510 Laser - Xerox 4510N | Advanced Features Guide - Page 5
A Printer Specifications B Regulatory Information C Material Safety Data Sheet D Product Recycling and Disposal Index Contents Phaser® 4510 Laser Printer iii - Xerox 4510N | Advanced Features Guide - Page 6
on page 1-10 ■ Printing Edge-To-Edge on page 1-11 ■ Printing Watermarks on page 1-12 ■ Printing Negative and Mirror Images on page 1-13 ■ Creating and Saving Custom Sizes on page 1-14 ■ Job Completion Notification on page 1-15 ■ Printing Special Job Types on page 1-16 Phaser® 4510 Laser Printer 1-1 - Xerox 4510N | Advanced Features Guide - Page 7
= Supported feature ■ = Only available if the printer is equipped with a hard drive ❍ = Only available when your printer is equipped with a hard drive and the printer is connected to your computer over a network. Note: Go to www.xerox.com/drivers for the latest printer drivers. Phaser® 4510 Laser - Xerox 4510N | Advanced Features Guide - Page 8
force the printer to use paper from a specific tray. To select which paper to use from a supported driver: Operating System Windows 2000 or later Mac OS X (version 10.2 and higher) Steps 1. Select the Paper/Output tab. The Paper summary displays the paper to use for the print job. 2. To change the - Xerox 4510N | Advanced Features Guide - Page 9
16 pages per side. 1 2 3 4 To print multiple pages on a single sheet of paper in a supported driver: Operating System Windows 2000 or later Mac OS X (version 10.2 the Print dialog box, select Layout. 2. Select the number of Pages per Sheet and Layout Direction. Phaser® 4510 Laser Printer 1-4 - Xerox 4510N | Advanced Features Guide - Page 10
following additional booklet printing options are available in some drivers: ■ Draw Page Borders: Prints a border around each page. ■ Target Paper Size: Specifies the size of the paper for the booklet. ■ Right to Left: Reverses the order of the pages in the booklet. Phaser® 4510 Laser Printer 1-5 - Xerox 4510N | Advanced Features Guide - Page 11
. 3. If desired, select Draw Page Borders from the drop-down lists. 1. In the Finishing Options dialog box, select Enable Booklet Printing. 2. If desired, specify the creep and gutter. 3. If desired, specify the paper size from the Target Paper Size drop-down list. Phaser® 4510 Laser Printer 1-6 - Xerox 4510N | Advanced Features Guide - Page 12
separator option and tray to use from the Separators dialog box. 1. In the Print dialog box, select Printer Features from the drop-down list. 2. Under Paper Feed Options, select Last Page Paper Source drop-down list, and then select the tray to use for the separator. Phaser® 4510 Laser Printer 1-7 - Xerox 4510N | Advanced Features Guide - Page 13
blank pages. Print Option 1-sided printing 2-sided printing Last Page of Text Odd-numbered Even-numbered Blank Pages Add one blank page at the end of the document. Add two blank pages at the end of the document. Add one blank page at the end of the document. Phaser® 4510 Laser Printer 1-8 - Xerox 4510N | Advanced Features Guide - Page 14
from, and then select the tray to use for the covers. 3. Under Paper Feed Options, select the tray to use for the cover pages from the Last Page Paper Source drop-down list. Note: For booklet printing, the cover page needs to be selected as the Last Page Paper Source. Phaser® 4510 Laser Printer 1-9 - Xerox 4510N | Advanced Features Guide - Page 15
. 3. Select an option from the Scale Options drop-down list. 4. If you select Manually Scale, enter a percentage in the percentage box. 1. Select File. 2. Select Page Setup. 3. Specify the percentage in the box for Scale. See also: Printing Edge-To-Edge on page 1-11 Phaser® 4510 Laser Printer 1-10 - Xerox 4510N | Advanced Features Guide - Page 16
the page in a supported driver: Operating System Windows 2000 or later Mac OS X (version 10.2 and higher) Steps 1. Select the Advanced tab. 2. Set Edge-To-Edge Printing to On. 1. Submit your print job from your application. On the Printer drop-down list, select the Phaser 4510 printer. 2. On the - Xerox 4510N | Advanced Features Guide - Page 17
New, and then use the Watermark Editor dialog box. 2. In the Watermarks drop-down list for Options: ■ Select to print the watermark in the foreground or background or to blend it with the job. ■ Select to print the watermark on all pages or only on the first page. Phaser® 4510 Laser Printer 1-12 - Xerox 4510N | Advanced Features Guide - Page 18
Output options are only available in the PostScript driver. To select negative or mirror images in a supported driver: Operating System Windows 2000 or later PostScript Driver Steps 1. Select the Advanced tab. 2. Select Yes for Mirrored Output or Negative Output. Phaser® 4510 Laser Printer 1-13 - Xerox 4510N | Advanced Features Guide - Page 19
Custom Sizes Creating and Saving Custom Sizes Phaser 4510 printers can print on custom size paper from all trays.You can save custom size paper settings in a supported printer driver. Since these custom sizes are saved in your computer's operating system, they are available for you to select in your - Xerox 4510N | Advanced Features Guide - Page 20
message appears in the lowerright corner of your computer screen with the name of the job and the name of the printer where it was printed. Note: This feature is only available when your printer is connected to your computer over a network. To select job completion notification in a supported driver - Xerox 4510N | Advanced Features Guide - Page 21
passcode so that only you can print it from the control panel in order to print it. The job is not deleted after printing. ■ Print With: Prints existing stored personal and/or shared saved jobs along with the current job. The current job is deleted after printing. Phaser® 4510 Laser Printer 1-16 - Xerox 4510N | Advanced Features Guide - Page 22
drop-down list. ■ For a secure print or personal saved job, enter a four digit number, ranging from 0000 through 9999, in the Numeric Password field. ■ For a proof print or saved print job, enter a document name (up to 20 alpha characters) in the Document Name field. Phaser® 4510 Laser Printer 1-17 - Xerox 4510N | Advanced Features Guide - Page 23
then click the Move Right button. 4. To change the order of the jobs to be printed, select a job to be moved in the list on the right, and then click the Move Up or Move Down button. Note: Print With jobs are not available for AppleTalk or USB connected printers. Phaser® 4510 Laser Printer 1-18 - Xerox 4510N | Advanced Features Guide - Page 24
so that there are four digits displayed on the control panel. For example, if you entered 222 in the driver, enter 0222 on the control panel. Use the Back button to return to a previous digit. 6. If you submitted more than one secure print job with that password, select the desired job or select - Xerox 4510N | Advanced Features Guide - Page 25
if you entered 222 in the driver, enter 0222 on the control panel. Use the Back button to return to a previous digit. 6. Select the desired job, and then press the OK button. 7. Select Print and Save or Delete, and then press the OK button to print or delete the job. Phaser® 4510 Laser Printer 1-20 - Xerox 4510N | Advanced Features Guide - Page 26
Using Fonts This chapter includes: ■ Types of Fonts on page 2-2 ■ Downloading Fonts on page 2-3 ■ Printing Font Samples on page 2-4 Phaser® 4510 Laser Printer 2-1 - Xerox 4510N | Advanced Features Guide - Page 27
as they will appear in your prints. If you do not have ATM on your computer: 1. Install it from the Software and Documentation CD-ROM. 2. Install the printer's screen fonts for your computer from the ATM folder. Note: ATM is not supported on Windows 64-bit systems. Phaser® 4510 Laser Printer 2-2 - Xerox 4510N | Advanced Features Guide - Page 28
to download the .hqx file. 5. Install the font manager. Note: If you turn off the printer, the fonts you download to memory are deleted. You must download them again when you turn on the printer. Fonts downloaded to the hard drive are not deleted when you turn off the printer. Phaser® 4510 Laser - Xerox 4510N | Advanced Features Guide - Page 29
your printer's IP address in the browser's Address field (http://xxx.xxx.xxx.xxx). 3. Click Properties. 4. Select the Emulations folder on the left navigation panel. 5. Select Font Files. 6. Select either PostScript or PCL. 7. Print the list of fonts from your browser. Phaser® 4510 Laser Printer 2-4 - Xerox 4510N | Advanced Features Guide - Page 30
UNIX (Linux) on page 3-15 This chapter provides detailed information for the system administrator. Additional information about print quality, maintenance, and troubleshooting issues is located in the User Guide. See also: User Guide at www.xerox.com/office/4510support Phaser® 4510 Laser Printer 3-1 - Xerox 4510N | Advanced Features Guide - Page 31
. In some printer models, a DX configuration is required to support these functions. ■ Troubleshoot print-quality problems using built-in diagnostics. ■ Define a link to your local web server's support page. ■ Access online manuals and technical support information located on the Xerox website. Note - Xerox 4510N | Advanced Features Guide - Page 32
through network or print server discovery and managed over TCP/IP networks using RFC-1759 SNMP (Simple Network Management Protocol). With CentreWare Web you can: ■ Remotely add ports, queues, and drivers to Windows 2000, Windows XP, and Windows Server 2003. ■ Install, troubleshoot, upgrade, and - Xerox 4510N | Advanced Features Guide - Page 33
Driver. 4. Read the Xerox Software License Agreement. 5. Click I Agree to accept the License Agreement. 6. In the Select Printer dialog box, the default Use Walk-Up Technology (recommended for network printers) is selected. Click Next. 7. Follow the Use Walk-Up Technology instructions displayed - Xerox 4510N | Advanced Features Guide - Page 34
Add Printer to launch the Add Printer Wizard, and then click Next. 3. Click the Local Printer button, and then click Next. 4. Click the Create a New Port button. 5. Select Standard TCP/IP Port from the New Port Type drop-down menu, and then click Next. 6. Click Next. Phaser® 4510 Laser Printer 3-5 - Xerox 4510N | Advanced Features Guide - Page 35
3. 3. If you printed a test page, you are prompted to confirm that the test page printed: ■ Click Yes if the test page printed successfully. ■ Click No if the test page did not print or printed incorrectly. See also: Windows 2000 or Later Troubleshooting on page 3-9 Phaser® 4510 Laser Printer 3-6 - Xerox 4510N | Advanced Features Guide - Page 36
for the printer and select whether you want that printer to be the default. Click Next. 6. Select one of these options: ■ If the printer is not shared, click Next. ■ If the printer is shared, enter a Share Name, check the Share box, and then click Next. 7. Click Next. Phaser® 4510 Laser Printer 3-7 - Xerox 4510N | Advanced Features Guide - Page 37
folder, select the .inf file, and then click OK. 9. Choose your Printer, and then click Next. 10. Select Intel Box for Windows XP, and then click Next. 11. Click Finish. 12. In the My Network Places dialog box, double-click the 64-bit system, and then select Yes. Phaser® 4510 Laser Printer 3-8 - Xerox 4510N | Advanced Features Guide - Page 38
Start, click Control Panel, and then Taskbar and Start Menu. Select the Start Menu tab, and then select Classic Start menu. Click OK. This Troubleshooting section assumes you have completed the following tasks: ■ Loaded a Phaser printer PCL or PostScript printer driver. ■ Printed and kept a current - Xerox 4510N | Advanced Features Guide - Page 39
page: 1. Select the General tab. 2. Click Print Test Page. If the printer does not print, select PhaserSMART Technical Support on the Troubleshooting tab of your Windows printer driver to access PhaserSMART Technical Support. See also: www.xerox.com/office/4510support Phaser® 4510 Laser Printer 3-10 - Xerox 4510N | Advanced Features Guide - Page 40
the network. Quick CD-ROM Install Steps To use the quick CD-ROM installation option: 1. Insert the Software and Documentation CD-ROM into the computer's CD-ROM drive. 2. Double-click the installer on the Software and Documentation CD-ROM to install the printer driver. Phaser® 4510 Laser Printer 3-11 - Xerox 4510N | Advanced Features Guide - Page 41
the printer's IP address in the Printer Address field. 4. Select the appropriate PPD from the list in the Printer Model pull-down list. If your printer PPD is not listed, install it from the Software and Documentation CD-ROM. 5. Click Add to complete the configuration. Phaser® 4510 Laser Printer - Xerox 4510N | Advanced Features Guide - Page 42
displaying name of your printer, followed by a series of numbers. For example, Your Printer's Name xx:xx:xx. Each numbered segment represents the last section of your printer's hardware address. Your PPD is automatically selected. 3. Click Add to complete the installation. Phaser® 4510 Laser Printer - Xerox 4510N | Advanced Features Guide - Page 43
If there are print-quality problems, see the User Guide at www.xerox.com/office/4510support. Mac OS X, Version 10.2 and Higher Troubleshooting Perform these steps only for Mac OS X, versions 10.2 and higher: 1. Open the Network Utility, and then click the Ping tab. 2. Enter the printer's IP address - Xerox 4510N | Advanced Features Guide - Page 44
that both TCP/IP protocol and the proper connector are enabled. 2. On the control panel, select one of these IP address options: ■ Allow the printer to set up a DHCP address. ■ Enter the IP address manually. 3. Print the Configuration page and keep it for reference. Phaser® 4510 Laser Printer 3-15 - Xerox 4510N | Advanced Features Guide - Page 45
screen appears displaying information about the download file. 6. Click the Start button to install the Unix driver. 7. Print a test page and verify the print quality of the printed page. Note: If print-quality problems exist, or your job did not print, see the User Guide at www.xerox.com/office - Xerox 4510N | Advanced Features Guide - Page 46
. Managing Your Printer This chapter includes: ■ Printer Settings on page 4-2 ■ Printer Security on page 4-15 ■ Analyzing Printer Usage on page 4-18 Phaser® 4510 Laser Printer 4-1 - Xerox 4510N | Advanced Features Guide - Page 47
xxx.xxx.xxx.xxx). 3. Click Properties. 4. Select the General folder on the left navigation panel, and then select Printer Defaults. 5. Select the language from the Set Control Panel Language drop-down list. 6. Click the Save Changes button at the bottom of the screen. Phaser® 4510 Laser Printer 4-2 - Xerox 4510N | Advanced Features Guide - Page 48
.xxx). 3. Click Properties. 4. Select the General folder on the left navigation panel. 5. Select Printer Defaults. 6. In the Accessible Control Panel drop-down list, select On or Off to change the setting. 7. Click the Save Changes button at the bottom of the screen. Phaser® 4510 Laser Printer 4-3 - Xerox 4510N | Advanced Features Guide - Page 49
on the left navigation panel, and then select Date and Time. The window displays the printer's current date and time setting. 5. To change the date or time, select the new values from the drop-down lists. 6. Click the Save Changes button at the bottom of the screen. Phaser® 4510 Laser Printer 4-4 - Xerox 4510N | Advanced Features Guide - Page 50
the General folder on the left navigation panel. 5. Select Printer Defaults. 6. In the Startup Page drop-down list, select Off or On to change the setting. 7. Click the Save Changes button at the bottom of the page. Printing the Startup Page from the Control Panel To print the Startup page on the - Xerox 4510N | Advanced Features Guide - Page 51
's Address field (http://xxx.xxx.xxx.xxx). 3. Click Properties. 4. Select the General folder on the left navigation panel, and then click Warmup. 5. Select a value from the Power Saver Timeout drop-down list. 6. Click the Save Changes button at the bottom of the page. Phaser® 4510 Laser Printer 4-6 - Xerox 4510N | Advanced Features Guide - Page 52
.xxx.xxx). 3. Click Properties. 4. Select the General folder on the left navigation panel, and then select Printer Defaults. 5. Select a value on the Low Toner Warning drop-down list to change the setting. 6. Click the Save Changes button at the bottom of the screen. Phaser® 4510 Laser Printer 4-7 - Xerox 4510N | Advanced Features Guide - Page 53
on the left navigation panel, and then select Printer Defaults. 5. Change the setting in the Print Density field. 6. Click the Save Changes button at the bottom of the page. Controlling Print Quantity The Print Quantity setting controls the number of copies the printer prints for each print job. To - Xerox 4510N | Advanced Features Guide - Page 54
. 4. Select the General folder on the left navigation panel, and then select Printer Defaults. 5. Change the setting in the Print With Low Toner drop-down list. To print with low toner, set the value to On. 6. Click the Save Changes button at the bottom of the page. Phaser® 4510 Laser Printer 4-9 - Xerox 4510N | Advanced Features Guide - Page 55
Mode setting using CentreWare IS: 1. Launch your web browser. 2. Enter the printer's IP address in the browser's Address field (http://xxx.xxx.xxx.xxx). 3. Click Properties. 4. Select the General folder on the left navigation panel, and then select Printer Defaults. Phaser® 4510 Laser Printer 4-10 - Xerox 4510N | Advanced Features Guide - Page 56
Properties. 4. Select the General folder on the left navigation panel, and then select Printer Defaults. 5. In either the Tray 1 Prompt or Tray 2-N Prompt drop-down list, select the appropriate setting. 6. Click the Save Changes button at the bottom of the page. Phaser® 4510 Laser Printer 4-11 - Xerox 4510N | Advanced Features Guide - Page 57
time you want the printer to wait for you to load paper before printing. If you select a value of None, the printer does not wait for paper to be inserted and immediately picks paper from the default tray. 6. Click the Save Changes button at the bottom of the screen. Phaser® 4510 Laser Printer 4-12 - Xerox 4510N | Advanced Features Guide - Page 58
's Address field (http://xxx.xxx.xxx.xxx). 3. Click Properties. 4. Select General on the left navigation panel, and then select Printer Defaults. 5. Select the appropriate tray in the Paper Destination drop-down list. 6. Click Save Changes at the bottom of the page. Phaser® 4510 Laser Printer 4-13 - Xerox 4510N | Advanced Features Guide - Page 59
(http://xxx.xxx.xxx.xxx). 3. Click Properties. 4. Select General on the left navigation panel, and then select Printer Defaults. 5. In the Job Offset drop-down list, select None, End of Job, or End of Set. 6. Click the Save Changes button at the bottom of the page. Phaser® 4510 Laser Printer 4-14 - Xerox 4510N | Advanced Features Guide - Page 60
of user access, printer feature authorization, and control panel selections in the following settings: ■ Administrative Security Settings ■ Printing Security Settings ■ Configure Feature Authorization table. 7. Click the Save Changes button at the bottom of the screen. Phaser® 4510 Laser Printer 4-15 - Xerox 4510N | Advanced Features Guide - Page 61
navigation panel, and then select Printing Security Settings. 5. Select the appropriate options. 6. Click the Save Changes button at the bottom of the screen. Configuring HTTPS To select when to use HTTPS (SSL): 1. Launch your web browser. 2. Enter your printer Help. Phaser® 4510 Laser Printer 4-16 - Xerox 4510N | Advanced Features Guide - Page 62
.xxx.xxx.xxx). 3. Click Properties. 4. On the left navigation panel select the Security folder, and then select Control Panel Lockout. 5. Click the check box for each control panel menu item you want to lock. 6. Click the Save Changes button at the bottom of the page. Phaser® 4510 Laser Printer 4-17 - Xerox 4510N | Advanced Features Guide - Page 63
■ MaiLinX Alerts on page 4-20 ■ Xerox Usage Analysis Tool on page 4-20 Job Accounting Job accounting is available through CentreWare IS and CentreWare Web. The printer stores information about print jobs in a log file. The log file is stored either in the printer's RAM memory or on the hard drive if - Xerox 4510N | Advanced Features Guide - Page 64
panel, select Usage Profile Reports. 4. Enter the desired email address in the Send to Specific Address field. 5. Click the Send Usage Profile Report button. Note: To send usage profile reports using email, MaiLinX must be properly set up. See MaiLinX Alerts on page 4-20. Phaser® 4510 Laser Printer - Xerox 4510N | Advanced Features Guide - Page 65
under the following conditions: ■ When printer errors, warnings, and alerts occur. ■ When the printer requires attention (for example, when service is required or supplies need to be replenished). ■ When a reply to a CentreWare IS Remote Internet Printing message is desired. For more information - Xerox 4510N | Advanced Features Guide - Page 66
lb.) 550-Sheet Multipurpose Tray Width: 28.4 cm (11.2 in.) Depth: 72.3 cm (28.5 in.) Height: 8.6 cm (3.4 in.) Weight: 2.12 kg (4.7 lb.) Environmental Specifications Temperature ■ Storage: -20o C to 50o C / -4o F to 122o F ■ Operating: 5° C to 35° C / 41° F to 95° F Phaser® 4510 Laser Printer A-1 - Xerox 4510N | Advanced Features Guide - Page 67
43 ppm A4 Controller Specifications 533 MHz processor Memory ■ 128 MB RAM (maximum of 512 MB installed memory in two slots) Page Description Languages (PDL) ■ PCL5e and 6.0 ■ Adobe PostScript 3 ■ Adobe PDF-Direct V1.4 Residential Fonts ■ 139 PostScript Type 1 ■ 81 PCL Phaser® 4510 Laser Printer A-2 - Xerox 4510N | Advanced Features Guide - Page 68
Interfaces ■ Ethernet 10/100 Base Tx (available as upgrade on Phaser 4510B configuration) ■ Universal Serial Bus (USB 2.0) ■ Parallel Phaser® 4510 Laser Printer A-3 - Xerox 4510N | Advanced Features Guide - Page 69
the equipment. To ensure compliance with Part 15 of the FCC rules, use shielded interface cables. Canada (Regulations) This Class B digital apparatus complies with Canadian ICES-003. Cet appareil numérique de la classe B est conforme à la norme NMB-003 du Canada. Phaser® 4510 Laser Printer B-1 - Xerox 4510N | Advanced Features Guide - Page 70
with the user's instructions, is neither dangerous for the consumer nor for the environment. To ensure compliance with European Union regulations, use shielded interface cables. A signed copy of the Declaration of Conformity for this product can be obtained from Xerox. Phaser® 4510 Laser Printer B-2 - Xerox 4510N | Advanced Features Guide - Page 71
For Material Safety Data information regarding your Phaser 4510 Laser Printer, go to: ■ United States and Canada: www.xerox.com/msds ■ European Union: www.xerox.com/environment_europe. For the Customer Support Center phone numbers, go to www.xerox.com/office/contacts. Phaser® 4510 Laser Printer C-1 - Xerox 4510N | Advanced Features Guide - Page 72
Product Recycling and Disposal All Countries If you are managing the disposal of your Xerox product, please note that the product may contain, lead, mercury, perchlorate, and other take back your old equipment free of charge. Please ask you retailer for information. Phaser® 4510 Laser Printer D-1 - Xerox 4510N | Advanced Features Guide - Page 73
or for recycling and disposal information, contact your local authorities. In the United States, you may also refer to the Electronic Industries Alliance website at www.eiae.org. Other Countries Please contact your local waste authorities and request disposal guidance. Phaser® 4510 Laser Printer D-2 - Xerox 4510N | Advanced Features Guide - Page 74
printing system, 3-2 troubleshooting print-quality problems, 3-2 usage profile reports, 4-19 viewing list of networked printers, 3-2 CentreWare Web, 3-3 certificates managing, 4-16 configuring 802.1X, 4-17 HTTPS, 4-16 configuring the printer Windows 2000 or later, 3-6 Phaser® 4510 Laser Printer - Xerox 4510N | Advanced Features Guide - Page 75
12 setting up for TCP/IP, 3-12 F first or last page of a document, 1-8 Font Management Utility, 2-3 fonts downloading, 2-3 printing a list from CentreWare IS, 2-4 printing a list from the control panel, 2-4 printing font samples, 2-4 specifications, A-2 types, 2-2 Phaser® 4510 Laser Printer Index-2 - Xerox 4510N | Advanced Features Guide - Page 76
certificates, 4-16 Material Safety Data Sheet, C-1 memory, A-2 mirror images, 1-2, 1-13 mode changing load paper timeout, 4-12 changing the power saver timeout, 4-6 modes Tray 1 Mode, 4-10 Tray 2-N Mode, 4-10 multiple-page printing on a single sheet of paper, 1-4 Phaser® 4510 Laser Printer Index-3 - Xerox 4510N | Advanced Features Guide - Page 77
settings, 4-16 setting date and time, 4-4 settings, 4-2 copy from one printer to another, 3-2 status notification, 4-20 usage Xerox Usage Analysis Tool, 4-20 verifying settings Windows 2000 or later, 3-9 waits before printing on another type or size of paper, 4-12 Phaser® 4510 Laser Printer Index-4 - Xerox 4510N | Advanced Features Guide - Page 78
, 4-15 selecting printing security settings, 4-16 selecting administrative security settings, 4-15 control panel menu locking option, 4-17 duration of tray prompts, 4-11 load paper timeout option, 4-12 printing security settings, 4-16 sending print with jobs, 1-18 Phaser® 4510 Laser Printer Index-5 - Xerox 4510N | Advanced Features Guide - Page 79
Web, 3-3 Windows 2000 or later, 3-9 two-sided printing booklets, 1-5 U Unix networking quick install, 3-15 Usage Analysis Tool, 4-20 usage profile reports, 4-19 using the printer analyzing printer usage, 4-18 V verifying settings Windows 2000 or later, 3-9 Phaser® 4510 Laser Printer Index-6 - Xerox 4510N | Advanced Features Guide - Page 80
Windows 2000 or later, 3-6, 3-10 quick CD-ROM installation Windows 2000 or later, 3-4 troubleshooting Windows 2000 or later, 3-9 verifying driver installation Windows 2000 or later, 3-9 verifying settings Windows 2000 or later, 3-9 X Xerox Usage Analysis Tool, 4-20 Index Phaser® 4510 Laser Printer
-
 1
1 -
 2
2 -
 3
3 -
 4
4 -
 5
5 -
 6
6 -
 7
7 -
8
-
9
-
10
-
11
-
12
-
13
-
14
-
15
-
16
-
17
-
18
-
19
-
20
-
21
-
22
-
23
-
24
-
25
-
26
-
27
-
28
-
29
-
30
-
31
-
32
-
33
-
34
-
35
-
36
-
37
-
38
-
39
-
40
-
41
-
42
-
43
-
44
-
45
-
46
-
47
-
48
-
49
-
50
-
51
-
52
-
53
-
54
-
55
-
56
-
57
-
58
-
59
-
60
-
61
-
62
-
63
-
64
-
65
-
66
-
67
-
68
-
69
-
70
-
71
-
72
-
73
-
74
-
75
-
76
-
77
-
78
-
79
-
80
 |
 |

Vejledningen Avancerede funktioner
Avancerade Funktionsguiden
Handleiding voor Geavanceerde Functies
Guia de Recursos Avançados
Guía de Características Avanzadas
Handbuch zu Erweiterten Funktionen
Guida alle Funzioni Avanzate
Guide des Fonctions Avancées
Advanced Features Guide
Phaser
®
4510
laser printer
www.xerox.com/support