Xerox 8560MFP Evaluator Guide - Page 10
Evaluate Installation - paper tray
 |
UPC - 095205428841
View all Xerox 8560MFP manuals
Add to My Manuals
Save this manual to your list of manuals |
Page 10 highlights
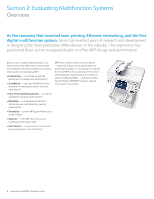
Section 2: Evaluating Multifunction Systems Evaluate Installation Installing and deploying a fleet of multifunction systems throughout your organization is a potentially time-consuming and complicated process. This process is not limited to physically placing the units in your environment - it also extends to how these systems will integrate into your existing network infrastructure. You also need to consider the process required to deploy printing and scanning services to your users, and how automated that process can be. How the phaser 8560MFP exceeds the installation requirement: Easy to Install Installation is a snap - once you've decided where in your office to locate the Phaser 8560MFP multifunction printer, simply open the packaging and follow the easy-to-understand graphical installation instructions. Assemble the product (comprised of print engine, scanner module and extra paper trays depending on your configuration), plug in the power and network cables and power it up - it will automatically connect to your network and already has supplies installed. Easy to Deploy Once you've assembled the Phaser 8560MFP, turned it on and connected it to your network, installing drivers to your employees' computers is a simple, wizard-based process using either the included CD-ROM or connecting to the Phaser 8560MFP via any standard web browser. When you insert the installation CD, you will be presented with links to a variety of information and tasks including installing drivers, accessing guides and tutorials, registering your printer, or accessing the Xerox Color Connection website. Choosing "Install Driver" will give you the choice of installing both the print and scan drivers, or installing the print or scan drivers individually - you decide what features of the Phaser 8560MFP your employees can access. 10 Xerox Phaser 8560MFP Evaluator Guide
-
 1
1 -
2
-
3
-
4
-
 5
5 -
 6
6 -
 7
7 -
 8
8 -
 9
9 -
 10
10 -
 11
11 -
 12
12 -
 13
13 -
 14
14 -
 15
15 -
16
-
17
-
18
-
19
-
20
 |
 |
