Yamaha DD-45 Owners Manual - Page 6

Panel Controls - kit

Page 6 highlights

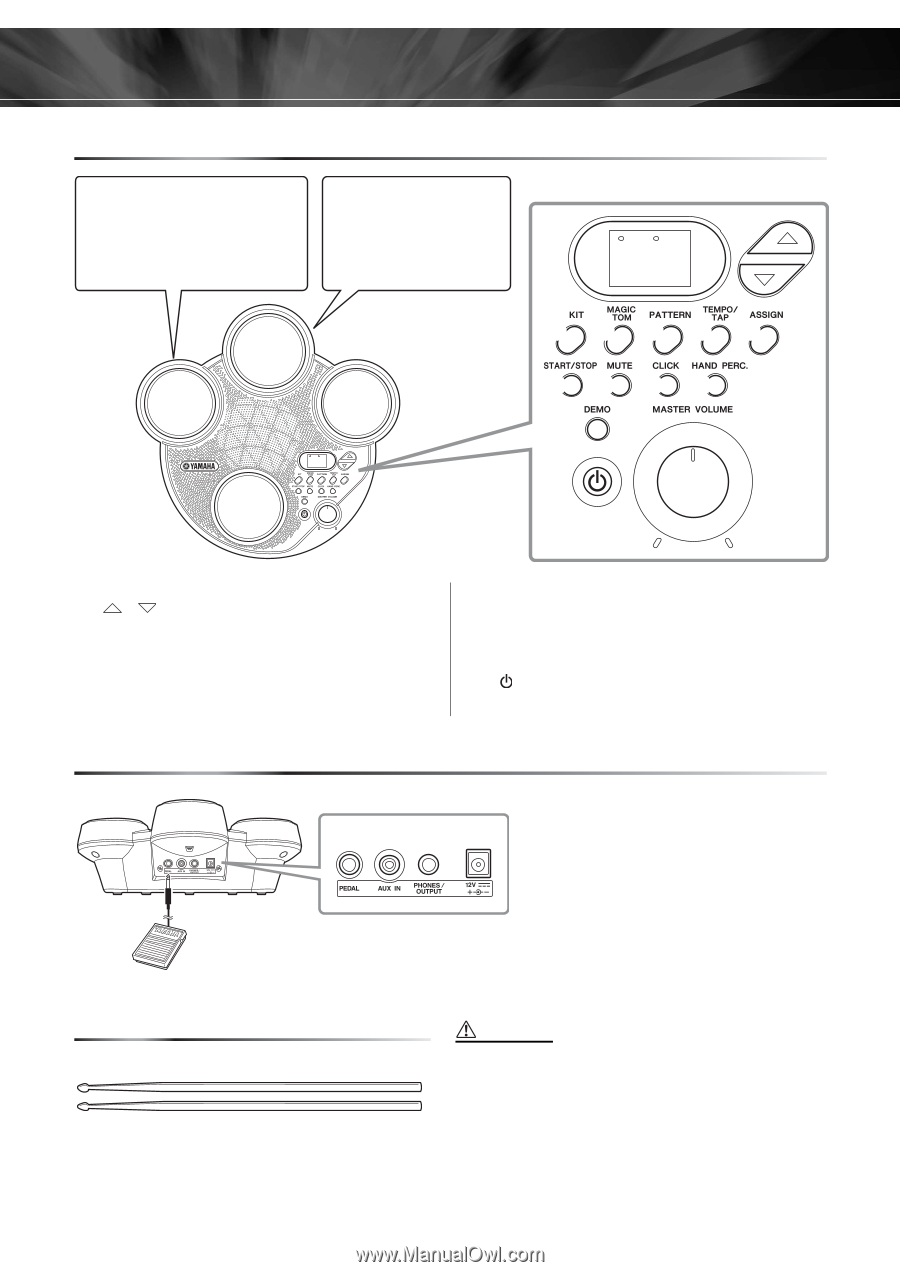
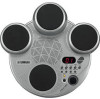
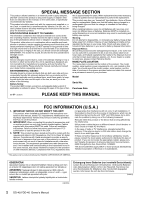
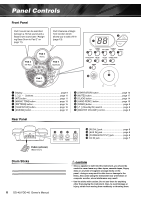
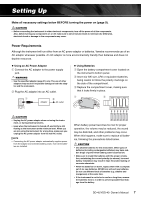
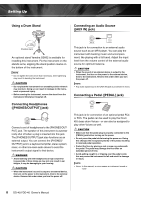
Panel Controls Front Panel Pad 2 sound can be switched between a Hi-Hat sound and a Bass Drum sound (see "Assigning Bass Drum to Pad 2" on page 11). Pad 3 features a Magic Tom function which allows you to add a fill-in (page 13). Pad 2 (Hi-Hat) Pad 3 (Tom) Pad 4 (Cymbal) 88 Pad 1 (Snare) w q 88 ertyu i o !0 !1 !2 !3 !4 q Display page 9 w [ ] [ ] buttons page 11 e [KIT] button page 11 r [MAGIC TOM] button page 13 t [PATTERN] button page 15 y [TEMPO/TAP] button page 16 u [ASSIGN] button page 12 i [START/STOP] button page 15 o [MUTE] button page 17 !0 [CLICK] button page 14 !1 [HAND PERC.] button page 10 !2 [DEMO] button page 9 !3 [ ] (Standby/On) switch page 9 !4 [MASTER VOLUME] control page 9 Rear Panel !5 !6 !7 !8 !5 [PEDAL] jack page 8 !6 [AUX IN] jack page 8 !7 [PHONES/OUTPUT] jack page 8 !8 DC IN jack page 7 Pedal (optional) (Bass Drum) Drum Sticks 6 DD-45/YDD-40 Owner's Manual CAUTION • Since a speaker is built into this instrument, you should be careful to never leave any video tapes, cassette tapes, floppy disks or any kind of magnetic storage media on the panel-doing so may result in data loss or damage to the items. Also avoid using the instrument near a television or computer monitor, since interference may result. • Use the sticks with caution. Do not use them for anything other than playing the instrument. Also, to avoid damage or injury, refrain from waving them recklessly or throwing them.

  • 1
  • 2
  • 3
  • 4
  • 5
  • 6
  • 7
  • 8
  • 9
  • 10
  • 11
  • 12
  • 13
  • 14
  • 15
  • 16
  • 17
  • 18
  • 19
  • 20
  • 21
  • 22
  • 23
  • 24
  • 25
  • 26
  • 27
  • 28
  • 29
  • 30
  • 31
  • 32
  • 33
  • 34
  • 35
  • 36

6
DD-45/YDD-40
Owner’s Manual
Panel Controls
Front Panel
q
Display
..............................................................
page 9
w
[
] [
] buttons
...........................................
page 11
e
[KIT] button
......................................................
page 11
r
[MAGIC TOM] button
.......................................
page 13
t
[PATTERN] button
............................................
page 15
y
[TEMPO/TAP] button
........................................
page 16
u
[ASSIGN] button
..............................................
page 12
i
[START/STOP] button
......................................
page 15
o
[MUTE] button
..................................................
page 17
!
0
[CLICK] button
.................................................
page 14
!
1
[HAND PERC.] button
......................................
page 10
!
2
[DEMO] button
..................................................
page 9
!
3
[
] (Standby/On) switch
.................................
page 9
!
4
[MASTER VOLUME] control
.............................
page 9
Rear Panel
88
88
q
!
2
!
4
!
3
w
e
i
o
!
0
!
1
r
t
y
u
Pad 3
(Tom)
Pad 2
(Hi-Hat)
Pad 4
(Cymbal)
Pad 1
(Snare)
Pad 2 sound can be switched
between a Hi-Hat sound and a
Bass Drum sound (see “Assign-
ing Bass Drum to Pad 2” on
page 11).
Pad 3 features a Magic
Tom function which
allows you to add a fill-in
(page 13).
!
5
!
6
!
7
!
8
Pedal (optional)
(Bass Drum)
!
5
[PEDAL] jack
..................................
page 8
!
6
[AUX IN] jack
.................................
page 8
!
7
[PHONES/OUTPUT] jack
..............
page 8
!
8
DC IN jack
.....................................
page 7
Drum Sticks
CAUTION
Since a speaker is built into this instrument, you should be
careful to never leave any video tapes, cassette tapes, floppy
disks or any kind of magnetic storage media on the
panel—doing so may result in data loss or damage to the
items. Also avoid using the instrument near a television or
computer monitor, since interference may result.
Use the sticks with caution. Do not use them for anything
other than playing the instrument. Also, to avoid damage or
injury, refrain from waving them recklessly or throwing them.