Yamaha DGX-630 Owner's Manual
Yamaha DGX-630 Manual
 |
View all Yamaha DGX-630 manuals
Add to My Manuals
Save this manual to your list of manuals |
Yamaha DGX-630 manual content summary:
- Yamaha DGX-630 | Owner's Manual - Page 1
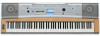
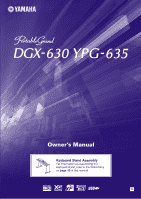
Owner's Manual Keyboard Stand Assembly For information on assembling the keyboard stand, refer to the instructions on page 10 of this manual. EN - Yamaha DGX-630 | Owner's Manual - Page 2
located on this plate. You should record the model number, serial number, and the date of purchase in the spaces provided below and retain this manual as a permanent record of your purchase. Model Serial No. Purchase Date 92-BP (bottom) PLEASE KEEP THIS MANUAL 2 DGX-630/YPG-635 Owner's Manual - Yamaha DGX-630 | Owner's Manual - Page 3
must accept any interference received including interference that may cause undesired operation. See user manual instructions if interference to radio reception is suspected. * This applies only to products distributed by YAMAHA CORPORATION OF AMERICA. (FCC DoC) DGX-630/YPG-635 Owner's Manual 3 - Yamaha DGX-630 | Owner's Manual - Page 4
by qualified Yamaha service personnel. • Never Use only the stand specified for the instrument. When attaching the stand or rack, use the provided screws only. Failure to do so could cause damage to the internal components or result in the instrument falling over. 4 DGX-630/YPG-635 Owner's Manual - Yamaha DGX-630 | Owner's Manual - Page 5
Yamaha service personnel. • Do not place vinyl, plastic or rubber objects on the instrument, since this might discolor the panel or keyboard. • Do not rest your weight this manual are the trademarks or registered trademarks of their respective companies. (3)-11 2/2 DGX-630/YPG-635 Owner's Manual 5 - Yamaha DGX-630 | Owner's Manual - Page 6
songs pre-installed in this electronic keyboard: Mona Lisa from the Paramount support GM System Level. XGlite As its name implies, "XGlite" is a simplified version of Yamaha's high-quality XG tone generation format. Naturally, you can play back any XG song data using DGX-630/YPG-635 Owner's Manual - Yamaha DGX-630 | Owner's Manual - Page 7
Congratulations and thank you for purchasing the Yamaha DGX-630/YPG-635 Portable Grand! Please read this owner's manual carefully before using the instrument in order to take full advantage of its various features. Make sure to keep this manual in a safe and handy place even after you finish reading, - Yamaha DGX-630 | Owner's Manual - Page 8
Voices Page 19 With the DGX-630/YPG-635, the instrument voice that sounds when you play the keyboard can be changed to violin, flute, harp, or any of an extensive range of voices. You can change the mood of a song written for piano, for example, by using violin to play it instead. Experience - Yamaha DGX-630 | Owner's Manual - Page 9
6 Included Accessories 7 Special Features of the DGX-630/YPG-635 8 Setting Up 10 Keyboard Stand Assembly 10 Power Requirements 13 Connecting Headphones (PHONES/OUTPUT Jack 13 Connecting a Footswitch (SUSTAIN Jack 13 Connecting a Pedal Unit (PEDAL UNIT jack 14 Connecting to a Computer (USB - Yamaha DGX-630 | Owner's Manual - Page 10
x 30 mm roundhead screws (4 pcs.) r Support rail t 4 x 45 mm flathead screws (6 pcs.) y 5 x 16 mm roundhead screws (4 pcs.) Use the packing sheet to protect both the instrument and the floor when assembling. * The sheet is the bag in which the instrument is wrapped. 10 DGX-630/YPG-635 Owner's Manual - Yamaha DGX-630 | Owner's Manual - Page 11
side on the bottom. Align the support rail r into the groove on the bottom of the instrument and attach the rail, using the screws t. NOTE • If you don't have the packing sheet, use a thick blanket or other soft material to protect the floor and the instrument. DGX-630/YPG-635 Owner's Manual 11 - Yamaha DGX-630 | Owner's Manual - Page 12
make a rattling noise when you play it or move it? ➔ If so, properly tighten all screws. • Also, if the keyboard makes a creaking noise or seems unsteady when you play it, refer carefully to the assembly instructions and diagrams and retighten all screws. 12 DGX-630/YPG-635 Owner's Manual - Yamaha DGX-630 | Owner's Manual - Page 13
an external output. You can connect the PHONES/OUTPUT jack to a keyboard amplifier, stereo system, mixer, tape recorder, or other line-level you play by pressing a footswitch. Plug the Yamaha FC5 footswitch into this jack and use it to switch sustain on and off. NOTE DGX-630/YPG-635 Owner's Manual 13 - Yamaha DGX-630 | Owner's Manual - Page 14
already playing when it is pressed. When you press the damper pedal here, the notes you play before you release the pedal have a longer sustain. When you press the sostenuto pedal here while holding the note, the note will sustain as long as you hold the pedal. 14 DGX-630/YPG-635 Owner's Manual - Yamaha DGX-630 | Owner's Manual - Page 15
use an AB type USB cable to connect the instrument to the computer. After making the connections, turn the instrument's power on. • Install the USB-MIDI driver on your computer. Installation of the USB-MIDI driver Rest Insert the music rest into the slots as shown. DGX-630/YPG-635 Owner's Manual 15 - Yamaha DGX-630 | Owner's Manual - Page 16
............pages 88, 79 DEMO] button page 35 @8 [EXIT] button page 68 @9 REGIST MEMORY [MEMORY/BANK], [1], [2] buttons......... page 90 #0 [PORTABLE GRAND key indicate the drum and percussion instruments assigned to the keys when "Standard Kit 1" is selected. 16 DGX-630/YPG-635 Owner's Manual - Yamaha DGX-630 | Owner's Manual - Page 17
#2 #3 #4 #5 Rear Panel #6 #7 #8 #9 $0 $1 Rear Panel #6 CONTRAST knob page 69 #7 USB TO DEVICE terminal page 97 USB TO HOST terminal page 105 #8 SUSTAIN jack page 13 #9 PEDAL UNIT jack page 14 $0 PHONES/OUTPUT jack page 13 $1 DC IN 12V jack page 13 DGX-630/YPG-635 Owner's Manual 17 - Yamaha DGX-630 | Owner's Manual - Page 18
Guide This instrument allows you to select English or Japanese as the display language. The default display language is English, but if you switch to Japanese the lyrics, file names, demo "Language" item. When highlighted you can use the [+] and [-] buttons to select the DGX-630/YPG-635 Owner's Manual - Yamaha DGX-630 | Owner's Manual - Page 19
uick Guid Try Playing a Variety of Instrument Voices In addition to piano, organ, and other "standard" keyboard keyboard. Select 105 Flute Adjusts volume. Try selecting and playing a variety of voices. Press the [EXIT] button to return to the MAIN display. DGX-630/YPG-635 Owner's Manual - Yamaha DGX-630 | Owner's Manual - Page 20
voice which will play in addition to the main voice when you play the keyboard. The second voice is known as the "dual" voice. 1 Press the use is selected. The voice selected here becomes the dual voice. For this example try selecting the "123 Vibraphone" voice. 20 DGX-630/YPG-635 Owner's Manual - Yamaha DGX-630 | Owner's Manual - Page 21
the left of the keyboard split point. Voice Number 2 Press and hold the [SPLIT ON/OFF] button for longer than a second. The split voice selection display will appear. Split voice selection display Hold for longer than a second The currently selected split voice DGX-630/YPG-635 Owner's Manual 21 - Yamaha DGX-630 | Owner's Manual - Page 22
Grand Piano" voice will be selected. NOTE • When you press the [PORTABLE GRAND] button all settings other than touch sensitivity are turned off. The dual and split voices will also be turned off, so only the Grand Piano voice will play over the entire keyboard. 22 DGX-630/YPG-635 Owner's Manual - Yamaha DGX-630 | Owner's Manual - Page 23
lightning, running water, dogs barking, and others. Some keys do not have assigned sound effects, and will therefore produce no sound. For details on the instruments included in the SFX kit voices, see "SFX Kit 1" and "SFX Kit 2" in the "Drum Kit List" on page 133. DGX-630/YPG-635 Owner's Manual 23 - Yamaha DGX-630 | Owner's Manual - Page 24
Q e uick Guid The Metronome The instrument includes a metronome with adjustable tempo and time signature. Play and Adjusting the Metronome Tempo 1 Press the [TEMPO/TAP] button to call up the tempo setting. Tempo 2 Use the dial to select a tempo from 5 to 280. 24 DGX-630/YPG-635 Owner's Manual - Yamaha DGX-630 | Owner's Manual - Page 25
is playing, so these parameters cannot be changed while a style or song is playing. 4 Use the dial to select the beat length. Select the required length for each beat: 2, 4, 8, or 16 (half note, quarter note, eighth note, or 16th note). Select 8 for this example. DGX-630/YPG-635 Owner's Manual 25 - Yamaha DGX-630 | Owner's Manual - Page 26
use the [+] and [-] buttons to turn the bell sound on or off. Adjusting the Metronome Volume 1 Press the [FUNCTION] button. 2 Use the CATEGORY [ ] and [ ] buttons to select the Metronome Volume item. r f 3 Use the dial to set the metronome volume as required. 26 DGX-630/YPG-635 Owner's Manual - Yamaha DGX-630 | Owner's Manual - Page 27
you use them for the above example. For these styles first turn auto accompaniment on as described on page 28, press the [START/STOP] button, and the accompaniment bass and chord parts will begin playing when you play a key to the left of the keyboard split point. DGX-630/YPG-635 Owner's Manual 27 - Yamaha DGX-630 | Owner's Manual - Page 28
chords. Split point (54: F#2) NOTE • The keyboard split point can be changed as required: refer to page 82. Auto accompaniment region 3 Turn sync start on. Press the [SYNC START] button to turn the sync start function on. Flashes when sync start is on. 28 DGX-630/YPG-635 Owner's Manual - Yamaha DGX-630 | Owner's Manual - Page 29
accompaniment included in a style will start playing as soon as you play a note to left of the keyboard split point. Press the button a second time to turn the sync start function off. 4 Play a left accompaniment. Refer to "Pattern Variation (Sections)" on page 79. DGX-630/YPG-635 Owner's Manual 29 - Yamaha DGX-630 | Owner's Manual - Page 30
's own unique "color"-even if it's different fingerings of the same chord-the chords you choose to use in your chord progressions have a huge influence on the overall feel of the music you play. On and the auto accompaniment function will create a perfect ending. 30 DGX-630/YPG-635 Owner's Manual - Yamaha DGX-630 | Owner's Manual - Page 31
Recommended Style 148 Piano Boogie -3-chord boogie-woogie- Press the [INTRO/ENDING/rit.] button. C F C Playing Styles G F C Press the [INTRO/ENDING/ playing it through several times. When you're ready to stop playing press the [INTRO/ENDING/rit.] button. DGX-630/YPG-635 Owner's Manual 31 - Yamaha DGX-630 | Owner's Manual - Page 32
the corresponding keys ■Easy Chords This method lets you easily play chords in the accompaniment range of the keyboard using only one, C(713) C(7#9) C(7b5) () () () () C7aug C7sus4 Csus2 32 DGX-630/YPG-635 Owner's Manual * Notes enclosed in parentheses ( ) are optional; the chords will - Yamaha DGX-630 | Owner's Manual - Page 33
name 2 Select a song. Select a song after referring to the preset song category list on page 35. Use the dial to select the song you want to listen to. NOTE • You can also play songs you have ) or Songs in a USB flash memory connected to the instrument (page 96) DGX-630/YPG-635 Owner's Manual 33 - Yamaha DGX-630 | Owner's Manual - Page 34
change the song tempo as required. Press the [TEMPO/TAP] button. The tempo display will appear and you can use the dial, the [+] and [-] buttons, or the [0] to [9] number buttons to set to tempo to anywhere . Press the [EXIT] button to return to the MAIN display. 34 DGX-630/YPG-635 Owner's Manual - Yamaha DGX-630 | Owner's Manual - Page 35
copyrighted, are provided in the Song Book on the CD-ROM. The scores for songs 9-11 are provided in this manual. Some of the classic and/or traditional songs have been edited for length or for ease in learning, and may not be exactly the same as the original. DGX-630/YPG-635 Owner's Manual 35 - Yamaha DGX-630 | Owner's Manual - Page 36
of 70 MIDI songs. See page 109 for instructions on how to transfer the songs to the instrument. The chart below shows the basic processes flow for using the preset songs, user songs, and external song files from storage to playback. Your own performance Record (page 60) DGX-630/YPG-635 Song Storage - Yamaha DGX-630 | Owner's Manual - Page 37
has a lot of lyrics. • Small notes that are hard to read may be easier to read after you use the quantize function (page 94). Melody score Chord Lyrics Double-staff NOTE • No chords or lyrics are shown . 4 Press the [EXIT] button to return to the MAIN display. DGX-630/YPG-635 Owner's Manual 37 - Yamaha DGX-630 | Owner's Manual - Page 38
long as they are standard MIDI file format files containing Used For Lyrics Display Number 016 020 030 Name Mona Lisa (Jay Livingston and Ray Evans) Against All Odds (Collins 0007403) Can't Help Falling In Love (George David Weiss, Hugo Peretti and Luigi Creatore) 38 DGX-630/YPG-635 Owner's Manual - Yamaha DGX-630 | Owner's Manual - Page 39
the selected song with one finger on the right-hand section of the keyboard, and play chords on the left-hand section of the keyboard using the Chord type. Split point Refer to page 48 for more information on using performance assistant technology to help you play. DGX-630/YPG-635 Owner's Manual 39 - Yamaha DGX-630 | Owner's Manual - Page 40
The Easy Way to Play Piano CHORD Type-Play with Both Hands 1 Press the [P.A.T. ON/ a complete song. The performance assistant technology features uses the chord and melody data, and should always be used with a song (page 33). 40 DGX-630/YPG-635 Owner's Manual The song displayed here will be played. - Yamaha DGX-630 | Owner's Manual - Page 41
. "..." will appear on the display where the performance assistant technology type is normally shown. NOTE • The score for Ave Maria is provided on page 124. DGX-630/YPG-635 Owner's Manual 41 - Yamaha DGX-630 | Owner's Manual - Page 42
The Easy Way to Play Piano CHORD/FREE Type-Applying the Chord Type to the Left Hand display appears. Select a song by using the dial. For this example try selecting the "011 Nocturne". Select Chord/Free NOTE • Using Songs (page 33) 42 DGX-630/YPG-635 Owner's Manual The song displayed here will be - Yamaha DGX-630 | Owner's Manual - Page 43
STOP] button. The Easy Way to Play Piano Song playback will begin. The left-hand keys you should play will be shown on the display. 5 Play on the keyboard. Play to the right of the split point where the performance assistant technology type is normally shown. DGX-630/YPG-635 Owner's Manual 43 - Yamaha DGX-630 | Owner's Manual - Page 44
The Easy Way to Play Piano MELODY Type-Play with One Finger See page 48 for some hints on using the dial. 3 Select a song. Press the [SONG] button, and the Song Select display appears. Select a song by using the dial. Select Melody NOTE • Using Songs (page 33) 44 DGX-630/YPG-635 Owner's Manual - Yamaha DGX-630 | Owner's Manual - Page 45
[P.A.T. ON/OFF] button to turn the performance assistant technology feature off. "..." will appear on the display where the performance assistant technology type is normally shown. DGX-630/YPG-635 Owner's Manual 45 - Yamaha DGX-630 | Owner's Manual - Page 46
Easy Way to Play Piano CHORD/MELODY-Chord Type using the dial. 3 Select a song. Press the [SONG] button, and the Song Select display appears. Select a song by using the dial. Select Chord/Melody NOTE • Using Songs (page 33) The song displayed here will be played. 46 DGX-630/YPG-635 Owner's Manual - Yamaha DGX-630 | Owner's Manual - Page 47
Piano Song playback will begin. The basic pattern will repeat. Listen to eight measures while memorizing the basic pattern. It's your turn to play the part from the ninth measure. 5 Play on the keyboard right hand. You can play any keys as long as you're playing to DGX-630/YPG-635 Owner's Manual 47 - Yamaha DGX-630 | Owner's Manual - Page 48
, try playing chords with your left hand and a melody with your right ... or any other combination. Play 3 notes at once with your right hand. 48 DGX-630/YPG-635 Owner's Manual - Yamaha DGX-630 | Owner's Manual - Page 49
score during playback. If you play a key each time the marker appears above a used with the performance assistant technology as long as they include the required chord and/or melody data. See page 109 for instructions on how to transfer the songs to the instrument. DGX-630/YPG-635 Owner's Manual - Yamaha DGX-630 | Owner's Manual - Page 50
Guid Select a Song For a Lesson Yamaha Education Suite You can select song you like and use it for a left-hand, right-hand, or both-hands lesson. You can also use ! Lesson Flow: Select a song from the Piano Solo, Piano Ensemble category! Select the song you want to DGX-630/YPG-635 Owner's Manual - Yamaha DGX-630 | Owner's Manual - Page 51
a song for your lesson. Press the [SONG] button, and rotate the dial to select the song you want to use for your lesson. As listed on page 35 there are a variety of song types. 2 Press [EXIT] button to . Select L for left-hand lesson. Select LR for bothhands lesson. DGX-630/YPG-635 Owner's Manual 51 - Yamaha DGX-630 | Owner's Manual - Page 52
will move to the next key to be played. Playback will pause and wait for you to play the correct note. The triangular marker (▼) above the score indicates playback progress. ▼ Marker Left-hand part Right-hand part ● Marker (In the case of a right-hand lesson) 52 DGX-630/YPG-635 Owner's Manual - Yamaha DGX-630 | Owner's Manual - Page 53
DGX-630/ YPG-635 actually have 88 keys. In some songs that include very high or low notes, those notes may fall outside the displayed range and may not be shown on the display. In such cases an "over" indicator appear to the left or right of the graphic keyboard. Use DGX-630/YPG-635 Owner's Manual 53 - Yamaha DGX-630 | Owner's Manual - Page 54
. You can stop the Lesson mode at any time by pressing the [START/ STOP] button. Once you've mastered Lesson 2, move on to Lesson 3. 54 DGX-630/YPG-635 Owner's Manual - Yamaha DGX-630 | Owner's Manual - Page 55
and keyboard marker in the display will indicate the notes to play. ▼ Marker Left-hand part Right-hand part ● Marker (In the case of a right-hand lesson) 3 Stop the Lesson mode. You can stop the Lesson mode at any time by pressing the [START/ STOP] button. DGX-630/YPG-635 Owner's Manual 55 - Yamaha DGX-630 | Owner's Manual - Page 56
Select a Song For a Lesson Practice Makes Perfect-Repeat and Learn Use this feature when you want to start again just ahead of a section on which you . e Jump back 4 measures and repeat playback Song playback direction q Oops! A mistake! w Press immediately 56 DGX-630/YPG-635 Owner's Manual - Yamaha DGX-630 | Owner's Manual - Page 57
Guid Play Using the Music Database You want to play music in your favorite style, but you're not sure how to select the best can be selected and used in the same way as the internal Music Databases (MDB numbers 301-). File transfer instructions are provided on page DGX-630/YPG-635 Owner's Manual 57 - Yamaha DGX-630 | Owner's Manual - Page 58
can also change the song's melody voice and the keyboard voice for a complete change of image. Try Out the Easy Song Arranger You can highlighted. 2 Select a Song. Use the dial to select the song you want to arrange. 58 DGX-630/YPG-635 Owner's Manual The currently selected song number and - Yamaha DGX-630 | Owner's Manual - Page 59
button. NOTE • Because the Easy Song Arranger uses song data you can't specify chords by playing in the accompaniment range of the keyboard. The [ACMP ON/ OFF] button will not the song will continue playing. Use the [START/STOP] button to stop playback completely. DGX-630/YPG-635 Owner's Manual 59 - Yamaha DGX-630 | Owner's Manual - Page 60
) track can be recorded. To record your own performance, first use the SONG MEMORY [1]-[5] and [A] buttons to specify the track(s) you only to the melody tracks. • User songs are saved as SMF (Standard MIDI File) format 0 files. Refer to page 108 for information on SMF DGX-630/YPG-635 Owner's Manual - Yamaha DGX-630 | Owner's Manual - Page 61
Your Own Performance Recording Procedure 1 From the MAIN display press the [SONG] button, then use the dial to select the user song number (031-035) you want to record to. a second time. Style accompaniment cannot be turned on or off while recording is in progress. DGX-630/YPG-635 Owner's Manual 61 - Yamaha DGX-630 | Owner's Manual - Page 62
play on the keyboard. You can appear and recording will stop automatically. Use the song clear or track clear (page MIDI file and saving it later. To do this press and hold the [REC] button until the save confirmation message appears, then press the [+/YES] button. 62 DGX-630/YPG-635 Owner's Manual - Yamaha DGX-630 | Owner's Manual - Page 63
[SONG] button from the MAIN display. 2 The current song number/name will be highlighted-use the dial to select the user song (031-035) you want to play. 3 Press the track from a user song use the Track Clear function. Hold for longer than a second Press and hold DGX-630/YPG-635 Owner's Manual 63 - Yamaha DGX-630 | Owner's Manual - Page 64
3 Press the [+] button to clear the track. The clear-in-progress message will appear briefly on the display while the track is being cleared. 64 DGX-630/YPG-635 Owner's Manual - Yamaha DGX-630 | Owner's Manual - Page 65
the settings, use the Initialize operation Grade, Demo Cancel key on the keyboard and the three highest black keys. CAUTION • When you execute the Flash Clear operation, data you have purchased will also be cleared. Be sure to save data you want to keep to a computer. DGX-630/YPG-635 Owner's Manual - Yamaha DGX-630 | Owner's Manual - Page 66
volume. Rotate clockwise to increase the volume. 1 Press a button to select a basic function. Select a song you want to listen to or a song you want to use for a lesson. Select an auto-accompaniment style. Select a voice you want to play on the keyboard. 66 DGX-630/YPG-635 Owner's Manual - Yamaha DGX-630 | Owner's Manual - Page 67
be selected using the dial can also be selected using the [+] and [-] buttons. 3 Start a function. This is the [START/STOP] button. Press the [START/STOP] button after pressing the [SONG] or [STYLE] button to start playback of the selected song or style (rhythm). DGX-630/YPG-635 Owner's Manual 67 - Yamaha DGX-630 | Owner's Manual - Page 68
Press the CATEGORY button(s) as many times as necessary until the required function appears. You can then use the dial, the [+] and [-] buttons, or the number [0]-[9] buttons to adjust the value of This provides convenient direct access to a range of functions. 68 DGX-630/YPG-635 Owner's Manual f r - Yamaha DGX-630 | Owner's Manual - Page 69
to turn accompaniment on after selecting a style. When showing the keyboard range to the left of the split point is used for accompaniment chord recognition. Appears when the synchro-stop function is that contains data. No border appears around a Muted track. DGX-630/YPG-635 Owner's Manual 69 - Yamaha DGX-630 | Owner's Manual - Page 70
displayed. The currently selected harmony type 3 Use the dial to select a harmony type. keys while playing chords in the auto accompaniment range of the keyboard when the Auto Accompaniment is on (page 28). • Harmony type 15 to 18 (Echo) Keep holding down the keys. 70 DGX-630/YPG-635 Owner's Manual - Yamaha DGX-630 | Owner's Manual - Page 71
to select a reverb type. You can check how the selected reverb type sounds by playing on the keyboard. 2 Use the CATEGORY [ ] and [ ] buttons to select the Reverb Type item. Reverb Type item f that is applied to the main, dual, and split voices. (See page 93). DGX-630/YPG-635 Owner's Manual 71 - Yamaha DGX-630 | Owner's Manual - Page 72
keyboard. f r 2 Use the CATEGORY [ ] and [ ] buttons to select the Chorus Type item. Chorus Type item Selected chorus type. ● Adjusting the Chorus Level You can individually adjust the amount of chorus that is applied to the main, dual, and split voices. (See page 93). 72 DGX-630/YPG-635 Owner - Yamaha DGX-630 | Owner's Manual - Page 73
DSP DSP is term of abbreviated form of Digital Signal Processor. The DSP effect can be dynamic processing tools that let you enhance the sound, or completely transform it. 1 Use the [DSP ON/OFF] button to turn the DSP function on. The indicator lights DSP Type DGX-630/YPG-635 Owner's Manual 73 - Yamaha DGX-630 | Owner's Manual - Page 74
to lower the pitch. If you use this feature with a voice such as the "048 Overdriven" guitar voice (page 19), you can produce remarkably realistic string-bending effects. You can change the amount of pitch bend produced by the wheel, as described on page 93. 74 DGX-630/YPG-635 Owner's Manual - Yamaha DGX-630 | Owner's Manual - Page 75
can adjust the keyboard's sensitivity to keys. NOTE • The initial default touch sensitivity setting is "2". 2 Use the CATEGORY [ ] and [ ] buttons to select the Touch Sensitivity item. The currently selected touch sensitivity will be displayed. Touch Sensitivity item DGX-630/YPG-635 Owner's Manual - Yamaha DGX-630 | Owner's Manual - Page 76
keyboard voice than you played in step 3. Watch the display while changing songs and you will see that different voices are selected for each song. If you have stopped playback at some point during this procedure press the [START/STOP] button to start playback again. 76 DGX-630/YPG-635 Owner - Yamaha DGX-630 | Owner's Manual - Page 77
Use the dial to select the desired Master EQ setting. Five settings are available: 1-5. Settings 1 and 2 are best for listening via the instrument's built-in speakers, setting 3 is for headphones, and settings 4 and 5 are ideal for listening via external speakers. DGX-630/YPG-635 Owner's Manual 77 - Yamaha DGX-630 | Owner's Manual - Page 78
between -12 and +12 as required. NOTE • The pitch of Drum Kits voices cannot be changed. Tuning item Can be set between -100 and +100 3 Use the dial to set the tuning value between -100 and +100 as required. NOTE • The pitch of Drum Kits voices cannot be changed. 78 DGX-630/YPG-635 Owner's Manual - Yamaha DGX-630 | Owner's Manual - Page 79
automatically added before changing to section A or B. ● ENDING section This is used for the ending of the Song. When the ending is finished, the auto accompaniment stops automatically. The length of the ending (in measures) differs depending on the selected Style. DGX-630/YPG-635 Owner's Manual 79 - Yamaha DGX-630 | Owner's Manual - Page 80
Start When the synchro start standby mode is engaged, style playback will begin as soon as you play a chord in the accompaniment range of the keyboard. You can disengage the synchro-start standby mode by pressing the [SYNC START] button again. 80 DGX-630/YPG-635 Owner's Manual Accompaniment range - Yamaha DGX-630 | Owner's Manual - Page 81
● Synchro Stop When this function is selected the accompaniment style will only play while you are playing chords in the accompaniment range of the keyboard. Style playback will stop when you release the keys. To turn the function on, press the [SYNC STOP] button. DGX-630/YPG-635 Owner's Manual 81 - Yamaha DGX-630 | Owner's Manual - Page 82
point cannot be changed during a song lesson. • The split voice sounds when the split-point key is played. NOTE • You can also access the Split Point item by pressing the [FUNCTION] button and using the CATEGORY [ ] and [ ] buttons to locate the item (page 92). 82 DGX-630/YPG-635 Owner's Manual - Yamaha DGX-630 | Owner's Manual - Page 83
play chords in the left-hand accompaniment range of the keyboard while the style is stopped and still hear the accompaniment chords Use the CATEGORY [ ] and [ ] buttons to select the Style Volume item. f r 3 Use the dial to set the style volume between 000 and 127. DGX-630/YPG-635 Owner's Manual - Yamaha DGX-630 | Owner's Manual - Page 84
... using other chord notes for the lowest note results in "inversions"). The root is the central sound of the chord, which supports and uses ... all at a glance. Cm Root note Chord type ● Some Chord Types (These are just some of the "Standard" chord types recognized by the DGX-630/YPG-635 - Yamaha DGX-630 | Owner's Manual - Page 85
• Notes in parentheses can be omitted. • Playing two same root keys in the adjacent octaves produces accompaniment based only on the root. • listed are all in "root" position, but other inversions can be used-with the following exceptions: m7, m7b5, 6, m6, sus4, aug, DGX-630/YPG-635 Owner's Manual 85 - Yamaha DGX-630 | Owner's Manual - Page 86
chord detection for style accompaniment occurs over the entire range of the keyboard, allowing for even more dynamic style performance. In this mode only the function "Chord Fingering". 2 Use the dial to select 2 "FullKeyboard". Hold for longer than a second 86 DGX-630/YPG-635 Owner's Manual - Yamaha DGX-630 | Owner's Manual - Page 87
Using ) key in the section of the keyboard labeled keyboard, checking the indications in the display. When you've played the chord properly, a bell sound signals your success and the chord name in the display flash. Press the [EXIT] button to return to the MAIN display. DGX-630/YPG-635 Owner's Manual - Yamaha DGX-630 | Owner's Manual - Page 88
] buttons to select the Song Volume item. Song volume item Can be set between 000 and 127 3 Use the dial to set the song volume between 000 and 127. NOTE • Song volume can be adjusted while song press the [A-B REPEAT] button before starting playback of the song. 88 DGX-630/YPG-635 Owner's Manual - Yamaha DGX-630 | Owner's Manual - Page 89
tracks and play the muted part on the keyboard yourself, or simply mute tracks other than the Use the dial to select the voice. As you select different melody voices, only the melody voice changes while the song will remain the same. Hold for longer than a second DGX-630/YPG-635 Owner's Manual - Yamaha DGX-630 | Owner's Manual - Page 90
the bank and registration memory numbers. Bank number 3 Use the dial or the [1]-[8] number buttons to select a bank number from 1 to 8. NOTE • Data cannot be saved to the registration memory during song play- back. 90 DGX-630/YPG-635 Owner's Manual Bank number NOTE • You can also save your panel - Yamaha DGX-630 | Owner's Manual - Page 91
settings Transpose, Pitch Bend Range * Style settings are not available for Registration Memory when using the Song features. You can check whether the panel settings are stored in registration memory recall. The panel controls will be instantly set accordingly. DGX-630/YPG-635 Owner's Manual 91 - Yamaha DGX-630 | Owner's Manual - Page 92
[-] buttons, or the [0]-[9] number buttons to set the selected function as required. The [+] and [-] buttons are used to make ON/ OFF type settings: [+] = ON, [-] = OFF. In some cases the [+] button will described in the "Initialization" section on page 65. 92 DGX-630/YPG-635 Owner's Manual - Yamaha DGX-630 | Owner's Manual - Page 93
C7) Determines the highest key for the Split voice and sets the Split "point"-in other words, the key that separates the Split split point are detected. In the Full Keyboard mode normal chords played anywhere on the keyboard will be detected, and the notes played DGX-630/YPG-635 Owner's Manual 93 - Yamaha DGX-630 | Owner's Manual - Page 94
notes. This determines the minimum timing resolution used in the song. For example, if there are both quarter notes and eighth notes in the song, you should set this value to "eighth note". Any notes or rests shorter than this value will not be shown in the score. 94 DGX-630/YPG-635 Owner's Manual - Yamaha DGX-630 | Owner's Manual - Page 95
when no such setting exists, the setting here is used. * All these settings can be conveniently reset to their initial default values by pressing the [+] and [-] buttons simultaneously. (The exception to this is Initial Send, which is an operation, not a setting.) DGX-630/YPG-635 Owner's Manual 95 - Yamaha DGX-630 | Owner's Manual - Page 96
them. Before using a USB device, read through the "Precautions when using the USB TO DGX-630/YPG-635 Owner's Manual You can go to the FILE CONTROL display from which you can access file operations by pressing the [MENU] button from this display. (Do not press this button now, but only when instructed - Yamaha DGX-630 | Owner's Manual - Page 97
media from the device, and do NOT turn the power off to either device. Doing so may corrupt the data on either or both devices. DGX-630/YPG-635 Owner's Manual 97 - Yamaha DGX-630 | Owner's Manual - Page 98
operation. f r 3 Use the CATEGORY [ ] and [ ] buttons to select the Format item. The display prompts you for confirmation. 4 Press the [EXECUTE] button and the display prompts you for confirmation. You can press the [-] button at this point to cancel the operation. 98 DGX-630/YPG-635 Owner's Manual - Yamaha DGX-630 | Owner's Manual - Page 99
the data. Erase unwanted files from the USB flash memory to make more memory available (page 102), or use a different USB flash memory. • Refer to the "Messages" list on page 120 for other possible errors operation will depend on the condition of the USB flash memory. DGX-630/YPG-635 Owner's Manual 99 - Yamaha DGX-630 | Owner's Manual - Page 100
To Overwrite an Existing File If you want to overwrite a file that already exists on the USB flash memory, use the dial or the [+] and [-] buttons to select the file, then skip ahead to step 7. 8 Press the cursor will appear below the first character in the file name. 100 DGX-630/YPG-635 Owner's Manual - Yamaha DGX-630 | Owner's Manual - Page 101
to the USB TO DEVICE connector, check that the File Control icon is shown in the MAIN display. 4 Use the dial to select the file you want to load. All user files in the USB flash memory operation has finished. Press the [EXIT] button to return to the MAIN display. DGX-630/YPG-635 Owner's Manual 101 - Yamaha DGX-630 | Owner's Manual - Page 102
is showing in the MAIN display. 2 Press the FILE CONTROL [MENU] button. 3 Use the CATEGORY [ ] and [ ] buttons to locate the USB Delete item. f r 4 Use the dial to select the file you want to delete. All User files in you will not be able to execute the operation. 102 DGX-630/YPG-635 Owner's Manual - Yamaha DGX-630 | Owner's Manual - Page 103
[STYLE] or [MUSIC DATABASE] button. Files of the corresponding type will be displayed. 3 Use the dial to select the file you want to play. 4 Play the selected file in the same way the internal files are played: press the [START/STOP] button, or play on the keyboard. DGX-630/YPG-635 Owner's Manual 103 - Yamaha DGX-630 | Owner's Manual - Page 104
to USB storage devices. Refer to "Precautions when using the USB TO DEVICE terminal" on page 97. w USB TO HOST terminal This terminal allows direct connection to a personal computer. Refer to "Connecting a Personal Computer" on page 105 for more information. 104 DGX-630/YPG-635 Owner's Manual - Yamaha DGX-630 | Owner's Manual - Page 105
-MIDI driver is described on pages 114-115. 2 Connect the USB terminal of the computer to the USB terminal on the instrument using an the instru- ment. (Data is transmitted whenever you play on the keyboard or play back a song, etc.) • While the computer is connected DGX-630/YPG-635 Owner's Manual 105 - Yamaha DGX-630 | Owner's Manual - Page 106
USB cable Instrument ■MIDI settings These settings external device (ON). Keyboard Out ON/OFF These settings determine whether keyboard performance data of the Use the CATEGORY [ ] and [ ] buttons to select the item you want to change its value. f r 106 DGX-630/YPG-635 Owner's Manual 3 Use - Yamaha DGX-630 | Owner's Manual - Page 107
keyboard (A-1 and A#-1) and press the appropriate key (shown below). NOTE • Remote control of MIDI devices will function independently of the PC2 mode. A#-1 A-1 C7: Fast forward B6: Start A6: Stop G6: Rewind F6: Top (move to the beginning of the song) E6: Metronome ON/OFF DGX-630/YPG-635 - Yamaha DGX-630 | Owner's Manual - Page 108
application and the USBMIDI Driver included on the Accessory CD-ROM on your computer. Refer to the Accessory CDROM Installation Guide on page 111 for procedure described on page 110. Use the Musicsoft Downloader application with Internet Explorer 5.5 or higher. 108 DGX-630/YPG-635 Owner's Manual - Yamaha DGX-630 | Owner's Manual - Page 109
FILES folder on the USB flash memory device-cannot be deleted via the instrument's file control display. Use the Musicsoft Downloader delete button to delete such files. w Double-click "SampleData" Folder ➝ "SongData" Folder, and click a song file. e Click "Open" DGX-630/YPG-635 Owner's Manual 109 - Yamaha DGX-630 | Owner's Manual - Page 110
le transferred from your computer. 9 To playback a song stored in flash memory, press the [SONG] button. Use the dial to select the song you want to play, then press the [START/STOP] button to start playback will not be recognized when transferred to the instrument. 110 DGX-630/YPG-635 Owner's Manual - Yamaha DGX-630 | Owner's Manual - Page 111
. • Yamaha makes no representations or warranties with regard to the use of the software and documentation and cannot be held responsible for the results of the use of this manual and the in this CD-ROM are provided in versions for Windows operating systems. DGX-630/YPG-635 Owner's Manual 111 - Yamaha DGX-630 | Owner's Manual - Page 112
software. Musicsoft Downloader: See page 115. 6 Launch the software. For further software operation refer to the online help supplied with the software. Refer to the "Troubleshooting" on page 116 when you have trouble with installing the driver. 112 DGX-630/YPG-635 Owner's Manual - Yamaha DGX-630 | Owner's Manual - Page 113
installation ➔ page 115. Check the drive name of the CD-ROM drive you will be using (D:, E:, Q: etc.) The drive name is displayed beside the CD-ROM icon in your "My Computer" folder. The root directory of the CDROM drive will be D:\ , E:\ , or Q:\ , respectively. DGX-630/YPG-635 Owner's Manual 113 - Yamaha DGX-630 | Owner's Manual - Page 114
Troubleshooting" in the "Accessory CD-ROM Installation Guide" section of the Owner's Manual. 5 Select the radio button for "Search for a suitable driver USB-MIDI driver installation is complete. 114 DGX-630/YPG-635 Owner's Manual Installing the driver on Windows XP 1 Start the computer and use the - Yamaha DGX-630 | Owner's Manual - Page 115
USB-MIDI driver installation is complete. ■Installing the Musicsoft Downloader and Digital yamaha.com/download/ IMPORTANT • Only Musicsoft Downloader can be used to transfer files between this instrument and a computer. No other file transfer application can be used. DGX-630/YPG-635 Owner's Manual - Yamaha DGX-630 | Owner's Manual - Page 116
the MIDI application is running. You may not be able to suspend/resume normally, depending on the particular environment (USB Host Controller, etc.). Even so, simply disconnecting and connecting the USB cable will allow you to use the instrument functions again. 116 DGX-630/YPG-635 Owner's Manual - Yamaha DGX-630 | Owner's Manual - Page 117
and launch "uninstall.exe." file. Follow the on-screen instructions to uninstall the driver. NOTE • When using a 64-bit OS, click "uninstall_x64.exe." from " Driver removal will be complete when you have restarted your computer. Accessory CD-ROM Installation Guide DGX-630/YPG-635 Owner's Manual - Yamaha DGX-630 | Owner's Manual - Page 118
actual sound of the voice may be slightly different from note to note. The Demo display is shown in Japanese, and/or there are Japanese characters in the display messages. Make sure the Language setting in the FUNCTION display is set to English. (See page 18) 118 DGX-630/YPG-635 Owner's Manual - Yamaha DGX-630 | Owner's Manual - Page 119
Troubleshooting Problem press the [STYLE] button first when you are going to use any style-related function. There is no harmony sound. The harmony on, chords are played in the accompaniment range of the keyboard, and a melody is played in the right-hand range. DGX-630/YPG-635 Owner's Manual 119 - Yamaha DGX-630 | Owner's Manual - Page 120
to the keyboard. This will MIDI data was received at one time and failed to proceed. Displayed while moving a file in the Musicsoft Downloader. Displayed while writing data in the memory. Never turn the power off while writing. Doing so may result in data loss. 120 DGX-630/YPG-635 Owner's Manual - Yamaha DGX-630 | Owner's Manual - Page 121
Rename File Save OK ? Saved data is not found. Saving... Send OK? Sending... "Since the media is in use now, this function is not available." Style data is too large to load. Sure ? [YES/NO] "The listed in the table: the messages neces- sary to be explained only. DGX-630/YPG-635 Owner's Manual 121 - Yamaha DGX-630 | Owner's Manual - Page 122
Scores This demo is an example of how the Easy Song Arranger can be used to change styles throughout a piece. Song No. 9 q =123 Hallelujah Chorus (Function Demo for Easy Song Arranger) 122 DGX-630/YPG-635 Owner's Manual - Yamaha DGX-630 | Owner's Manual - Page 123
Scores DGX-630/YPG-635 Owner's Manual 123 - Yamaha DGX-630 | Owner's Manual - Page 124
assistant technology feature, the part will be corrected and played so that it matches the backing part. Song No. 10 q =61 Ave Maria (Function Demo for performance assistant technology) P.A.T. Type =CHORD Your Turn. Repeatedly Play the Same Key. 124 DGX-630/YPG-635 Owner's Manual - Yamaha DGX-630 | Owner's Manual - Page 125
Scores DGX-630/YPG-635 Owner's Manual 125 - Yamaha DGX-630 | Owner's Manual - Page 126
These Notes" part using the performance assistant technology feature, the part will be corrected and played so that it matches the backing part. Song No. 11 q =108 Nocturne op.9-2 (Function Demo for performance assistant technology) P.A.T. Type =CHORD/FREE 126 DGX-630/YPG-635 Owner's Manual - Yamaha DGX-630 | Owner's Manual - Page 127
Scores DGX-630/YPG-635 Owner's Manual 127 - Yamaha DGX-630 | Owner's Manual - Page 128
pedal (footswitch) is held. ● Panel Voice List Bank Select MIDI Voice No. MSB (0-127) LSB (0-127) Program Change# (1-128) Voice Name PIANO 001 000 113 001 Live! Grand Piano 002 000 114 001 Live! Warm Grand Piano 003 000 112 001 Grand Piano DGX-630/YPG-635 Owner's Manual Bank Select MIDI - Yamaha DGX-630 | Owner's Manual - Page 129
* List Bank Select MIDI Voice No. MSB (0-127) LSB (0-127) Program Change# (1-128) Voice Name XG PIANO 143 000 000 001 Grand Piano 144 000 001 001 Grand Piano KSP 145 000 040 001 Piano Strings 146 000 041 000 096 026 Mandolin 226 000 000 027 Jazz Guitar DGX-630/YPG-635 Owner's Manual 129 - Yamaha DGX-630 | Owner's Manual - Page 130
051 Synth Strings 1 296 000 000 052 Synth Strings 2 130 DGX-630/YPG-635 Owner's Manual Bank Select MIDI Voice No. MSB (0-127) LSB (0-127) Program Change# (1-128 Thick Sawtooth 355 000 018 082 Dynamic Sawtooth 356 000 019 082 Digital Sawtooth 357 000 020 082 Big Lead 358 000 096 082 - Yamaha DGX-630 | Owner's Manual - Page 131
Release 401 000 040 100 Nylon Electric Piano 402 000 064 100 Nylon Harp 403 434 000 096 113 Bonang Voice List Bank Select MIDI Voice No. MSB (0-127) LSB (0-127) Program 004 String Slap 466 064 000 017 Flute Key Click 467 064 000 033 Shower 468 064 DGX-630/YPG-635 Owner's Manual 131 - Yamaha DGX-630 | Owner's Manual - Page 132
uses one note. • The MIDI Note # and Note are actually one octave lower than keyboard 127/000/001 Keyboard MIDI Key Alternate Note# Tom H 56 G# 2 44 G# 1 1 Hi-Hat Pedal 57 A 2 45 A 1 Low Tom 58 A# 2 5 99 D# 6 87 D# 5 100 E 6 88 E 5 101 F 6 89 F 5 102 F# DGX-630/YPG-635 Owner's Manual - Yamaha DGX-630 | Owner's Manual - Page 133
127/000/033 Keyboard Note# Note MIDI Note# Note Key Alternate Off assign Standard Tom Jazz 2 56 G# 2 44 G# 1 1 Hi-Hat Pedal Hi-Hat Closed Analog 4 57 A 2 45 A 1 Low 5 98 D 6 86 D 5 99 D# 6 87 D# 5 100 E 6 88 E 5 101 F 6 89 F 5 102 F# 6 90 F# 5 103 G DGX-630/YPG-635 Owner's Manual 133 - Yamaha DGX-630 | Owner's Manual - Page 134
Garage UKPop HipHopGroove HipShuffle HipHopPop DISCO 70'sDisco1 70'sDisco2 LatinDisco DiscoPhilly 134 DGX-630/YPG-635 Owner's Manual Style No. 56 57 58 59 60 61 62 63 64 65 66 67 68 69 70 71 72 73 74 75 76 77 78 79 80 81 82 83 84 85 86 87 88 - Yamaha DGX-630 | Owner's Manual - Page 135
CndleWnd 80 Cavatina 81 Cherish 82 ToLoveMe 83 YouKnow 84 Evrythng 85 EyesOfBl 86 Hello 87 BeThere 88 FlyAway 89 LoveYou 90 NeverLet 91 JustOnce 92 IfYouGo 93 SavingAl 94 InTheDrk 95 LovePwr 96 Vision 296 Favorite 297 SugerSpn 298 Washngtn 299 ThisWay 300 ZipperD DGX-630/YPG-635 Owner's Manual 135 - Yamaha DGX-630 | Owner's Manual - Page 136
Canon in D Der Vogelfänger Bin Ich Ja "Die Zauberflöte" Piano Sonate No.14 op.27-2 "Mondschein" The "Surprise" Symphony No. Blind Mice (DUET) The easy song arranger can only be used with songs that include chord data. Composer P.I. Tchaikovsky J. Offenbach 136 DGX-630/YPG-635 Owner's Manual - Yamaha DGX-630 | Owner's Manual - Page 137
right hand. These types sound when chords are played in the auto accompaniment range of the keyboard. These Harmony types will also work when playing songs that contain chord data. Types 15-26 26) create two-note trills (alternating notes) when two notes are held. DGX-630/YPG-635 Owner's Manual 137 - Yamaha DGX-630 | Owner's Manual - Page 138
Creates a sound reminiscent of a jet airplane. Adds more stages to the modulation of Celeste. Simulates a rotary speaker. No effect. 138 DGX-630/YPG-635 Owner's Manual MSB 1 1 1 1 1 1 1 2 2 2 2 2 2 2 2 2 2 3 3 3 3 4 4 4 4 16 17 18 19 0 LSB 0 16 17 18 1 6 7 16 17 18 19 0 1 2 5 6 7 16 17 0 1 16 17 - Yamaha DGX-630 | Owner's Manual - Page 139
65 65 65 65 65 65 65 65 66 66 LSB 0 16 17 18 1 6 7 16 17 18 19 0 1 2 5 6 7 16 17 0 1 16 17 0 7 0 0 0 0 16 0 0 0 0 0 8 0 0 1 2 0 1 0 0 17 8 16 1 2 0 1 8 3 4 5 6 7 0 2 DGX-630/YPG-635 Owner's Manual 139 - Yamaha DGX-630 | Owner's Manual - Page 140
Stereo Distortion Hard) 86 ST DIST SOFT (Stereo Distortion Soft) 87 V_DIST HARD (V Distortion Hard) 88 V_DIST SOFT (V Distortion Soft) 89 AMP SIM1 (Amp Simulator 1) 90 AMP SIM2 (Amp Simulator 0 0 8 16 1 0 8 16 22 17 23 18 19 0 2 0 1 20 21 8 24 25 26 16 0 140 DGX-630/YPG-635 Owner's Manual - Yamaha DGX-630 | Owner's Manual - Page 141
78 78 82 82 82 82 82 82 82 LSB 17 1 16 0 17 1 1 3 0 1 0 1 16 17 18 19 20 0 1 16 0 1 16 0 17 1 18 2 0 8 16 1 17 2 18 DGX-630/YPG-635 Owner's Manual 141 - Yamaha DGX-630 | Owner's Manual - Page 142
(left, right, front, back). 71 71 LSB 19 16 0 0 17 1 1 16 0 0 0 16 17 18 17 18 0 22 0 1 1 2 2 3 3 0 1 16 19 0 18 20 19 16 0 21 1 142 DGX-630/YPG-635 Owner's Manual - Yamaha DGX-630 | Owner's Manual - Page 143
of a specified frequency band of the input signal. No effect. Bypass without applying an effect. MSB 76 76 77 76 81 81 76 85 88 93 115 0 64 LSB 16 17 0 0 16 0 18 0 0 0 0 0 0 DGX-630/YPG-635 Owner's Manual 143 - Yamaha DGX-630 | Owner's Manual - Page 144
DGX-630/YPG-635 Owner's Manual YAMAHA [ Portable Grand ] Model DGX-630/YPG-635 MIDI o 9nH,v=1-127 x 9nH,v=0 o 9nH,v=1-127 x After Key's x x Touch Ch's x x Pitch Bend o Bank Select Data Entry Pedal Harmonic Content Release Time Attack Time Brightness Effect Depth RPN Inc,Dec RPN - Yamaha DGX-630 | Owner's Manual - Page 145
MIDI Implementation Chart DGX-630/YPG-635 Owner's Manual 145 Prog Change : True # o 0 - 127 System Exclusive o : Song Pos. x Common : Song Sel. x : Tune x System : Clock o Real Time: Commands o Aux :All Sound OFF x :Reset All Cntrls x : - Yamaha DGX-630 | Owner's Manual - Page 146
allows the volume of all channels to be changed simultaneously (Universal System Exclusive). • The values of "mm" is used for MIDI Master Volume. (Values for "ll" are ignored.) F0H, 43H, 1nH, 4CH, 00H, OFF> Bn, 7A, 00 Value for "n" is ignored. 146 DGX-630/YPG-635 Owner's Manual - Yamaha DGX-630 | Owner's Manual - Page 147
. • You may not initiate services based on the use of the SOFTWARE without permission by Yamaha Corporation. Copyrighted data, including but not limited to MIDI data for songs, obtained by means in writing and signed by a fully authorized representative of Yamaha. DGX-630/YPG-635 Owner's Manual 147 - Yamaha DGX-630 | Owner's Manual - Page 148
graphics files and print files, for any purpose, except for creating MIDI files (if permitted by the Software) for private non-commercial use. 2.4 You shall not, and shall not cause or permit any third party subject matter hereof. (License v5.0 (DMN), 30 July 2007) 148 DGX-630/YPG-635 Owner's Manual - Yamaha DGX-630 | Owner's Manual - Page 149
for information purposes only. Yamaha Corp. reserves the right to change or modify products or specifications at any time without prior notice. Since specifications, equipment or options may not be the same in every locale, please check with your Yamaha dealer. DGX-630/YPG-635 Owner's Manual 149 - Yamaha DGX-630 | Owner's Manual - Page 150
PORTABLE GRAND Keyboard Stand Assembly 10 L Language 18 Lesson 50 Load 101 Local 94, 106 L-Part 95, 110 Lyric 38 M Main Chorus Level 93 MAIN Display 68 Main Octave 93 Main Pan 93 Main Reverb Level 93 Main Voice 19 Main Volume 93 Master EQ Type 77, 94 150 DGX-630/YPG-635 Owner's Manual - Yamaha DGX-630 | Owner's Manual - Page 151
Clear 64 Transfer 106, 108 Transpose 78 Troubleshooting 116, 118 Tuning 78 U USB 104 USB-MIDI Driver 114-115 User file 99, 101 Standard MIDI File 108 Software Licensing Agreement .......... 147 Song 33 V Voice 19 Voice List 128 X XF 6, 38 XGlite 6 DGX-630/YPG-635 Owner's Manual 151 - Yamaha DGX-630 | Owner's Manual - Page 152
is applicable to all models included in the following series of products: DGX, YPG SERIES OF Portable Grand ELECTRONIC KEYBOARDS If during the first 90 days that immediately follows the purchase date, your new Yamaha product covered by this warranty is found to have a defect in material and/or - Yamaha DGX-630 | Owner's Manual - Page 153
Yamaha Yamaha Yamaha Yamaha Musica Italia S.P.A. Viale Italia 88, 20020 Lainate (Milano), Italy Tel: 02-935-771 SPAIN/PORTUGAL Yamaha Yamaha Yamaha Music Yamaha Music Central Europe GmbH Siemensstraße 22-34, 25462 Rellingen, Germany Tel: 04101-3030 OTHER COUNTRIES Yamaha Yamaha Yamaha Yamaha Yamaha Yamaha - Yamaha DGX-630 | Owner's Manual - Page 154
Yamaha Home Keyboards Home Page (English Only) http://music.yamaha.com/homekeyboard Yamaha Manual Library http://www.yamaha.co.jp/manual/ U.R.G., Pro Audio & Digital Musical Instrument Division, Yamaha Corporation © 2007 Yamaha Corporation WM92600 XXXPOXXX.X-01A0 Printed in China
-
 1
1 -
 2
2 -
 3
3 -
 4
4 -
 5
5 -
 6
6 -
 7
7 -
8
-
9
-
10
-
11
-
12
-
13
-
14
-
15
-
16
-
17
-
18
-
19
-
20
-
21
-
22
-
23
-
24
-
25
-
26
-
27
-
28
-
29
-
30
-
31
-
32
-
33
-
34
-
35
-
36
-
37
-
38
-
39
-
40
-
41
-
42
-
43
-
44
-
45
-
46
-
47
-
48
-
49
-
50
-
51
-
52
-
53
-
54
-
55
-
56
-
57
-
58
-
59
-
60
-
61
-
62
-
63
-
64
-
65
-
66
-
67
-
68
-
69
-
70
-
71
-
72
-
73
-
74
-
75
-
76
-
77
-
78
-
79
-
80
-
81
-
82
-
83
-
84
-
85
-
86
-
87
-
88
-
89
-
90
-
91
-
92
-
93
-
94
-
95
-
96
-
97
-
98
-
99
-
100
-
101
-
102
-
103
-
104
-
105
-
106
-
107
-
108
-
109
-
110
-
111
-
112
-
113
-
114
-
115
-
116
-
117
-
118
-
119
-
120
-
121
-
122
-
123
-
124
-
125
-
126
-
127
-
128
-
129
-
130
-
131
-
132
-
133
-
134
-
135
-
136
-
137
-
138
-
139
-
140
-
141
-
142
-
143
-
144
-
145
-
146
-
147
-
148
-
149
-
150
-
151
-
152
-
153
-
154
 |
 |
Owner’s Manual
EN
Keyboard Stand Assembly
For information on assembling the
keyboard stand, refer to the instructions
on
page 10
of this manual.