Yamaha DSP-A970 Owner's Manual - Page 24
Adjustment, Main/center/effect Speaker Level Balance, Adjustment
 |
View all Yamaha DSP-A970 manuals
Add to My Manuals
Save this manual to your list of manuals |
Page 24 highlights
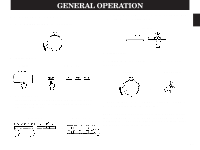
1-4. ADJUSTMENT MAIN/CENTER/EFFECT SPEAKER LEVEL BALANCE ADJUSTMENT This operation uses an internal test-tone generator for balancing the levels of the main, center and effect speakers. 1. Depress the TEST switch on the remote control so that "TEST DOLBY SUR." appears in the display panel to enter test mode. A hiss-like calibration signal should be heard from the left main speaker, center speaker(s), right main speaker and rear effect speakers in turn (see diagram). Adjust the MASTER VOLUME to a normal listening level. * The state of test-tone output is shown by the display panel and the monitor screen. (Especially on the monitor screen, it is shown by an image of audio listening room.) This is convenient for adjusting each speaker level. Left main Center Right main Rear 2. Adjust the center and rear level by using the CENTER and REAR LEVEL +/- keys on the remote control so that the sound coming from the corresponding speakers seems to be at the same level as that from the main speakers when you are at a normal listening position. If there is insufficient volume from the effect speakers, you may decrease the main speaker volume level by setting the MAIN LEVEL switch on the rear panel to "-10 dB", and adjust the center and rear level again. Volume controls on external power amplifiers may also be adjusted if necessary to achieve proper balance. 3. For the front effect speaker level adjustment, depress the TEST switch on the remote control again so that "TEST DSP" appears in the display panel. A calibration signal should be heard from the main speakers and the front effect speakers in turn (see diagram). Main Front 4. Adjust the front level by using the FRONT LEVEL +/- keys on the remote control so that the speaker volume is the same as that of the main speakers. NOTE: If not using a center speaker, be sure to set the CENTER MODE to the PHNTM (phantom) position.You will then hear the center channel test tone from the left and right main speakers. After completing this adjustment, press the TEST switch once again. NOTE: Once you have completed these adjustments, use only this unit's MASTER VOLUME control to adjust listening volume. Do not change any other volume settings in the system. 22
-
 1
1 -
2
-
3
-
4
-
5
-
6
-
7
-
8
-
9
-
10
-
11
-
12
-
13
-
14
-
15
-
16
-
17
-
18
-
 19
19 -
 20
20 -
 21
21 -
 22
22 -
 23
23 -
 24
24 -
 25
25 -
 26
26 -
 27
27 -
 28
28 -
 29
29 -
30
-
31
-
32
-
33
-
34
-
35
-
36
-
37
-
38
-
39
-
40
-
41
-
42
-
43
-
44
-
45
-
46
-
47
-
48
 |
 |
