Yamaha DSP-A970 Owner's Manual - Page 5
Setup & Adjustment, 1-1. Getting Started - remote
 |
View all Yamaha DSP-A970 manuals
Add to My Manuals
Save this manual to your list of manuals |
Page 5 highlights
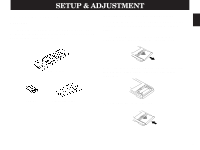
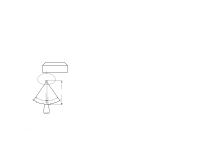
English SETUP & ADJUSTMENT 1-1. GETTING STARTED Unpacking If you haven't already done so, carefully remove this unit and its accessories from the box and wrapping material.You should find the unit itself and the following accessories. Installing the Remote Control Unit Batteries Since the remote control unit will be used for many of this unit's control operations, you should begin by installing the supplied batteries. 1. Turn the remote control unit over and slide the battery compartment cover downward in the direction of the arrow. Remote control Batteries User program sheets 2. Insert the batteries (R6, AA, UM-3 type), being careful to align them with the polarity markings on the inside of the battery compartment. 3. Close the battery compartment cover. 3
-
 1
1 -
 2
2 -
 3
3 -
 4
4 -
 5
5 -
 6
6 -
 7
7 -
 8
8 -
 9
9 -
 10
10 -
 11
11 -
12
-
13
-
14
-
15
-
16
-
17
-
18
-
19
-
20
-
21
-
22
-
23
-
24
-
25
-
26
-
27
-
28
-
29
-
30
-
31
-
32
-
33
-
34
-
35
-
36
-
37
-
38
-
39
-
40
-
41
-
42
-
43
-
44
-
45
-
46
-
47
-
48
 |
 |
