Yamaha MO6 Owner's Manual - Page 82
Creating a Pattern with the Realtime and Step Recording methods, Creating a Pattern with Realtime
 |
UPC - 086792837703
View all Yamaha MO6 manuals
Add to My Manuals
Save this manual to your list of manuals |
Page 82 highlights
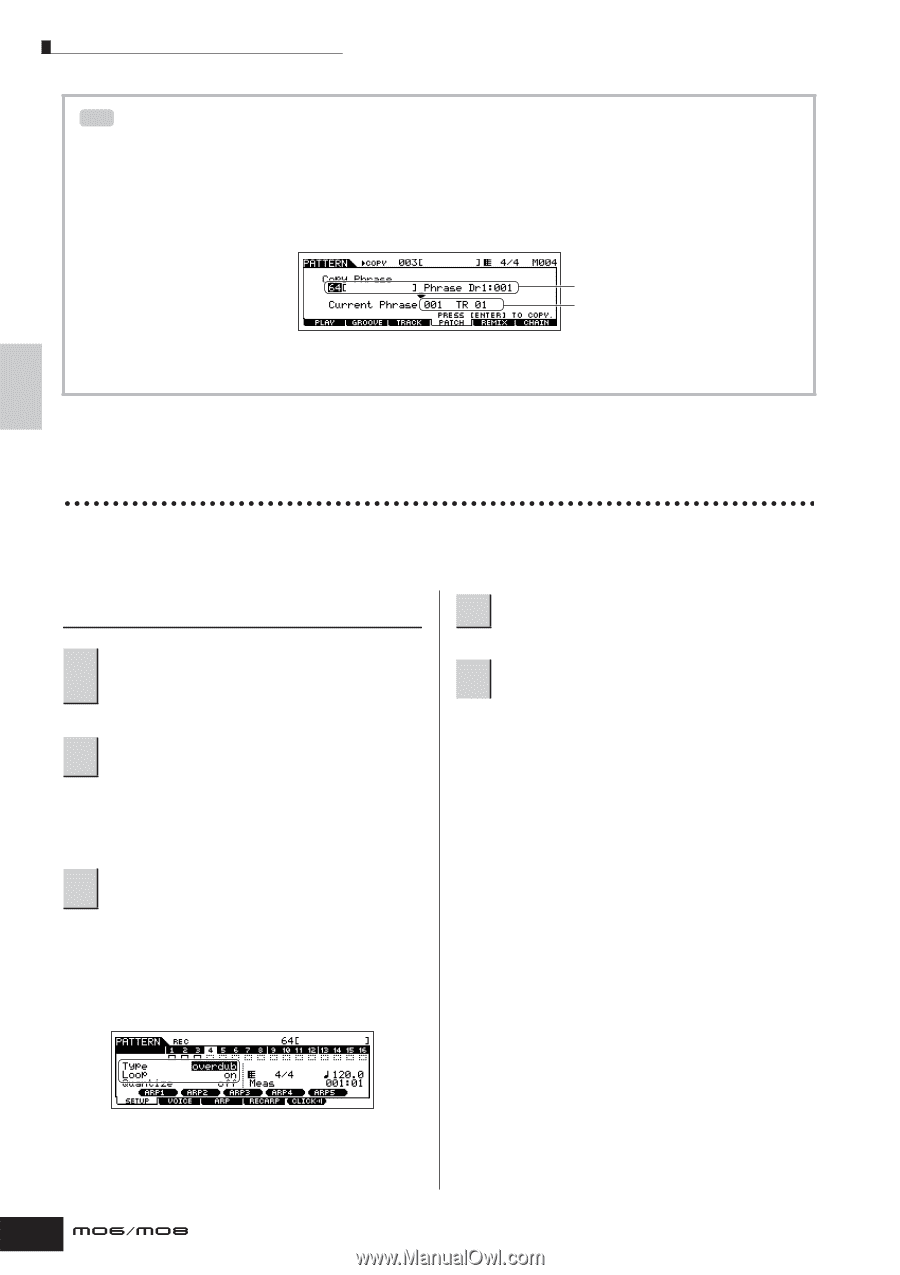
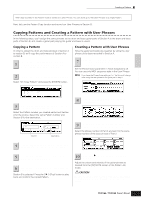
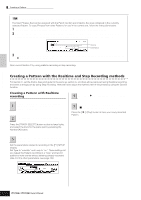
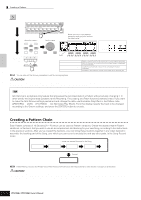
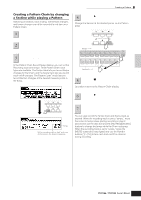
Quick Guide Creating a Song on the MO Creating a Pattern TIP Copying a User Phrase from another Pattern to the current Pattern The User Phrases that can be assigned with the Patch function are limited to the ones contained in the currently selected Pattern. To copy Phrases from other Patterns for use in the current one, follow the instructions below. 1 In the [F4] PATCH display, press the [SF5] COPY button to call up the Copy Phrase display. 2 First, specify the source Pattern number and Phrase number as well as the destination (current Pattern) Phrase number and track number. Then, press the [ENTER] button to execute the Copy operation. Source Destination 3 Press the [EXIT] button to return to the [F4] PATCH display, then check the assigned Phrase by pressing the [F] (Play) button to play the Pattern. Next, record Section C by using realtime recording or step recording. Creating a Pattern with the Realtime and Step Recording methods For Section C, set the drums, bass and guitar to the same as section A, and then add a piano part using Realtime recording, and enter a strings part by using Step recording. Here we'll also adjust the rhythmic feel of the phrase by using the Groove function. Creating a Pattern with Realtime recording 4 Press the [F] (Play) button to start recording. Copy Section A to Section C, following the 1 instructions in the section "Copying a Pattern" on page 81. 2 Select the track to which the piano part is to be assigned. Press the [TRACK SELECT] button so that its lamp lights, and select the track for the piano part by pressing the Number [4] button. 5 When the recording is finished, press the [J] (Stop) button to stop recording. Press the [F] (Play) button to hear your newly recorded Pattern. 3 Press the [REC] button to enter the Pattern Record mode. Set the parameters related to recording in the [F1] SETUP display. Set Type to "overdub" and Loop to "on." These settings let you repeat the Pattern recording in a "loop" and record additional note events without deleting already-recorded data. For the other parameters, see page 198. 82 Owner's Manual
-
 1
1 -
2
-
3
-
4
-
5
-
6
-
7
-
8
-
9
-
10
-
11
-
12
-
13
-
14
-
15
-
16
-
17
-
18
-
19
-
20
-
21
-
22
-
23
-
24
-
25
-
26
-
27
-
28
-
29
-
30
-
31
-
32
-
33
-
34
-
35
-
36
-
37
-
38
-
39
-
40
-
41
-
42
-
43
-
44
-
45
-
46
-
47
-
48
-
49
-
50
-
51
-
52
-
53
-
54
-
55
-
56
-
57
-
58
-
59
-
60
-
61
-
62
-
63
-
64
-
65
-
66
-
67
-
68
-
69
-
70
-
71
-
72
-
73
-
74
-
75
-
76
-
 77
77 -
 78
78 -
 79
79 -
 80
80 -
 81
81 -
 82
82 -
 83
83 -
 84
84 -
 85
85 -
 86
86 -
 87
87 -
88
-
89
-
90
-
91
-
92
-
93
-
94
-
95
-
96
-
97
-
98
-
99
-
100
-
101
-
102
-
103
-
104
-
105
-
106
-
107
-
108
-
109
-
110
-
111
-
112
-
113
-
114
-
115
-
116
-
117
-
118
-
119
-
120
-
121
-
122
-
123
-
124
-
125
-
126
-
127
-
128
-
129
-
130
-
131
-
132
-
133
-
134
-
135
-
136
-
137
-
138
-
139
-
140
-
141
-
142
-
143
-
144
-
145
-
146
-
147
-
148
-
149
-
150
-
151
-
152
-
153
-
154
-
155
-
156
-
157
-
158
-
159
-
160
-
161
-
162
-
163
-
164
-
165
-
166
-
167
-
168
-
169
-
170
-
171
-
172
-
173
-
174
-
175
-
176
-
177
-
178
-
179
-
180
-
181
-
182
-
183
-
184
-
185
-
186
-
187
-
188
-
189
-
190
-
191
-
192
-
193
-
194
-
195
-
196
-
197
-
198
-
199
-
200
-
201
-
202
-
203
-
204
-
205
-
206
-
207
-
208
-
209
-
210
-
211
-
212
-
213
-
214
-
215
-
216
-
217
-
218
-
219
-
220
-
221
-
222
-
223
-
224
-
225
-
226
-
227
-
228
-
229
-
230
-
231
-
232
-
233
-
234
-
235
-
236
-
237
-
238
-
239
-
240
 |
 |